SINUMERIK 840D sl. Service - Configuring Commissioning. Manual (2011-2020) - page 46
Generating user dialogs
2.7 XML identifier
Tag identifier
Meaning
CREATE_CYCLE_EVENT
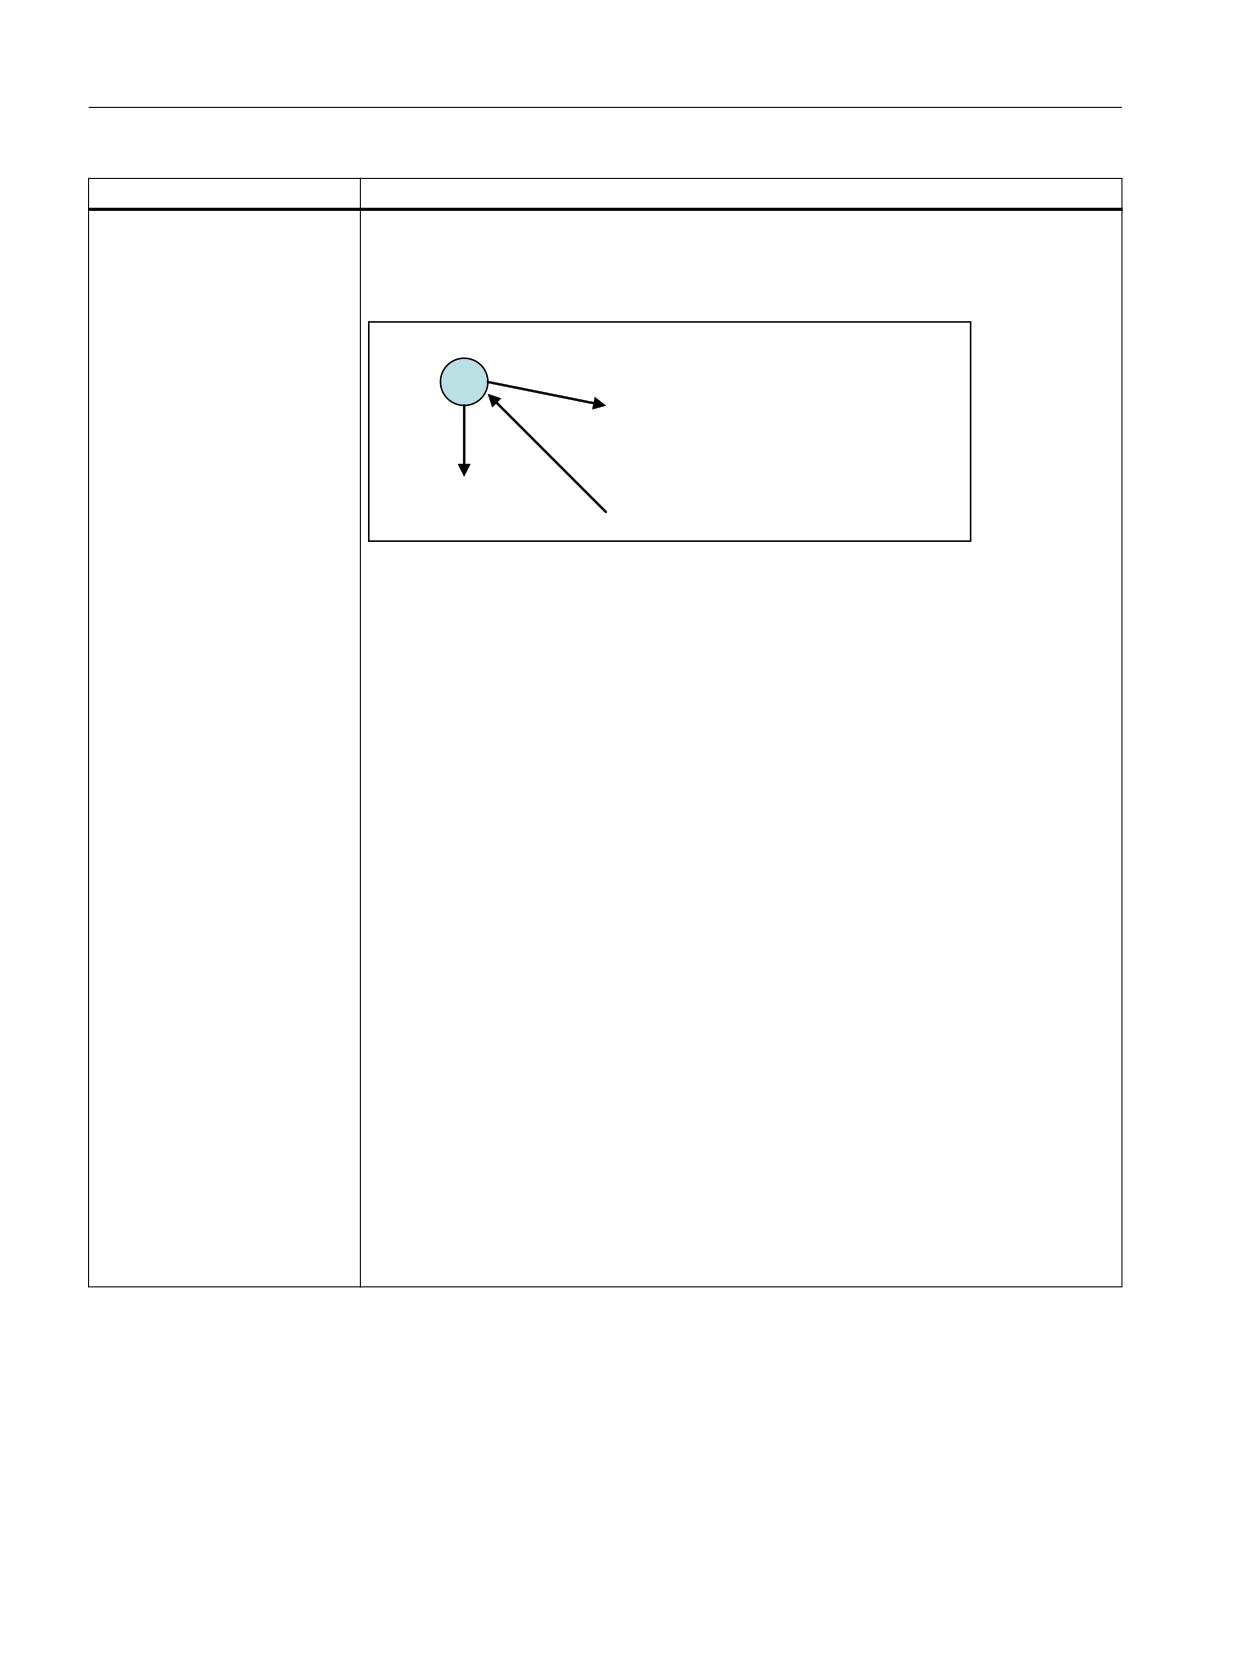
If the parser starts to process the tag CREATE_CYCLE, initially, the message <CREATE_CY-
CLE_EVENT> is sent to the active form. This message can be used for preparing the cycle
parameters, before the parser generates the NC operation from the parameter list and the
generation rule.
&5($7( &<&/( !
&5($7(B&<&/(B(9(17!
3DUDPHWHU
*HQHUDWH F\FOH
&5($7(B&<&/(B(9(17!
Syntax:
<CREATE_CYCLE_EVENT>
…
…
</CREATE_CYCLE_EVENT>
Example:
<SOFTKEY_OK>
…
<CREATE_CYCLE />
…
…
<SOFTKEY_OK>
…
…
<FORM>
<NC_INSTRUCTION>MY_CYCLE($P1, $P2)</ NC_INSTRUCTION >
…
…
<CREATE_CYCLE_EVENT>
<type_cast name="P1" type="int"/>
<OP> P1 = P1 * 150 </OP>
</CREATE_CYCLE_EVENT>
…
…
</FORM>
Easy XML
38
Programming Manual, 10/2020, 6FC5397-1DP40-6BA4
Generating user dialogs
2.7 XML identifier
Tag identifier
Meaning
DATA
The tag allows writing to NC, PLC, GUD and drive data.
Chapter "Component addressing (Page 127)" describes how addresses are formed.
Attribute:
• name
Variable address
Tag value:
A constant, a variable, or a term is expected as tag value.
Syntax:
<DATA name="<variable name>"> value </DATA>
<DATA name="<variable name>"> <term> </DATA>
Example:
<DATA name = "plc/mb170"> 1 </DATA>
…
<LET name = "tempVar"> 7 </LET>
<!- the contents of the local variables "tempVar" are written to
bit memory byte 170 →
<DATA name = "plc/mb170">$tempVar</DATA>
DATA continued
Example:
Calculation of a term. The result is assigned to the specified variable.
<let name="a" >#f</let>
<let name="b" >7</let>
<data name = "b"> a & b</data>
<let name="c" type="string"></let>
<data name = "c"> _T" test" + _T" and test"</data>
Easy XML
Programming Manual, 10/2020, 6FC5397-1DP40-6BA4
39
Generating user dialogs
2.7 XML identifier
Tag identifier
Meaning
DATA_LIST
The tag enables the listed drive and machine data to be saved or restored.
Addresses are listed in lines. Chapter "Component addressing (Page 127)" describes how
addresses are formed.
Up to 20 temporary data lists can be created.
Attributes:
• action
read - the values of the listed variables are stored in a temporary memory
append - the values of the listed variables are added to an existing list
write - the backed up values are copied to the relevant machine data
• id
The identifier identifies the temporary memory
Syntax:
<DATA_LIST action="<read/write/append>" id="<list name>">
NC/PLC address compilation
</DATA_LIST>
Example:
<DATA_LIST action ="read" id="<name>">
nck/channel/parameter/r[2]
nck/channel/parameter/r[3]
nck/channel/parameter/r[4]
$MN_USER_DATA_INT[0]
…
</ DATA_LIST>
<DATA_LIST action ="write" id="<name>" />
DIALOGGUI
This tag represents the root tag for the Easy XML function. All of the instructions encom-
passed are edited using the Easy XML parser.
Attributes:
The listed attributes can be optionally specified in order to activate central functions:
• diagnose - value true activates the XML diagnostics
• debug_msg - value "on" - trace messages are saved
Further information is provided in Chapter "XML diagnostics (Page 34)"
• textfile - name of the text file to be used
• textcontext - text context to be used only valid in conjunction with the attribute textfile
• textfilelist - allows a list with different text files to be loaded
Further information is provided in Chapter "Project-specific text files (Page 243)"
DIALOGGUI continued
• restoresession - value true
If the Easy XML project is selected again, the parser opens the menu last selected and the
last selected form. This behavior is retained until the HMI is restarted.
Further information is provided in Chapter "Restoring the session (Page 248)"
DEBUG_MSG
The attribute controls the storage of trace outputs. For a description, see Chapter "Generating
softkey menus and dialog forms (Page 66)" under tag DEBUG.
If the value on is assigned, the parser stores all outputs in one file. This can result in slower
script execution. The value off is set by default.
Easy XML
40
Programming Manual, 10/2020, 6FC5397-1DP40-6BA4
Generating user dialogs
2.7 XML identifier
Tag identifier
Meaning
DO_WHILE
Do while loop
DO
Instructions
WHILE (Test)
Syntax:
<DO_WHILE>
Instructions
…
<CONDITION>…</CONDITION>
</DO_WHILE>
The Do While loop comprises a block of instructions and a condition. The code in the in-
struction block is executed first, then the condition is applied. If the condition is true, the
function executes the code section again. This is continually repeated until the condition is
false.
Example:
<DO_WHILE>
<DATA name = "PLC/qb11"> 15 </DATA>
<CONDITIION> "plc/ib9" == 0 </CONDITION>
</DO_WHILE>
DYNAMIC_INCLUDE
The tag includes an XML script file.
Contrary to the INCLUDE tag, read-in is first only realized when executing the corresponding
operation.
For large projects, the use of the tag reduces the load time of the customer area and/or the
cycle support. Further, the average level of resources is reduced, as not all of the dialogs are
always called during a session.
Syntax:
<DYNAMIC_INCLUDE src="path name"/>
Example:
<SOFTKEY POSITION="3">
<CAPTION>MY_MENU</CAPTION>
<DYNAMIC_INCLUDE src/>
<NAVIGATION>MY_MENU</NAVIGATION>
</SOFTKEY>
ELSE
Instruction for situations where the condition has not been met (IF, THEN, ELSE)
Easy XML
Programming Manual, 10/2020, 6FC5397-1DP40-6BA4
41
Generating user dialogs
2.7 XML identifier
Tag identifier
Meaning
FOR
For loop
for (initialization; test; continuation) instruction(s)
Syntax:
<FOR>
<INIT>…</INIT>
<CONDITION>…</CONDITION>
<INCREMENT>…</INCREMENT>
Instructions
…
</FOR>
The For loop is executed as follows:
1. Evaluation of the expression initialization (INIT).
2. Evaluation of the expression test (CONDITION) as a Boolean expression.
If the value is false, the For loop is exited.
3. Execution of the following instructions.
4. Evaluation of the expression continuation (INCREMENT).
5. Continue with 2.
All the variables within the INIT, CONDITION, and INCREMENT branches are declared and
initialized outside the For loop.
Example:
<LET name = "count">0</LET>
<FOR>
<INIT>
<OP> count = 0</OP>
</INIT>
<CONDITION> count <= 7 </CONDITION>
<INCREMENT>
<OP> count = count + 1 </OP>
</INCREMENT>
<OP> "plc/qb10" = 1+ count </OP>
</FOR>
FORM
The tag contains the description of a user dialog. The description is provided in Chapter
"Generating softkey menus and dialog forms (Page 66)".
HMI_RESET
The tag triggers an HMI restart.
Interpretation is stopped after this instruction.
Easy XML
42
Programming Manual, 10/2020, 6FC5397-1DP40-6BA4
Generating user dialogs
2.7 XML identifier
Tag identifier
Meaning
IF
Conditional instruction (IF, THEN, ELSE)
The THEN and ELSE tags are enclosed in the IF tag.
The condition that is executed in the CONDITION tag follows the IF tag. The further process-
ing of the instructions depends upon the result of the operation. If the function result is true,
then the THEN branch is executed and the ELSE branch is skipped. If the result of the function
is false, the parser executes the ELSE branch.
Syntax:
<IF>
<CONDITION> Condition != 7 </CONDITION>
<THEN>
Instruction for the case: condition fulfilled
</THEN>
<ELSE>
Instruction for the case: Condition not fulfilled
</ELSE>
</IF>
Example:
<IF>
<CONDITION> "plc/mb170" != 7 </CONDITION>
<THEN>
<OP> "plc/mb170" = 7 </OP>
…
</THEN>
<ELSE>
<OP> "plc/mb170" = 2 </OP>
…
</ELSE>
</IF>
IF continued
If only local variables are used in the condition, then the condition can be specified as at-
tribute in the IF tag.
Example:
<let name="var1">1</let>
<if condition="var == 1">
<then>
</then>
</if>
Note:
If control variables are used in a condition, then a control variable is assigned data type
integer.
Exceptions:
Controls, type imagebox and multiline, are assigned data type string.
Easy XML
Programming Manual, 10/2020, 6FC5397-1DP40-6BA4
43
Generating user dialogs
2.7 XML identifier
Tag identifier
Meaning
INCLUDE
The instruction includes an XML description.
(see also DYNAMIC_INCLUDE in this table)
Attribute:
• src
Contains the path name.
Syntax:
<?INCLUDE src="<Path name>" ?>
Easy XML
44
Programming Manual, 10/2020, 6FC5397-1DP40-6BA4
Generating user dialogs
2.7 XML identifier
Tag identifier
Meaning
LET
The instruction creates a local variable under the specified name.
Fields:
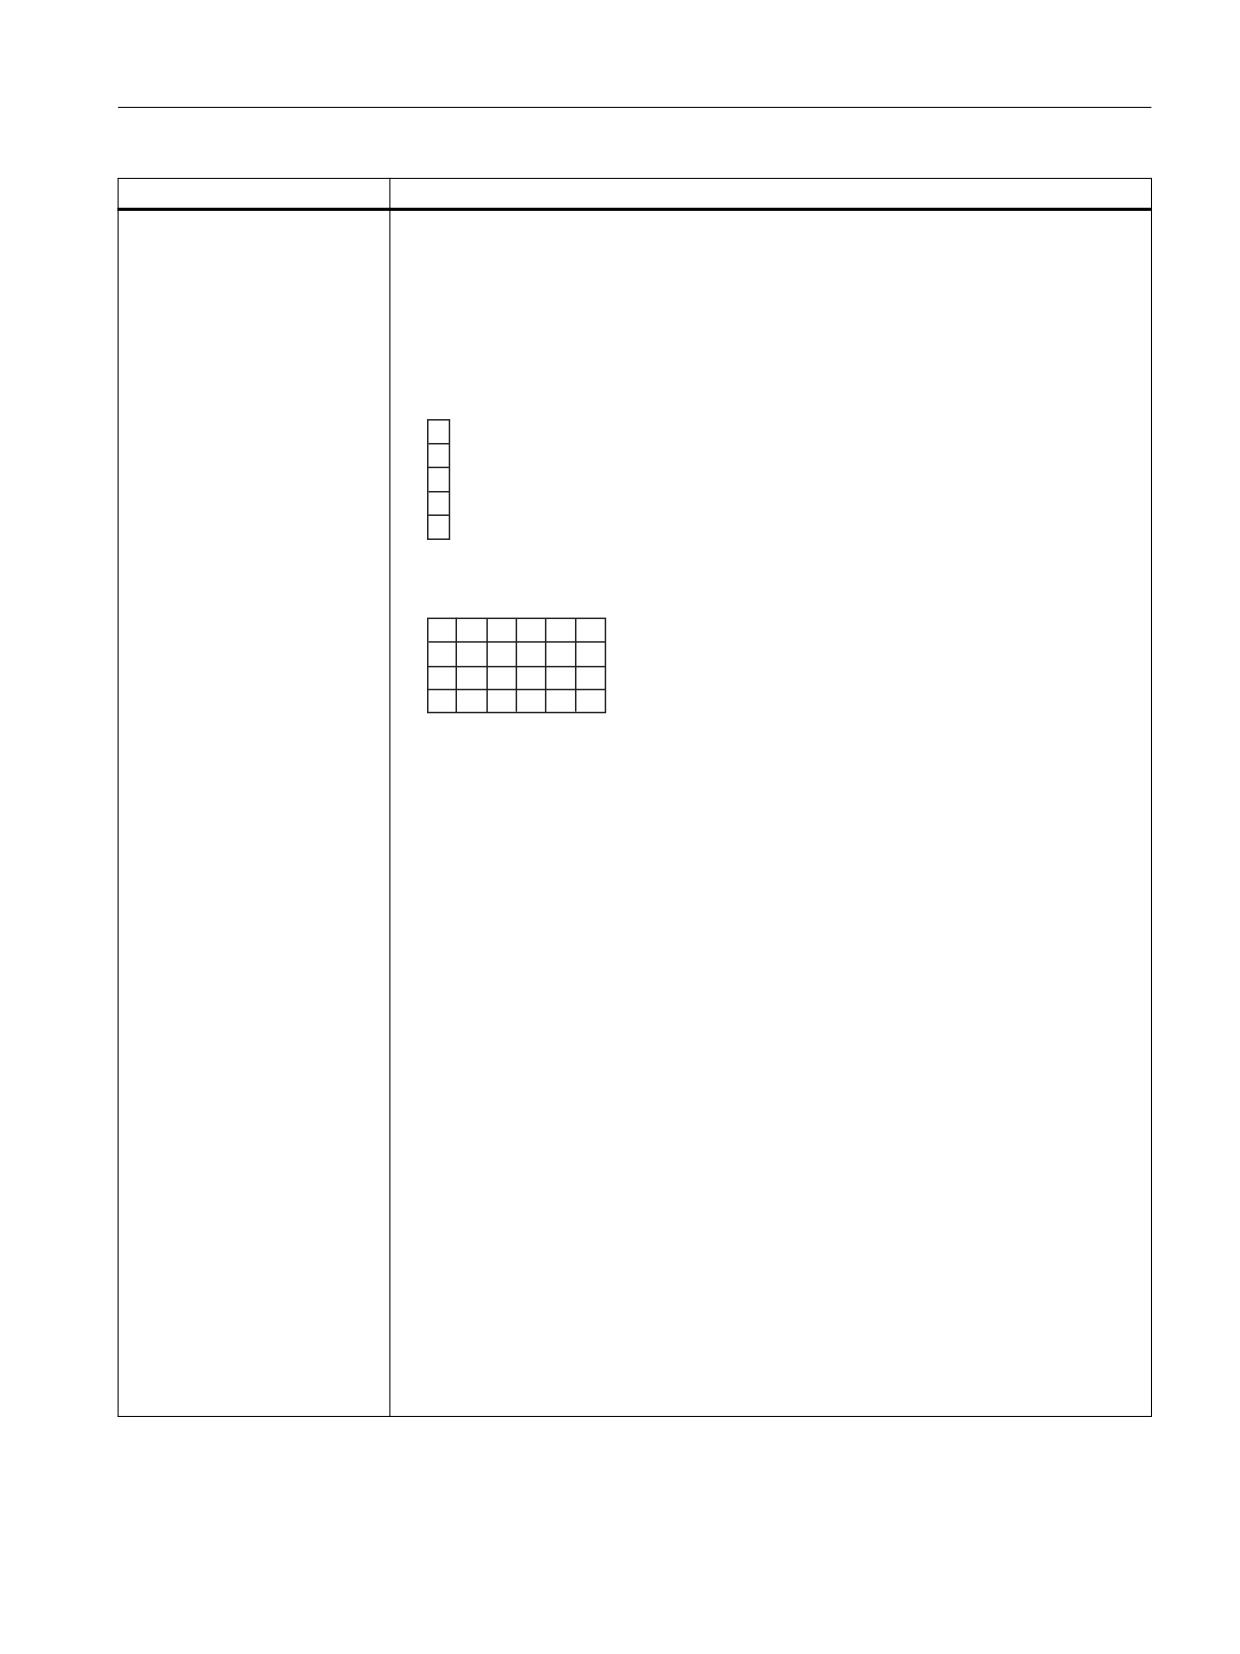
Using the attribute dim (dimension) single or two-dimensional fields can be created. The
field index addresses the individual field elements.
For a two-dimensional field, initially the line index is specified and then the column index.
• One-dimensional field:
Indices 0 to 4
• Two-dimensional field:
Index line 0 to 3 and index column 0 to 5
Attributes:
• name
Variable name
• type
The variable type can be an integer (INT), unsigned integer (UINT), double (DOUBLE),
float (FLOAT), string (STRING), or STRUCT. It is also possible to use a structure created
by typedef as a variable type (see tag identifier TYPEDEF). If there is no type instruction
specified, the system creates an integer variable.
<LET name = "VAR1" type = "INT" />
• permanent
If the attribute is set to true, then the variable value is saved permanently. This attribute
is only effective for a global variable.
• poweroff
If the value of the attribute is true, the values are retained until the control is switched off.
Further information is provided in Chapter "Restoring the session (Page 248)"
• dim
The following number of field elements must be specified. For a two-dimensional field,
the second dimension is specified after the first dimension separated by a comma.
A field element is accessed via the field index, which is specified in square brackets after
the variable name.
name[index] or name[row,column]
- One-dimensional field: dim="<number of elements>"
- Two-dimensional field: dim="<number of lines>,<number of columns>"
Non-initialized field elements are pre-assigned with "0".
Easy XML
Programming Manual, 10/2020, 6FC5397-1DP40-6BA4
45
Generating user dialogs
2.7 XML identifier
Tag identifier
Meaning
LET continued
Example:
One-dimensional field:
<let name="array" dim="10"></let>
Two-dimensional field:
<let name="list_string" dim="10,3" type="string"></let>
Pre-assignment:
A variable can be initialized with a value.
<LET name = "VAR1" type = "INT"> 10 </LET>
If values comprising NC or PLC variables are saved in a local variable, the assignment opera-
tion automatically adapts the format to that of the variables which have been loaded.
• Pre-assignment for a string variable:
Texts containing more than one line can be assigned to a string variable if the formatted
text is transferred as a value. If a line is to end with a line feed <LF> (line feed) , the
characters "\\n" should be added at the end of the line.
<LET name = "text" type = "string"> F4000 G94\\n
G1 X20\\n
Z50\\n
M2\\n
</LET>>
Fields (Arrays):
<let name="list" dim="10,3">
{1,2,3},
{1,20}
</let>
<let name="list_string" dim="10,3" type="string">
{"text 10","text 11"},
{"text 20","text 21"}
</let>
Assignment:
Values made up of the machine data or subroutines can be assigned to a variable using the
assignment operation "=".
A variable remains valid until the end of the higher-level XML block.
Variables which are to be available globally should be created directly after the DialogGUi tag.
The following must be observed for a dialog box:
• The message processing opens the corresponding tag.
• The tag is closed after the message has been executed.
• All variables within the tag are deleted when closing.
Easy XML
46
Programming Manual, 10/2020, 6FC5397-1DP40-6BA4
Generating user dialogs
2.7 XML identifier
Tag identifier
Meaning
LET continued
Variable type struct:
This variable type contains a composition of variables that can be addressed using the struc-
ture name. A structure can contain all variable types and structures.
Within the structure, a variable is declared with the "element" tag. The attributes of the tags
and the initialization correspond to the attributes and initialization of the let instruction.
<let name="name" type="struct">
<element name="<Name>" type="<Variable type>" />
…
…
…
</let>
LET continued
Access to a variable of the structure is via the structure name and variable name. Both names
are separated by a point operator.
<op>
Structure_name.variable_name = value;
</op>
Example:
<let name="info" type="struct">
<element name="id" type="int" />
<element name="name" type="string" />
<element name="phone" type="string" />
</let>
<op>
info.id = 1;
info.name = _T"my name";
info.phone = _T"0034 45634";
</op>
Initialization of structures:
Structures can be initialized when the variables are created by specifying an initial value for
each structure element. In an array of structures, each structure must be separated from the
others by braces.
Easy XML
Programming Manual, 10/2020, 6FC5397-1DP40-6BA4
47
Generating user dialogs
2.7 XML identifier
Tag identifier
Meaning
LOCK_OPERATING_AREA
The operating area switchover is locked.
The operating area switchover lock is withdrawn with the UNLOCK_OPERATING_AREA tag.
Syntax:
<LOCK_OPERATING_AREA />
MSG
The operator component shows the message which is indicated in the tag.
If an alarm number is used, the dialog box displays the text which is saved for the number.
Example:
<MSG text ="my message" />
MSGBOX
The instruction opens a message box whose return value can be used for branching.
Syntax:
<MSGBOX text="<Message>" caption="<caption>" retvalue="<variable
name>" type="<button type>" />
Attributes:
• text
Text
• caption
Header
• retvalue
Name of the variables to which the return value is copied:
1 - OK
0 - CANCEL
• type
Acknowledgment options:
"BTN_OK"
"BTN_CANCEL"
"BTN_OKCANCEL"
If an alarm number is used for the "text" or "caption" attribute, the message box displays the
text which is saved for the number.
Example:
<MSGBOX text="Test message" caption="Information"
retvalue="result" type="BTN_OK" />
Easy XML
48
Programming Manual, 10/2020, 6FC5397-1DP40-6BA4
Generating user dialogs
2.7 XML identifier
Tag identifier
Meaning
OP
The tag executes the specified operations.
The operations listed in Chapter "Operators (Page 64)" can be executed.
For the purpose of accessing the NC, PLC and drive data, the complete variable name should
be placed in quotation marks. Chapter "Component addressing" (Page 127) describes how
addresses are formed.
PLC: "PLC/MB170"
NC: "NC/Channel/…"
Example:
<LET name = "tmpVar" type="INT"> </LET>
<OP> tmpVar = "plc/mb170" </OP>
<OP> tmpVar = tmpVar *2 </OP>
<OP> "plc/mb170" = tmpVar </OP>
More than one equation can be used within an operation tag. A semicolon marks the end of
the instruction.
Example:
<op>
x = x+1;
y = y+1;
</op>
Character string processing:
The operation instruction is able to process character strings and assign the results to the
string variable specified in the equation.
The identifier _T should be placed at the start as a means of identifying text expressions.
Formatting of variable values is also possible. The identifier _F should be placed at the start
of the formatting regulation, followed by the format instruction. The address is then speci-
fied for the variable.
Example:
<LET name="buffer" type="string"></LET>
…
…
…
<OP> buffer = _T"unformatted value R0= " + "nck/Channel/Parameter/
R[0]" + _T" and " + _T"$$85051" + _T" formatted value R1 " + _F
%9.3f"nck/Channel/Parameter/R[1]" </OP>
Easy XML
Programming Manual, 10/2020, 6FC5397-1DP40-6BA4
49
Generating user dialogs
2.7 XML identifier
Tag identifier
Meaning
OPERATION
Operation
Instructions can be moved within an equation.
Move left "<<" operator
The << function moves bits to the left. You can specify the value and the number of move
increments directly or with a variable. If the limit of the data format is reached, the bits will
be moved beyond the limit without an error message being issued.
Execution rule
Execution from left to right; '+' and '-' have priority over '<<' and '>>'
Example:
<op> idx = idx << 2 </op>
<op> idx = 3 + idx << 2 </op>
Move right ">>" operator
The >> function moves bits to the right. You can specify the value and the number of move
increments directly or with a variable. If the limit of the data format is reached, the bits will
be moved beyond the limit without an error message being issued.
Execution rule
Execution from left to right; '+' and '-' have priority over '<<' and '>>'
Example:
<op> idx = idx >> 2 </op>
<op> idx = 3+idx >> 2</op>
PASSWORD
This tag is used to unlock additional units for the "EasyExtend" function.
The specified character string is written to the specified reference variable and must be pro-
cessed in the PLC user program.
Syntax:
<PASSWORD refVar ="<variable name>" />
Attributes:
• refVar
Name of the reference variable
• text
Specifying an attribute replaces the default text (optional)
Example:
<PASSWORD refvar="plc/mw107" />
Example optional:
<password refVar = "plc/MD108" text="Password" />
POWER_OFF
A message prompts the operator to switch the machine off. The message text is permanently
saved in the system.
Easy XML
50
Programming Manual, 10/2020, 6FC5397-1DP40-6BA4
Generating user dialogs
2.7 XML identifier
Tag identifier
Meaning
PRINT
The tag outputs a text in the dialog line or copies the text to the variable specified.
If the text contains formatting identifiers, the variable values are inserted at the appropriate
places.
Syntax:
<PRINT name="Variable name" text="text %Formatting"> Variable, … </
PRINT>
<PRINT text="text %Formatting"> Variable, … </PRINT>
Attributes:
• name
Name of the variable where the text is to be stored (optional)
• text
Text
Formatting:
The character "%" causes the variable specified as the value to be formatted.
%[Flags] [Width] [.decimal places] type
• Flags:
Optional character for defining output formatting:
- Right-justified or left-justified ("-" for left-justified)
- Add leading zeros ("0")
- Fill with blanks
• Width:
The argument defines the minimum output width for a non-negative number. If the value
to be output has fewer places than the argument defined, the missing spaces are filled
with blanks.
• Decimal places:
With floating-point numbers, the optional parameter defines the number of decimal
places.
• Type:
The type character defines which data formats are transferred for the print instruction.
These characters need to be specified.
- d: Integer value
- f: Floating-point number
- s: String
Easy XML
Programming Manual, 10/2020, 6FC5397-1DP40-6BA4
51
Generating user dialogs
2.7 XML identifier
Tag identifier
Meaning
PRINT continued
Values:
Number of variables whose values are to be inserted into the text.
The variable types must match the corresponding type identifier for the formatting instruc-
tion and must be separated from one another with a comma.
Example:
Output of a text in the information line
<PRINT text="Infotext" />
Output of a text with variable formatting
<LET name="trun_dir"></LET>
<PRINT text="M%d">trun_dir</PRINT>
Output of a text in a string variable with variable formatting
<LET name="trun_dir"></LET>
<LET name="str" type="string" ></LET>
<print name="str" text="M%d ">trun_dir</print>
PROGRESS_BAR
The tag opens or closes a progress bar. The bar is displayed below the application window.
Syntax:
<PROGRESS_BAR type="<true/false>"> value </ PROGRESS_BAR>
Attributes:
• type = "TRUE" - opens the progress bar
• type = "FALSE" - closes the progress bar
• min
(optional) - minimum value
• max
(optional) - maximum value
Value:
• Value
Percentage position of the bar
Example:
<PROGRESS_BAR type="true" min="0" max="101" >20< /
PROGRESS_BAR>
<PROGRESS_BAR >50< /
PROGRESS_BAR>
<PROGRESS_BAR type="false" >100< /PROGRESS_BAR>
Easy XML
52
Programming Manual, 10/2020, 6FC5397-1DP40-6BA4
Generating user dialogs
2.7 XML identifier
Tag identifier
Meaning
SEND_MESSAGE
The tag sends a message with two parameters to the active form, which is processed in the
tag message.
Syntax:
<SEND_MESSAGE>p1, p2</SEND_MESSAGE>
Example:
<SOFTKEY POSITION="3">
<caption>Set%nParameter</caption>
<send_message>1, 0</send_message>
</SOFTKEY>
<FORM>
…
…
<MESSAGE>
<SWITCH>
<CONDITION>$message_par1</CONDITION>
<CASE value="1">
…
…
</CASE>
</SWITCH>
</MESSAGE>
…
…
</FORM>
SHOW_CONTROL
The visibility of a control can be controlled using the tag.
Syntax:
<SHOW_CONTROL name="<name>" type="<type>" />
Attributes:
• name
Name of the control
• type = "TRUE" - control becomes visible
• type = "FALSE" - control becomes invisible (hidden)
Example:
<SHOW_CONTROL name="myEditfield" type="false" />
…
…
<SHOW_CONTROL name="myEditfield" type="true" />
Easy XML
Programming Manual, 10/2020, 6FC5397-1DP40-6BA4
53
Generating user dialogs
2.7 XML identifier
Tag identifier
Meaning
SLEEP
The tag interrupts script execution for the specified period. The interruption time is obtained
from the transferred value multiplied by the time base of 50 ms.
Syntax:
<SLEEP value="Interruption time" />
Example:
Wait time, 1.5 s
<SLEEP value="30" />
STOP
Interpretation is canceled at this point.
SWITCH
The SWITCH instruction describes a multiple choice. A term is evaluated once and compared
with a number of constants. If the expression matches the constants, the instructions are
executed within the CASE instruction.
The DEFAULT instruction is executed when none of the constants match the expression.
Syntax:
<SWITCH>
<CONDITION> Value </CONDITION>
<CASE value="<Constant 1>">
Instructions
…
</CASE>
<CASE value="<Constant 2>">
Instructions
…
</CASE>
<DEFAULT>
Instructions
…
</DEFAULT>
</SWITCH>
Easy XML
54
Programming Manual, 10/2020, 6FC5397-1DP40-6BA4
Generating user dialogs
2.7 XML identifier
Tag identifier
Meaning
SWITCHTOAREA
The SWITCHTOAREA tag changes from the Customer area into the specified operating area.
The parameter is specified as an attribute value.
Syntax:
<switchToArea name="area" args="argument "/>
Attributes:
name
The following names are declared for the operating areas:
• AreaMachine - machine
• AreaParameter - parameters
• AreaProgramEdit - editor
• AreaProgramManager - Program Manager
• AreaDiagnosis - diagnostics
• AreaStartup - setup
args (reserved)
Runtime arguments can be passed to the operating area to activate dialogs.
Example:
<switchToArea name="AreaMachine" />
SWITCHTODYNAMICTARGET
If the previous dialog is defined as a dynamic jump destination, the SWITCHTODYNAMICTAR-
GET tag will activate this dialog and end script execution.
Syntax:
<switchToDynamicTarget />
THEN
Instruction if the condition has been fulfilled (IF, THEN, ELSE)
TYPE_CAST
The tag converts the data type of a local variable.
Syntax:
<type_cast name="variable name" type=" new type" />
Attributes:
• name
Variable name
• type
The new data type is assigned to the variable.
• convert
The new data type is assigned to the variable. The variable value is also converted to the
new data type.
Easy XML
Programming Manual, 10/2020, 6FC5397-1DP40-6BA4
55
Generating user dialogs
2.7 XML identifier
Tag identifier
Meaning
TYPEDEF
A new identifier for a data type can be defined with this tag. This has the benefit for the
structure definitions that the data type can be defined once and then used as a data type in
a LET instruction.
The identifier and type are expected as attributes.
The parser supports only the specification of structure definitions.
In the type definition, a variable is declared with the "element" tag. The attributes of the tag
correspond to the attributes of the let instruction.
<typedef name="<identifier>" type="struct">
<element name="<name>" type="<variable type>" />
…
…
…
</typedef>
After definition, the identifier can be used as a data type for the LET instruction.
<let name="<variable name>" type="<identifier>"></let>
Example:
<typedef name="my_struct" type="struct">
<element name="id" type="int" />
<element name="name" type="string" />
<element name="phone" type="string" />
</typedef>
<let name="info" type="my_struct"></let>
…
…
<op>
info.id = 1;
info.name = _T"my name";
info.phone= _T"0034 45634";
</op>
Easy XML
56
Programming Manual, 10/2020, 6FC5397-1DP40-6BA4
Generating user dialogs
2.7 XML identifier
Tag identifier
Meaning
TYPEDEF continued
Some predefined functions expect variables of structure type RECT, POINT, or SIZE as the call
parameter. These structures are defined in the file struct_def.xml.
Further information is provided in Chapter "Creating the file struct_def.xml (Page 125)"
RECT:
<typedef name="StructRect" type="struct" >
<element name="left" type="int">0</element>
<element name="top" type="int">0</element>
<element name="right" type="int">0</element>
<element name="bottom" type="int">0</element>
</typedef>
POINT:
<typedef name="StructPoint" type="struct" >
<element name="x" type="int">0</element>
<element name="y" type="int">0</element>
</typedef>
SIZE:
<typedef name="StructSize" type="struct" >
<element name="width" type="int">0</element>
<element name="height" type="int">0</element>
</typedef>
UNLOCK_OPERATING_AREA
Withdrawal of operating area switchover lock
Syntax:
<UNLOCK_OPERATING_AREA />
WAITING
The tag waits for the component to undergo a hot restart after an NC or drive reset.
Attributes:
• WAITINGFORNC = "TRUE" - the system waits for the NC to restart
• WAITINGFORDRIVE = "TRUE" - the system waits for the drives to restart
Syntax:
<WAITING WAITINGFORNC = "TRUE"/>
Example:
<CONTROL_RESET resetnc = "true" resetdrive = "true"/>
<WAITING waitingfornc = "true" waitingfordrive = "true" />
Easy XML
Programming Manual, 10/2020, 6FC5397-1DP40-6BA4
57
Generating user dialogs
2.7 XML identifier
Tag identifier
Meaning
WHILE
WHILE loop
WHILE (Test)
Instruction
Syntax:
<WHILE>
<CONDITION>…</CONDITION>
Instructions
…
</WHILE>
The While loop executes a sequence of instructions repeatedly while a condition is met. This
condition is tested before the sequence of instructions is executed.
Example:
<WHILE>
<CONDITION> "plc/ib9" == 0 </CONDITION>
<DATA name = "PLC/qb11"> 15 </DATA>
</WHILE>
XML_PARSER
The "XML_PARSER" tag can be used to parse XML files.
The parser interprets an XML file and calls defined call-back functions. Each call-back function
belongs to a predefined event. The programmer can process the XML data within this func-
tion.
Predefined events:
• start document
The parser opens the document and starts parsing.
• end document
The parser closes the document.
• start element
The parser has found an element and creates a list with all attributes and attribute values.
These lists are forwarded to the call-back function.
• end element
The end of the element has been found.
• characters
The parser forwards all characters of an element.
• error
The parser has detected a syntax error.
When an event occurs, the parser calls the callback function and checks the return value of
the function. If the function returns the value "true", the parser continues the process.
Easy XML
58
Programming Manual, 10/2020, 6FC5397-1DP40-6BA4
Generating user dialogs
2.7 XML identifier
Tag identifier
Meaning
XML_PARSER continued
Interfaces
The value of the name attribute contains the path to the XML file.
To assign events to the call-back functions, the following properties must be specified:
Standard
startElementHandler
endElementHandler
charactersHandler
Optional
errorHandler
documentHandler
The value of an attribute defines the name of the call-back function.
Example:
<XML_PARSER name="f:\appl\xml_test.xml">
<!-- standard handler -->
<property startElementHandler="startElementHandler" />
<property endElementHandler="endElementHandler" />
<property charactersHandler="charactersHandler" />
<!-- optional handler -->
<property errorHandler="errorHandler" />
<property documentHandler="documentHandler" />
</XML_PARSER>
Easy XML
Programming Manual, 10/2020, 6FC5397-1DP40-6BA4
59
Generating user dialogs
2.7 XML identifier
Tag identifier
Meaning
XML_PARSER continued
The parser also supplies variables so that the call-back functions can access the event data.
startElementHandler:
Function parameters
tag_name
- tag name
num
- number of attributes found
System variables
$xmlAttribute String array with the number of elements indicated by num.
$xmlValue
String array that contains the 0-num attribute value range.
Example:
<function_body name="startElementHandler" return="true"
parameter="tag_name, num">
<print text="attribute name %s"> $xmlAttribute[0]</print>
<print text="attribute value %s"> $xmlValue[0]</print>
</function_body>
endElementHandler:
Function parameters
tag_name
- tag name
Example:
<function_body name="endElementHandler" parameter="tag_name">
<print text="name %s"> tag_name </print>
</function_body>
Easy XML
60
Programming Manual, 10/2020, 6FC5397-1DP40-6BA4
Generating user dialogs
2.7 XML identifier
Tag identifier
Meaning
XML_PARSER continued
charactersHandler:
System variables
$xmlCharacters
String with data
$xmlCharactersStart
Always 0
$xmlCharactersLength
Number of bytes
Example:
<function_body name="charactersHandler" return="true" >
<print text="chars %s"> $xmlCharacters </print>
</function_body>
documentHandler:
Function parameters
state
1 start document, 2 end document
errorHandler:
System variables
$xmlErrorString Contains the invalid line (system variable)
Example:
<function_body name="errorHandler" >
<print text="error %s">$xmlErrorString</print>
</function_body>
Call-back result:
$return
If 1 (true), the parser continues parsing the file
Easy XML
Programming Manual, 10/2020, 6FC5397-1DP40-6BA4
61
Generating user dialogs
2.7 XML identifier
2.7.3
Color coding
The color attribute uses the color coding scheme for the HTML language.
In terms of syntax, color specifications consist of the "#" (hash) character and six digits from the
hexadecimal system, with each color represented by two digits.
R - Red
G - Green
B - Blue
#RRGGBB
Example:
color= "#ff0011"
Example colors:
Red
Green
Blue
Yellow
White
Black
#FF0000
#00FF00
#0000FF
#ffff00
#FFFFFF
#000000
2.7.4
Special XML syntax
Characters with special meanings in XML syntax have to be rewritten if they are to be displayed
correctly by a general XML editor.
The following characters are affected:
Character
Notation in XML
<
<
>
>
&
&
"
"
'
'
2.7.5
HTML special characters
For the representation of characters or for the use of control characters, the HTML special
character evaluation is offered.
The decimal and hexadecimal encodings of the code page Latin 1 can be used.
Easy XML
62
Programming Manual, 10/2020, 6FC5397-1DP40-6BA4
Generating user dialogs
2.7 XML identifier
Example
Characters
Description
Notation decimal
Notation hexadecimal
"
Quotation marks
"
"
LF
Line feed


Diagnostics
<MENU name="DgGlobalHu">
<ETCLEVEL id="0">
<SOFTKEYGROUP name="GroupEtc">
<SOFTKEY position="7">
<PROPERTY name="textID" type="QString">DG_SK</PROPERTY>
<PROPERTY name="translationContext" type="QString">EASY_XML</
PROPERTY>
<FUNCTION args="-area CustomXML -dialog SlEECustomDialog -
mainModule<space ?>dg.xml -entry main" name="switchToDialog"/>
</SOFTKEY>
</SOFTKEYGROUP>
</ETCLEVEL>
</MENU>
<space ?> - space at this point
Easy XML
Programming Manual, 10/2020, 6FC5397-1DP40-6BA4
63
Generating user dialogs
2.7 XML identifier
2.7.6
Operators
The operation instruction processes the following operators:
Operator
Meaning
=
Assignment
==
Equal to
<, <
Less than
>, >
Greater than
<=, <=
Less than or equal to
>=, >=
Greater than or equal to
|
OR operation in bits
||
Logic OR operation
&, &
AND operation in bits
&&, &&
Logic AND operation
+
Addition
-
Subtraction
*
Multiplication
/
Division
!
Not
!=
Not equal to
Operation instructions are processed from left to right. It may make sense to place terms in
parentheses under certain circumstances in order to define the priority for executing subterms.
Easy XML
64
Programming Manual, 10/2020, 6FC5397-1DP40-6BA4
Generating user dialogs
2.7 XML identifier
2.7.7
System variables
System variables are variables available in every script, which are used for exchanging data
between the parser and the script execution.
The following table provides an overview of the tags for which variables are automatically
generated.
Variable name
Meaning
Valid in tag
$actionresult
Signals to the parser, whether
KEY_EVENT
the parser is to process the event.
$focus_name
Contains the name of the field
FOCUS_IN
which has the input focus
INDEX_CHANGED
$focus_item_data
Contains the numerical value
EDIT_CHANGED
item_data, that was assigned to
the field
$gestureinfo
For finger gestures, the parser
GESTURE_EVENT
provides the gesture information
in the variable and executes the
gesture_event tag.
$return
The variable transports the re-
FUNCTION_BODY
turn value of a subfunction
$message_par1
Contains the call parameters of
MESSAGE
the SEND_MESSAGE function
$message_par2
$xmlAttribute
Contains a list of the tag attrib-
XML_PARSER
utes found
startElementHandler
$xmlValue
Contains a list of the tag values
found
$xmlCharacters
Contains the data flow
XML_PARSER
charactersHandler
$xmlCharactersStart
Contains the start index:
$xmlCharactersLength
Contains the number of charac-
ters stored in the data flow
$mouse_event.type
Structure to transfer the parame-
MOUSE_EVENT
ters of the mouse event
$mouse_event.x
$mouse_event.y
$mouse_event.id
$mouse_event.buttons
$mouse_event.button
Easy XML
Programming Manual, 10/2020, 6FC5397-1DP40-6BA4
65
Generating user dialogs
2.7 XML identifier
2.7.8
Generating softkey menus and dialog forms
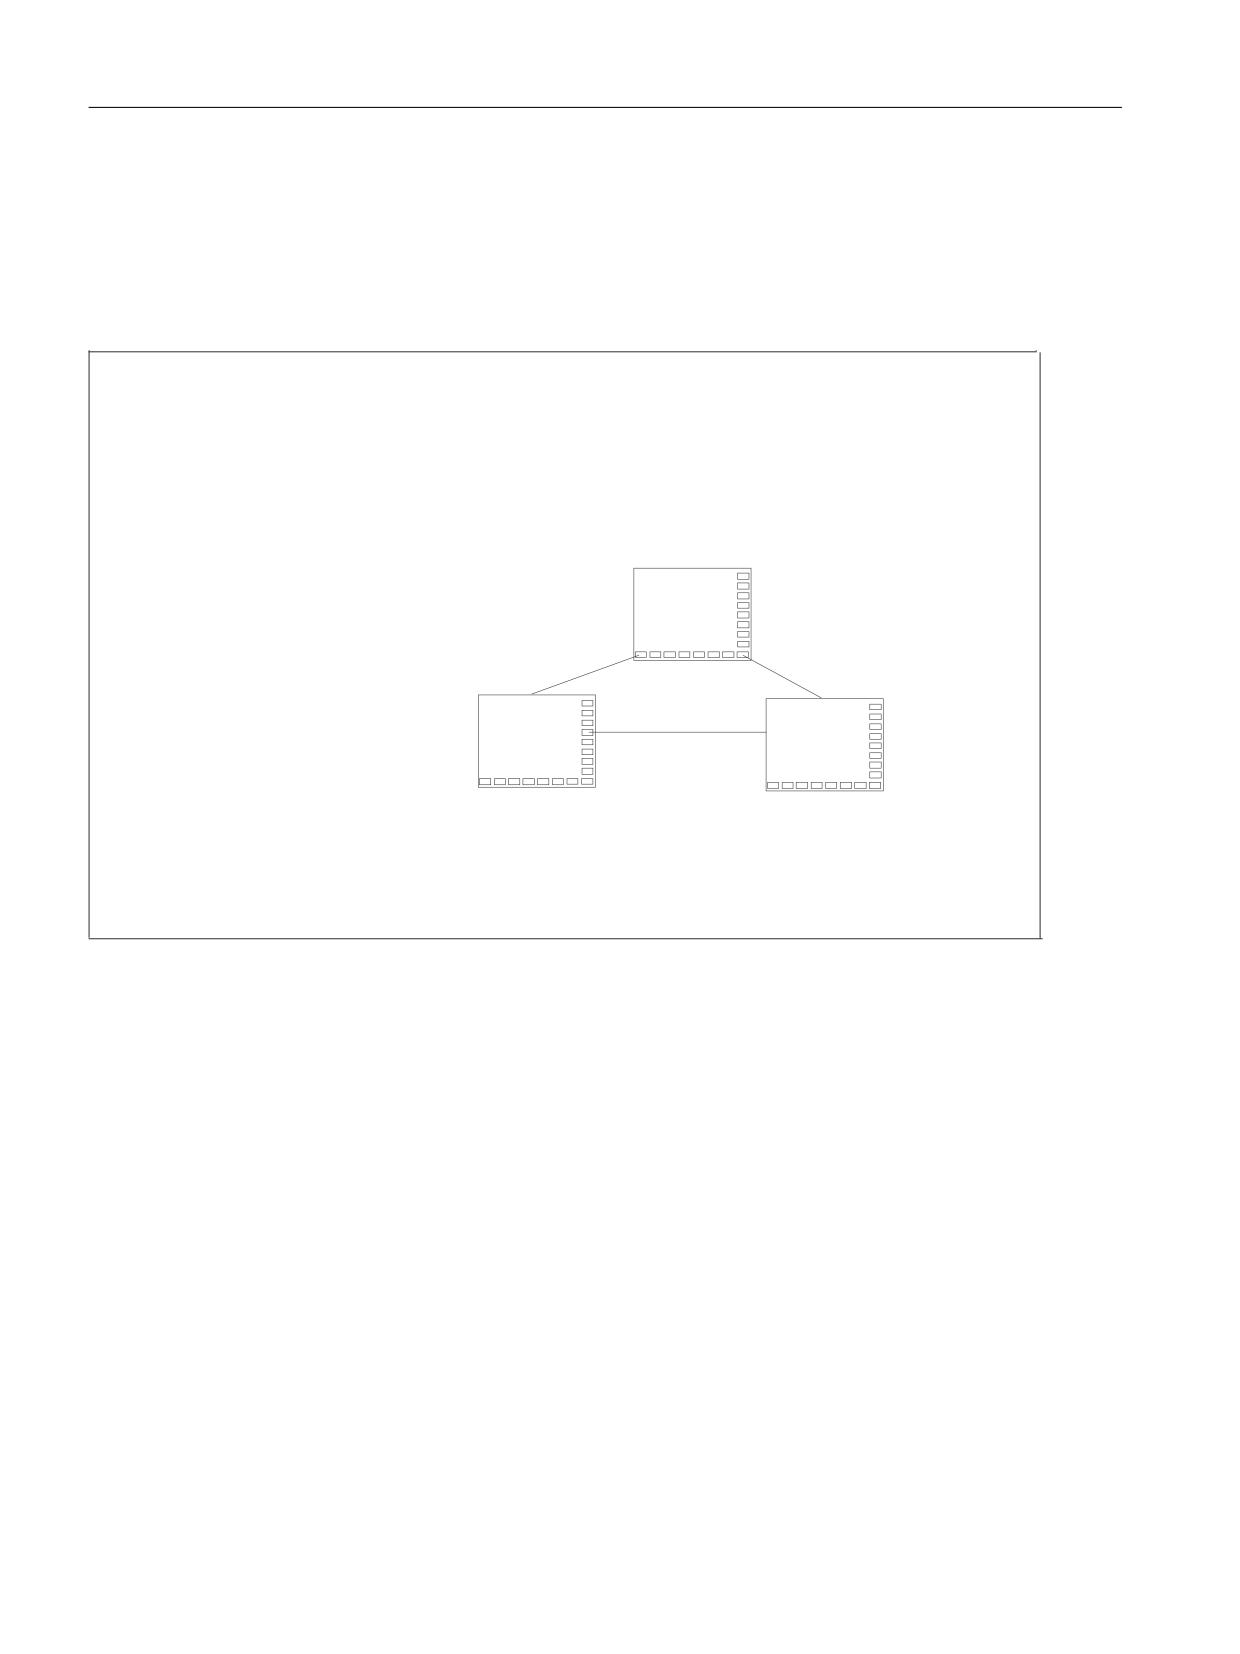
Dialog forms can only be integrated if there is a menu tag with the name "main" in the XML
description. This tag is called by the system after the <CUSTOM> operating area has been
activated. Additional dialog forms can be branched and activation of a dialog box defined within
the tag.
PHQX QDPH
0$,1 !
23(1B)250 QDPH
PDLQ GLDORJXH !
VRIWNH\ 326,7,21
!
FDSWLRQ!VXE PHQX
FDSWLRQ!
QDYLJDWLRQ!VXE PHQX
QDYLJDWLRQ!
VRIWNH\!
PDLQ PHQX
VRIWNH\ 326,7,21
!
FDSWLRQ!VXE PHQX
FDSWLRQ!
PDLQ GLDORJXH
QDYLJDWLRQ!VXE PHQX
QDYLJDWLRQ!
VRIWNH\!
VXE PHQX
VXE PHQX
PHQX!
PHQX QDPH VXE PHQX
!
GLDORJXH
GLDORJXH
23(1B)250 QDPH GLDORJXH
!
PHQX!
PHQX QDPH VXE PHQX
!
23(1B)250 QDPH GLDORJXH ಯ!
PHQX!
Figure 2-6
Menu structure
Easy XML
66
Programming Manual, 10/2020, 6FC5397-1DP40-6BA4
Generating user dialogs
2.7 XML identifier
Tag identifier
Meaning
FORM
The tag contains the description of a user dialog. The relevant tags are described in the section
on generating menus and dialog masks.
Syntax:
<FORM name="<dialog name>" color="#ff0000">
Attributes:
• color
Background color of the dialog mask
Further information is provided in Chapter "Color coding (Page 62)"
- Default white
• name
Identifier of the form
• type
Permissible value is cycle , which identifies a user cycle screen form
• xpos
X-position of the top left corner of the dialog box (optional)
• ypos
Y position of the top left corner (optional)
• width
Extension in the X direction (in pixels) (optional)
• height
Extension in the Y direction (in pixels) (optional)
FORM continued
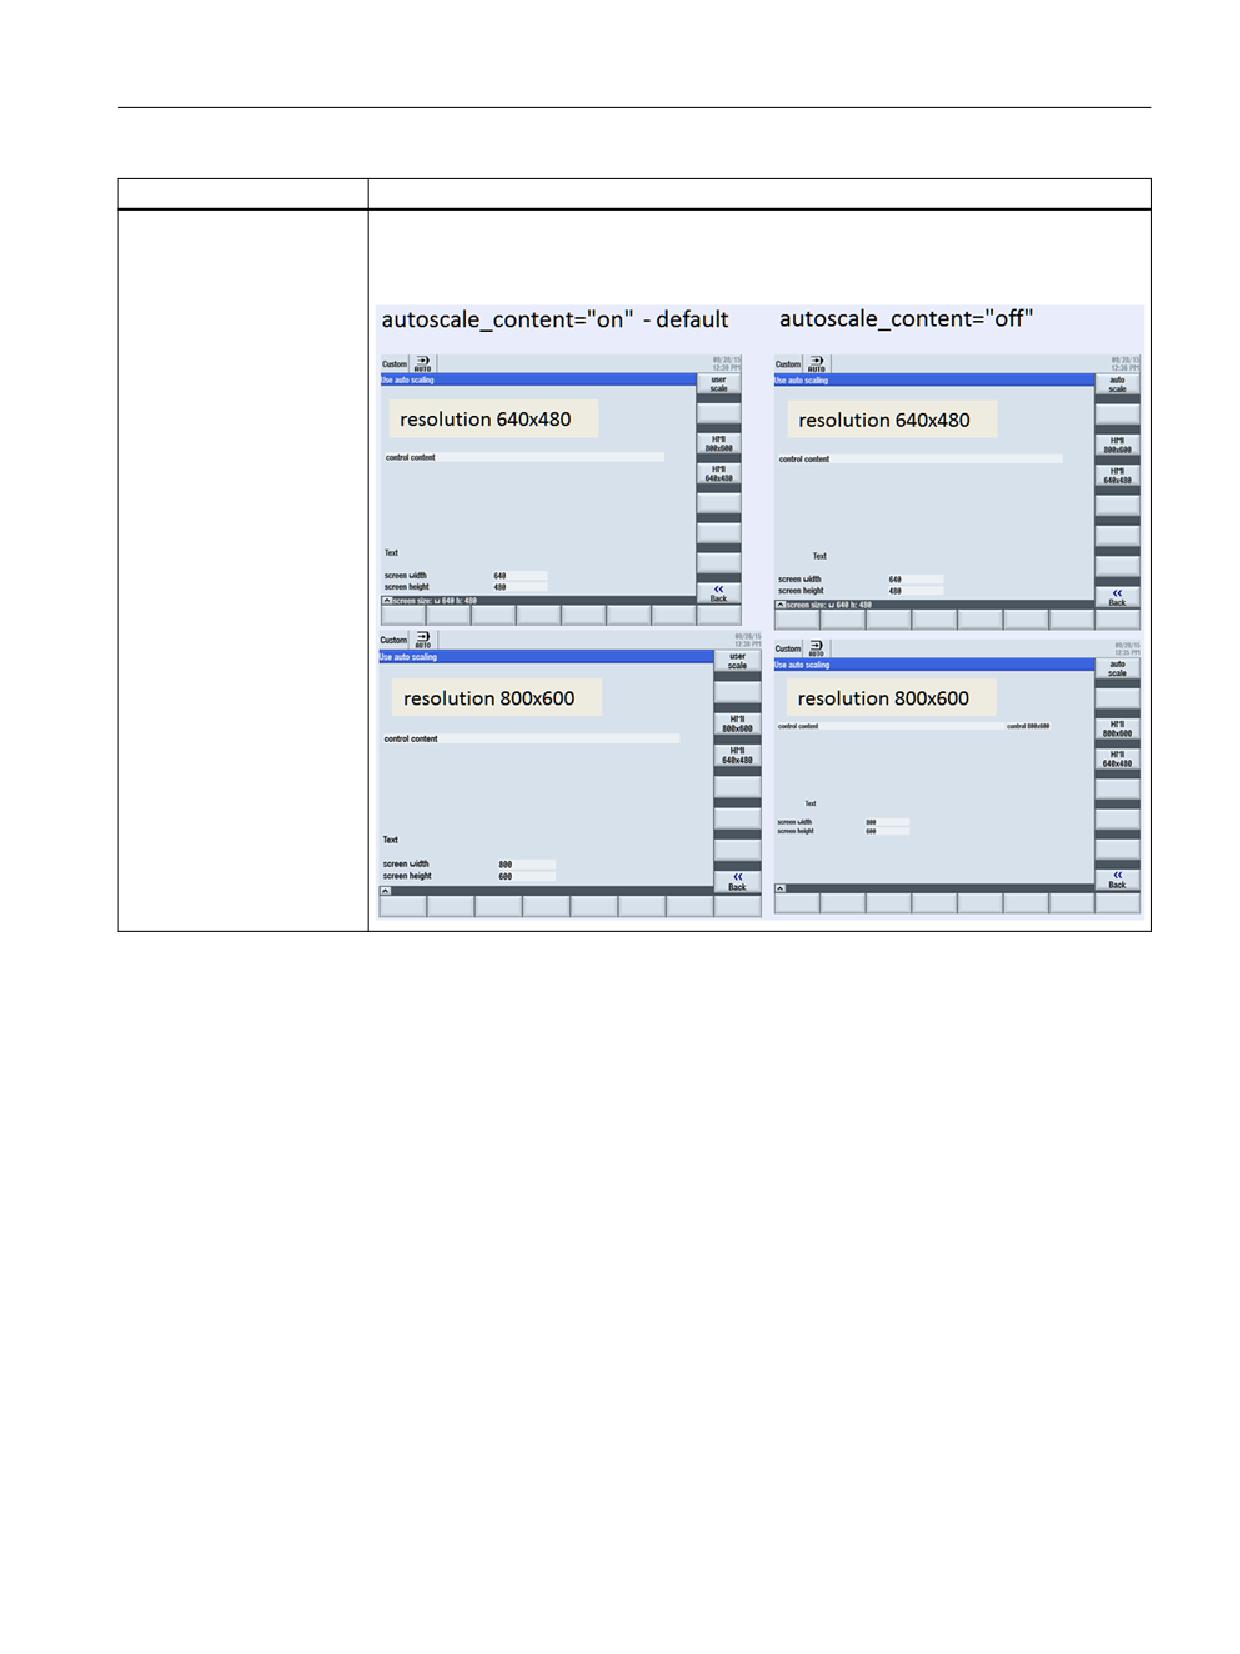
With the AUTOSCALE_CONTENT attribute, you can define how the controls of a form will behave
at different screen resolutions. By default, the controls are automatically adapted to the screen
resolution already set. If you would like to control the positioning and dimensioning yourself,
set value OFF for the attribute in the Form tag.
Attribute:
autoscale_content
Values:
• on
The coordinates of the controls are automatically adapted to the screen resolution (default)
• off
The coordinates of the controls are used unchanged
Example:
<form name="main_form" autoscale_content="off">
…
…
…
</form>
Easy XML
Programming Manual, 10/2020, 6FC5397-1DP40-6BA4
67
Generating user dialogs
2.7 XML identifier
Tag identifier
Meaning
FORM continued
Attributes:
• textfile
The attribute allows a form-related text file to be specified. As standard text context, the
system uses identifier EASY_XML.
• textcontext
The attribute allows an identifier to be specified for the text context to be used. This attribute
is only valid in conjunction with attribute textfile.
FORM continued
In order to be able to use standard layouts or layouts that are stored in the easyscreen.ini file, use
the attribute LAYOUT. The value that you enter is the name of the layout to be used.
Note:
It is only advisable to change the default settings for popup windows because for these the
calling dialog box is not hidden.
Attribute:
layout
Syntax:
<form name="Name of the form" layout="Name of the layout" >
…
…
</form>
Example:
<form name="form0" layout="slstandardscreenlayout.
SlStandardScreenLayout.LowerForm" >
…
…
</form>
Besides the predefined screen form positions and dimensions, you can also store your own
definitions in the easyscreen.ini file.
Entry in easyscreen.ini:
[640x480]
MyPanel = x:=0, y:=220, width:=340, height:=174
[800x480]
MyPanel = x:=0, y:=220, width:=420, height:=174
Example:
<form name="form0" layout="MyPanel" >
…
…
</form>
Easy XML
68
Programming Manual, 10/2020, 6FC5397-1DP40-6BA4
Generating user dialogs
2.7 XML identifier
Tag identifier
Meaning
FORM continued
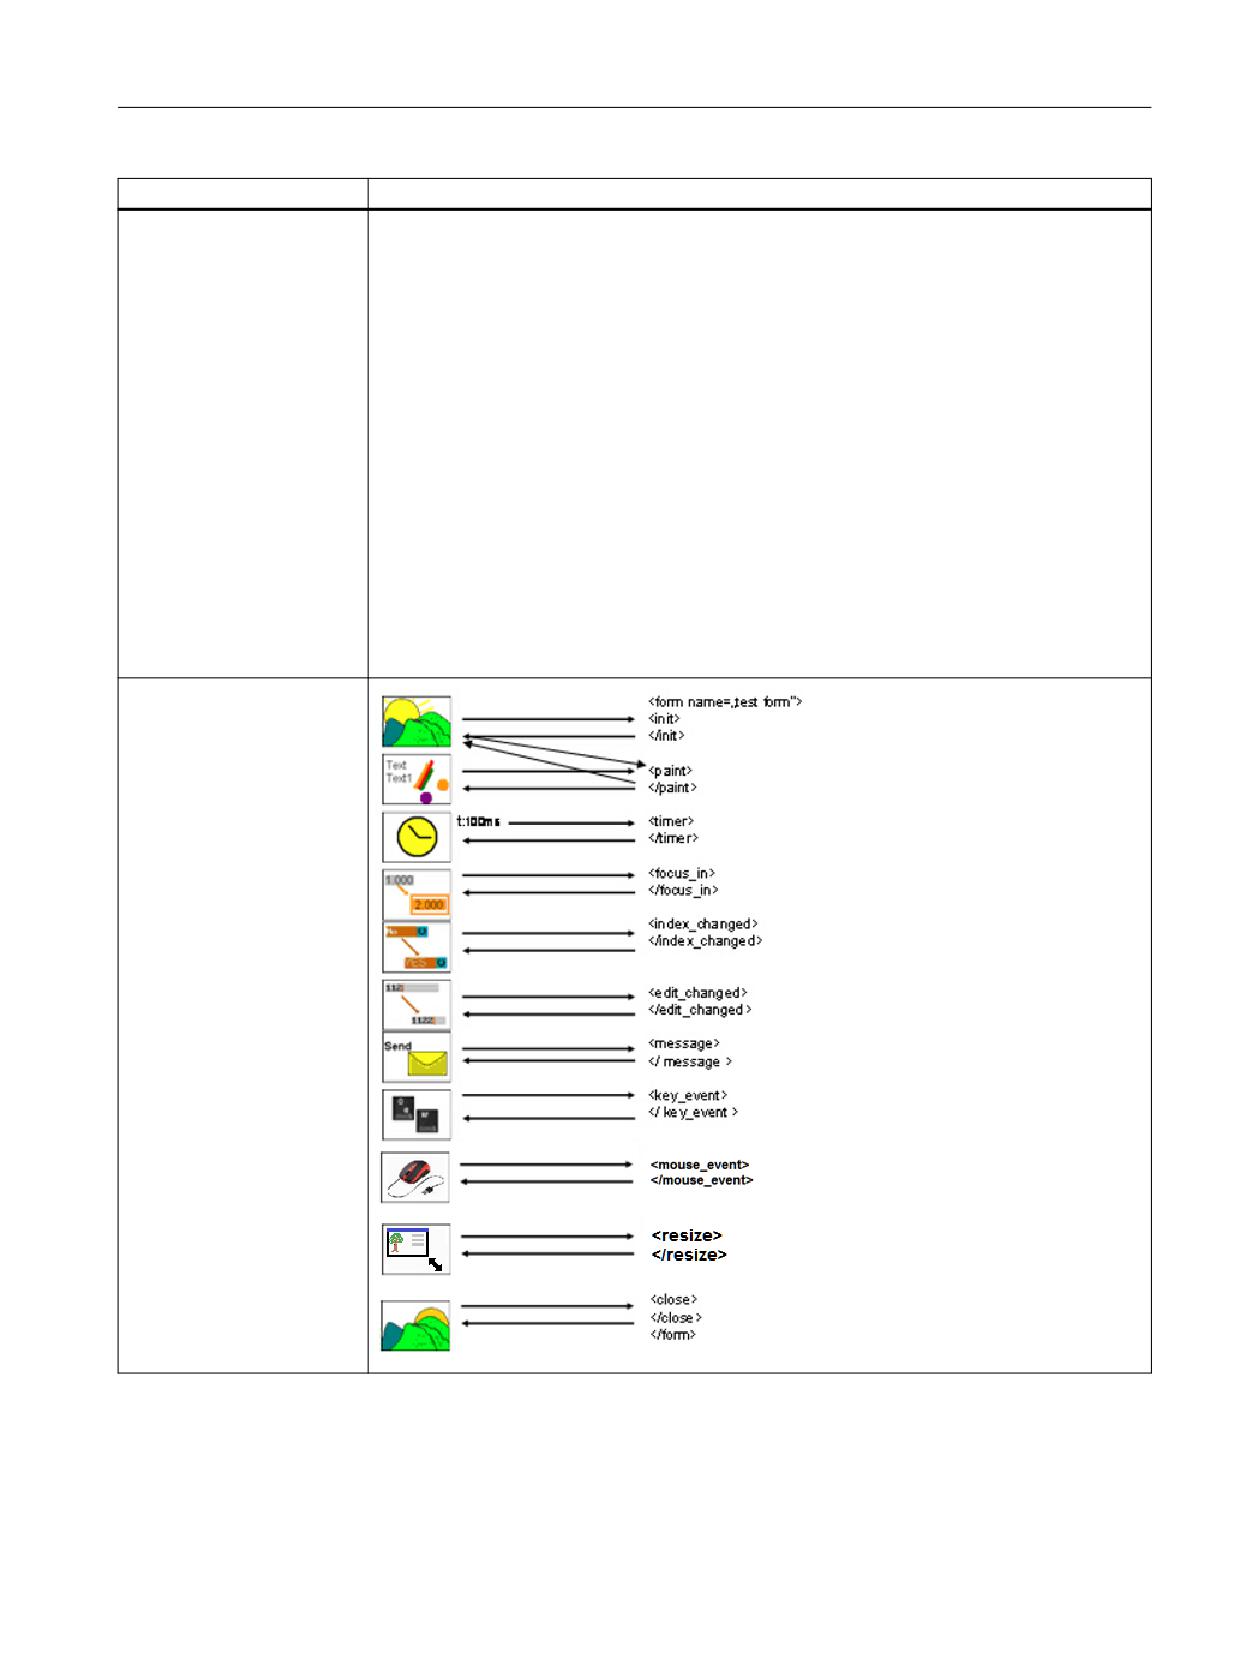
Dialog messages:
• INIT
• PAINT
• TIMER
• CLOSE
• FOCUS_IN
• INDEX_CHANGED
• EDIT_CHANGED
• GESTURE_EVENT
• KEY_EVENT
• MESSAGE
• MOUSE_EVENT
• RESIZE
• CHANNEL_CHANGED
• LANGUAGE_CHANGED
FORM continued
Easy XML
Programming Manual, 10/2020, 6FC5397-1DP40-6BA4
69
Generating user dialogs
2.7 XML identifier
Tag identifier
Meaning
FORM continued
Syntax:
<FORM name = "<dialog name>" color = "#ff0000">
Example:
<FORM name = "R-Parameter">
<INIT>
<DATA_ACCESS type = "true" />
<CAPTION>R - Parameter</CAPTION>
<CONTROL name = "edit1" xpos = "322" ypos = "34" refvar = "nck/
Channel/Parameter/R[1]" />
<CONTROL name = "edit2" xpos = "322" ypos = "54" refvar = "nck/
Channel/Parameter/R[2]" />
<CONTROL name = "edit3" xpos = "322" ypos = "74"
</INIT>
<PAINT>
<TEXT xpos = "23" ypos = "34">R - Parameter 1</TEXT>
<TEXT xpos = "23" ypos = "54">R - Parameter 2</TEXT>
<TEXT xpos = "23" ypos = "74">R - Parameter 3</TEXT>
</PAINT>
</FORM>
INIT
Dialog box message
The tag is executed immediately after the dialog box is generated. All the input elements and
"hotlinks" for the dialog form should be created here.
Easy XML
70
Programming Manual, 10/2020, 6FC5397-1DP40-6BA4
Generating user dialogs
2.7 XML identifier
Tag identifier
Meaning
KEY_EVENT
Dialog message
The tag KEY_EVENT can be integrated in the form to evaluate keyboard events. The system
sends the MF2 keyboard code to the active form if the tag is available in a form. If the varia-
ble $actionresult is not set to zero, the system then subsequently processes the keyboard event.
The keyboard code is provided in the variable $keycode as an integer value.
Example:
The character entered into the variable exclude_key should be filtered-out of the input stream.
<LET name="stream" type="string"/>
<LET name="exclude_key" type="string"/>
<FORM name = "keytest_form">
<INIT>
<CONTROL name = "p1" xpos = "120" ypos = "84" width ="200"
refvar="stream" hotlink="true" />
<CONTROL name = "p2" xpos = "160" ypos = "104" width ="8"
refvar="exclude_key" hotlink="true" />
</INIT>
<PAINT>
<text xpos = "8" ypos = "84">data stream</text>
<text xpos = "8" ypos = "104">exclude key</text>
</PAINT>
<KEY_EVENT>
<LET name="excl_keycode" type="string"/>
<OP>excl_keycode = exclude_key</OP>
<type_cast name="excl_keycode" type="int" />
<PRINT text="%d %d">$keycode, excl_keycode</PRINT>
<IF>
<CONDITION>$keycode == excl_keycode</CONDITION>
<THEN>
<op> $actionresult = 0</op>
</THEN>
</IF>
</KEY_EVENT>
</FORM>
Easy XML
Programming Manual, 10/2020, 6FC5397-1DP40-6BA4
71
Generating user dialogs
2.7 XML identifier
Tag identifier
Meaning
MOUSE_EVENT
The tag can be linked into the script for processing mouse events. It is executed when the
following activities have been performed with the mouse:
• A button has been pressed
• A button has been released
• The mouse has been moved
The parser provides the information in a structure and creates the structure
variable $mouse_event with the following elements:
Structure elements:
• type
Coding of the activity
-
2 - A button has been pressed
-
3 - A button has been released
–
5 - The mouse has been moved
• x
X-position of the cursor in pixels; relative to the current screen resolution
• y
Y-position of the cursor in pixels; relative to the current screen resolution
• id
Identifier
-
-1, if the position cannot be assigned to any control
-
!= -1, if the mouse cursor is inside a control, the content of attribute idemdata is returned
• button
Contains the state of the buttons at the time of the event
-
0 - No button
–
1 - Left button
–
2 - Right button
–
4 - Center button
The buttons can be associated with a bit-by-bit OR operation.
Example:
<MOUSE_EVENT>
<print text="button %d type %d x %d y %d ">$mouse_event.button,
$mouse_event.type, $mouse_event.x, $mouse_event.y</print>
</MOUSE_EVENT>
Easy XML
72
Programming Manual, 10/2020, 6FC5397-1DP40-6BA4
Generating user dialogs
2.7 XML identifier
Tag identifier
Meaning
MESSAGE
Dialog message
If the Send_message operation is executed in the script, then the parser processes the tag
message. Values P1 and P2 are provided in the variables $message_par1 and $message_par2
(see the "SEND_MESSAGE" tag).
Syntax:
<MESSAGE>
</MESSAGE>
Example:
<LET name="user_selection" />
<SOFTKEY POSITION="3">
<CAPTION>Set%nParameter</CAPTION>
<SEND_MESSAGE>1, 10</SEND_MESSAGE>
</SOFTKEY>
…
…
<FORM>
…
…
<MESSAGE>
<SWITCH>
<CONDITION>$message_par1</CONDITION>
<CASE value="1">
<OP> user_selection = $message_par2 </OP>
…
…
</CASE>
</SWITCH>
</MESSAGE>
…
…
</FORM>
Easy XML
Programming Manual, 10/2020, 6FC5397-1DP40-6BA4
73
Generating user dialogs
2.7 XML identifier
Tag identifier
Meaning
SEND_MESSAGE
The tag sends a message with two parameters to the active form, which is processed in the tag
message (see also MESSAGE).
Syntax:
<SEND_MESSAGE>p1, p2</SEND_MESSAGE>
Example:
<LET name="user_selection" />
<SOFTKEY POSITION="3">
<CAPTION>Set%nParameter</CAPTION>
<SEND_MESSAGE>1, 10</SEND_MESSAGE>
</SOFTKEY>
…
…
<FORM>
…
…
<MESSAGE>
<SWITCH>
<CONDITION>$message_par1</CONDITION>
<CASE value="1">
<OP> user_selection = $message_par2 </OP>
…
</CASE>
</SWITCH>
</MESSAGE>
…
…
</FORM>
Easy XML
74
Programming Manual, 10/2020, 6FC5397-1DP40-6BA4
Generating user dialogs
2.7 XML identifier
Tag identifier
Meaning
RESIZE
Dialog box message
The tag can be linked into the script for processing a RESIZE event. This event is created by a
dynamic resolution switchover.
Easy XML
Programming Manual, 10/2020, 6FC5397-1DP40-6BA4
75
Generating user dialogs
2.7 XML identifier
Tag identifier
Meaning
RESIZE continued
Example:
<let name="screen_size" type="StructSize" />
<form name="menu_userscale_form" autoscale_content="off">
<init>
<caption>Use auto scaling</caption>
<function name="hmi.get_hmi_resolution">screen_size</function>
<print text="screen size: w %d h: %d">screen_size.width,
screen_size.height</print>
<data_access type="true" />
<control name="s_c" xpos="8" ypos="140" fieldtype="readonly"
width="500" refvar="string_var" hotlink="true"/>
<if>
<condition>screen_size.width == 800</condition>
<then>
<control name="s_1" xpos="508" ypos="140" fieldtype="readonly"
width="100" refvar="string_var1" hotlink="true"/>
</then>
</if>
<control name="s_w" xpos="200" ypos="350" fieldtype="readonly"
refvar="screen_size.width" hotlink="true"/>
<control name="s_h" xpos="200" ypos="370" fieldtype="readonly"
refvar="screen_size.height" hotlink="true"/>
</init>
<paint>
<text xpos ="68" ypos="310">Text</text>
<text xpos ="8" ypos="350">screen width</text>
<text xpos ="8" ypos="370">screen height</text>
</paint>
<resize>
<function name="hmi.get_hmi_resolution">screen_size</function>
<print text="resize_event screen size: w %d h:
%d">screen_size.width, screen_size.height</print>
<switch>
<condition>screen_size.width</condition>
<case value="640">
<function name="control.delete">_T"s_1"</function>
</case>
<case value="800">
<control name="s_1" xpos="508" ypos="140" fieldtype="readonly"
width="100" refvar="string_var1" hotlink="true"/>
</case>
</switch>
</resize>
</form>
Easy XML
76
Programming Manual, 10/2020, 6FC5397-1DP40-6BA4
Generating user dialogs
2.7 XML identifier
Tag identifier
Meaning
CHANNEL_CHANGED
Dialog message
The tag enables processing of the channel change event. It is executed when the user presses
the channel advance button.
Syntax:
<channel_changed>
</channel_changed>
Example:
When the channel is changed, the form is to close and open again so that the data of the selected
channel can be displayed.
<channel_changed>
<open_form name = "form1" reopen="true"/>
</channel_changed>
or
a another menu is activated when a channel is changed.
<channel_changed>
<navigation>menu2</navigation>
</channel_changed>
LANGUAGE_CHANGED
Dialog message
The tag allows processing of a language switchover request. It is executed when the user
switches language while the screen form is open.
Syntax:
<language_changed>
</language_changed>
Example:
When the language is switched over, the form is to close and open again in order to be able to
supply the controls with the text elements of the activated language.
<language_changed>
<open_form name = "form1" reopen="true"/>
</language_changed>
FOCUS_IN
Dialog box message
The tag is called if the system places the focus on a control. To identify the control, the system
copies the name of the control into variable $focus_name and the value of the
attribute item_data into variable $focus_item_data.
This message can be used, e.g. to output images depending on the focus position.
Example:
<focus_in>
<PRINT text="focus on filed:%s, %d">$focus_name,
$focus_item_data </PRINT>
</focus_in>
Easy XML
Programming Manual, 10/2020, 6FC5397-1DP40-6BA4
77
Generating user dialogs
2.7 XML identifier
Tag identifier
Meaning
PAINT
Dialog box message
The tag is executed when the dialog box is displayed. All the texts and images which are to be
displayed in the dialog box should be specified here.
Further, the tag is executed if the system identifies that parts of the dialog box are to be redis-
played. For example, this can be initiated by closing high-level windows.
TIMER
Dialog box message
The tag is executed cyclically.
Each form is assigned a timer that initiates that the timer - tag is executed approx. every 100 ms.
CAPTION
The tag contains the title of the dialog box.
This tag should be used within the INIT tag.
The title bar can be divided into multiple columns.
To divide the title bar, the "caption" tag must be programmed with the "define_section" attribute
before the text is output.
The "define_section" attribute specifies the number of columns
The "property" attribute is used to define the length, starting position, and text alignment for
each column. The position and length specification is a percentage value referring to the width
of the form.
The value of the "value" attribute indicates the column number (beginning with zero)
<caption define_sections="3">
<property value="0" length="20" position="2" alignment="left" />
<property value="1" length="20" position="79"
alignment="right" />
</caption>
The text can then be assigned to the column by additionally specifying the "index" attribute with
the column index.
<caption index="0">column1</caption>
<caption index="1">column2</caption>
Syntax:
<CAPTION>Titel</CAPTION>
Example:
<CAPTION>my first dialogue</CAPTION>
CLOSE
Dialog box message
This tag is executed before the dialog box is closed.
Easy XML
78
Programming Manual, 10/2020, 6FC5397-1DP40-6BA4
Generating user dialogs
2.7 XML identifier
Tag identifier
Meaning
CLOSE_FORM
The tag closes the active dialog.
This instruction is only necessary if the dialog is opened by the MMC command and the user is
offered a softkey function to close the dialog. Generally, dialogs are automatically managed and
do not have to be explicitly closed.
Syntax:
<CLOSE_FORM/>
Example:
<softkey_ok>
<caption>OK</caption>
<CLOSE_FORM />
<navigation>main_menu</navigation>
</softkey_ok>
Easy XML
Programming Manual, 10/2020, 6FC5397-1DP40-6BA4
79
Generating user dialogs
2.7 XML identifier
Tag identifier
Meaning
CONTROL
The tag is used to generate control elements.
Syntax:
<CONTROL name = "<control name>" xpos = "<X position>" ypos = "<Y
position>" refvar = "<NC variable>" hotlink = "true" format =
"<format>" />
Note:
Variables used to set attribute values must be declared global variables.
Attributes:
• name
Identifier of the field.
The identifier simultaneously represents a local variable, and must not be used a multiple
number of times in the form.
• xpos
X position of the top left corner
• ypos
Y position of the top left corner
• fieldtype
Field type
If no type is specified, the field is set as an edit field.
- edit
Data can be changed
- readonly
Data cannot be changed
combobox
The field displays the corresponding identifiers instead of numerical values.
If field type combobox is selected, the expressions to be displayed must also be assigned
to the field.
The <ITEM> tag should be used for this purpose.
The combo box saves the index of the currently selected text in the variable belonging
to the control (see the attribute refvar).
After the control has been created, additional elements can be inserted using the func-
tions addItem or insertItem.
- progressbar
A progress bar with a value range of 0 to 100 appears.
The valley value and peak value properties can be used to adapt the value range to the
data to be displayed.
Easy XML
80
Programming Manual, 10/2020, 6FC5397-1DP40-6BA4
Generating user dialogs
2.7 XML identifier
Tag identifier
Meaning
CONTROL continued
• fieldtype
- graphicbox
The field type generates a 2D broken line graphic control. Using the tag <ITEM> a graph-
ical element can be inserted into the control. Parameters width and height specify the
width and height of the box.
After the control has been created, additional elements can be inserted using the func-
tions addItem or insertItem. Parameter itemdata is not evaluated for this control.
If a reference variable is assigned to the control, its values will be recorded in a 100 ms
time base. Up to 10000 values can be recorded. With the property max, values are
recorded endlessly. The oldest value is then deleted when the maximum recording time
is reached. The recording time must be specified in milliseconds.
Although the values are stored at discrete times, the control displays them as connected
lines. The attribute channel permits recording of up to three further reference variables.
The index starts with one. Index zero is used to set the properties of the variables as-
signed in the control tag.
Example:
<control name= "c_gbox1" xpos = "250" ypos="24" width="240"
height="356" fieldtype="graphicbox" refvar="val" hotlink="true"
COLOR_BK="#ffffff">
<property max="60000" /> <!-- steps of ms -->
<property min="0" />
<property channel="0" color="#00ffff" penwidth="3"/>
<property ORDINATE="Y sinus" />
<property ABSCISSA="time *100 ms" />
<property channel="1" refvar="val2" color="#000000" />
</control>
Easy XML
Programming Manual, 10/2020, 6FC5397-1DP40-6BA4
81
Generating user dialogs
2.7 XML identifier
Tag identifier
Meaning
CONTROL continued
Example graphicbox:
<CONTROL name= "graphic" xpos = "8" ypos="23" width="300"
height="352" fieldtype="graphicbox" />
• Adding elements:
Elements are added using the function additem or loaditem.
The following 2d elements can be used:
- Line - l(inc)
- Circle sector - c(ircle)
- Point - p(oint)
Structure of an element:
<Element type>; coordinates
• Line:
l; xs; ys; xe, ye
I - line marking
Xs - X start position
Ys - Y start position
Xe - X end position
Ye - Y end position
• Circle:
C, xs, ys, xe, ye, cc_x, cc_y, r
C - circular sector marking
Xs - X start position
Ys - Y start position
Xe - X end position
Ye - Y end position
Cc_x - X-coordinate, circle center point
CC_y - Y-coordinate circle center point
• Radius:
R
• Point:
P, x, y
P - point marking
X - X position
Y - Y position
• Deleting the graphic:
The content is deleted using the function empty.
Easy XML
82
Programming Manual, 10/2020, 6FC5397-1DP40-6BA4
Generating user dialogs
2.7 XML identifier
Tag identifier
Meaning
CONTROL continued
The following field types are described in section "Configuring your own buttons (Page 198)".
• fieldtype
- pushbutton
The field type is used as a pushbutton or a switch.
- radiobutton
The field type allows you to select one of several options.
- checkbox
The field type allows you to select several options.
- groupbox
The field type visually encloses a group of controls with a frame and a title.
- switch
The field type is a graphical element that signals one of two states using an icon.
- scrollarea
The field type is used to display controls within a specified area.
Easy XML
Programming Manual, 10/2020, 6FC5397-1DP40-6BA4
83
Generating user dialogs
2.7 XML identifier
Tag identifier
Meaning
CONTROL continued
• fieldtype
- listbox
The field type generates an empty list box control.
Using the tag <ITEM> a list box element can be inserted in the list box.
The ITEM attribute value allows this element to be assigned a unique value.
This can serve to identify the element, for example.
Parameters width and height specify the width and height of the list box.
After the control has been created, additional list box elements can be inserted using the
functions addItem, insertItem, or loadItem.
After the control has been created, additional list box elements can be inserted using the
function addItem or insertItem. Parameter itemdata is not evaluated for this control.
- itemlist
The field type generates a static control, which displays the corresponding identifier
instead of numerical values.
The <ITEM> tag can be used to assign an identifier to the field.
• item_data
A user-specific integer value can be assigned to the attribute. This value is given as part of the
FOCUS_IN message for identifying the focus field.
• refvar
Identifier of the reference variable that can be linked to the field (optional).
• hotlink = "TRUE" " If the value of the reference variable changes, then the field is automat-
ically updated (optional).
• format
The attribute defines the display format of the specified variable.
Formatting data, see print-Tag (optional).
The Format attribute also allows an integer value to be displayed in other number systems or
display as a Boolean value for the field types edit and readonly. Formatting using number of
characters and alignment is not supported.
The following types of representation can be used:
• %o - octal
• %x - hexadecimal
• %n - binary
• %b - bool
CONTROL continued
Example for creating columns, attribute property:
<control name="lb1" xpos = "10" ypos = "94" width="200" height="250"
fieldtype="listbox" refvar="tmp" hotlink="true">
<property columns="4" />
<property column="0" type="width">190</property>
<property column="1" type="width">100</property>
<property column="2" type="width">190</property>
<property column="3" type="width">16</property>
</control>
Easy XML
84
Programming Manual, 10/2020, 6FC5397-1DP40-6BA4
Generating user dialogs
2.7 XML identifier
Tag identifier
Meaning
CONTROL continued
Example attribute format:
<let name="val_test">255</let>
<form name="main_form">
<init>
<caption>bool hex octal bin display</caption>
<control name="test_oVal" xpos="250" ypos="60"
refvar="val_test" hotlink = "true" />
<control name="test_bool" xpos="250" ypos="90"
refvar="val_test" hotlink = "true" format="%b"/>
<control name="test_hex" xpos="250" ypos="120"
refvar="val_test" hotlink = "true" format="%x"/>
<control name="test" xpos="250" ypos="150"
refvar="val_test" hotlink = "true" format="%o"/>
<control name="test_b" xpos="200" ypos="180"
width="300" refvar="val_test" hotlink = "true"
format="%n"/>
</init>
<paint>
<text xpos="16" ypos="60">integer value</text>
<text xpos="16" ypos="90">boolean display</text>
<text xpos="16" ypos="120">hexadecimal
display</text>
<text xpos="16" ypos="150">octal display</text>
<text xpos="16" ypos="180">binary display</text>
</paint>
</form>
CONTROL continued
Attributes:
• color_bk
The attribute sets the backg30round color of the control.
• color_fg
The attribute sets the foreground color of the control.
Further information is provided in Chapter "Color coding (Page 62)"
• display_format
The attribute defines the processing format of the specified variable. This attribute must be
used when accessing a PLC float variable, as the access is realized by reading a double word.
The following data formats are permitted:
- FLOAT
- INT
- DOUBLE
- STRING
Assigning expressions (e.g. text or graphic element to be displayed) to a list box, graphics box
or combo box:
Syntax:
<ITEM>Expression</ITEM>
<ITEM value ="<Value>">Expression</ITEM>
Easy XML
Programming Manual, 10/2020, 6FC5397-1DP40-6BA4
85
Generating user dialogs
2.7 XML identifier
Tag identifier
Meaning
CONTROL continued
Example:
<CONTROL name = "button1" xpos = "10" ypos = "10" fieldtype = "
combobox ">
<ITEM>text1</ITEM>
<ITEM>text2</ITEM>
<ITEM>text3</ITEM>
<ITEM>text4</ITEM>
</CONTROL>
If any integer value is to be assigned to an expression, the attribute value = "value" should be
added to the tag.
Rather than consecutive numbers, the control variable now contains the item's assigned value.
Example:
<CONTROL name = "button1" xpos = "10" ypos = "10" fieldtype = "
combobox ">
<ITEM value = "10">text1</ITEM>
<ITEM value = "20">text2</ITEM>
<ITEM value = "12">text3</ITEM>
<ITEM value = "1">text4</ITEM>
</CONTROL>
Example of a progress bar:
<CONTROL name = "progress1" xpos = "10" ypos = "10" width = "100"
fieldtype = "progressbar" hotlink = "true" refvar = "nck/Channel/
GeometricAxis/actProgPos[1]">
<PROPERTY min = "0" />
<PROPERTY max = "1000" />
</CONTROL>
Example, list box:
<let name="item_string" type="string"></let>
<let name="item_data" ></let>
<CONTROL name="listbox1" xpos = "360" ypos="150" width="200"
height="200" fieldtype="listbox" />
• Adding elements:
Elements are added using the function additem or loaditem.
• Deleting the content:
The content is deleted using the function empty.
<op> item_string = _T"text1\\n" </op>
<function name="control.additem">_T"listbox1", item_string,
item_data </function>
<op> item_string = _T"text2\\n" </op>
<function name="control.additem">_T"listbox1", item_string,
item_data </function>
CONTROL continued
Example itemlist:
<CONTROL name = "itemlist1" xpos = "10" ypos = "10" fieldtype = "
itemlist">
<ITEM value = "10">text1</ITEM>
<ITEM value = "20">text2</ITEM>
<ITEM value = "12">text3</ITEM>
<ITEM value = "1">text4</ITEM>
</CONTROL>
Easy XML
86
Programming Manual, 10/2020, 6FC5397-1DP40-6BA4
Generating user dialogs
2.7 XML identifier
Tag identifier
Meaning
CONTROL continued
The image box control manages a picture in bitmap or GIF format. If the picture is larger than the
displayable area, the control will show a scroll bar.
To control the visible area, the system provides the CONTROL.IMAGEBOXSET function.
Further information is provided in Chapter "Predefined functions (Page 140)"
Syntax:
<function name="control.imageboxget"> ... </function>
CONTROL continued
Attributes:
• disable
The attribute locks/permits the input in an edit control.
• tooltip
An information text is displayed if the cursor is placed on the control.
• factor
Conversion factor
• font
Definition of a font
• fontpixelsize
Font size - specify the desired height of the character in pixels.
CONTROL continued
Changing the control after creation
A control tag changes the properties of an existing control after it has been created. The tag
must be specified with the name of the control to be changed and the new properties. It can be
executed only within a form tag. The following properties can be changed, for example:
• name
• xpos
• ypos
• width
• height
• color_bk
• color_fg
• access level
• fieldtype
• itemdata
• min
• max
• default
• disable
• tooltip
• font
• factor
The reference variable cannot be modified. If a property is to be changed by triggering by a
softkey event, the send message tag must transfer this request into the form context. The
message tag is used to acquire the message.
Easy XML
Programming Manual, 10/2020, 6FC5397-1DP40-6BA4
87
Generating user dialogs
2.7 XML identifier
Tag identifier
Meaning
CONTROL continued
Control change in an operating instruction
Another possibility of changing properties of a control during runtime is to make the change in
an operating instruction. Therefore the name of the control and the property to which a new
value is to be assigned must be defined. The property is separated from the control name by a
point.
Syntax:
<Name>.<Property>
Example:
<let name="value" />
<let name="w" />
<let name="h" />
<control name="c_move" xpos="$xpos" ypos="124" />
<op>
c_move.xpos = 300;
value = c_move.xpos;
h = c_move.height;
w = c_move.width;
</op>
Easy XML
88
Programming Manual, 10/2020, 6FC5397-1DP40-6BA4
Generating user dialogs
2.7 XML identifier
Tag identifier
Meaning
HELP_CONTEXT
This tag defines the help topic to be called. It should be programmed in the INIT block.
808/802D sl systems
The name specified in the attribute is supplemented by the prefix XmlUserDlg_ and is transferred
to the help system. The associated structure of the help file should be taken from the topic -
generating an online help.
Sequence when activating the help system:
1. Press the "Info" key.
2. The dialog supplies the expression "my_dlg_help".
3. Parser converts the expression into "XmlUserDlg_my_dlg_help" .
4. Activating the help system.
5. Submitting the search term "XmlUserDlg_my_dlg_help".
840D sl/828D systems
Further information regarding the layout and generation of a help book:
SINUMERIK Operate Commissioning Manual
Attributes:
• name
The name specified in the attribute is passed on to the help system. The file name used in the
help book in tag entry must be specified.
• anchor
With the attribute you can enter a keyword.
Syntax:
<HELP_CONTEXT name="<file name>" anchor="key word"/>
Example:
<form name = "form1">
<init>
<help_context name="chapter_1.html" anchor="Keyword_1" />
<control name = "cpwd" xpos = "322" ypos = "64" >
<property password="true" />
<property help_context="chapter_1.html" anchor="Keyword_2" />
</control>
</form>
Easy XML
Programming Manual, 10/2020, 6FC5397-1DP40-6BA4
89
Generating user dialogs
2.7 XML identifier
Tag identifier
Meaning
DATA_ACCESS
The tag controls the behavior of the dialog forms when user inputs are being saved.
The behavior should be defined within the INIT tag.
If the tag is not used, inputs are buffered in each case.
Exception: Controls for which the hotlink attribute is set to true are always written to and read
directly.
Attribute:
• type = "TRUE" - the input values are not buffered. The dialog form copies the input values
to the reference variables directly.
• type = "FALSE" - the values are only copied to the reference variable with the UPDATE_CON-
TROLS type = "FALSE" tag
Example:
<DATA_ACCESS type = "true" />
Easy XML
90
Programming Manual, 10/2020, 6FC5397-1DP40-6BA4
Generating user dialogs
2.7 XML identifier
Tag identifier
Meaning
DEBUG
The tag is used to store trace outputs, which can be programmed in the script. The attribute text
is used to write the text to be stored. This attribute and its values correspond to the text attribute
and the values of the print instruction.
By default, a debug tag is not executed as it slows down the system. To activate the debug
outputs, program the attribute debug_msg, with value on in tag DialogGui or AGM.
The debug outputs are stored together with the parser error messages in the following file:
card/oem/sinumerik/hmi/dvm/log/dvm.log
Syntax:
<debug text="<Text see print instruction>">Variables see print
instruction</debug>
Example Easy XML:
<DialogGui debug_msg="on">
<control name="test_bool" xpos="250" ypos="90"
refvar="val_test" hotlink = "true" format="%b"/>
<debug text="main_form control test_bool created
value:%d">test_bool</debug>
Entry in the file dvm.log:
date: 10/22/ 2018 time: 09:38:44:351
Debug xmldial.xml 17: main_form control test_bool
created value:255
Example Easy Extend:
<AGM debug_msg="on">
<control name="test_bool" xpos="250" ypos="90"
refvar="val_test" hotlink = "true" format="%b"/>
<debug text="main_form control test_bool created
value:%d">test_bool</debug>
Entry in the file dvm.log:
date: 10/22/ 2018 time: 09:38:44:351
Debug xmldial.xml 17: main_form control test_bool
created value:255
Easy XML
Programming Manual, 10/2020, 6FC5397-1DP40-6BA4
91
Generating user dialogs
2.7 XML identifier
Tag identifier
Meaning
EDIT_CHANGED
Dialog box message
This tag is called if the contents of an edit control have changed.
To identify the control, the system copies the name of the control into variable $focus_name
and the value of the attribute item_data into variable $focus_item_data.
Example:
<EDIT_CHANGED>
<print text="index changed filed:%s, %d"> $focus_name,
$focus_item_data </print>
…
…
</EDIT_CHANGED>
GESTURE_EVENT
The tag is used to perform finger gestures for multi-touch operation.
The tag is described in section "Multitouch operation (Page 190)".
INDEX_CHANGED
Dialog box message
The tag is called, if the operator changes the selection of a combo box.
To identify the control, the system copies the name of the control into the variable
$focus_name and the value of the attribute item_data into the variable $focus_item_data.
Note:
A reference variable assigned to the control, has not been aligned to the control variable at this
point in time and contains the index of the previous selection of the combo box.
Example:
<INDEX_CHANGED>
<print text="index changed filed:%s, %d"> $focus_name,
$focus_item_data </print>
…
…
</INDEX_CHANGED>
MENU
The tag defines a menu containing the softkey description and the dialog to be opened.
Attribute:
• name
Menu name
Syntax:
<MENU name = "<menu name>">
…
<open_form …>
…
<SOFTKEY …>
</SOFTKEY>
</MENU>
Easy XML
92
Programming Manual, 10/2020, 6FC5397-1DP40-6BA4
Generating user dialogs
2.7 XML identifier
Tag identifier
Meaning
NAVIGATION
This tag defines the menu to be called. It can be used within a softkey block, a menu block, and
in a form. If a variable name is assigned to the tag as its value, the parser will activate the menu
stored in the variable.
In a menu block, the navigation is at the position in the instruction. Subsequent instructions are
no longer executed.
Note:
If the navigation target is to be determined by the content of a variable, this variable must be
declared a global variable.
Syntax:
<NAVIGATION>menu name</NAVIGATION>
Example:
<menu name = "main">
<softkey POSITION="1">
<caption>sec. form</caption>
<navigation>sec_menu</navigation>
</softkey>
</menu>
<menu name = "sec_menu">
<open_form name = "sec_form" />
<softkey_back>
<navigation>main</navigation>
</softkey_back>
</menu>
Easy XML
Programming Manual, 10/2020, 6FC5397-1DP40-6BA4
93
Generating user dialogs
2.7 XML identifier
Tag identifier
Meaning
OPEN_FORM
The tag opens the dialog form given under the name.
If the specified screen form is already active, this tag is not executed.
You can force the screen form to open again by entering the attribute reopen. This may be
necessary if system states change that require rearrangement of screen form contents.
Attribute:
• name
Name of the dialog form
• reopen
If the value of the attribute is set to true, when the tag open_form is called again, a check
is made to see whether the screen form is the active form. If this is the case, the parser closes
the active form and opens it again.
Syntax:
<OPEN_FORM name = "<form name>" />
Example:
<menu name = "main">
<open_form name = "main_form" />
<softkey POSITION="1">
<caption>main form</caption>
<navigation>main</navigation>
</softkey>
</menu>
<form name="main_form">
<init>
</init>
<paint>
</paint>
</form>
Easy XML
94
Programming Manual, 10/2020, 6FC5397-1DP40-6BA4
Generating user dialogs
2.7 XML identifier
Tag identifier
Meaning
PROPERTY
This tag can be used to define additional properties for an operator control. The tag is embedded
in the control tag.
Attributes:
• max = "<maximum value>"
• min = "<minimum value>"
• default = "<default>"
• factor = "conversion factor"
• color_bk = "<backg30round color coding>"
• color_fg = "<font color coding>"
• password = "<true>" - entered character is displayed with "*"
• multiline = "<true>" - permits multi-line inputs in an edit control
• disable = "<true/false>" - blocks/permits the input in an edit control
• transparent = "transparent color of a bitmap"
Further information is provided in Chapter "Color coding (Page 62)"
• tooltip = Information text is displayed if the cursor is set to the control.
The syntax is: <property tooltip="note text" />
• abscissa = "name of the first coordinate axis" (only permissible for a graphic box)
• ordinate = "name of the second coordinate axis" (only permissible for a graphic box)
Example:
<CONTROL name = "progress1" xpos = "10" ypos = "10" width = "100"
fieldtype = "progressbar" hotlink = "true" refvar = "nck/Channel/
GeometricAxis/actProgPos[1]">
<PROPERTY min = "0" />
<PROPERTY max = "1000" />
</CONTROL>
<CONTROL name = "edit1" xpos = "10" ypos = "10">
<PROPERTY min = "20" />
<PROPERTY max = "40" />
<PROPERTY default = "25" />
</CONTROL>
Easy XML
Programming Manual, 10/2020, 6FC5397-1DP40-6BA4
95
Generating user dialogs
2.7 XML identifier
Tag identifier
Meaning
PROPERTY continued
Attribute:
alignment - the property allows left or right-justified text alignment. By default, a text is left-
justified.
Values:
• left
• right
Syntax:
alignment="<right/left>"
Example:
<control name="edit2" xpos="208" ypos="52" >
<property alignment="right"/>
</control>
Easy XML
96
Programming Manual, 10/2020, 6FC5397-1DP40-6BA4
Generating user dialogs
2.7 XML identifier
Tag identifier
Meaning
PROPERTY continued
Attribute:
parent - the property determines the membership of the control. By default, controls are as-
signed to the form. If you want to assign controls to a scroll view, you must specify it as the
parent window.
Value:
Name of the parent window
Example:
<control name="area" xpos="8" ypos="72" width="554" height="320"
fieldtype="scrollarea" >
<control name="test" xpos="20" ypos="40" width="20"
fieldtype="readonly" />
</control >
<control name="test1" xpos="20" ypos="80" width="20"
fieldtype="readonly" parent="area"/>
<init>
<control name="area" xpos="8" ypos="72" width="554" height="120"
fieldtype="scrollarea">
<control name="test" xpos="20" ypos="40" width="80"
fieldtype="readonly" type="string"/>
</control >
<control name="test1" xpos="20" ypos="80" width="80"
fieldtype="readonly" type="string" parent="area"/>
<op>test = _T"test"</op>
<op>test1 = _T"test1"</op>
<update_controls type="true" />
Easy XML
Programming Manual, 10/2020, 6FC5397-1DP40-6BA4
97
Generating user dialogs
2.7 XML identifier
Tag identifier
Meaning
PROPERTY continued
Attribute:
picture - the attribute specifies a graphic to be displayed
The specified graphic is displayed or the name of the graphic is stored in a variable if the input
focus is set on this field. This attribute is to be used in conjunction with the refvar attribute to
be able to define the data sink.
To display a graphic or an animation, the name of an imagebox type control must be specified.
This control assumes management of the graphic.
If the name of a local variable is specified, this variable must be of a String data type.
The graphic continues to be displayed until a new name is assigned to the reference variables.
Syntax:
<property picture="<Name der Grafik>" refvar="<Datensenke>"/>
Easy XML
98
Programming Manual, 10/2020, 6FC5397-1DP40-6BA4
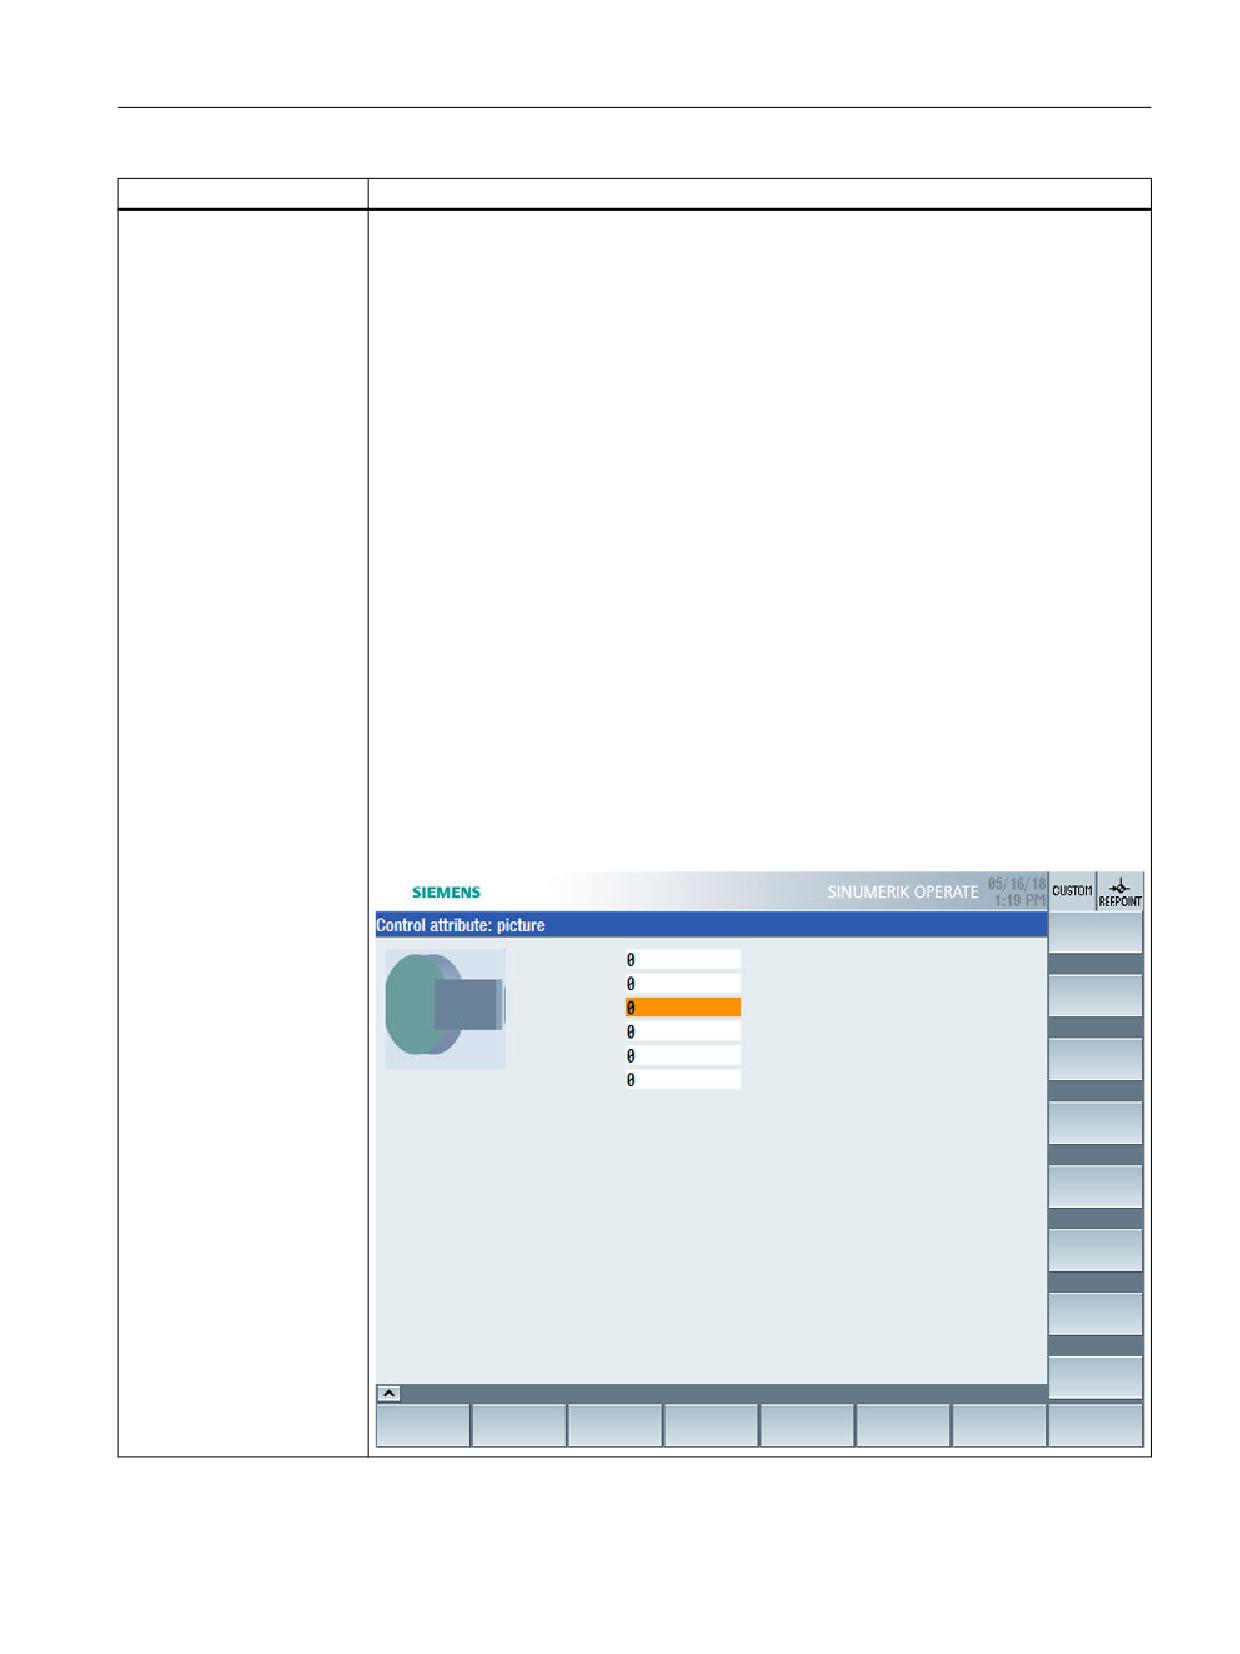
Generating user dialogs
2.7 XML identifier
Tag identifier
Meaning
PROPERTY continued
Example:
<let name="cursor_icon" type="string" />
<form name="main_form1">
<init>
<caption>Control attribute: picture</caption>
<control name="cursor_image" xpos="8" ypos="32" width="100"
height="100" fieldtype="imagebox" />
<control name="edit1" xpos="208" ypos="32" >
<property picture="red_led_off.bmp" refvar="cursor_image"/>
</control>
<control name="edit2" xpos="208" ypos="52" >
<property picture="red_led_on.bmp" refvar="cursor_image"/>
</control>
<control name="edit3" xpos="208" ypos="72" >
<property picture="test.gif" refvar="cursor_image"/>
</control>
<control name="edit4" xpos="208" ypos="92" >
<property picture="red_led_off.bmp" refvar="cursor_image"/>
</control>
<control name="edit5" xpos="208" ypos="112" >
<property picture="red_led_off.bmp" refvar="cursor_icon"/>
</control>
<control name="edit6" xpos="208" ypos="132" >
<property picture="red_led_on.bmp" refvar="cursor_icon"/>
</control>
</init>
<timer><print text="%s">cursor_icon</print></timer>
</form>
Easy XML
Programming Manual, 10/2020, 6FC5397-1DP40-6BA4
99
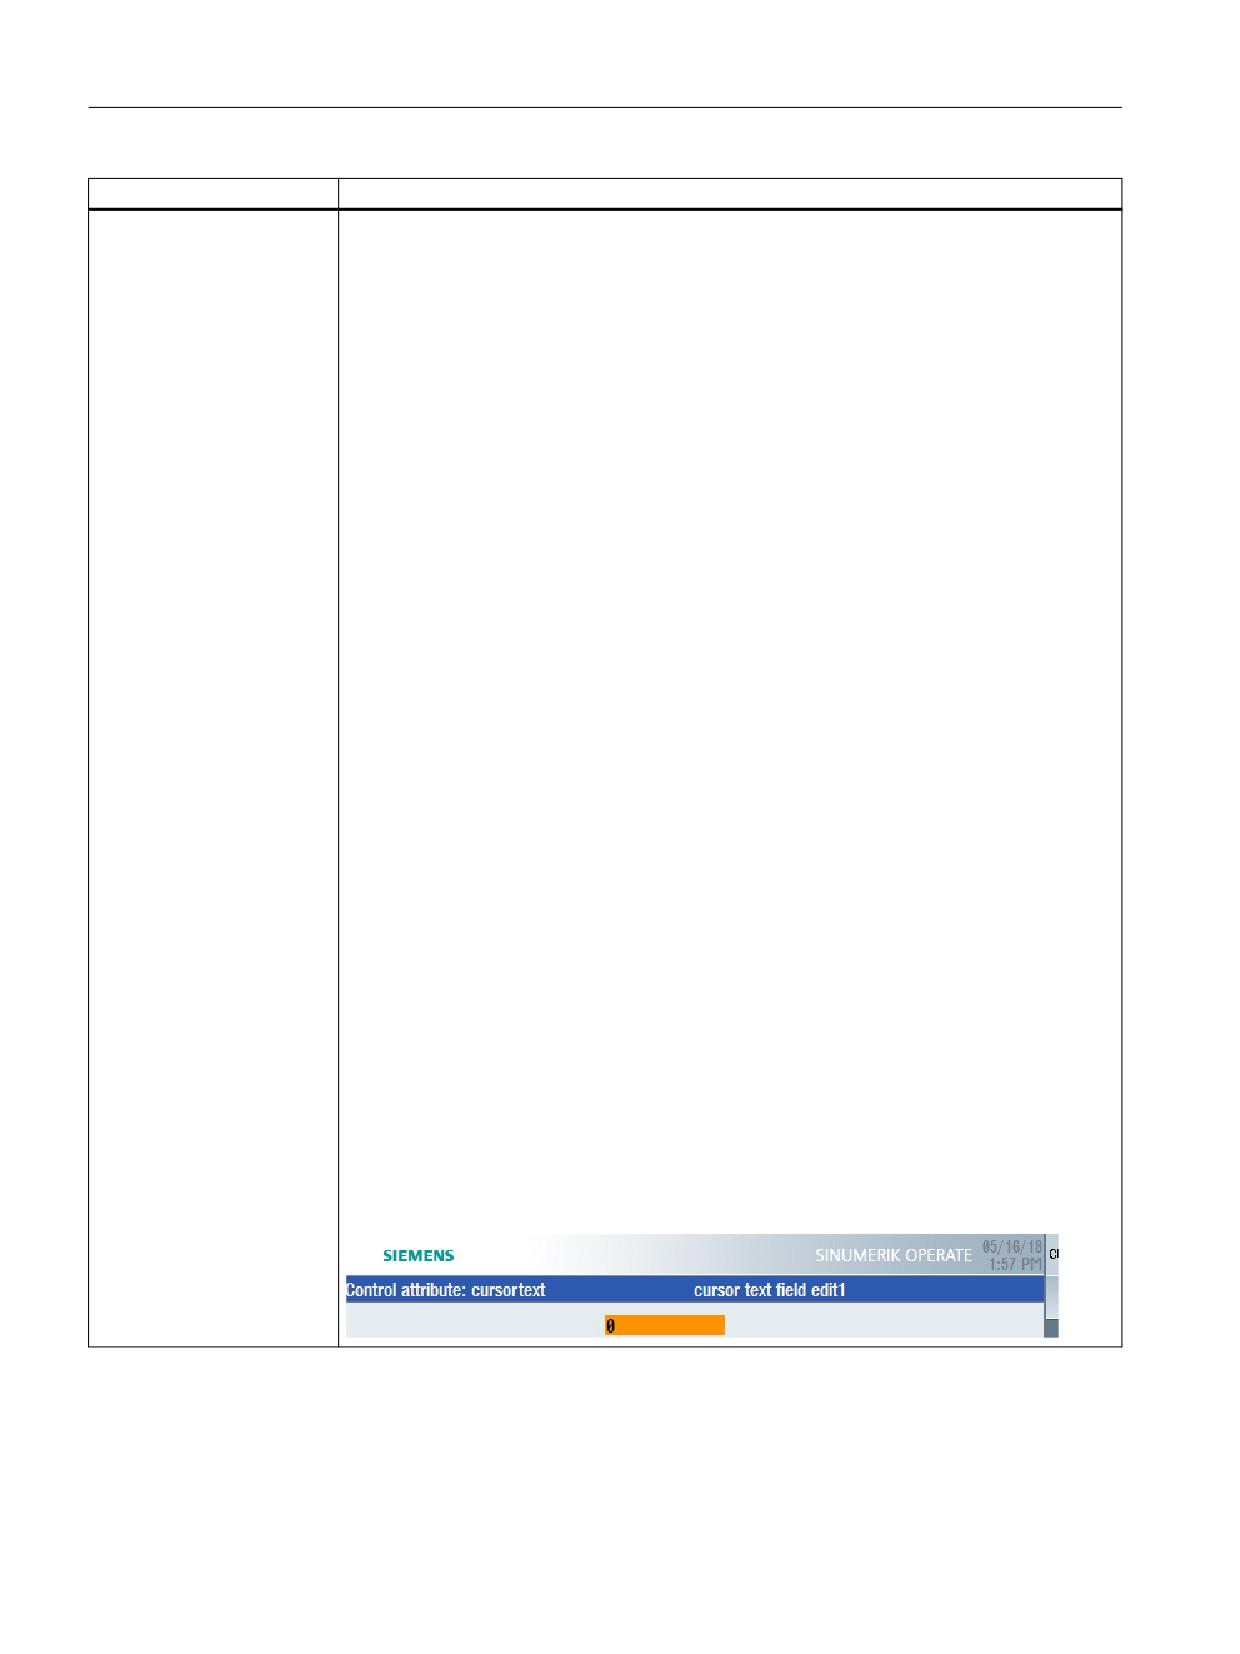
Generating user dialogs
2.7 XML identifier
Tag identifier
Meaning
PROPERTY continued
Attribute:
cursortext - this attribute defines the cursor text to be displayed
The text is issued in the title bar if the input focus is set on this field.
Two further attributes can be specified in addition to this attribute which define the alignment
of the text and the cursor text area. The text is left-justified as standard. The cursor text area
takes up 50% of the title bar width by default.
alignment="<right/left>" - text alignment right-justified/left-justified
length="<Width>" - percentage of the title bar which should be required for the cursor text
Syntax:
<property cursortext="<text>" />
or
<property cursortext="<text>" alignment="<right/left>" />
or
<property cursortext="text2" alignment="r="<text>"
alignment="<right/left>" length="<Ratio>"/>
Example:
<form name="main_form2">
<init>
<caption>Control attribute: cursortext</caption>
<control name="edit1" xpos="208" ypos="32" >
<property cursortext="cursor text field edit1" />
</control>
<control name="edit2" xpos="208" ypos="52" >
<property cursortext="cursor text field edit2"
alignment="right"/>
</control>
<control name="edit3" xpos="208" ypos="72" >
<property cursortext="cursor text field edit3"
alignment="right" length="40"/>
</control>
<control name="edit4" xpos="208" ypos="92" >
<property cursortext="cursor text field edit4" />
</control>
</init>
</form>
Easy XML
100
Programming Manual, 10/2020, 6FC5397-1DP40-6BA4
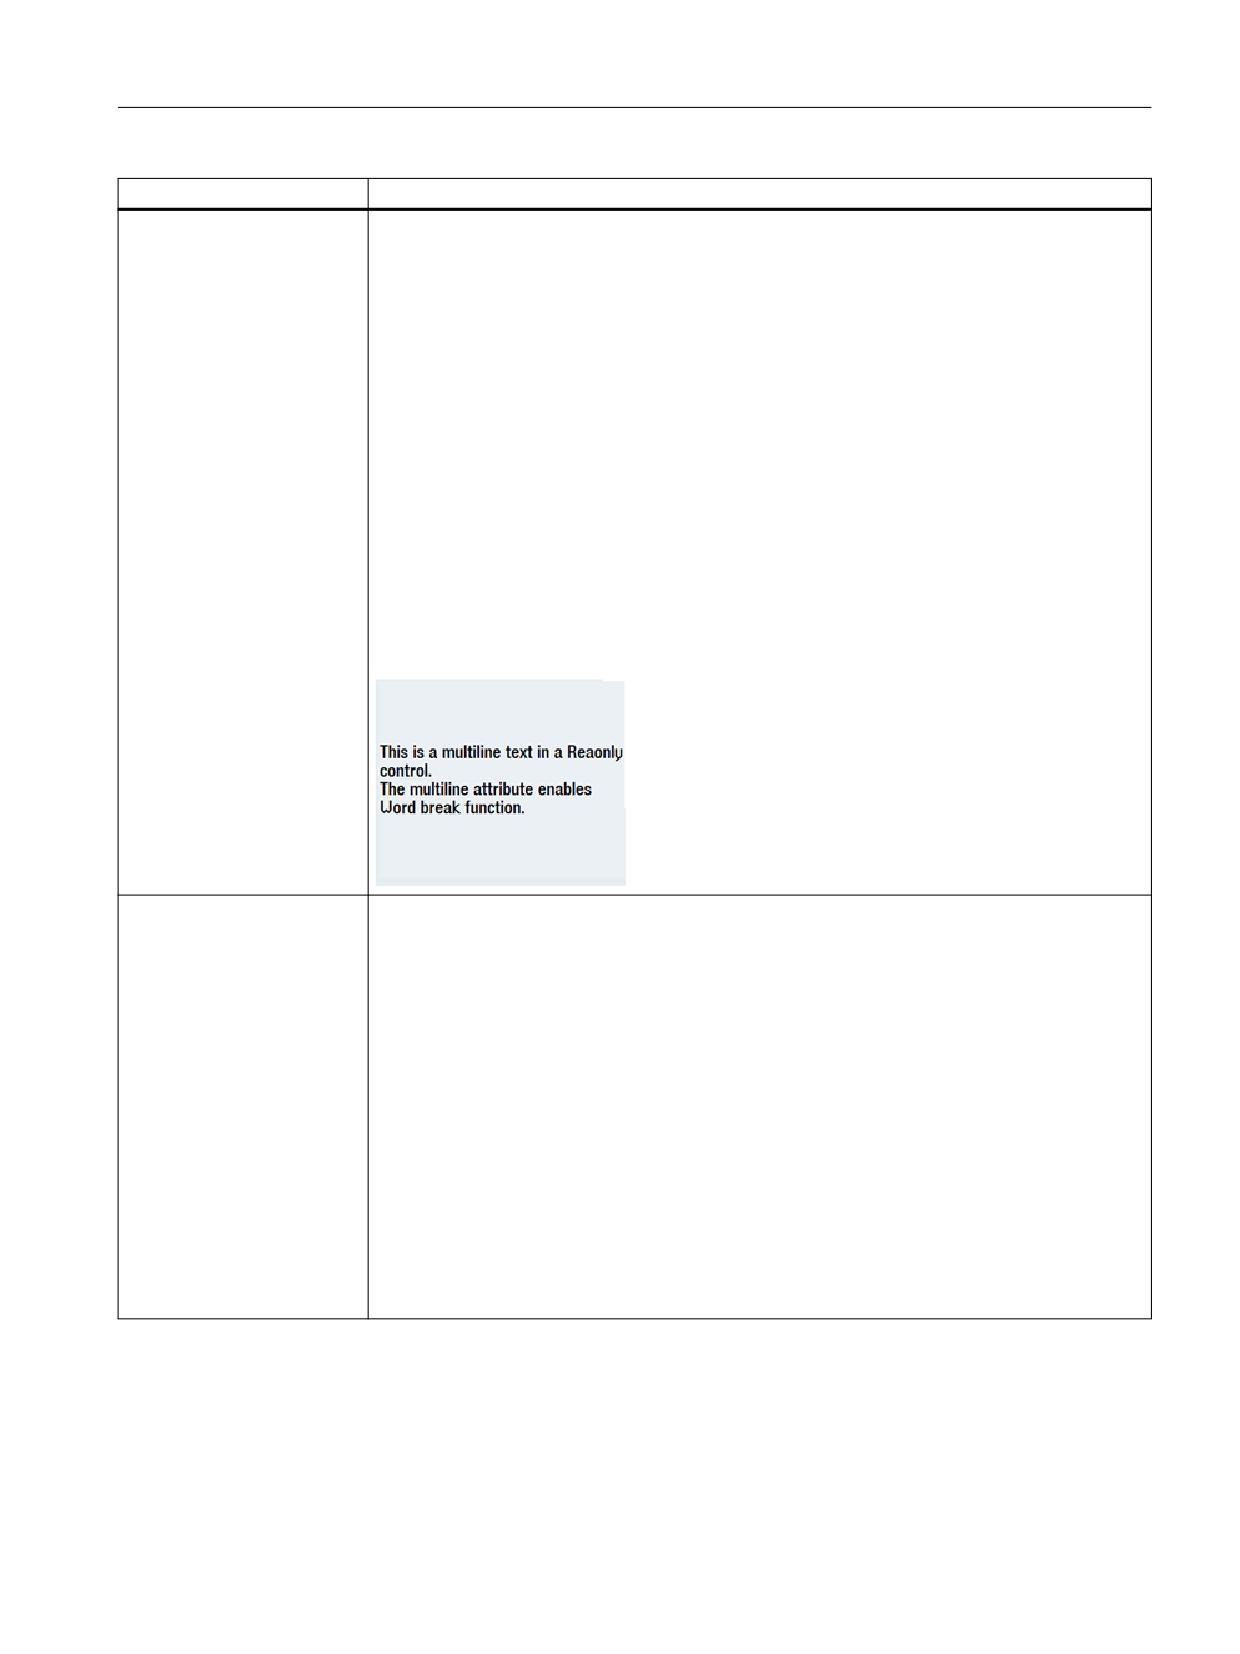
Generating user dialogs
2.7 XML identifier
Tag identifier
Meaning
PROPERTY continued
Attribute:
multiline - this allows the multi-line output of a text in an edit or read-only control
Syntax:
<property multiline="true" />
Example:
<op>
textlist[2] = _T"This is a multiline text in a Reaonly control.\
\nThe multiline attribute enables Word break function.";
</op>
<control name="lstring" xpos="8" ypos="120" width="200" height="160"
fieldtype="readonly" refvar="textlist[2]" >
<property multiline="true" />
</control>
PROPERTY continued
Attributes:
• help_context
The attribute makes it possible to assign a help topic to a control. The file name used in
tag entry in the help book must be specified.
• anchor
With the attribute you can enter a keyword. This attribute is only valid in conjunction with
the attribute help_context.
Syntax:
<property help_context="<file name>" anchor="<key word>"/>
Example:
<control name = "cpwd" xpos = "322" ypos = "64" >
<property password="true" />
<property help_context="chapter_1.html" anchor="Keyword_2" />
</control>
Easy XML
Programming Manual, 10/2020, 6FC5397-1DP40-6BA4
101
Generating user dialogs
2.7 XML identifier
Tag identifier
Meaning
SOFTKEY
The tag defines the properties and responses of a softkey.
Attributes:
• position
Number of the softkey. 1-8 horizontal softkeys, 9-16 vertical softkeys
The following attributes become effective from:
• type
Defines the property of the softkey.
user_controled - the script defines how the softkey is displayed
toggle_softkey - the softkey is displayed alternating between pressed and not pressed
• refvar
Should only be used in conjunction with toggle_softkey .
Reference variable, into which the actual softkey property is copied.
A variable, type "String" should be specified, which includes the properties pressed, not
pressed or locked (see tag state).
• picture
Using the attribute, a bitmap can be output left justified on the softkey. The complete path
name should be specified.
The number of text characters that can be displayed is reduced to the width of the bitmap.
Easy XML
102
Programming Manual, 10/2020, 6FC5397-1DP40-6BA4
Generating user dialogs
2.7 XML identifier
Tag identifier
Meaning
SOFTKEY continued
The following additional actions can be defined within the softkey block:
•
picturealignment
The image orientation is specified by this attribute.
The image is aligned with the left side of the softkey by default.
The following values can be specified for alignment:
- top
Top edge
- bottom
Bottom edge
- left
Left edge
- right
Right edge
- center
Centered
•
caption
Softkey text
•
state
Should only be used in conjunction with user_controlled .
The tag assigns the required softkey display to the system.
Syntax:
<state type="<state>" />
The following strings can be specified:
- notpressed
The softkey is displayed as being not pressed.
- pressed
The softkey is displayed as being pressed.
- disabled
The softkey is locked and is displayed in gray.
•
navigation
•
update_controls
•
function
Easy XML
Programming Manual, 10/2020, 6FC5397-1DP40-6BA4
103
Generating user dialogs
2.7 XML identifier
Tag identifier
Meaning
SOFTKEY continued
Syntax:
Standard softkey:
<state type="<softkey state>" />
<softkey position = "<1>">
…
…
</softkey>
or
Script-controlled softkey:
<softkey position = "<1>" type="<user_defined>" >
<state type="<softkey state>" />
…
…
</softkey>
or
Toggle softkey:
<softkey position = "<1>" type="<toggle_softkey>" refvar="<variable
name>" >
…
…
</softkey>
Example:
<let name="define_sk_type" type="string">PRESSED</let>
<let name="sk_type">1</let>
<softkey POSITION="1" type="user_controled" >
<caption>Toggle%nSK</caption>
<if>
<condition>sk_type == 0 </condition>
<then>
<op> sk_type = 1 </op>
<op> define_sk_type = _T"PRESSED" </op>
</then>
<else>
<op> define_sk_type = _T"NOTPRESSED" </op>
<op> sk_type = 0 </op>
</else>
</if>
<state type="$$$define_sk_type" />
…
…
</softkey>
Easy XML
104
Programming Manual, 10/2020, 6FC5397-1DP40-6BA4
Generating user dialogs
2.7 XML identifier
Tag identifier
Meaning
SOFTKEY continued
Example:
or
<let name="curr_softkey_state" type="string">PRESSED</let>
</softkey>
<softkey POSITION="3" type="toggle_softkey"
refvar="curr_softkey_state">
<caption>Toggle%nSK</caption>
…
</softkey>
SOFTKEY_OK
The tag defines the response of the softkey "OK".
The following additional actions can be defined within the softkey block:
• navigation
• update_controls
• function
Syntax:
<SOFTKEY_OK>
…
…
</SOFTKEY_OK>
SOFTKEY_CANCEL
The tag defines the response of the softkey "Cancel".
X
Abort
The following additional actions can be defined within the softkey block:
• navigation
• update_controls
• function
Syntax:
<SOFTKEY_CANCEL>
…
…
</SOFTKEY_CANCEL>
Easy XML
Programming Manual, 10/2020, 6FC5397-1DP40-6BA4
105
Generating user dialogs
2.7 XML identifier
Tag identifier
Meaning
SOFTKEY_BACK
The tag defines the response of the softkey "Back".
<<
Back
The following additional actions can be defined within the softkey block:
• navigation
• update_controls
• function
Syntax:
<SOFTKEY_BACK>
…
…
</SOFTKEY_BACK>
SOFTKEY_ACCEPT
The tag defines the response of the softkey "Accept".
Accept
The following additional actions can be defined within the softkey block:
• navigation
• update_controls
• function
Syntax:
<SOFTKEY_ACCEPT>
…
…
</SOFTKEY_ACCEPT>
TEXT
The tag is used to display a text in the specified position.
If an alarm number is used, the dialog box displays the text which is saved for the number.
Syntax:
<TEXT xpos = "<X position>" ypos = "<Y position>"> Text </TEXT>
Attributes:
• xpos
X position of the top left corner
• ypos
Y position of the top left corner
• color
Text color
Further information is provided in Chapter "Color coding (Page 62)"
Value:
Text to be displayed
Easy XML
106
Programming Manual, 10/2020, 6FC5397-1DP40-6BA4