Iveco EuroCargo (12 to 26 t). Manual - part 200
78714
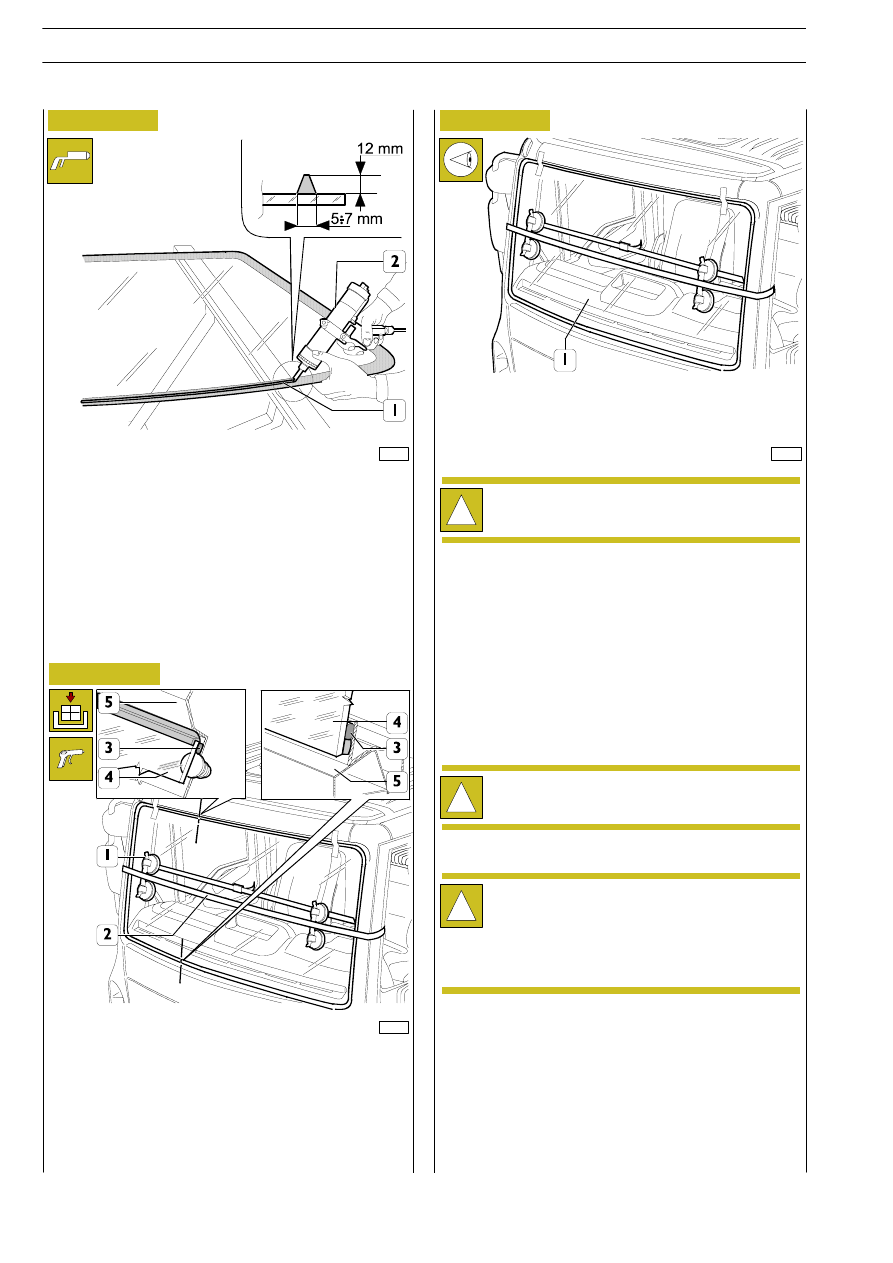
Figure 51
Extrude a polyurethane adhesive bead (1) with air gun (2)
along the windscreen perimeter as regularly as possible.
Start operation from the middle of the lower side and go on
without interrupting throughout the windscreen perimeter.
Cut the adhesive cartridge spout in such a way that extrusion
shape is a triangle with 5 x 7 mm base and 12 mm height.
By dedicated vacuum cups (1), place the windscreen in its seat
immediately after applying sealant, then settle its position.
Position a belt (2) by using vacuum cups (1) as shims, then
tension it in such a way that an even pressure is applied
throughout the windscreen to the purpose of assuring correct
matching among window (4), adhesive (3) and windscreen
opening (5).
78715
Figure 52
Figure 53
78716
!
Hold window (1) under pressure for at least 1 hour.
Before re-attaching previously detached portions, check for
lack of infiltration points.
Apply suds with a sponge along the outer perimeter and blow
compressed air from inside in order to highlight possible
infiltration.
When bubbles are in, degrease affected portion and fill it with
the adhesive.
Possible sealant overflowed portions inside can be removed,
once the sealant has hardened, by cutting them with a blade
and detaching them with a pair of pliers.
!
Pay attention not to damage silk screen on the
window with the blade.
Re-attach detached portions and clean the window.
!
Do not move or deliver the vehicle before one hour
and thirty minutes expired at 23.5
°C and 50% RU
(Relative Humidity) climatic conditions.
When either temperature or humidity are lower, the
dwell time has to be increased.
E
URO
C
ARGO
T
ECTOR
12-26 t
32
BODY - CHASSIS
Base — February 2003