Geely Emgrand X7. Manual part - 449


  Главная      Geely     Geely Emgrand X7 - Manual


поиск по сайту            


содержание   ..   444  445  446  447  448  449  450  ..


Geely Emgrand X7. Manual part - 449


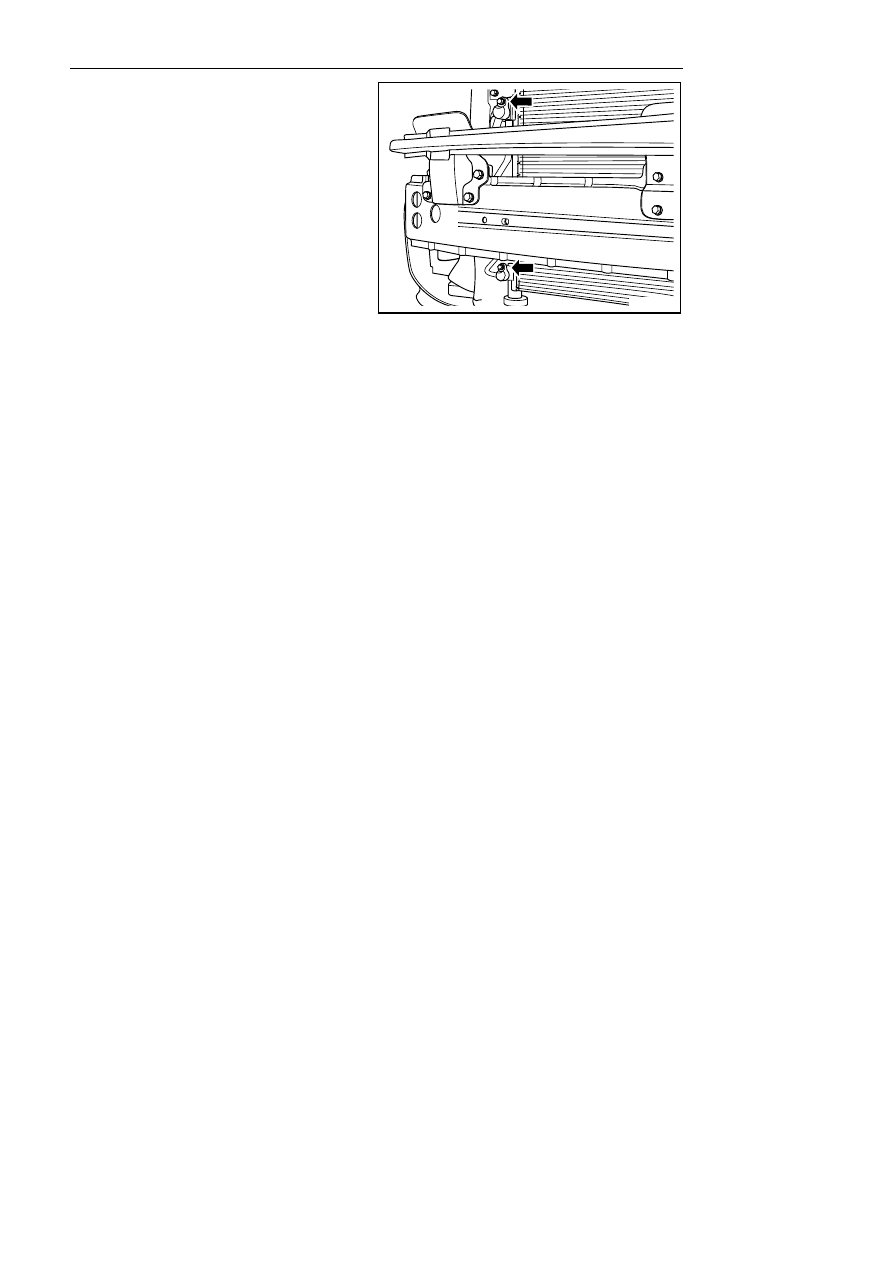
2.  Install upper and lower 2 hard pipe connector 

of condenser and tighten it with bolt. 

Notes: 

The O-ring related in the process of installation must 
be replaced by a new one. 

3.  Install the engine hood latch. 

4. Install 

horn. 

5. Install 

front 

bumper. 

6. A/C 

refrigerant 

filling 

procedures 


NL08-0049b


1795


8.3.8.16 A/C pipe replacement 

Refrigerant A/C pipe replacement 

Dismantle procedure 

Warning! 

See "Warnings for intake of R-134a" in 1.1.1.1 warning and precaution . 

1.  For operation of recycling procedures of A/C 

refrigerant, refer to 8.2.7.12 recycling and filling 
of A/C refrigerant. 

2.  Disconnect the battery negative cable. Refer to 

2.11.8.1 battery cable disconnection/connection 
Procedures. 

3.  For dismantling of fixing bolt of expansion valve 

and removing of expansion valve, refer to 8.3.8.5 
Replacement of expansion valve. 

4.  Dismantle front bumper, refer to 12.4.3.1 

Replacement of Front Bumper. 

NL08-0021b


5.  Remove the A/C pipe rigid connector fixing bolt 

on the expansion valve side. 

6.  Remove the fixing bolt for the A/C low pressure 

pipe rigid connector on the compressor side. 


NL08-0051b


7.  Dismantle 2 brackets for the A/C low pressure 

pipe from the evaporator to the compressor. 

8.  Dismantle the A/C low pressure pipe from the 

evaporator to the compressor. 


NL08-0052b


1796


9.  Dismantle the lower A/C high pressure pipe rigid 

connector on the condenser side. 


NL08-0053b


10.  For dismantling of A/C pressure switch, refer to 

8.3.8.2 Replacement of A/C pressure switch. 

11.  Dismantle 2 supports from condenser to A/C 

high pressure pipe of evaporator 

12. Dismantle high pressure from condenser to 

evaporator 


NL08-0054b


13.  Dismantle high-pressure pipe hard joint from 

compressor side to condenser A/C. 


NL08-0055b


1797


14.  Dismantle A/C high-pressure pipe joint on the 

top of condenser. 

15. Dismantle A/C high-pressure pipe between 

compressor and condenser. 


NL08-0056b


Installation Procedure: 

Notes: 

The O-ring related in the process of installation must 
be replaced by a new one. During installation of A/C 
pipe, first insert thoroughly the pipe joint and then 
tighten the bolt. 

O-ring and pipeline joint are damaged. 

1.  Install A/C pipe and tighten A/C fixing bracket. 

2.  Tighten fixing bolt on expansion valve side. 


NL08-0021b


3.  Install high-pressure pipe hard joint bolt on the 

upper section of condenser and tighten it. 


NL08-0056b


1798


содержание   ..   444  445  446  447  448  449  450  ..