Geely Emgrand X7. Manual part - 386


  Главная      Geely     Geely Emgrand X7 - Manual


поиск по сайту            


содержание   ..   381  382  383  384  385  386  387  ..


Geely Emgrand X7. Manual part - 386


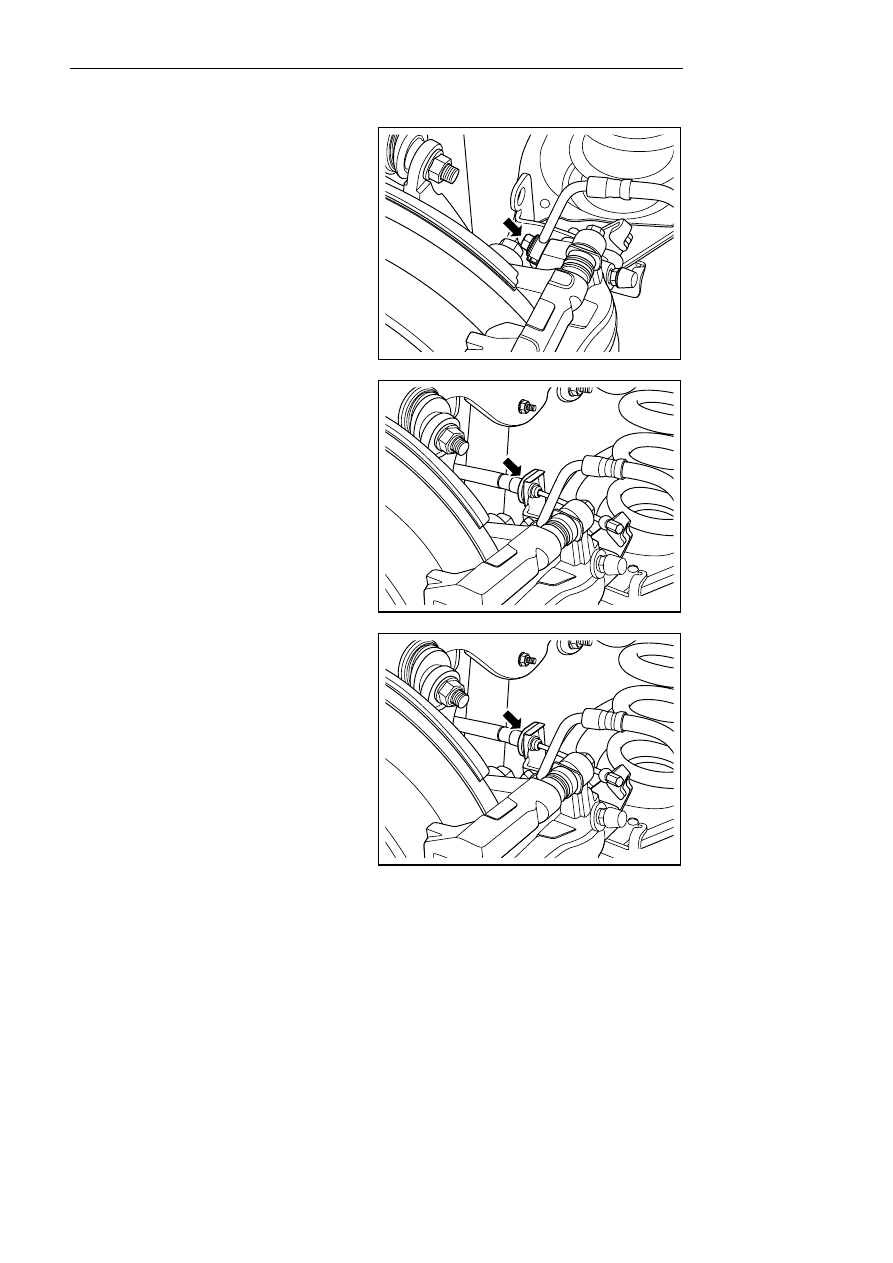
7.   Remove the inlet bolt for the brake hose of the 

brake caliper. 

8.   Block the inlet of the brake caliper and brake 

hose to prevent the loss or contamination of the 
brake fluid. 

9.    For removal of the upper and lower brake caliper 

fixing bolts and brake caliper, see 6.3.5.1 
replacement of brake pad-rear. 


NL06-0021b


Installation Procedure: 

Warning! 

Refer to important precation of fastener in warnings 
and precaution. 

1.   Install brake pad and brake caliper onto brake 

caliper bracket and tighten assembly bolt. 

Torque:30 Nm (Metric) 22.2 lb-ft (English system) 

2.    Install brake caliper oil inlet hose and tighten oil 

inlet bolt. 

Torque:30 Nm (Metric) 22.2 lb-ft (English system) 

NL06-0020b


3.    Install fixing clip of parking brake cable. 

NL06-0020b


1543


4.    Install parking brake cable. 


NL06-0019b


5.    Install the parking brake return spring. 

6.    Install the rear wheels 

7.   Lower the vehicle. 

8.  Add clean brake fluid into the master cylinder 

reservoir to the correct level. 

9.    For exhausting of the air from the brake system, 

see 6.4.5.5 Hydraulic Brake System Air 
Exhausting Procedures. 

Notes: 

Similarly disassembly method of left/right rear brake 
caliper. 


NL06-0018b


1544


6.3.5.3 Brake disc replacement —rear 

Dismantle procedure 

Warning! 

See Warnings for vehicle lifting in warnings and precaution. 

1.    Release parking brake. 

2.    For lifting vehicle, refer to 1.3 lifting vehicle. 

Notes: 

In order to keep the wheels balanced, mark the position of the hub with respect to the hub before dismantling the 
tires. 

3.    For dismantling of rear wheel, refer to 4.4.5.1 Replacement of wheels. 

4.   For dismantling of brake pad, refer to 6.3.5.1 

Replacement of brake pad- rear. 

Notes: 

See Important precaution  for brake caliper in 
warnings and precaution. 

5.  For dismantlement of the brake caliper, see 

6.3.5.2 Replacement of brake caliper-Rear. 

Notes: 

To dismantle the brake caliper, you do not need to 
dismantle the brake caliper brake hose but should 
hang the brake caliper with a steel wire to avoid 
damaging the brake hose. 

NL06-0020b


6.   Remove the fixing bolts for the brake caliper 

support. 

7.    Dismantle the brake disc. 

Notes: 

The matching mark is marked on the brake disc and 
the axle hub. 


NL06-0023b


1545


8.    Check the thickness of brake disk 

Standard thickness:11 mm (0 . 429in) 

Min. thickness:9 mm (0.351in) 

If the brake disc is thinner than the minimum value, 
replace the rear brake disc. 


NL06-0024b


9.    Check the brake disc for run-out. 

–    install front brake disc. 

Use special tool and hub not to tight brake disc. 

Torque: 5Nm (Metric system) 3.7lb-ft (English 
system) 

Install the dial indicator on the shock absorber where 
is far from axle wheel hub and speed sensor. A dial 
indicator is used for measuring the brake disc rub-out 
in the position of 10mm (0.39 in) distancing from the 
edge of the brake disc. 

Max. brake disc hop: 0.005mm ( 0.002in) 

NL06-0025b


Notes: 

If the brake disc run-out exceeds the maximum, firstly change the mounting position of the brake disc and the axle 
to minimize the brake disc run-out; if the brake disc run-out further exceeds the maximum after changing the 
mounting position, inspect the upward clearance of the bearing and the run-out of the axle hub; if the bearing 
clearance and the axle hub run-out are normal, or the thickness of the brake disc is within the specified range, 
grind the brake disc; and if the brake disc is thinner than the minimum value, replace the brake disc. 

1546


содержание   ..   381  382  383  384  385  386  387  ..