Chrysler Le Baron, Dodge Dynasty, Plymouth Acclaim. Manual - part 178
(10) Locate feature strip insert at end of bow. Slide
feature strip to the side and separate strip from bow.
Do not damage foam filler strips attached to fourth
bow.
(11) Separate top cover from fourth roof bow.
(12) Remove rivets holding rear window retainer
to fourth roof bow.
(13) Separate retainer from bow.
(14) Mark location of stay pads and rear window
zipper apron to aid installation.
(15) Remove staples holding stay pads to fourth
roof bow.
(16) Remove staples holding rear window zipper
apron to fourth roof bow.
(17) Remove staples holding side stay pads to
fourth roof bow.
(18) Separate fourth roof bow from vehicle.
INSTALLATION
Reverse the preceding operation.
FORWARD ROOF RAIL
REMOVAL
(1) Lower convertible top and remove top header
trim cover.
(2) Remove screws holding pivot bracket to for-
ward roof rail.
(3) Remove bolt, washer and bushing holding cen-
ter link arm to forward roof rail.
(4) Remove bolt, washer and bushing holding con-
trol link arm to forward roof rail.
(5) Separate forward roof rail from frame.
INSTALLATION
Reverse the preceding operation.
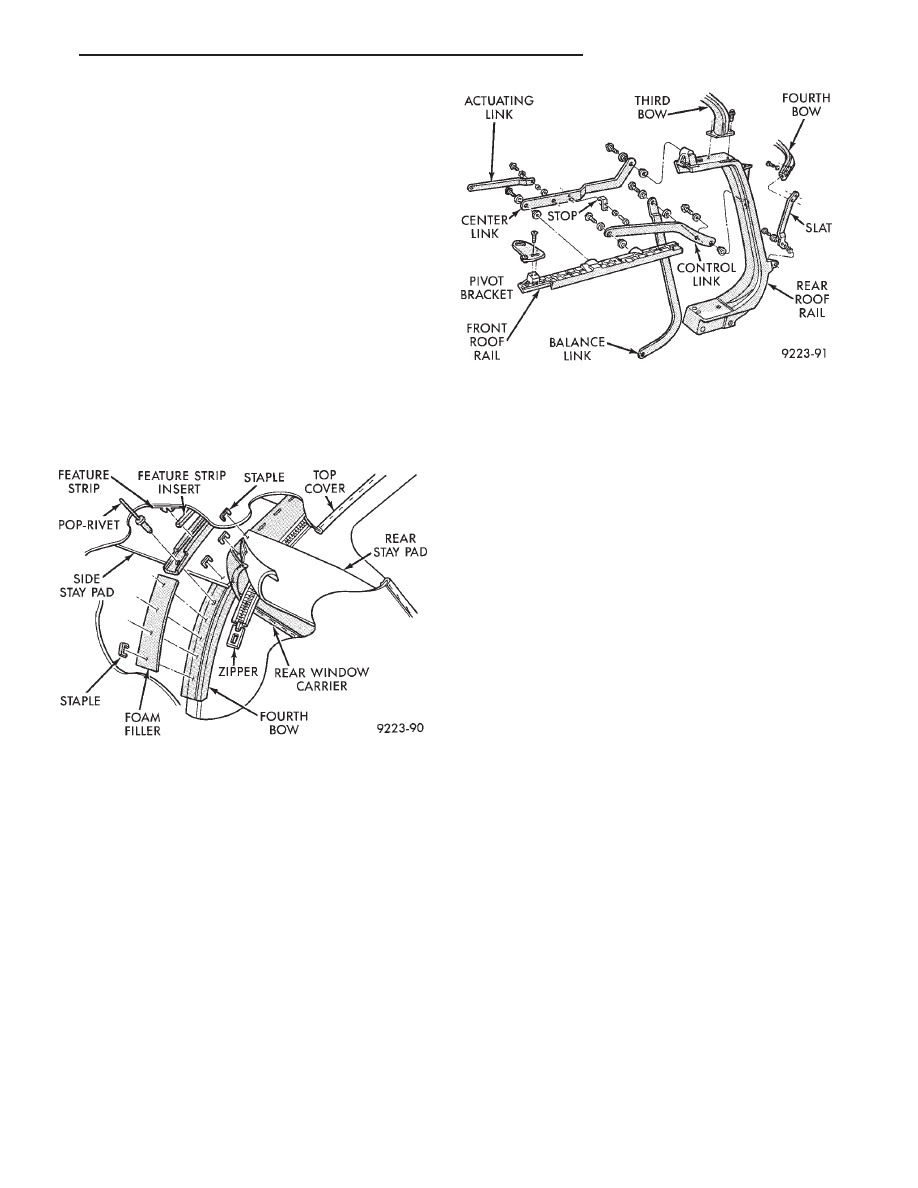
ROOF LINKAGE
REMOVAL (FIG. 12)
(1) Disengage top header latches.
(2) Remove bolt, washer and bushing holding bal-
ance link arm to control link.
(3) Remove bolt, washer and bushing holding bal-
ance link arm to rear roof rail behind quarter trim
link.
(4) Separate balance link arm from vehicle.
INSTALLATION
Reverse the preceding operation.
REAR ROOF RAIL
REMOVAL (FIG. 13)
(1) Remove quarter trim panel.
(2) Disengage top latches, do not lower top.
(3) Remove quarter glass and weatherstrip.
(4) Loosen bolts holding rear roof rail main pivot
plate to quarter panel.
(5) Remove clip and clevis pin holding gas assist
cylinder to rear roof rail.
(6) Remove fourth roof bow slat spring.
(7) Remove pivot bolt holding slat to rear roof rail.
(8) Remove pivot bolt holding center link to rear
roof rail.
(9) Remove bolts holding third roof bow to rear
roof rail.
(10) Remove pivot bolt holding rear roof rail to
main pivot bracket.
(11) Separate rear roof rail from roof frame.
INSTALLATION
Reverse the preceding operation.
STATIONARY QUARTER GLASS AND
WEATHERSTRIP
REMOVAL (FIG. 14)
(1) Lower convertible top.
(2) Remove quarter trim panel.
(3) Remove nut holding quarter glass to rear roof
rail.
Fig. 11 Fourth Roof Bow
Fig. 12 Roof Rails and Linkage
Ä
AP/27 CONVERTIBLE
23 - 121