Volvo V60 Twin Engine (2018 year). Instruction - part 5
||
INSTRUMENTS AND CONTROLS
* Option/accessory.
84
Selecting key position/level
•
Key position 0 - Unlock the car - This
means that the car's electrical system is at
level 0.
To reach level I or II without starting the
engine - do not depress the brake/clutch
pedal when these key positions are due to be
selected.
•
Key position I - With the remote control key
fully inserted into the ignition switch
6
- Briefly
press START/STOP ENGINE.
•
Key position II - With the remote control
key fully inserted into the ignition switch
6
-
Give a long
7
press on START/STOP
ENGINE.
•
Back to key position 0 - To return to key
position 0 from position II and I - Briefly
press on START/STOP ENGINE.
Audio system
For information on audio system functions with
remote control key removed, see the Sensus
Infotainment supplement.
Starting and stopping the engine
For information about starting/stopping the
engine, see Starting the engine (p. 266).
Related information
•
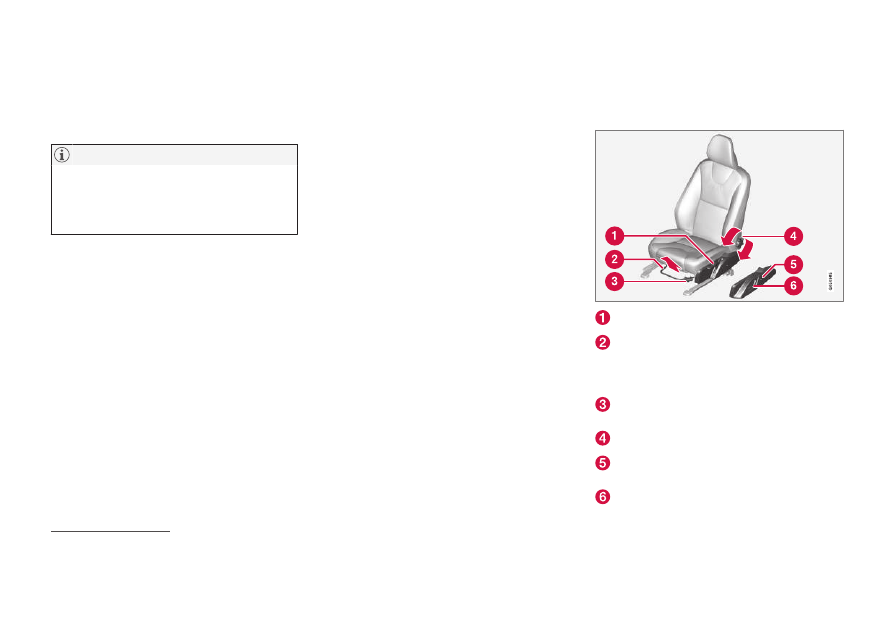
Seats, front
The car's front seats have different setting
options for optimum seating comfort.
Raise/lower the seat, pump up/down.
Forward/backward: lift the handle to adjust
the distance to the steering wheel and ped-
als. Check that the seat is locked after
changing position.
Raise/lower
* front edge of seat cushion,
pump up/down.
Adjust backrest rake, turn the wheel.
Change the lumbar support
*, press the but-
ton.
Control panel for power seat
6
Not required for cars with keyless start and lock system
*.
7
Approx. 2 seconds.