Toyota 4Runner (2024 year). Manual in english - page 5
129
3
Op
eration
o
f each
compo
nen
t
4RUNNER (U)
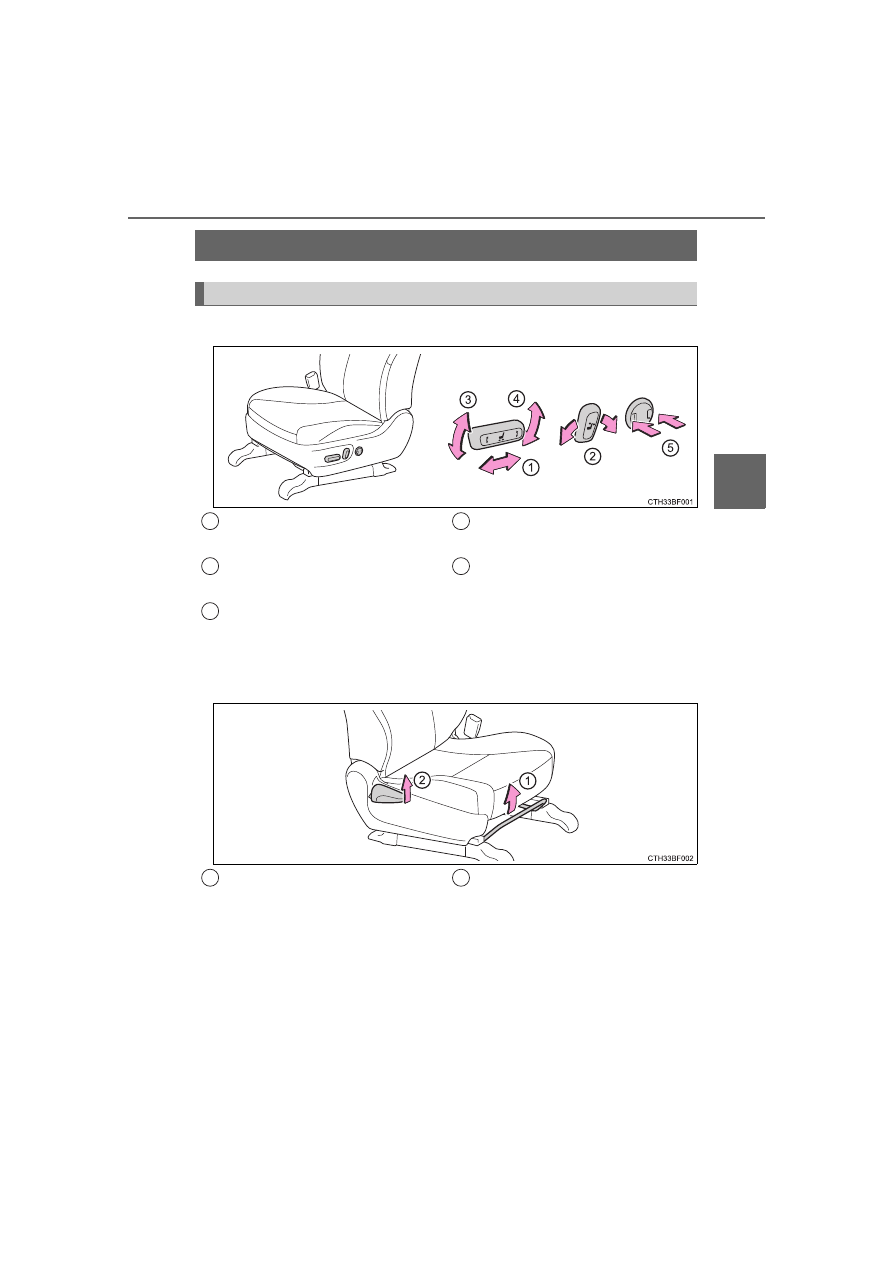
3-3. Adjusting the seats
Power seat
Manual seat
Front seats
Adjustment procedure
Seat position adjustment
switch
Seatback angle adjustment
switch
Seat cushion (front) angle
adjustment switch (driver’s
side only)
Vertical height adjustment
switch (driver’s side only)
Lumbar support adjustment
switch (driver’s side only)
1
2
3
4
5
Seat position adjustment lever
Seatback angle adjustment
lever
1
2