Toyota bZ4X (2023 year). Manual in english - page 27
433
6-4. Using the other interior features
6
Interior
featur
es
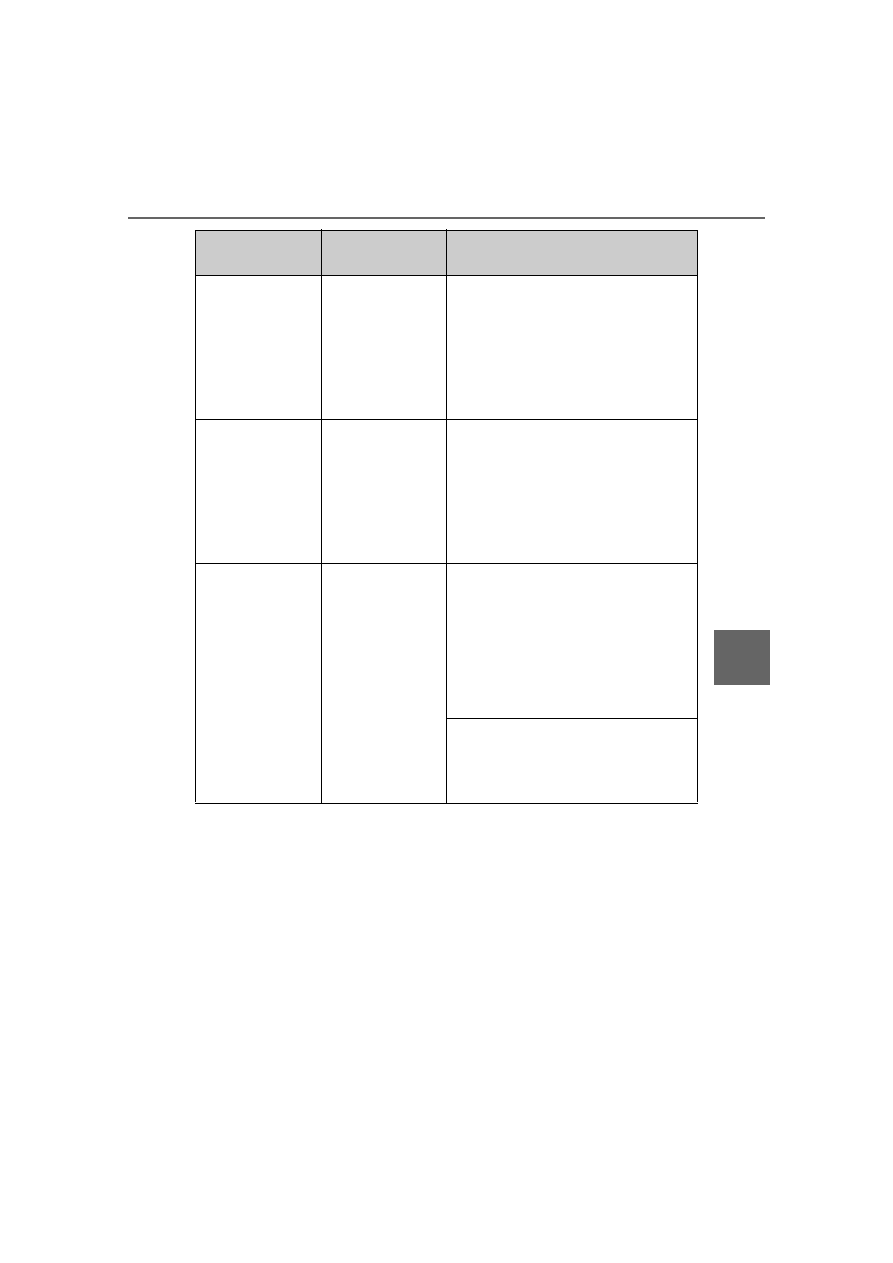
Operation indica-
tor light
Multimedia sys-
tem screen
Suspected causes/Handling method
Orange (Flashing
repeatedly once
every second)
Gray
Wireless charger and smart key
communication failure
If the EV system is turned on,
off and then restart the EV sys-
tem
If the power switch is in ACC, start
the EV system. (
Green (Flashing
repeatedly once
every second)
Disappear
Wireless charger and multimedia
system communication failure
If the EV system is turned on,
off and then restart the EV sys-
tem
If the power switch is in ACC, start
the EV system. (
Green (comes
on)
Blue
AM radio stations are being auto-
matically selected
Wait until the system has com-
pleted the automatic selection
of AM radio stations. In the case
that automatic selection cannot
be completed, stop automatic
selection.
The smart key system is detecting
the key
Please wait until the key detec-
tion is complete.