Toyota 86 (2023 year). Manual in english - page 22
 

  Index      Toyota     Toyota 86 (2023 year). Manual in english


Search            copyright infringement  


Content      ..     20      21      22      23     ..


Toyota 86 (2023 year). Manual in english - page 22


351

7-2. Steps to take in an emergency

7

Whe

n tr

ouble

 ar

ises

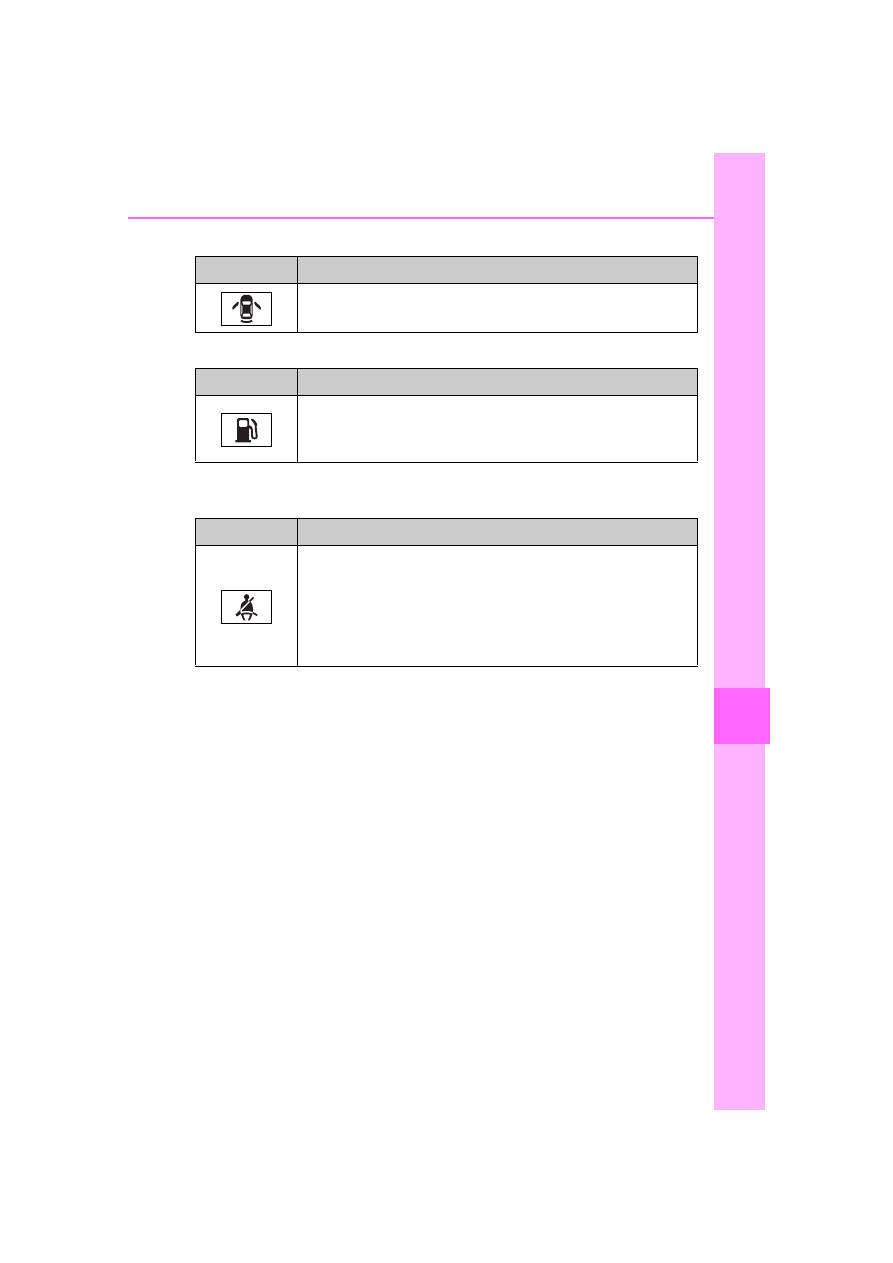
Open door warning light

Low fuel level warning light (warning buzzer)

Driver’s and front passenger’s seat belt reminder light (warn-
ing buzzer)

*1, 2

*1

:The front passenger’s seat belt reminder light is located on the overhead 

console.

*2

:Driver’s seat belt warning buzzer:

The driver’s seat belt warning buzzer sounds to alert the driver that his or 
her seat belt is not fastened. Once the engine switch is turned to ON, the 
buzzer sounds. If the seat belt is still unfastened, the buzzer sounds inter-
mittently for a certain period of time after the vehicle reaches a certain 
speed.
Front passenger’s seat belt warning buzzer:
The front passenger’s seat belt warning buzzer sounds to alert the front 
passenger that his or her seat belt is not fastened. If the seat belt is unfas-
tened, the buzzer sounds intermittenly for a certain period of time after the 
vehicle reaches a certain speed.

Warning light

Details/Actions

Indicates that a door or the trunk is not fully closed

Check that both side doors and the trunk are closed.

Warning light

Details/Actions

Indicates that remaining fuel is approximately 1.8 gal. (7.0 
L, 1.5 Imp. gal.) or less

Refuel the vehicle.

Warning light

Details/Actions

Warns the driver and/or front passenger to fasten their seat 
belts

Fasten the seat belt. 
If the front passenger’s seat is occupied, the front 
passenger’s seat belt also needs to be fastened to 
make the warning light (warning buzzer) turn off.

352

7-2. Steps to take in an emergency

Rear passengers’ seat belt reminder lights (warning buzzer)

*1, 

2

*1

:This light illuminates on the overhead console.

*2

:Rear passengers’ seat belt warning buzzer:

The rear passengers’ seat belt warning buzzer sounds to alert the rear pas-
senger that his or her seat belt is not fastened. If the seat belt is unfas-
tened, the buzzer sounds intermittently for a certain period of time, after the 
vehicle reaches a certain speed.

Conventional cruise control indicator (if equipped)

BSD/RCTA warning light (if equipped) (warning buzzer)

SRH warning light (if equipped) (warning buzzer)

Warning light

Details/Actions

Warns the rear passengers to fasten their seat belts

Fasten the seat belt.
If the rear passenger’s seat is occupied, the rear pas-
senger’s seat belt also needs to be fastened to make 
the warning light (warning buzzer) turn off.

Warning light

Details/Actions

(yellow)

Indicates a malfunction in the conventional cruise control 
system

Have the vehicle inspected by your Toyota dealer 
immediately.

Warning light

Details/Actions

Indicates a malfunction in the BSD/RCTA system

Have the vehicle inspected by your Toyota dealer 
immediately.

Warning light

Details/Actions

Indicates a malfunction in the SRH function

Have the vehicle inspected by your Toyota dealer 
immediately.

353

7-2. Steps to take in an emergency

7

Whe

n tr

ouble

 ar

ises

RAB warning light (if equipped) (warning buzzer)

LED headlight warning light (warning buzzer)

Automatic headlight leveling system warning light (warning 
buzzer)

Master warning light (warning buzzer)

EyeSight warning light (if equipped) (warning buzzer)

Warning light

Details/Actions

Indicates a malfunction in the RAB system

Have the vehicle inspected by your Toyota dealer 
immediately.

Warning light

Details/Actions

Indicates a malfunction in the LED headlights

Have the vehicle inspected by your Toyota dealer 
immediately.

Warning light

Details/Actions

Indicates a malfunction in the automatic headlight leveling 
system

Have the vehicle inspected by your Toyota dealer 
immediately.

Warning light

Details/Actions

A buzzer sounds and the warning light comes on and 
flashes to indicate that the master warning system has 
detected a malfunction.

P.357

Warning light

Details/Actions

Indicates a malfunction in the EyeSight

Have the vehicle inspected by your Toyota dealer 
immediately.

354

7-2. Steps to take in an emergency

Tire pressure warning light (warning buzzer)

Front passenger detection sen-

sor, seat belt reminder and 

warning buzzer

If luggage is placed on the front 

passenger seat, the front passen-

ger detection sensor may cause 

the warning light to flash and the 

warning buzzer to sound even if a 

passenger is not sitting in the 

seat.

If a cushion is placed on the seat, 

the sensor may not detect a pas-

senger, and the warning light may 

not operate properly.

If the malfunction indicator 

lamp comes on while driving

First check the following:

Is the fuel tank empty?

If it is, fill the fuel tank immediately.

Is the fuel tank cap loose?

If it is, tighten it securely.

The light will go off after several 

driving trips.
If the light does not go off even after 

several trips, contact your Toyota 

dealer as soon as possible.

Electric power steering system 

warning light (warning buzzer)

When the battery charge becomes 

insufficient or the voltage temporar-

ily drops, the electric power steering 

system warning light may come on 

and the warning buzzer may sound.

When the tire pressure warning 

light comes on

Check the tire inflation pressure and 

adjust to the appropriate level. 

Pushing the tire pressure warning 

reset switch will not turn off the tire 

pressure warning light.

The tire pressure warning light 

may come on due to natural 

causes

The tire pressure warning light may 

come on due to natural causes such 

as natural air leaks and tire inflation 

pressure changes caused by tem-

perature. In this case, adjusting the 

tire inflation pressure will turn off the 

warning light (after a few minutes).

Conditions that the tire pres-

sure warning system may not 

function properly

P.315

Warning light

Details/Actions

When the light comes on:
Low tire inflation pressure such as

Natural causes (

P.354)

Flat tire (

P.358)

Adjust the tire inflation pressure to the specified 
level. The light will turn off after a few minutes. In 
case the light does not turn off even if the tire infla-
tion pressure is adjusted, have the system checked 
by your Toyota dealer.

When the light comes on after blinking for 1 minute:
Malfunction in the tire pressure warning system

Have the system checked by your Toyota dealer.

355

7-2. Steps to take in an emergency

7

W

he

tro

ub

le

 ar

is

es

If the tire pressure warning light 

frequently comes on after blink-

ing for 1 minute

If the tire pressure warning light fre-

quently comes on after blinking for 1 

minute when the engine switch is 

turned to ON, have it checked by 

your Toyota dealer.

Warning buzzer

In some cases, the buzzer may not 

be heard due to being in a noisy 

location or audio sound.

WARNING

If both the ABS and the brake 

system warning lights remain 

on

Stop your vehicle in a safe place 

immediately and contact your Toy-

ota dealer. The vehicle will 

become extremely unstable 

during braking, and the ABS sys-

tem may fail, which could cause 

an accident resulting in death or 

serious injury.

When the electric power 

steering system warning light 

comes on

The steering wheel may become 

extremely heavy.

When steering wheel operations 

are heavier than usual, grip the 

steering wheel firmly and operate 

it using more force than usual.

If the tire pressure warning 

light comes on

Be sure to observe the following 

precautions. Failure to do so 

could cause a loss of vehicle con-

trol and result in death or serious 

injury.

Stop your vehicle in a safe place 

as soon as possible. Adjust the 

tire inflation pressure immedi-

ately.

If the tire pressure warning light 

comes on even after tire infla-

tion pressure adjustment, it is 

probable that you have a flat 

tire. Check the tires. If a tire is 

flat, repair the flat tire by using 

emergency tire puncture repair 

kit.

Avoid abrupt maneuvering and 

braking. If the vehicle tires dete-

riorate, you could lose control of 

the steering wheel or the 

brakes.

If a blowout or sudden air 

leakage should occur

The tire pressure warning system 

may not activate immediately.

Maintenance of the tires

Each tire, including the spare (if 

provided), should be checked 

monthly when cold and inflated to 

the inflation pressure recom-

mended by the vehicle manufac-

turer on the vehicle placard or tire 

inflation pressure label (tire and 

load information label). (If your 

vehicle has tires of a different size 

than the size indicated on the 

vehicle placard or tire inflation 

pressure label [tire and load infor-

mation label], you should deter-

mine the proper tire inflation 

pressure for those tires.)

356

7-2. Steps to take in an emergency

WARNING

As an added safety feature, your 

vehicle has been equipped with a 

tire pressure monitoring system 

(TPMS-tire pressure warning sys-

tem) that illuminates a low tire 

pressure telltale (tire pressure 

warning light) when one or more 

of your tires is significantly 

under-inflated. Accordingly, when 

the low tire pressure telltale (tire 

pressure warning light) illumi-

nates, you should stop and check 

your tires as soon as possible, 

and inflate them to the proper 

pressure. Driving on a signifi-

cantly under-inflated tire causes 

the tire to overheat and can lead 

to tire failure. Under-inflation also 

reduces fuel efficiency and tire 

tread life, and may affect the vehi-

cle’s handling and stopping ability.

Please note that the TPMS (tire 

pressure warning system) is not a 

substitute for proper tire mainte-

nance, and it is the driver’s 

responsibility to maintain correct 

tire pressure, even if under-infla-

tion has not reached the level to 

trigger illumination of the TPMS 

low tire pressure telltale (tire pres-

sure warning light).

Your vehicle has also been 

equipped with a TPMS (tire pres-

sure warning system) malfunc-

tion indicator to indicate when the 

system is not operating properly. 

The TPMS (tire pressure warning 

system) malfunction indicator is 

combined with the low tire pres-

sure telltale (tire pressure warning 

light). When the system detects a 

malfunction, the telltale will flash 

for approximately one minute and 

then remain continuously illumi-

nated. This sequence will con-

tinue upon subsequent vehicle 

start-ups as long as the malfunc-

tion exists. When the malfunction 

indicator is illuminated, the sys-

tem may not be able to detect or 

signal low tire pressure as 

intended.

TPMS (tire pressure warning sys-

tem) malfunctions may occur for a 

variety of reasons, including the 

installation of replacement or 

alternate tires or wheels on the 

vehicle that prevent the TPMS 

(tire pressure warning system) 

from functioning properly. Always 

check the TPMS (tire pressure 

warning system) malfunction tell-

tale after replacing one or more 

tires or wheels on your vehicle to 

ensure that the replacement or 

alternate tires and wheels allow 

the TPMS (tire pressure warning 

system) to continue to function 

properly.

NOTICE

To ensure the tire pressure 

warning system operates 

properly

Do not install tires with different 

specifications or makers, as the 

tire pressure warning system may 

not operate properly.

357

7-2. Steps to take in an emergency

7

Whe

n tr

ouble

 ar

ises

Warning messages

The warning messages explained 

below may differ from the actual 

messages according to operation 

conditions and vehicle specifica-

tions.

Warning buzzer

In some cases, the buzzer may not 

be heard due to being in a noisy 

location or audio sound.

If “Check Owner’s Manual” is 

displayed

If the following messages are 

shown, following the instructions, 

accordingly.

• “High Coolant Temperature” 

(

P.375)

• “Transmission Oil Temperature” 

(

P.149)

If any of the following messages 

are shown on the multi-informa-

tion display, it may indicate a mal-

function. Have the vehicle 

inspected by your Toyota dealer 

immediately.

• “EyeSight OFF”

• “Headlights Disabled”

• “ABS”

• “Steering System”

• “Vehicle Stability Control”

• “Transmission”

• “Low Tire Pressure”

• “RAB Disabled”

• “BSD/RCTA Disabled”

• “Keyless Access System Dis-

abled”

• “Auto Headlight Leveler Disabled”

• “SRH Disabled”

If any of the following messages 

are shown on the multi-informa-

tion display, it may indicate a mal-

function. Immediately stop the 

vehicle and contact your Toyota 

dealer.

• “Brake System”

• “Check Engine”

• “SRS Airbag System”

If a warning message 

is displayed

The multi-information dis-
play shows warnings of sys-
tem malfunctions, 
incorrectly performed oper-
ations, and messages that 
indicate a need for mainte-
nance. When a message is 
shown, perform the correc-
tion procedure appropriate 
to the message.

Master warning light

The master warning light also 
comes on or flashes in order to 
indicate that a message is cur-
rently being displayed on the 
multi-information display.

Multi-information display

Follow the instructions of the 
message on the multi-information 
display.

A

358

7-2. Steps to take in an emergency

Stop the vehicle in a safe 
place on a hard, flat surface.

Set the parking brake.

Shift the shift lever to P (auto-
matic transmission) or R 
(manual transmission).

Stop the engine.

Turn on the emergency flash-
ers. (

P.338)

Check the degree of the tire 

damage.

A tire should only be repaired 
with the emergency tire punc-
ture repair kit if the damage is 
caused by a nail or screw pass-
ing through the tire tread.
• Do not remove the nail or 

screw from the tire. Removing 
the object may widen the 
opening and disenable emer-
gency repair with the kit.

• To avoid sealant leakage, 

move the vehicle until the 
area of the puncture, if 
known, is positioned at the 
top of the tire.

A flat tire that cannot be 

repaired with the emergency 

tire puncture repair kit

In the following cases, the tire can-

not be repaired with the emergency 

tire puncture repair kit. Contact your 

Toyota dealer.

When the tire is damaged due to 

driving without sufficient air pres-

sure

When the tire lost air pressure due 

to a crack or damage in the tire 

sidewall

When the tire is visibly separated 

from the wheel

When the cut or damage to the 

tread is 0.16 in. (4 mm) long or 

If you have a flat tire

Your vehicle is not equipped 
with a spare tire, but instead 
is equipped with an emer-
gency tire puncture repair 
kit.
A puncture caused by a nail 
or screw passing through 
the tire tread can be 
repaired temporarily with 
the emergency tire puncture 
repair kit.

WARNING

If you have a flat tire

Do not continue driving with a flat 

tire. 

Driving even a short distance with 

a flat tire can damage the tire and 

the wheel beyond repair. Driving 

with a flat tire may cause a cir-

cumferential groove on the side 

wall. In such a case, the tire may 

explode when using the emer-

gency tire puncture repair kit, 

resulting in death or serious injury.

Before repairing the vehi-
cle

359

7-2. Steps to take in an emergency

7

Whe

n tr

ouble

 ar

ises

more

When the wheel is damaged

When 2 or more sharp objects, 

such as nails or screws, have 

passed through the tread on a sin-

gle tire

When there is more than one hole 

or cut in the damaged tire

When the sealant has expired

Towing eyelet
Screwdriver
Emergency tire puncture repair kits
Wheel nut wrench

Location of the emergency tire puncture repair kit and 
tools

A

C
D

360

7-2. Steps to take in an emergency

Sealant
Sticker
Quick reference
Compressor

Compressor

Compressor switch
Hose

Sealant

Hose
Valve

Emergency tire puncture repair 

kit

The sealant has a limited lifespan. 

The expiry date is marked on the 

bottle. The sealant should be 

replaced before the expiry date. 

Contact your Toyota dealer for 

replacement.

The sealant stored in the emer-

Emergency tire puncture repair kit components

A

C
D

A

A

361

7-2. Steps to take in an emergency

7

W

he

tro

ub

le

 ar

is

es

gency tire puncture repair kit can 

be used only once to temporarily 

repair a single tire. If the sealant 

has been used and needs to be 

purchased, contact your Toyota 

dealer. The compressor is reus-

able.

The sealant can be used when the 

outside temperature is from -22°F 

(-30°C) to 140°F (60°C).

The kit is exclusively designed for 

size and type of tires originally 

installed on your vehicle. Do not 

use it for tires that a different size 

than the original ones, or for any 

other purposes.

If the sealant gets on your clothes, 

it may stain.

If the sealant adheres to a wheel 

or the surface of the vehicle body, 

the stain may not be removable if 

it is not cleaned at once. Immedi-

ately wipe away the sealant with a 

wet cloth.

During operation of the kit, a loud 

operation noise is produced. This 

does not indicate a malfunction.

Do not use the emergency tire 

puncture repair kit to check or to 

adjust the tire pressure.

In extremely low temperatures 

-22°F to -4°F (-30°C to -20°C), the 

viscosity of the sealant increases 

and the sealant will flow more 

slowly. In such temperatures, 

bring the sealant into the vehicle 

to warm it up before use.

Note for checking the emer-

gency tire puncture repair kit

Check the sealant expiry date occa-

sionally. 

The expiry date is shown on the bot-

tle. Do not use sealant whose expiry 

date has already passed. Other-

wise, repairs conducted using the 

emergency tire puncture repair kit 

may not be performed properly.

WARNING

Caution while driving

Store the repair kit in the trunk.

Injuries may result in the event 

of an accident or sudden brak-

ing.

The repair kit is exclusively only 

for your vehicle.

Do not use repair kit on other 

vehicles, which could lead to an 

accident causing death or seri-

ous injury.

Do not use repair kit for tires 

that are different size than the 

original ones, or for any other 

purpose. If the tires have not 

been completely repaired, it 

could lead to an accident caus-

ing death or serious injury.

Precautions for use of the 

sealant

Ingesting the sealant is hazard-

ous to your health. If you ingest 

sealant, consume as much 

water as possible, then immedi-

ately consult a doctor.

If sealant gets in eyes or 

adheres to skin, immediately 

wash it off with water. If discom-

fort persists, consult a doctor.

If a person who is allergic to nat-

ural rubber comes in contact the 

sealant, allergy symptoms may 

occur.

362

7-2. Steps to take in an emergency

1

Remove the luggage mat.

2

Take out the emergency tire 
puncture repair kits. 
(

P.359)

1

Shake the sealant bottle up 
and down several times and 
loosen the hose.

2

Connect the air compressor 
hose to the valve on the bot-
tle.

The sealant may leak if the fitting is 

not tight enough.

Valve

3

Remove the valve cap from 
the valve of the punctured 
tire.

Valve
Cap

4

Connect the sealant bottle 
hose by threading it on the 
valve.

The sealant may leak if the fitting is 

not tight enough.

Taking out the emer-
gency tire puncture repair 
kits

Emergency repair method

A

A

363

7-2. Steps to take in an emergency

7

Whe

n tr

ouble

 ar

ises

5

Turn the bottle upside down 
and tilt the bottle cap into the 
bottle holder of the air com-
pressor.

6

Make sure that the air com-
pressor switch is off.

7

Connect the compressor 
power plug to the power out-
let.

The engine switch must be in ACC.

Power plug
Power outlet

8

To inject the sealant and 
inflate the tire, turn the com-
pressor switch on.

9

Adjust the air pressure to the 
appropriate level (green zone 
of the air gauge).

After the compressor starts to oper-

ate, the air pressure will temporarily 
rise to 44 psi (300 kPa, 3.0kgf/cm

2


or bar) or higher. After about 30 

seconds when all of the sealant is 

inside the tire, the air pressure will 

lower, representing the air pressure 

in the tire.

10

While filling the tire with air, 

attach the speed limit label 

A

364

7-2. Steps to take in an emergency

on the position shown in the 
illustration.

11

Turn the air compressor 

power switch off when the air 
pressure reaches the green 
zone of the air gauge.
Remove the power plug from 
the accessory power socket.

12

With the compressor switch 

off, disconnect the hose from 
the valve on the tire and then 
pull out the power plug from 
the power outlet socket.

Some sealant may leak when the 

hose is removed.

13

Install the valve cap onto the 

valve of the emergency 
repaired tire.

14

Connect the hose of the bot-

tle to the valve of the bottle in 
a circular fashion to avoid 
leakage of the remaining 
sealant.

The sealant may stain clothing.

15

Stow the kit back in the vehi-

cle and drive your vehicle 
immediately for 10 minutes or 
3 miles (5 km).

16

After driving for 10 minutes or 

3 miles (5 km), pull your vehi-

365

7-2. Steps to take in an emergency

7

W

he

tro

ub

le

 ar

is

es

cle over in a safe place and 
reconnect the compressor.

17

Turn the compressor switch 

on and wait for several sec-
onds, then turn it off. Check 
the tire inflation pressure.

18

If the air pressure is in red 

zone of the air gauge, the kit 
did not successfully seal the 
puncture. In this case, please 
stop driving and contact your 
Toyota dealer.

19

Taking precautions to avoid 

sudden braking, sudden 

acceleration and sharp turns, 
drive carefully at under 50 
mph (80 km/h) to the nearest 
Toyota dealer that is less 
than 124 miles (200 km) 
away for tire repair or 
replacement.

After a tire is repaired with the 

emergency tire puncture repair 

kit

The tire pressure warning valve 

and transmitter should be 

replaced.

Even if the tire inflation pressure is 

at the recommended level, the tire 

pressure warning light may come 

on/flash.

WARNING

Do not drive the vehicle with 

a flat tire

Do not continue driving with a flat 

tire.

Driving even a short distance with 

a flat tire can damage the tire and 

the wheel beyond repair. Driving 

with a flat tire may cause a cir-

cumferential groove on the side 

wall. In such a case, the tire may 

explode when using a repair kit.

When fixing the flat tire

Stop your vehicle in a safe and 

flat area.

Do not touch the wheels or the 

area around the brakes immedi-

ately after the vehicle has been 

driven. 

After the vehicle has been 

driven, the wheels and the area 

around the brakes may be 

extremely hot. Touching these 

areas with hands, feet or other 

body parts may result in burns.

366

7-2. Steps to take in an emergency

WARNING

Connect the valve and hose 

securely with the tire installed 

on the vehicle.

If the hose is not properly con-

nected to the valve, air leakage 

may occur or sealant may be 

sprayed out.

If the hose comes off the valve 

while inflating the tire, there is a 

risk that the hose will move 

abruptly due to air pressure.

After inflation of the tire has 

completed, the sealant may 

splatter when the hose is dis-

connected or some air is let out 

of the tire.

Follow the operation procedure 

to repair the tire. If the proce-

dure is not followed, the sealant 

may spray out.

Keep back from the tire while it 

is being repaired, as there is a 

chance of it bursting while the 

repair operation is being per-

formed. If you notice any cracks 

or deformation of the tire, turn 

off the compressor switch and 

stop the repair operation imme-

diately.

The kit may overheat if operated 

for a long period of time. Do not 

operate the compressor contin-

uously for more than 10 min-

utes.

Parts of the kit become hot 

during operation. Be careful 

handling the kit during and after 

operation. Do not touch the 

metal part around the connect-

ing area between the bottle and 

compressor. It will be extremely 

hot.

Do not attach the vehicle speed 

warning sticker to an area other 

than the one indicated. If the 

sticker is attached to an area 

where an SRS airbag is located, 

such as the pad of the steering 

wheel, it may prevent the SRS 

airbag from operating properly.

Driving to spread the liquid 

sealant evenly

Observe the following precautions 

to reduce the risk of accidents.

Failing to do so may result in a 

loss of vehicle control and cause 

death or serious injury.

Drive the vehicle carefully at a 

low speed. Be especially careful 

when turning and cornering.

If the vehicle does not drive 

straight or you feel a pull 

through the steering wheel, stop 

the vehicle and check the tire. 

The tire may have separated 

from the wheel.

NOTICE

When performing an emer-

gency repair

Perform the emergency repair 

without removing the nail or 

screw that has punctured the 

tread of the tire. If the object 

that has punctured the tire is 

removed, repair by the emer-

gency tire puncture repair kit 

may not be possible.

The kit is not waterproof. Make 

sure that the kit is not exposed 

to water, such as when it is 

being used in the rain.

Do not put the kit directly onto 

dusty ground such as sand at 

the side of the road. If the kit 

vacuums up dust etc., a mal-

function may occur.


Content      ..     20      21      22      23     ..