Toyota Corolla Hatchback (2020 year). Manual in english - part 7
386
6-1. Using the air conditioning system and defogger
COROLLA H/B_U
6-1.Using the air conditioning system and defogger
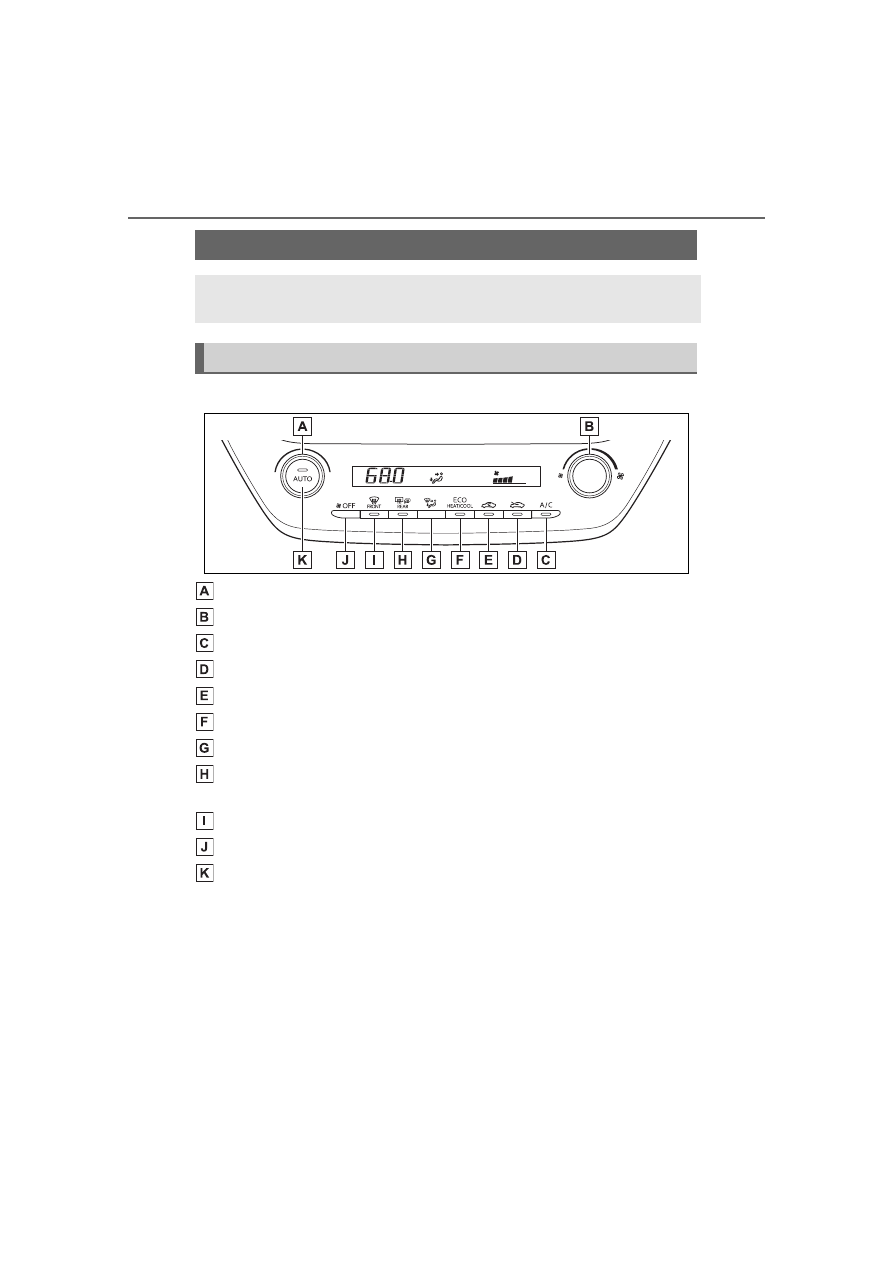
Vehicles without DUAL mode air conditioning system
Temperature control switch
Fan speed control switch
“A/C” switch
Outside air mode switch
Recirculated air mode switch
Eco air conditioning mode switch
Airflow mode control switch
Rear window defogger and outside rear view mirror defoggers
switch
Windshield defogger switch
Off switch
Automatic mode switch
Automatic air conditioning system
Air outlets are automatically selected and fan speed is auto-
matically adjusted according to the set temperature setting.
Air conditioning controls