Toyota Tundra. Manual - part 906
 

  Index      Toyota     Toyota Tundra (2007-2010 year) - Service and Repair Manual


Search            copyright infringement  


Content   ..  904  905  906  907   ..


Toyota Tundra. Manual - part 906


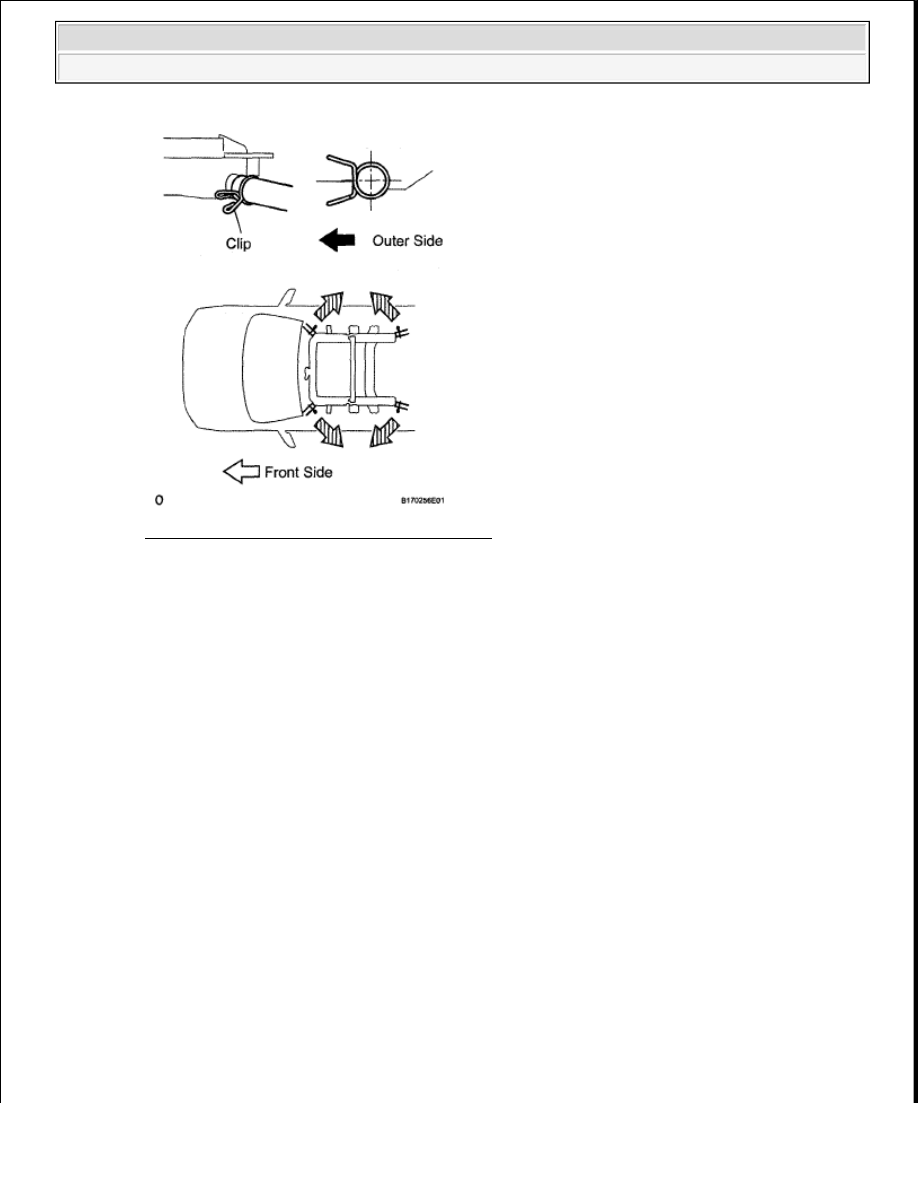
Fig. 43: Identifying Sliding Roof Drain Hoses 
Courtesy of TOYOTA MOTOR SALES, U.S.A., INC. 

2. INSTALL SLIDING ROOF WEATHERSTRIP 

a. Install the sliding roof weatherstrip as described below. 

1. Attach each comer of the weatherstrip so that each weatherstrip mark is aligned with the 

sliding roof glass' center mark. After attaching the entire weatherstrip, check that all 
weatherstrip marks are within the sliding roof glass' end marks.  

2. Make sure the weatherstrip's cutout is toward the rear side of the vehicle and centered.  

3. Make sure the weatherstrip is securely installed as shown in the illustration.  


2009 Toyota Tundra 

2009 ACCESSORIES AND EQUIPMENT Sliding Roof - Tundra


Fig. 44: Identifying Sliding Roof Weatherstrip 
Courtesy of TOYOTA MOTOR SALES, U.S.A., INC. 

3. INSTALL SLIDING ROOF GLASS SUB-ASSEMBLY 

a. Using a T25 "TORX" driver, temporarily install the glass with the 4 screws. 

Fig. 45: Identifying Sliding Roof Glass Sub-Assembly With Screws 
Courtesy of TOYOTA MOTOR SALES, U.S.A., INC. 

b. Perform a level check. 


2009 Toyota Tundra 

2009 ACCESSORIES AND EQUIPMENT Sliding Roof - Tundra


Fig. 46: Checking Level Of Sliding Roof Glass 
Courtesy of TOYOTA MOTOR SALES, U.S.A., INC. 

1. Check the difference in the level between the roof panel and the upper surface of the 

weatherstrip labeled "a" when the sliding roof glass is fully closed. 

Standard  

SLIDING ROOF GLASS 

HINT: 

"+" represents the condition that the glass is above the panel level. "-" represents the 
condition that the glass is below the panel level. 

2. Perform a gap check. 

Check the gap between the roof panel and roof glass. 

c. Tighten the 4 screws. 

Torque: 4.0 N*m (41 kgf*cm, 35 in.*lbf)  

Area

Measurement

A-A

0+/-1.5mm(0+/-0.0591 in.)

B-B
C-C

D-D

NOTE:

The gap must be even all around.


2009 Toyota Tundra 

2009 ACCESSORIES AND EQUIPMENT Sliding Roof - Tundra


Fig. 47: Identifying Sliding Roof Glass Screws 
Courtesy of TOYOTA MOTOR SALES, U.S.A., INC. 

4. CHECK FOR WATER LEAK 

a. After adjusting the sliding roof glass sub-assembly, check for water leak.  

b. If there are any leaks, readjust the sliding roof glass sub-assembly.  

5. INSTALL SLIDING ROOF SIDE GARNISH LH 

a. Attach the 5 claws to install the sliding roof side garnish.  

Fig. 48: Identifying Sliding Roof Side Garnish Claws 
Courtesy of TOYOTA MOTOR SALES, U.S.A., INC. 

6. INSTALL SLIDING ROOF SIDE GARNISH RH 

HINT: 

Use the same procedures described for the LH side. 

7. INSTALL CURTAIN SHIELD AIRBAG ASSEMBLY LH 

a. Install the curtain shield airbag (see INSTALLATION ).  

8. INSTALL CURTAIN SHIELD AIRBAG ASSEMBLY RH 

HINT: 

Use the same procedures described for the LH side. 


2009 Toyota Tundra 

2009 ACCESSORIES AND EQUIPMENT Sliding Roof - Tundra


Content   ..  904  905  906  907   ..