Toyota Tundra. Manual - part 870


  Index      Toyota     Toyota Tundra (2007-2010 year) - Service and Repair Manual


Search            copyright infringement  


Content   ..  868  869  870  871   ..


Toyota Tundra. Manual - part 870


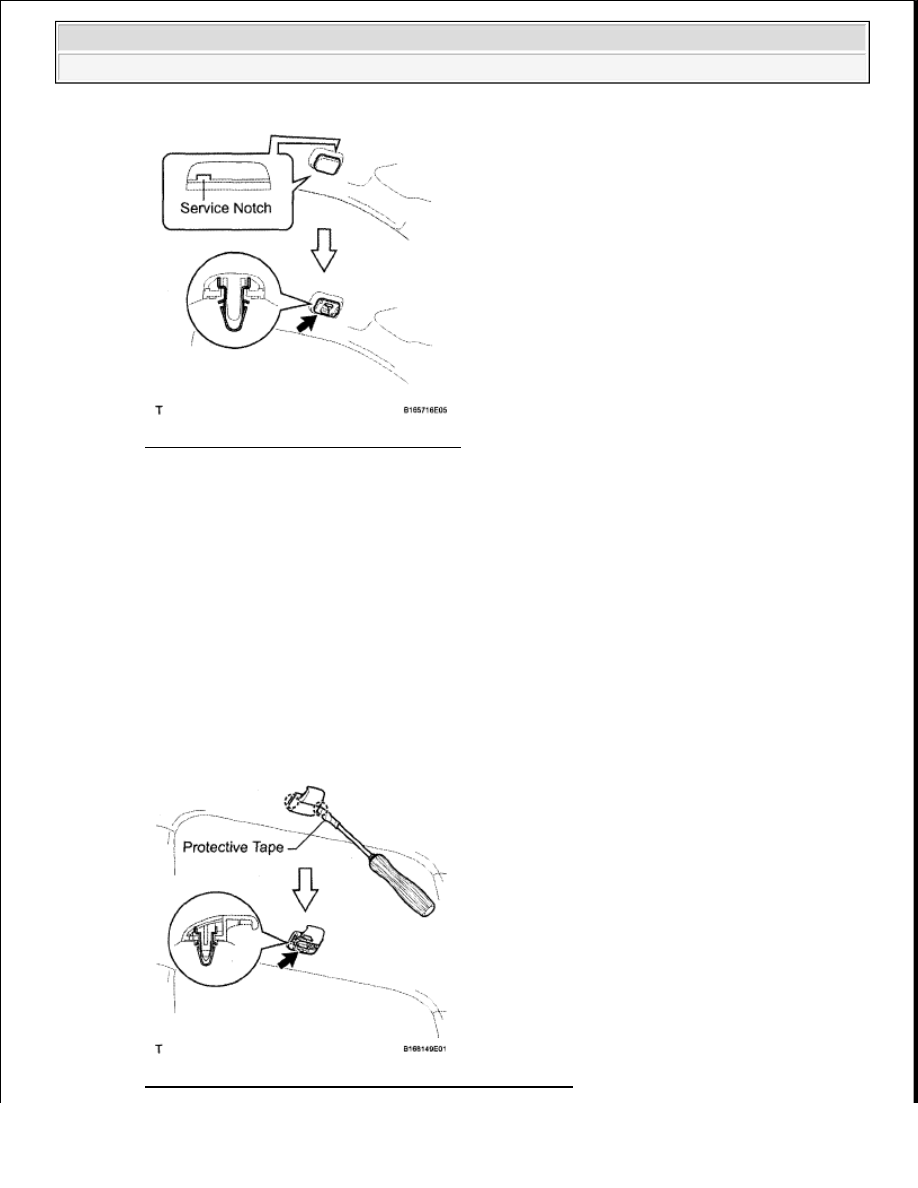
Fig. 29: Identifying Assist Grip Plug Clip 
Courtesy of TOYOTA MOTOR SALES, U.S.A., INC. 

37. REMOVE COAT HOOK 

HINT: 

Use the same procedure to remove the coat hook on the other side. 

a. Using a screwdriver, detach the 2 claws and remove the coat hook cap. 

HINT: 

Tape the screwdriver tip before use. 

b. Detach the clip and remove the coat hook. 

Fig. 30: Identifying Claws And Remove Coat Hook Cap 


2009 Toyota Tundra 

2009 ACCESSORIES AND EQUIPMENT Interior - Tundra


Courtesy of TOYOTA MOTOR SALES, U.S.A., INC. 

38. REMOVE ROOF HEADLINING ASSEMBLY 

a. w/ EC Mirror: 

1. Detach the 2 claws and remove the inner rear view mirror cover. 

Fig. 31: Identifying Claws And Inner Rear View Mirror Cover 
Courtesy of TOYOTA MOTOR SALES, U.S.A., INC. 

2. Disconnect the EC mirror connector. 

Fig. 32: Locating EC Mirror Connector 
Courtesy of TOYOTA MOTOR SALES, U.S.A., INC. 

b. Disconnect the roof wire connector and detach each clamp from the front pillar. 

Fig. 33: Locating Roof Headlining Wire Connector And Clamps 


2009 Toyota Tundra 

2009 ACCESSORIES AND EQUIPMENT Interior - Tundra


Courtesy of TOYOTA MOTOR SALES, U.S.A., INC. 

c. Detach the 4 clips and remove the roof headlining. 

Fig. 34: Identifying Roof Headlining Clips 
Courtesy of TOYOTA MOTOR SALES, U.S.A., INC. 

39. REMOVE REAR ROOF DRIP SIDE FINISH MOULDING LH (See REMOVAL )  

40. REMOVE REAR ROOF DRIP SIDE FINISH MOULDING RH 

HINT: 

Use the same procedures described for the LH side. 

41. REMOVE BACK WINDOW ASSEMBLY (See REMOVAL )  

42. CLEAN BACK WINDOW ASSEMBLY (See REMOVAL )  

43. CLEAN VEHICLE BODY (See REMOVAL )  

44. TAKE OUT ROOF HEADLINING ASSEMBLY 

a. Take out the roof headlining from the cabin as shown in the illustration. 

NOTE:

Place the removed headlining in the cabin so that it will not be 
damaged.

NOTE:

Be careful not to damage the roof headlining when taking it out.


2009 Toyota Tundra 

2009 ACCESSORIES AND EQUIPMENT Interior - Tundra


Fig. 35: Removal/Installation Of Roof Headlining Assembly 
Courtesy of TOYOTA MOTOR SALES, U.S.A., INC. 

INSTALLATION 

HINT: 

A bolt without a torque specification is shown in the standard bolt chart (see SPECIFIED TORQUE FOR 
STANDARD BOLTS
 ). 

1. PLACE ROOF HEADLINING ASSEMBLY 

a. Place the roof headlining into the cabin as shown in the illustration. 

Fig. 36: Removal/Installation Of Roof Headlining Assembly 
Courtesy of TOYOTA MOTOR SALES, U.S.A., INC. 

2. INSTALL BACK WINDOW ASSEMBLY (See INSTALLATION )  

3. CHECK FOR LEAKS AND REPAIR (See INSTALLATION )  

4. INSTALL REAR ROOF DRIP SIDE FINISH MOULDING LH (See INSTALLATION )  

5. INSTALL REAR ROOF DRIP SIDE FINISH MOULDING RH 

HINT: 

Use the same procedures described for the LH side. 

6. INSTALL ROOF HEADLINING ASSEMBLY 

a. Attach the 4 clips to install the headlining. 

NOTE:

Place the headlining in the cabin so that it will not be damaged.  

Be careful not to damage the roof headlining when placing it in 
the cabin.  


2009 Toyota Tundra 

2009 ACCESSORIES AND EQUIPMENT Interior - Tundra


Content   ..  868  869  870  871   ..