Toyota Tundra. Manual - part 2916


  Index      Toyota     Toyota Tundra (2007-2010 year) - Service and Repair Manual


Search            copyright infringement  


Content   ..  2914  2915  2916  2917   ..


Toyota Tundra. Manual - part 2916
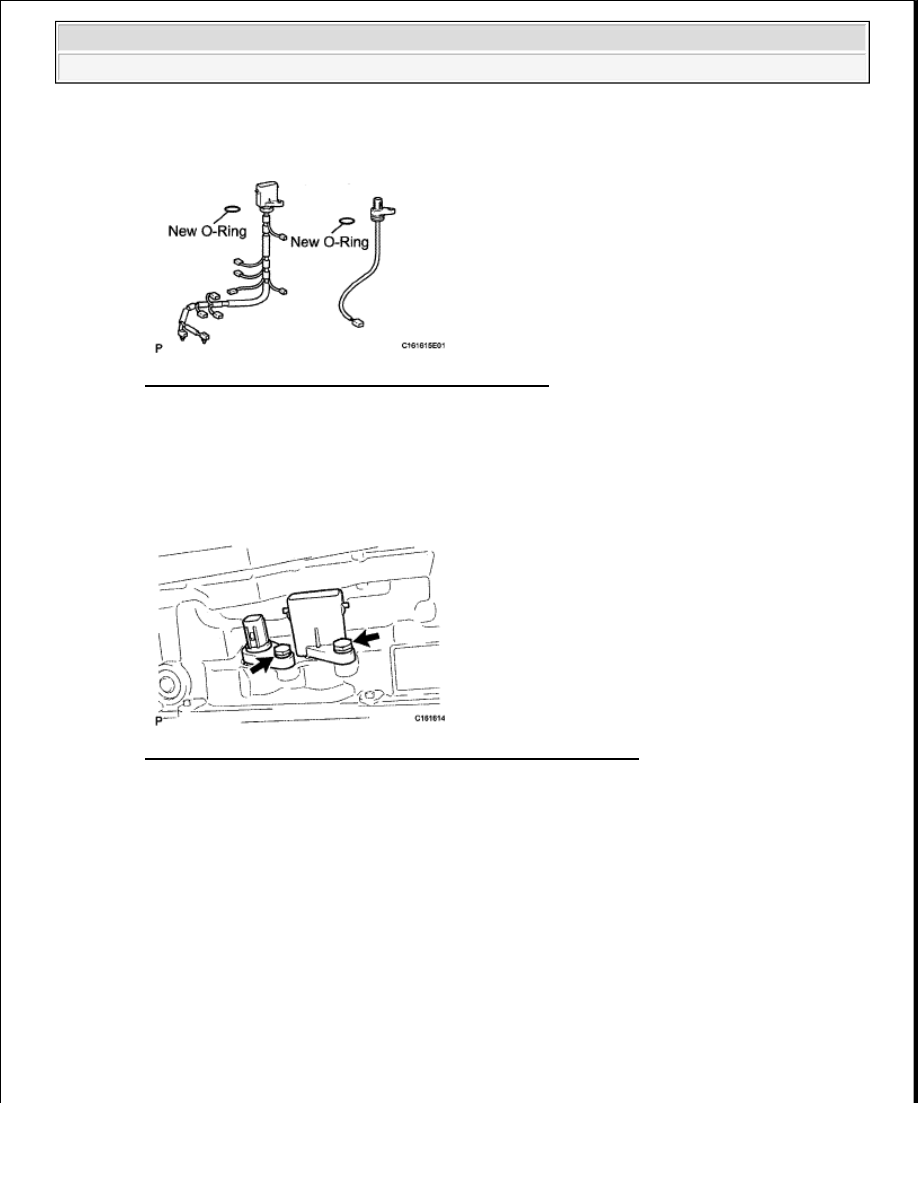


a. Install 2 new O-rings to the transmission wires. 

Fig. 626: Identifying Transmission Wires & O-Rings 
Courtesy of TOYOTA MOTOR SALES, U.S.A., INC. 

b. Install the transmission wire harnesses.  

c. Install the bolts. 

Torque: 5.4 N*m (55 kgf*cm, 48 in.*lbf)  

Fig. 627: Locating No. 1 & No. 2 Transmission Wires With Bolts 
Courtesy of TOYOTA MOTOR SALES, U.S.A., INC. 

d. Connect the 9 connectors to the solenoid valves.  

e. Connect the 2 ATF temperature sensors with the 2 clamps and 2 bolts. 

Torque: for bolt A  

10 N*m (102 kgf*cm, 7 ft.*lbf)  

for bolt B  

11 N*m (112 kgf*cm, 8 ft.*lbf)  

HINT: 

Each bolt length is indicated below. 


2009 Toyota Tundra 

2009 TRANSMISSION AB60F Automatic Transaxle - Tundra


12 mm (0.472 in.) for bolt A 

36 mm (1.42 in.) for bolt B 

Fig. 628: Locating Solenoid Valves & Connectors 
Courtesy of TOYOTA MOTOR SALES, U.S.A., INC. 

69. INSTALL VALVE BODY OIL STRAINER ASSEMBLY 

a. Coat a new O-ring with ATF, and install it to the oil strainer.  

b. Install the oil strainer with the 4 bolts. 

Torque: 10 N*m (102 kgf*cm, 7 ft.*lbf)  

Fig. 629: Identifying Valve Body Oil Strainer Bolts 
Courtesy of TOYOTA MOTOR SALES, U.S.A., INC. 

70. INSTALL AUTOMATIC TRANSMISSION OIL PAN SUB-ASSEMBLY 

a. Install the 4 magnets. 


2009 Toyota Tundra 

2009 TRANSMISSION AB60F Automatic Transaxle - Tundra


Fig. 630: Identifying Transmission Oil Cleaner Magnets 
Courtesy of TOYOTA MOTOR SALES, U.S.A., INC. 

b. Install a new gasket on the oil pan.  

c. Install the 12 bolts. 

Torque: 7.4 N*m (75 kgf*cm, 65 in.*lbf)  

d. Install the drain plug. 

Torque: 20 N*m (204 kgf*cm, 15 ft.*lbf)  

Fig. 631: Identifying Correct & Incorrect Position Of Gasket Installation 
Courtesy of TOYOTA MOTOR SALES, U.S.A., INC. 

71. INSTALL TRANSFER CASE ADAPTER RADIAL BALL BEARING 

NOTE:

Make sure that there is no oil or foreign matter on the gasket 
seal surface and oil pan contact surface.  

Install the gasket so that there is no slack in the gasket, and 
make sure the seal surface's entire circumference is level.  

Make sure that the 9 gasket drop prevention protrusions are set 
on the oil pan.  

When tightening the oil pan, make sure that the gasket is not 
pinched between the gasket tightening area's sleeve and the 
transmission's seal surface.  


2009 Toyota Tundra 

2009 TRANSMISSION AB60F Automatic Transaxle - Tundra


a. Using SST and a press, press in the bearing. 

SST 09950-60010 (09951-00650), 09950-70010 (09951-07150)  

Fig. 632: Identifying SST For Pressing Bearing 
Courtesy of TOYOTA MOTOR SALES, U.S.A., INC. 

b. Using a screwdriver, install the snap ring.  

72. INSTALL TRANSMISSION CASE ADAPTOR OIL SEAL 

a. Coat the lip of a new oil seal with ATF.  

b. Using SST and a hammer, tap in the oil seal. 

Standard depth:  

0 to 0.1 mm (0 to 0.00394 in.)  

SST 09950-60010 (09951-00650), 09950-70010 (09951-07150)  

Fig. 633: Identifying Transmission Case Adaptor Oil Seal Using SST 
Courtesy of TOYOTA MOTOR SALES, U.S.A., INC. 

73. INSTALL REAR ADAPTOR TRANSFER 

a. Clean the threads of the bolts and case with non-residue solvent.  

b. Apply seal packing to the rear adaptor transfer. 


2009 Toyota Tundra 

2009 TRANSMISSION AB60F Automatic Transaxle - Tundra


Content   ..  2914  2915  2916  2917   ..