Toyota Tundra. Manual - part 1749


  Index      Toyota     Toyota Tundra (2007-2010 year) - Service and Repair Manual


Search            copyright infringement  


Content   ..  1747  1748  1749  1750   ..


Toyota Tundra. Manual - part 1749


e

Disconnect the vent line hose  

1

Pinch the retainer and then raise it  

f

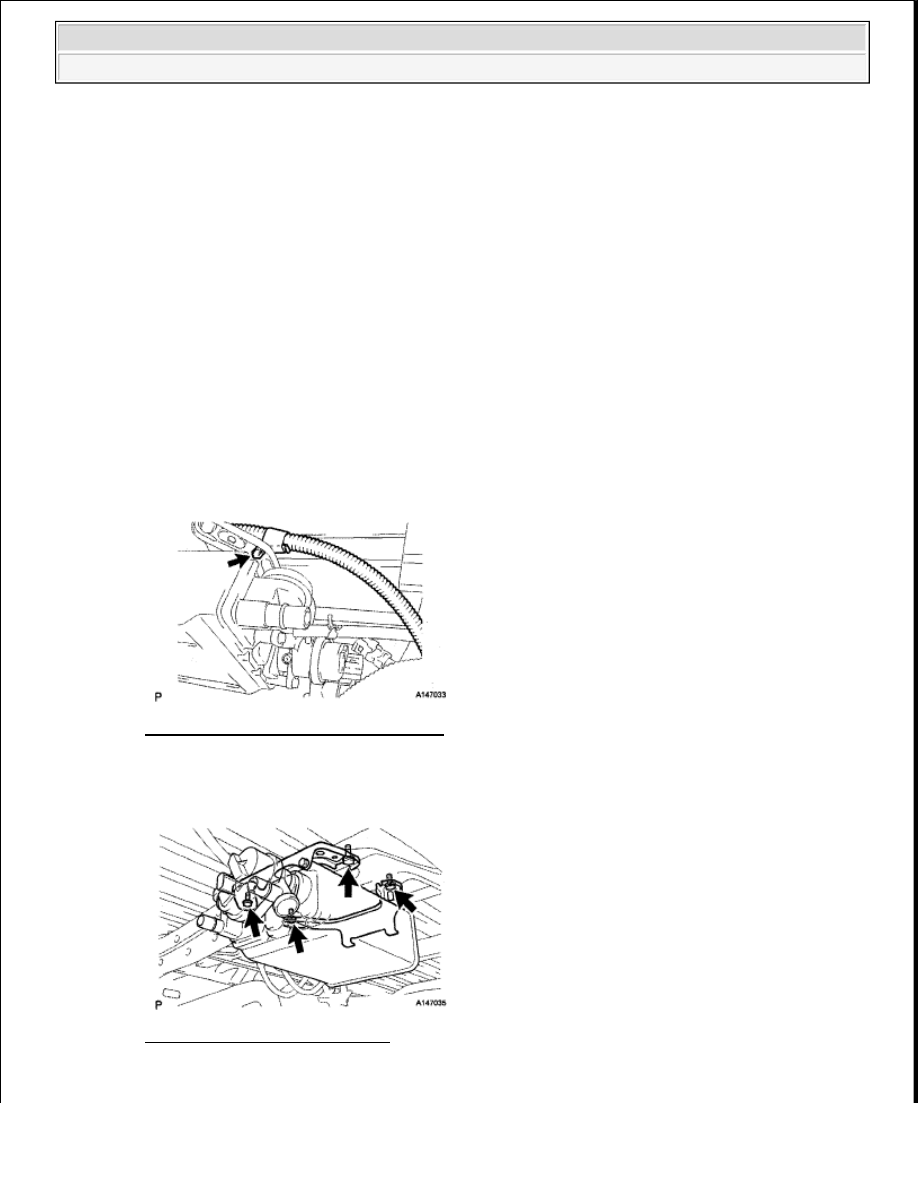
Disconnect the wire harness clamp  

Fig. 80: Locating Wire Harness Clamp 
Courtesy of TOYOTA MOTOR SALES, U.S.A., INC. 

g

Remove the 4 bolts and canister  

Fig. 81: Locating Canister Bolts 
Courtesy of TOYOTA MOTOR SALES, U.S.A., INC. 

NOTE:

Do not use any tools in this procedure.  

Check for any dirt and foreign matter contamination in the 
canister and around the hose. Clean if necessary. Foreign 
matter may damage the O-rings or cause leaks in the seal 
between the canister and hose.  

NOTE:

Do not use any tools in this procedure.  

Check for any dirt and foreign matter contamination in the 
valve and around the connector. Clean if necessary. 
Foreign matter may damage the O-rings or cause leaks in 
the seal between the valve and connector.  


2009 Toyota Tundra 

2009 ENG NE Emission Control (3UR-FBE) - Tundra


INSPECTION 

1

INSPECT CANISTER ASSEMBLY 

a

Visually check the canister for cracks or damage  If cracks or damage are found, replace the 
canister assembly  

Fig. 82: Locating Canister Assembly 
Courtesy of TOYOTA MOTOR SALES, U.S.A., INC. 

b

Check for the canister operation  

1

With the purge port closed, blow 2 kPa (20 gf/cm

2

 , 0 3 psi) of air into the vent port, and 

check that air flows from the air inlet port  If the result is not as specified, replace the canister 
assembly  

Fig. 83: Identifying Purge Port And Vent Port 
Courtesy of TOYOTA MOTOR SALES, U.S.A., INC. 

2

With the vent port closed, blow 1 kPa (10 gf/cm

2

 , 0 2 psi) of air inlet port, and check that air 

flows from the purge port  If the result is not as specified, replace the canister assembly  


2009 Toyota Tundra 

2009 ENG NE Emission Control (3UR-FBE) - Tundra


Fig. 84: Identifying Air Inlet Port, Purge Port And Vent Port 
Courtesy of TOYOTA MOTOR SALES, U.S.A., INC. 

c

Check for air leak  

1

Remove the air hose between ports A and B  

Fig. 85: Checking Air Hose Between Ports A And B 
Courtesy of TOYOTA MOTOR SALES, U.S.A., INC. 

2

Connect the pressure gauge to the vent port of the canister   

3

With port B, purge port and the air inlet port closed and port A open, apply 20 kPa (0 2 
kgf/cm

2

 , 2 9 psi) of pressurized air into the vent port, then confirm that pressure is retained 

for 1 minute  

If the result is not as specified, replace the canister assembly  


2009 Toyota Tundra 

2009 ENG NE Emission Control (3UR-FBE) - Tundra


d

Check the leak detection pump  

1

Remove the detection pump from the canister   

2

Check that air flows from port A to B and then to C  

If the result is not as specified, replace the canister assembly  

Fig. 86: Checking Air Flows From Port A To B And C 
Courtesy of TOYOTA MOTOR SALES, U.S.A., INC. 

3

Connect the positive (+) lead of the battery to terminal 7 and the negative (-) lead to terminal 
6  

Fig. 87: Connecting Positive Lead Of Battery Terminal 7 And Negative Lead To 
Terminal 6
 
Courtesy of TOYOTA MOTOR SALES, U.S.A., INC. 

4

Check that the valve is closed  

If the result is not as specified, replace the canister assembly  

5

Install the detection pump   

INSTALLATION 

1

INSTALL CANISTER ASSEMBLY 

a

Install the canister with the 4 bolts  


2009 Toyota Tundra 

2009 ENG NE Emission Control (3UR-FBE) - Tundra


Content   ..  1747  1748  1749  1750   ..