Subaru Solterra (2023 year). Manual in english - page 7
112
2-2. Charging
nate.
2
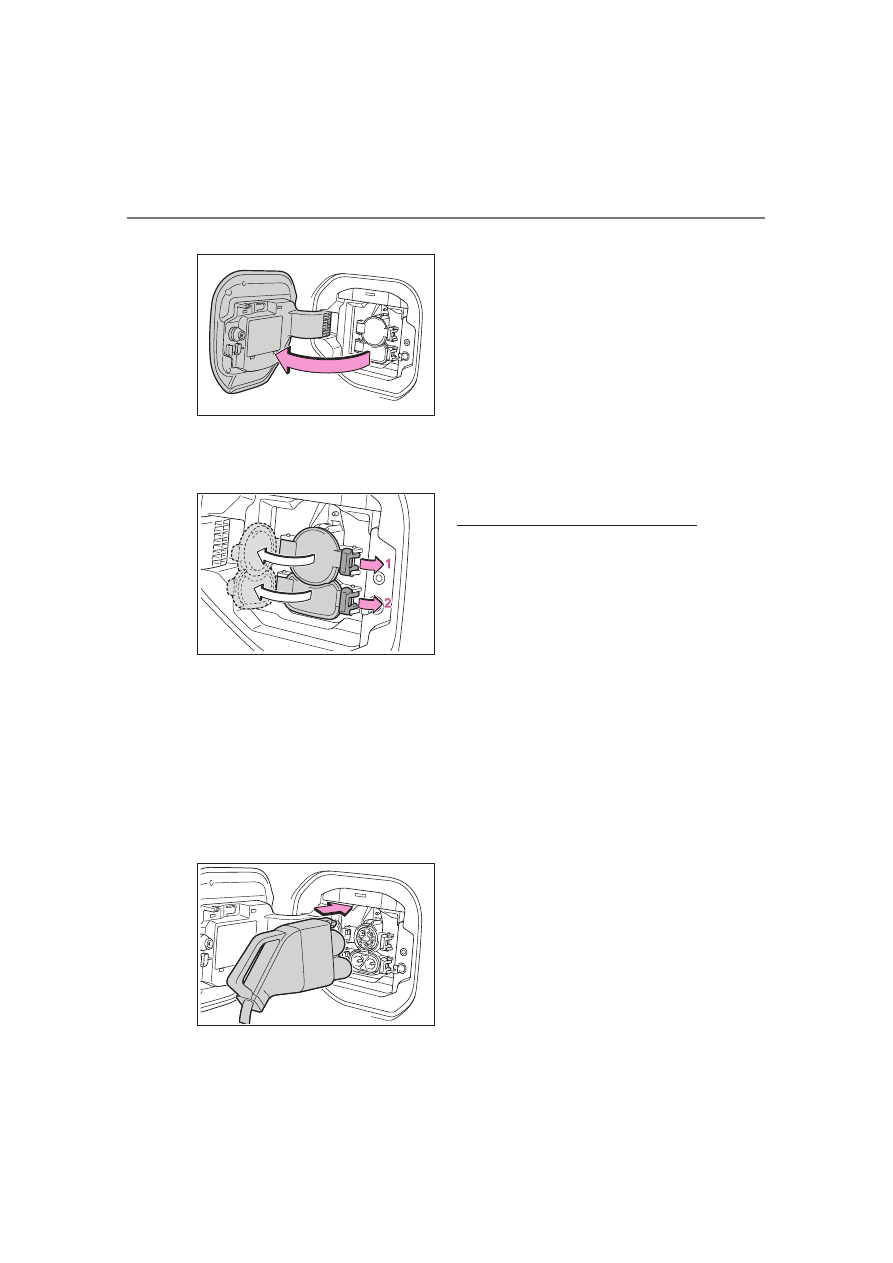
Open the AC charging inlet
cap, and then open the DC
charging inlet cap.
3
Insert DC charging connector
firmly and fully into the
charging inlet.
Insert the DC charging connector
and it will lock automatically.
The DC charging connector shape
and treatment will differ depending
on the type of DC charger. Perform
the operations in accordance to
handling procedures of the DC
charger.
4
Operate the DC charger and
start the charging.
Follow the handling procedures of
the DC charger to start charging.
Charging starts after a system
check is done.
5
Confirm that the charging
indicator on the charging port
lights up.
When the charging indicator is not
lit, charging has not started.
Stop the charging in accordance to
the handling procedures of the DC
charger when it is desired to inter-
rupt the DC charging.
■
Charging time may increase
when
P.102
■
When the DC charging connec-
tor cannot be inserted into the
DC charging inlet
P.93
■
If a message indicating vehicle
error on the DC charger side is
displayed
Even if a message indicating vehicle
error on the DC charger side (ex.
vehicle error found, vehicle error
occurred, etc.) is displayed, there is
no vehicle fault but possibly a com-
munication error between the DC
charger and vehicle. In this case,
there may be terminal damage (bad
contact) in the DC charging connec-
tor. If there is no error with the vehi-
cle, contact the facility manager of
the DC charger.
■
During DC charging
●
The current charging condition
can be checked on the multi-infor-
mation display.
●
The actual charging time may dif-
fer from that displayed on the DC
charger during charging.
●
There may be occasions the radio