Subaru Outback (2019 year). Instruction - part 12
(186,1)
北米Model "A2550BE-A" EDITED: 2018/ 5/ 9
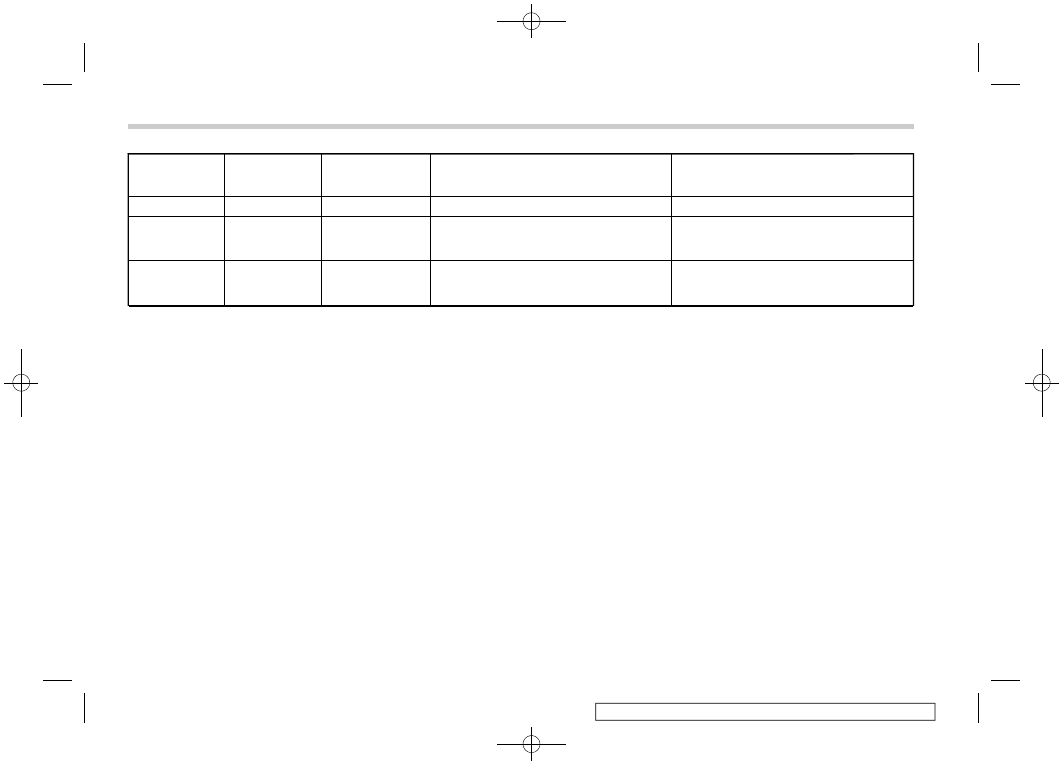
Inside warning
chime
Outside warning
chime
Operation indica-
tor on push-button
ignition switch
Status
Action
Ding
—
—
The battery of the access key fob is low.
Replace the battery of the access key.
Ding
—
Flashes in green
(15 seconds max.)
Steering lock warning:
The engine start procedure is performed, but
the steering is still locked.
While turning the steering wheel right and left
lightly, depress the brake pedal and press the
push-button ignition switch.
Ding
—
Flashes in orange
System malfunction warning:
A malfunction is detected in the power
system or steering lock.
Contact a SUBARU dealer immediately and
have the vehicle inspected.
Instruments and controls/Warning and indicator lights
3-28