Subaru Legacy III (2000-2003 year). Manual - part 443


  Index      Subaru     Subaru Legacy III - service repair manual 2000-2003 year


Search            


Content   ..  441  442  443  444   ..


Subaru Legacy III (2000-2003 year). Manual - part 443


CO(H4DOSTC)-26

COOLING

RADIATOR

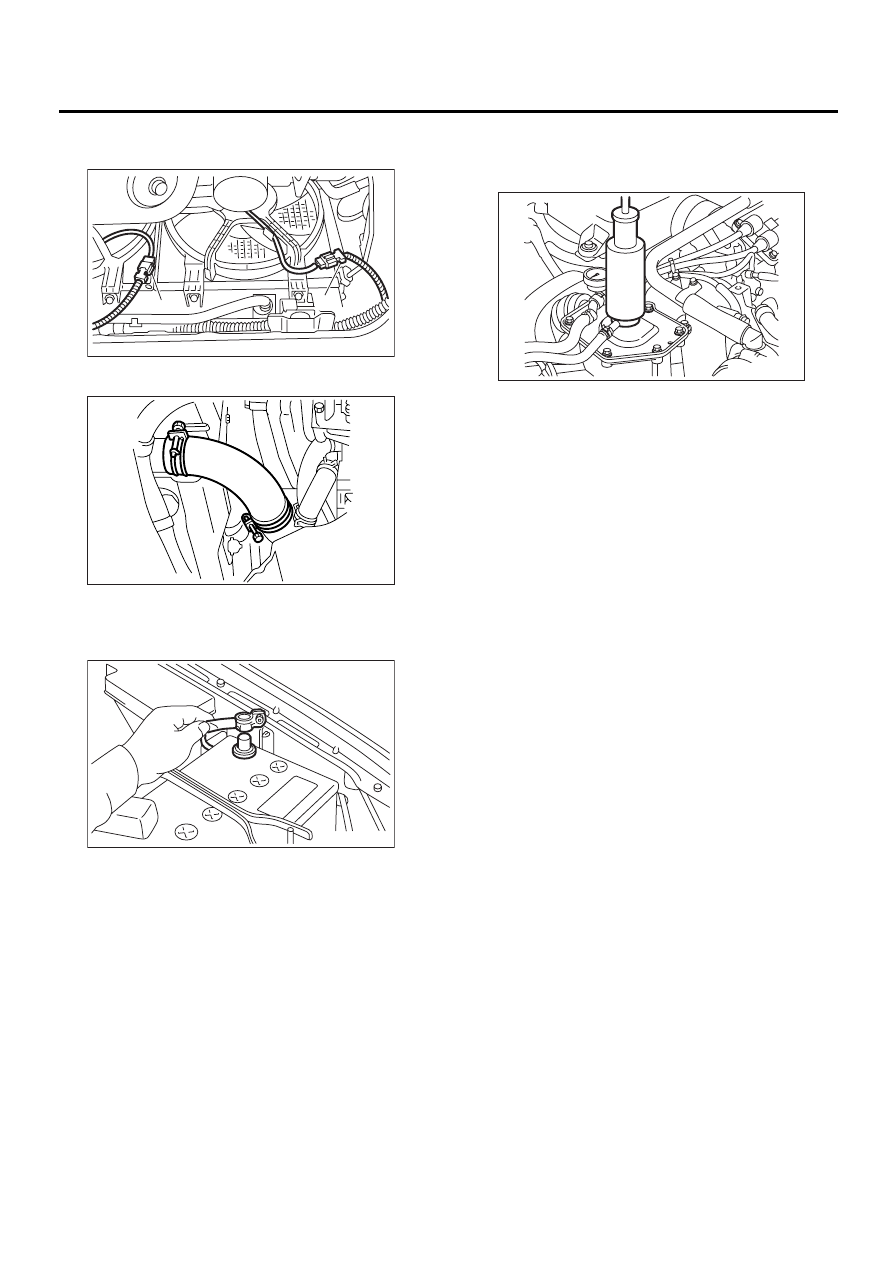
11) Connect connectors to radiator main fan motor
(A) and sub fan motor (B).

12) Connect radiator outlet hose.

13) Install under cover.
14) Lower the vehicle.
15) Connect battery ground cable.

16) Fill coolant. <Ref. to CO(H4DOSTC)-15, FILL-
ING OF ENGINE COOLANT, REPLACEMENT,
Engine Coolant.>
17) Check ATF level. <Ref. to AT-30, REPLACE-
MENT, Automatic Transmission Fluid.>

C: INSPECTION

1) Remove radiator cap, top off radiator, and attach
tester to radiator in place of cap.

2) Apply a pressure of 157 kPa (1.6 kg/cm

2

, 23 psi)

to radiator to check if:

(1) Engine coolant leaks at/around radiator.
(2) Engine coolant leaks at/around hoses or
connections.

NOTE:
• Engine should be off.
• Wipe engine coolant from check points in ad-
vance.
• Be careful to prevent engine coolant from spurt-
ing out when removing tester.
• Be careful also not to deform filler neck of radia-
tor when installing or removing tester.

( A )

( B )

CO-00084

CO-00153

FU-00009

CO-00159

CO(H4DOSTC)-27

COOLING

RADIATOR CAP

8. Radiator Cap

A: INSPECTION

1) Attach radiator cap to tester.

2) Increase pressure until tester gauge pointer
stops. Radiator cap is functioning properly if it holds
the service limit pressure for five to six seconds.

Standard pressure:

93 — 123 kPa (0.95 — 1.25 kg/cm

2

, 14 — 18 

psi)

Service limit pressure:

83 kPa (0.85 kg/cm

2

, 12 psi)

CAUTION:
Be sure to remove foreign matter and rust from 
the cap in advance. Otherwise, results of pres-
sure test will be incorrect.

CO-00044

CO(H4DOSTC)-28

COOLING

RADIATOR MAIN FAN AND FAN MOTOR

9. Radiator Main Fan and Fan 

Motor

A: REMOVAL

1) Disconnect battery ground cable.

2) Lift-up the vehicle.
3) Remove under cover.
4) Disconnect connector of main fan motor.

5) Lower the vehicle.
6) Remove air intake duct.

7) Disconnect overflow hose.

8) Remove reservoir tank.

9) Remove radiator main fan motor assembly.

B: INSTALLATION

Install in the reverse order of removal.

NOTE:
When the main fan motor assembly cannot be in-
stalled as is, loosen the sub fan motor assembly
securing bolts to install it.

Tightening torque:

4.9 N·m (0.50 kgf-m, 3.6 ft-lb)

FU-00009

CO-00095

CO-00156

CO-00086

CO-00087

CO-00096

CO-00096

CO-00087

CO(H4DOSTC)-29

COOLING

RADIATOR MAIN FAN AND FAN MOTOR

C: DISASSEMBLY

1) Remove clip which holds motor connector onto
shroud.

2) Remove nut which holds fan itself onto fan motor
and shroud assembly.

3) Remove bolts which install fan motor onto
shroud.

D: ASSEMBLY

Assemble in the reverse order of disassembly.

Tightening torque:

4.4 N·m (0.45 kgf-m, 3.3 ft-lb)

Tightening torque:

3.4 N·m (0.35 kgf-m, 2.5 ft-lb)

E: INSPECTION

1) Connect battery positive (+) terminal to terminal
No. 2, and negative (

) terminal to terminal No. 1 of

main fan motor connector.
2) Make sure the main fan motor operates properly.
Replace it if it doesn't.

CO-00046

CO-00097

CO-00098

CO-00098

CO-00097

CO-00099

1 2

F17

To


Content   ..  441  442  443  444   ..