Subaru Impreza 3 / Impreza WRX / Impreza WRX STI. Manual - part 753
 

  Index      Subaru     Subaru Impreza 3 / Impreza WRX / Impreza WRX STI - service repair manual 2008-2014 year


Search            


Content   ..  751  752  753  754   ..


Subaru Impreza 3 / Impreza WRX / Impreza WRX STI. Manual - part 753


EB-23

Rear Door

EXTERIOR BODY PANELS

B: INSTALLATION

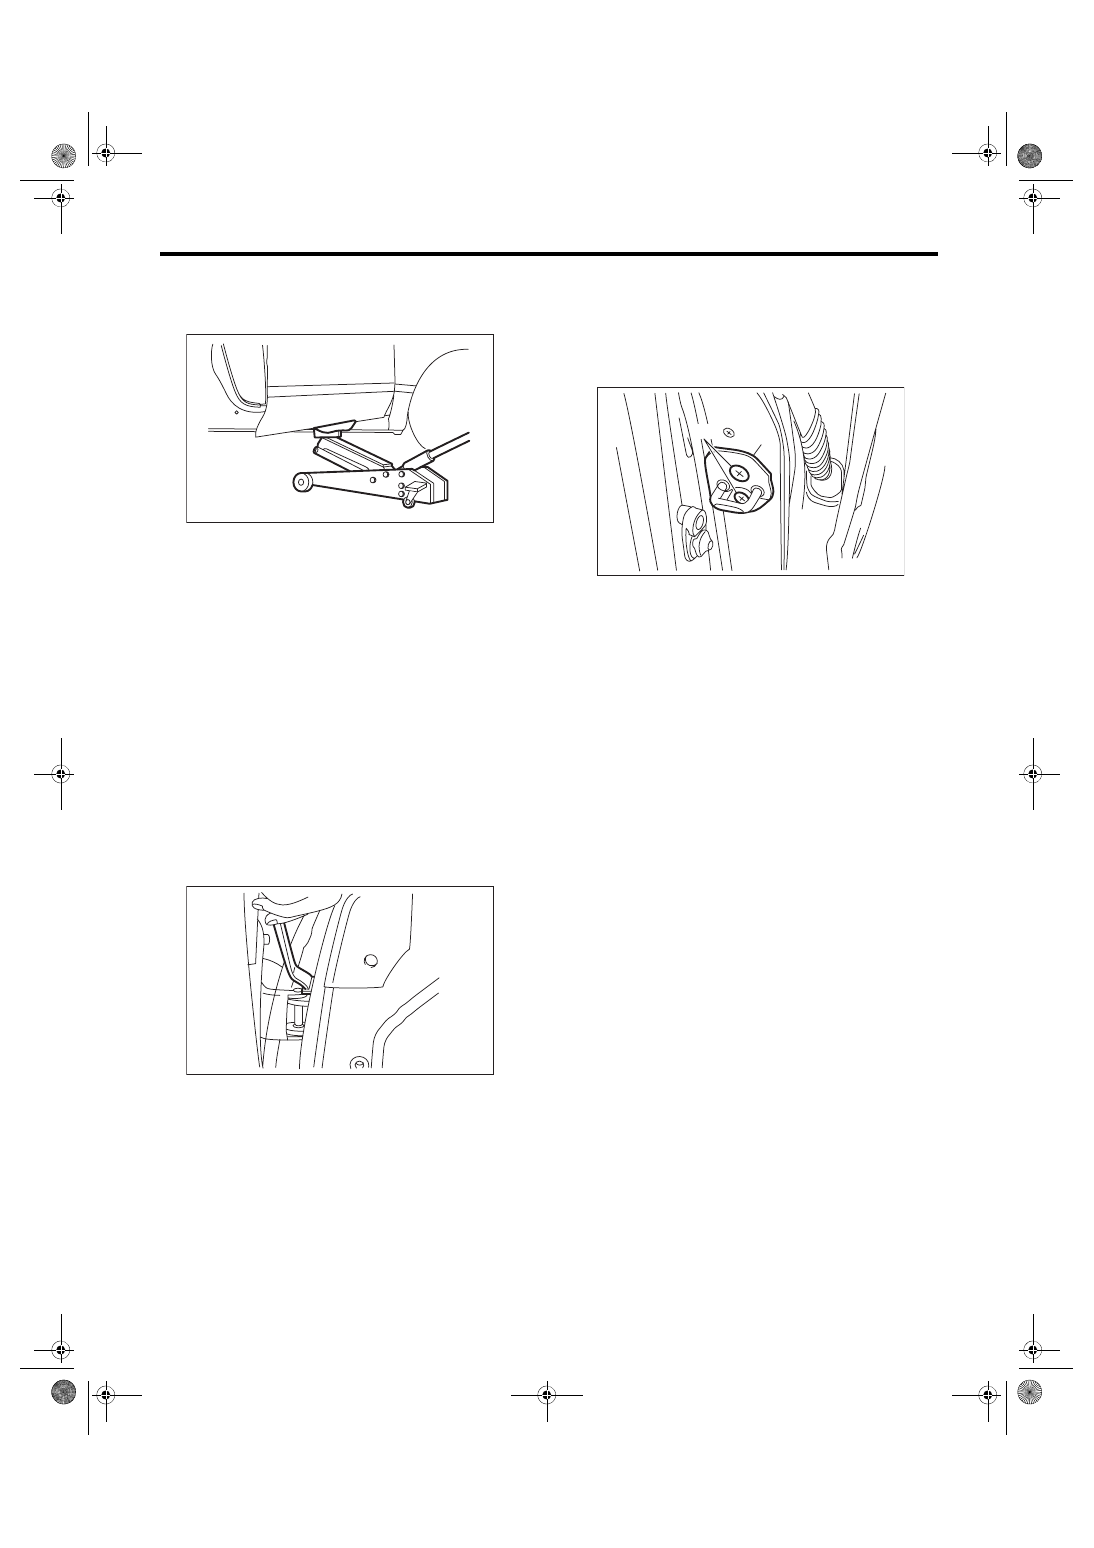
1) Put a wooden block on jack and place the rear

door on that.

2) Apply grease to the moving part of door hinges.

3) Install  the  rear  door  to  upper  hinge  and  lower

hinge adjusting by jack.

4) Tighten bolt of door checker.

5) Connect door harness connector.
Tightening torque:

Refer to “COMPONENT” of “General Descrip-

tion”. <Ref. to EB-11, REAR DOOR, COMPO-

NENT, General Description.>

6) Install while paying attention to make a uniform

clearance around the rear door panel. For the di-

mension of clearance, refer to “SPECIFICATION”

in “General Description”. <Ref. to EB-2, SPECIFI-

CATION, General Description.>

C: ADJUSTMENT

1) Open the rear door, loosen the door-side bolts of

upper and lower hinges to align the position for ver-

tical and horizontal direction of rear door panel.

2) Loosen the screw (A) and tap striker (B) using

plastic hammer to adjust the gap between rear end

surface of rear door panel and body surface.
CAUTION:

Do not use an impact wrench. Welding area on

the striker nut plate is easily broken.

EB-00013

EB-00015

EB-00017

(B)

(A)

EB-24

Rear Sealing Cover

EXTERIOR BODY PANELS

8. Rear Sealing Cover

A: REMOVAL

1) Disconnect the ground cable from battery.

2) Remove  the  rear  door  trim.  <Ref.  to  EI-46,

REAR DOOR, REMOVAL, Door Trim.>

3) Remove  the  rear  speaker.  <Ref.  to  ET-9,  RE-

MOVAL, Rear Speaker.>

4) Remove the sealing cover.
CAUTION:

• Carefully  remove  the  butyl  tape.  Excessive

force will easily break the cover.

• If  the  sealing  cover  gets  broken,  replace  it

with a new part.

B: INSTALLATION

CAUTION:

• If  the  sealing  cover  gets  broken,  replace  it

with a new part.

• Apply a butyl tape evenly.

• Attach the sealing cover, keeping it from be-

coming wrinkled.

• If  the  butyl  tape  is  applied  unevenly,  it  will

cause water leakage and soiling.

1) Install each part in the reverse order of removal.

2) When replacing the sealing cover, use the butyl

tape.

3) Press the butyl tape-applied area firmly to pre-

vent any floating on surface.
Butyl tape:

3M8626 or the equivalent

C: INSPECTION

If the sealing cover gets damaged, replace it with a

new part.

EB-00018

EB-25

Door Sash Tape

EXTERIOR BODY PANELS

9. Door Sash Tape

A: REMOVAL

1. FRONT DOOR

1) Disconnect the ground cable from battery.

2) Remove  the  front  door  trim.  <Ref.  to  EI-45,

FRONT DOOR, REMOVAL, Door Trim.>

3) Remove  the  outer  mirror  assembly.  <Ref.  to

GW-16, REMOVAL, Outer Mirror Assembly.>

4) Remove the sealing cover. <Ref. to EB-21, RE-

MOVAL, Front Sealing Cover.>

5) Remove  the  front door glass.  <Ref.  to GW-12,

REMOVAL, Front Door Glass.>

6) Remove the glass run rubber.

7) Remove the B pillar upper clip, and remove the

front door weather strip.

8) Remove the screws, and remove the front door

weather strip outer.
CAUTION:

• When  removing  the  weather  strip  outer,  be

careful not to damage the vehicle.

• If the weather strip outer is deformed, always

replace with a new part.

9) Peel the door sash tape from the door sash.
NOTE:

• If the tape is difficult to remove, warm the tape

with a hairdryer, etc. to make the removal easier.

Use  a  household  hairdryer.  Do  not  use  industrial

dryers.

• If  tape  residue  is  remaining  on  the  door  sash,

wipe clean.

2. REAR DOOR

1) Disconnect the ground cable from battery.

2) Remove  the  rear  door  trim.  <Ref.  to  EI-46,

REAR DOOR, REMOVAL, Door Trim.>

3) Remove the sealing cover. <Ref. to EB-24, RE-

MOVAL, Rear Sealing Cover.>

4) Remove  the  rear  door  glass.  <Ref.  to  GW-21,

REMOVAL, Rear Door Glass.>

5) Remove the glass run rubber.

6) Remove the B pillar upper clip, and remove the

front door weather strip.

7) Loosen the screws and clips to remove the gus-

set cover outer.

8) Remove the rear door weather strip outer.
CAUTION:

• When  removing  the  weather  strip  outer,  be

careful not to damage the vehicle.

• If the weather strip outer is deformed, always

replace with a new part.

EB-00423

EB-00398

A-A

A-A

EB-00424

EB-00399

EB-00400

A-A

A-A

EB-26

Door Sash Tape

EXTERIOR BODY PANELS

9) Peel the door sash tape from the door sash.
NOTE:

• If the tape is difficult to remove, warm the tape

with a hairdryer, etc. to make the removal easier.

Use  a  household  hairdryer.  Do  not  use  industrial

dryers.

• If  tape  residue  is  remaining  on  the  door  sash,

wipe clean.

B: INSTALLATION

CAUTION:

• When applying tape, use a spatula, etc. to ap-

ply evenly, pushing it against the sash to make

sure that no air bubbles are formed.

If air bubbles are formed, reapply the tape.

• If the tape is wrinkled, etc. during application,

replace the tape.

• Turning points and ends of the tape will be a

cause for peeling if the pressure is insufficient

during application, so make sure to push down

on the tape firmly when applying. 

• There are locations where the tape ends will

overlap each other. When applying the tape, be

careful of the order of their application.

• Front

• Rear

1. FRONT DOOR

1) Match the upper area of the gusset and the cut

area of the tape as shown in the figure. (Position of

the arrow)

EB-00407

(1)

(2)

EB-00409

(1)

(2)

(3)

(1) Front door sash tape - front

EB-00401

A-A

A-A

(1)


Content   ..  751  752  753  754   ..