Subaru Impreza 3 / Impreza WRX / Impreza WRX STI. Manual - part 610
 

  Index      Subaru     Subaru Impreza 3 / Impreza WRX / Impreza WRX STI - service repair manual 2008-2014 year


Search            


Content   ..  608  609  610  611   ..


Subaru Impreza 3 / Impreza WRX / Impreza WRX STI. Manual - part 610


AB-7

General Description

AIRBAG SYSTEM

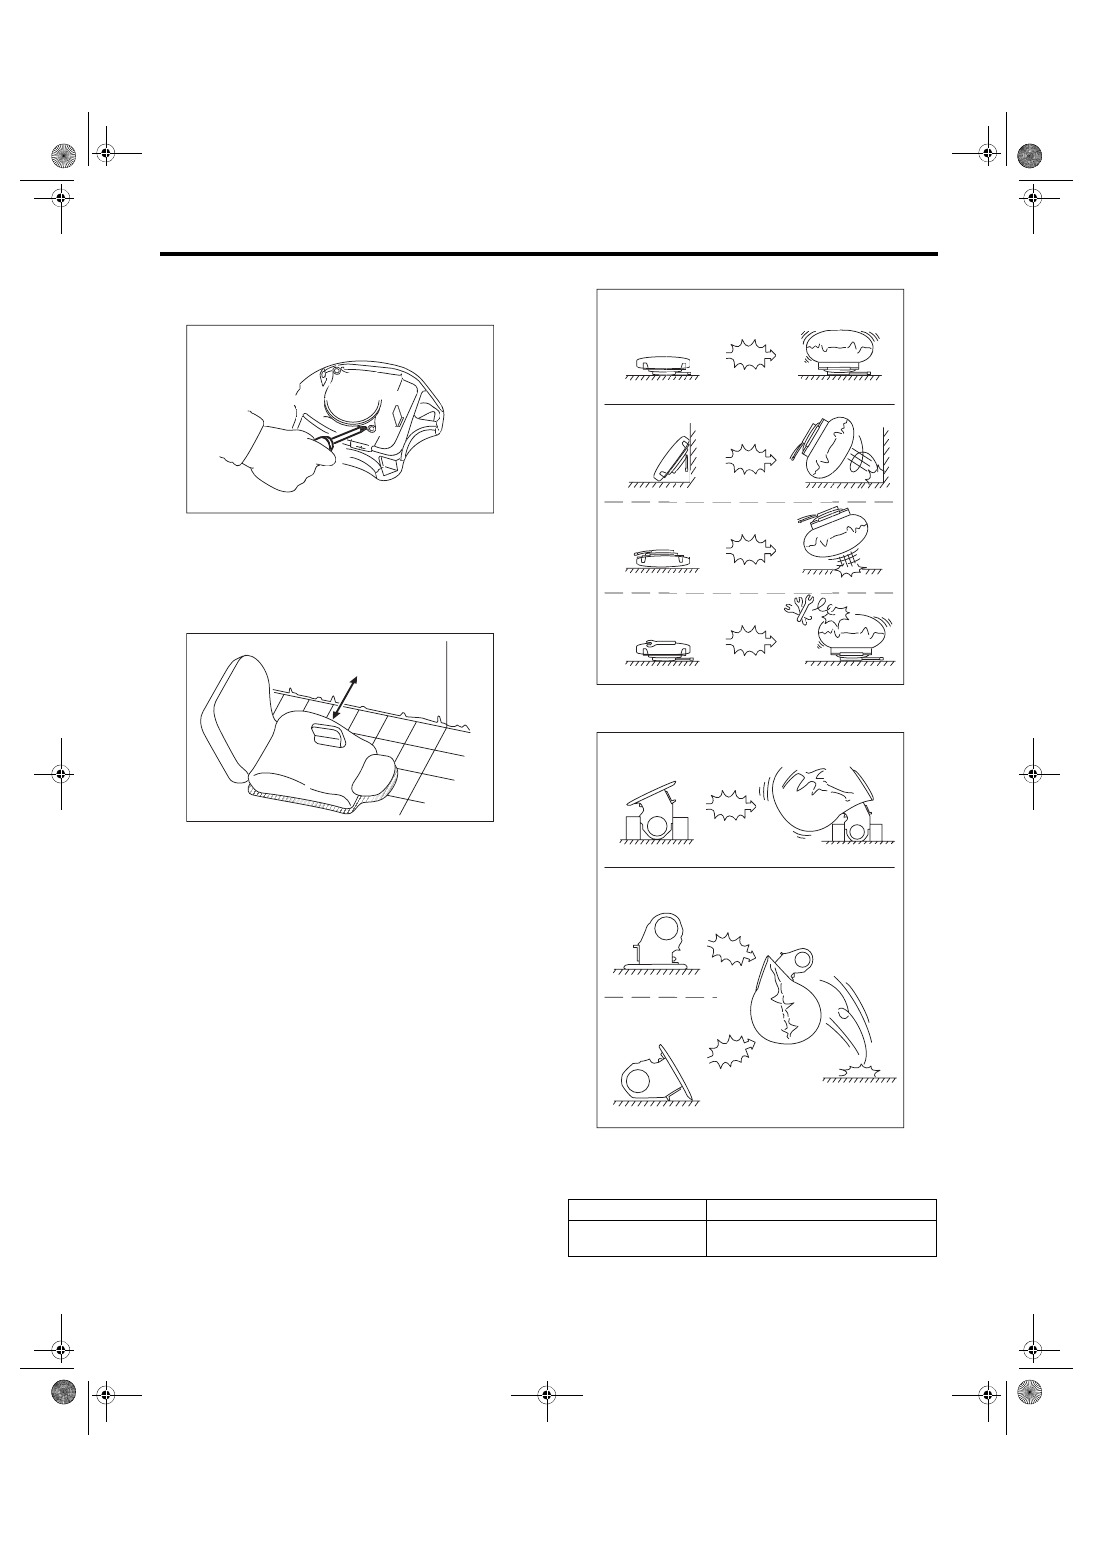
• Do not disassemble driver’s airbag module, pas-

senger’s  airbag  module,  side  or  curtain  airbag

modules, or pretensioner.

• When attaching the steering wheel and steering

roll  connector,  be  sure  to  adjust  the  steering  roll

connector.

• The removed front seat with airbag module must

be kept at least 200 mm (8 in) away from walls and

other objects.

• When storing a removed airbag module, do not

place it with the pad side facing downward. Do not

place any objects on the airbag module. Do not pile

up the airbag module. If the pad of the airbag mod-

ule is in contact with other objects, it may cause a

serious accident if the airbag accidentally operates.

• Driver’s airbag module

• Passenger’s  airbag  module  and  side  airbag

module

C: PREPARATION TOOL

1. GENERAL TOOL

(1) 200 mm (8 in) or more

AB-01541

NG

NG

NG

G

G

N

N

N

N

N

N

N

NG

G

G

G

G

G

G

G

G

G

G

G

G

G

G

G

G

G

G

G

G

G

G

G

G

G

G

G

G

G

G

G

G

G

G

G

G

G

G

G

G

G

G

G

G

G

G

N

G

G

G

G

G

G

G

G

G

G

G

G

G

G

G

G

G

N

N

N

N

N

N

N

N

N

N

N

NG

G

G

G

G

G

G

G

NG

G

G

G

NG

NG

NG

AB-00128

(1)

TOOL NAME

REMARKS

TORX

®

 T30

Used for removal/installation of driv-
ers airbag module

AB-02148

NG

NG

NG

NGGGGGGGGGG

G

G

NN

N

NNNNNNNNNNNNGGGGGGGG

G

GGGGGGGGGGGGGGGGGGGG

NNNNNNNNG

NG

OK

OK

O

O

O

O

O

O

O

O

O

O

O

O

O

OK

K

K

K

K

K

K

K

K

K

K

K

K

K

K

K

K

K

K

K

K

K

K

K

K

AB-02149

NG

N

N

NN

OK

O

AB-8

Airbag Connector

AIRBAG SYSTEM

2. Airbag Connector

A: PROCEDURE

1. POWER SUPPLY

1) How to disconnect:
CAUTION:

When  pulling  the  slide  lock  or  disconnecting

connector, be sure to hold the connector, not

the harness.

Press  the  lock  (A),  and  then  disconnect  the  con-

nector.

2) How to connect:
CAUTION:

Be  sure  to  insert  the  connector  in  until  it  is

locked. Then pull it gently to make sure that it is

locked.

Holding  the  connector,  push  it  in  securely  until  a

clicking sound is heard.

2. AIRBAG CONTROL MODULE

1) How to disconnect:
CAUTION:

When disconnecting connector, be sure to hold

the connector, not the harness.

Press the lock lever plate (A) and pull out the lock

lever.

2) How to connect:
CAUTION:

Be  sure  to  insert  the  connector  in  until  it  is

locked. Then pull it gently to make sure that it is

locked.

Insert the connector and push the lock lever in se-

curely.

3. DRIVER’S AIRBAG MODULE (BETWEEN 

AIRBAG MAIN HARNESS AND ROLL CON-

NECTOR) AND PASSENGER’S AIRBAG 

MODULE

1) How to disconnect:
CAUTION:

When  pulling  the  slide  lock  or  disconnecting

connector, be sure to hold the connector, not

the harness.

(1) Push the slide lock (A) in the direction of ar-

row.

AB-01637

(A)

AB-01638

AB-01751

(A)

AB-00722

(A)

AB-9

Airbag Connector

AIRBAG SYSTEM

(2) With the slide lock pushed, disconnect the

connector.

2) How to connect:
CAUTION:

Be  sure  to  insert  the  connector  in  until  it  is

locked. Then pull it gently to make sure that it is

locked.

Holding  the  connector,  push  it  in  securely  until  a

clicking sound is heard.

4. DRIVER’S AIRBAG MODULE, CURTAIN 

AIRBAG MODULE AND PRETENSIONER

1) How to disconnect:

(1) Using  a  flat  tip  screwdriver,  pry  the  push

lock upward to unlock.

(2) Pull  the  connector  to  disconnect  from  the

driver’s airbag module assembly or the retractor

assembly.

2) How to connect:
CAUTION:

• Be sure to insert the connector in until it is

locked.

• Press in the push lock securely. Then pull it

gently to make sure that it is locked.

Connect the connector in the reverse order of dis-

connecting.  At  this  time,  be  sure  to  insert  until  a

clicking sound is heard.

5. SIDE AIRBAG SENSOR AND CURTAIN 

AIRBAG SENSOR

1) How to disconnect:
CAUTION:

When  pulling  the  slide  lock  or  disconnecting

connector, be sure to hold the connector, not

the harness.

(1) Push the lock arm.

(2) Holding outer part, pull it one step in the di-

rection of arrow.

AB-00022

AB-00023

AB-00478

AB-00479

AB-00480

AB-02605

(2)

(1)

AB-10

Airbag Connector

AIRBAG SYSTEM

(3) Push the lock arm again.

(4) Holding outer part, pull it in the direction of

arrow to disconnect the connector.

2) How to connect:
CAUTION:

Be  sure  to  insert  the  connector  in  until  it  is

locked. Then pull it gently to make sure that it is

locked.

Holding  the  connector,  push  it  in  securely  until  a

clicking sound is heard.

6. SATELLITE SAFING SENSOR

1) How to disconnect:
CAUTION:

When  pulling  the  slide  lock  or  disconnecting

connector, be sure to hold the connector, not

the harness.

Holding outer part (A), pull it in the direction of ar-

row.

2) How to connect:
CAUTION:

• Outer  side  (A)  moves  back,  and  so  do  not

touch the outer part.

• Be sure to insert the connector in until it is

locked. Then pull it gently to make sure that it is

locked.

Holding  the  connector,  push  it  in  securely  until  a

clicking sound is heard.

7. SIDE AIRBAG MODULE

1) How to disconnect:
CAUTION:

When  pulling  the  slide  lock  or  disconnecting

connector, be sure to hold the connector, not

the harness.

(1) Move the slide lock (A) in the direction of ar-

row and hold it.

(2) While holding the slide lock (A), pull the con-

nector (B) in the direction of arrow.

2) How to connect:
CAUTION:

Be  sure  to  insert  the  connector  in  until  it  is

locked. Then pull it gently to make sure that it is

locked.

Holding  the  connector,  push  it  in  securely  until  a

clicking sound is heard.

AB-02606

(3)

(4)

AB-02607

AB-00024

AB-00025

AB-01830

(A)

(B)

AB-01829


Content   ..  608  609  610  611   ..