Subaru Impreza 3 / Impreza WRX / Impreza WRX STI. Manual - part 187
CO(w/o STI)-17
Thermostat
COOLING
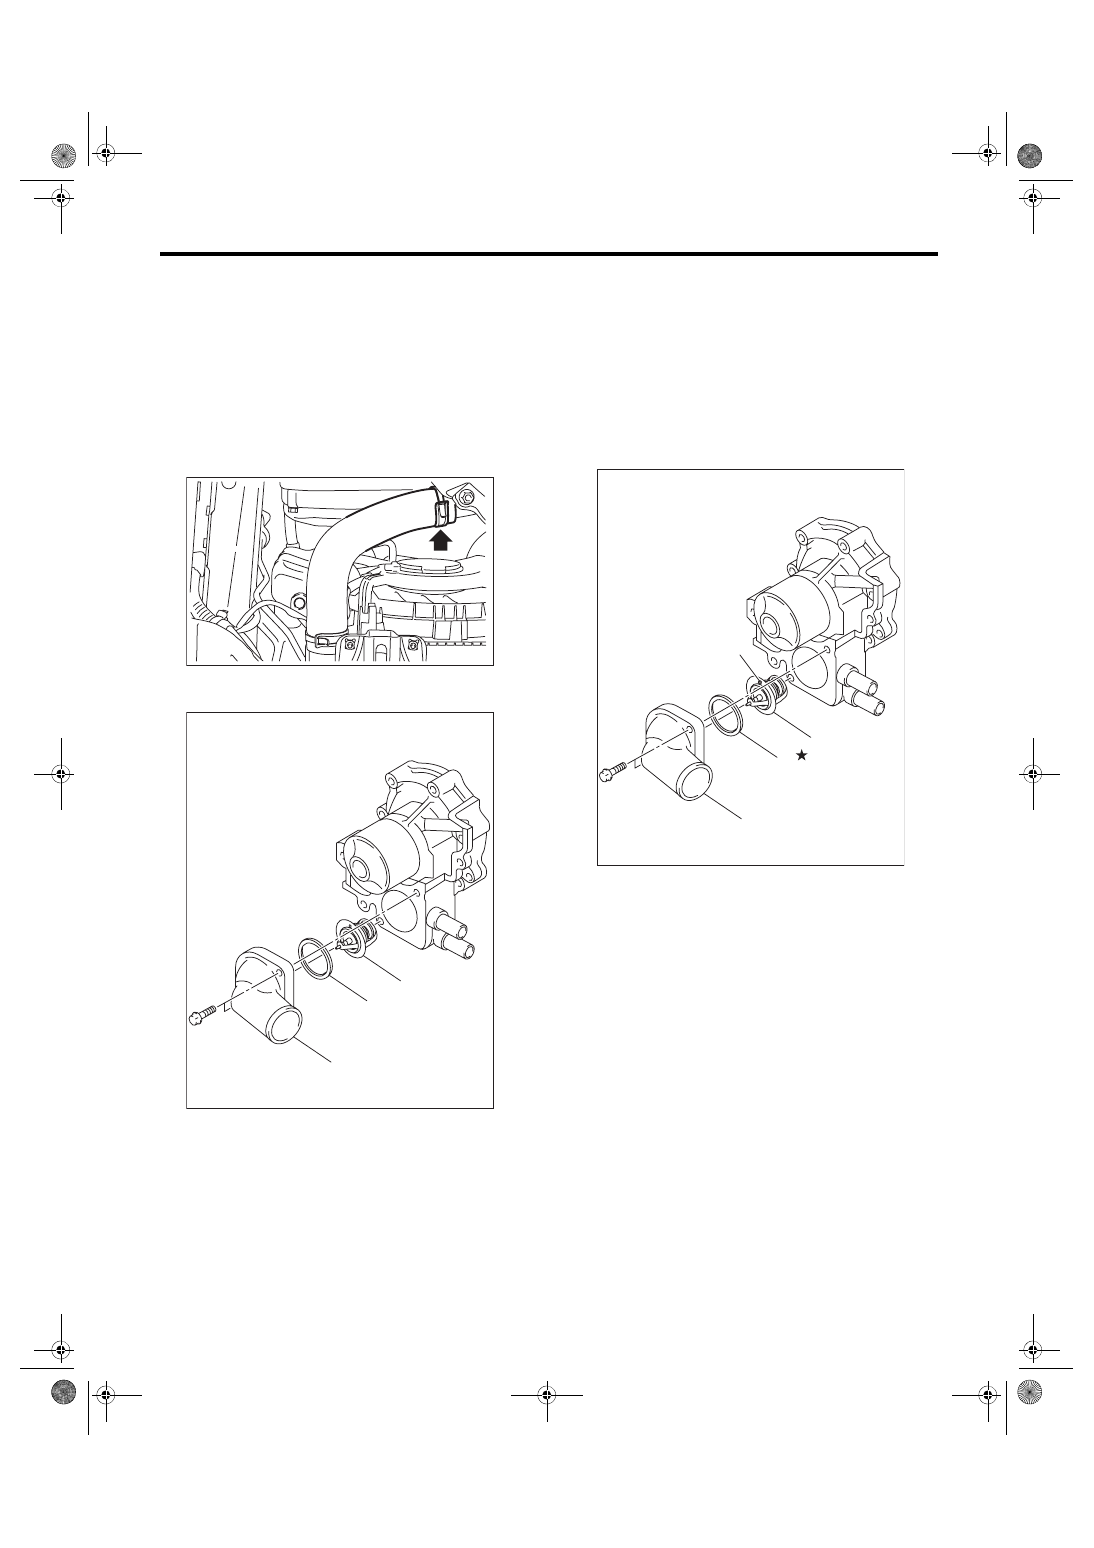
5. Thermostat
A: REMOVAL
1) Lift up the vehicle.
2) Remove the under cover. <Ref. to EI-28, RE-
3) Drain engine coolant. <Ref. to CO(w/o STI)-13,
DRAINING OF ENGINE COOLANT, REPLACE-
4) Disconnect the radiator outlet hose from thermo-
stat cover.
5) Remove the thermostat cover, and then remove
the gasket and thermostat.
B: INSTALLATION
1) Install a gasket to thermostat.
NOTE:
Use a new gasket.
2) Install the thermostat and thermostat cover.
NOTE:
Install the parts with the jiggle pin facing upward.
Tightening torque:
12 N·m (1.2 kgf-m, 8.9 ft-lb)
3) Connect the radiator outlet hose to thermostat
cover.
4) Install the under cover. <Ref. to EI-28, INSTAL-
5) Lower the vehicle.
6) Fill engine coolant. <Ref. to CO(w/o STI)-13,
FILLING OF ENGINE COOLANT, REPLACE-
(A) Thermostat cover
(B) Gasket
(C) Thermostat
CO-02771
CO-02780
(B)
(A)
(C)
(A) Thermostat cover
(B) Gasket
(C) Thermostat
(D) Jiggle pin
CO-02781
(B)
(A)
(C)
(D)