Subaru Impreza 3 / Impreza WRX / Impreza WRX STI. Manual - part 96
 

  Index      Subaru     Subaru Impreza 3 / Impreza WRX / Impreza WRX STI - service repair manual 2008-2014 year


Search            


Content   ..  94  95  96  97   ..


Subaru Impreza 3 / Impreza WRX / Impreza WRX STI. Manual - part 96


CO(STI)-16

Water Pump

COOLING

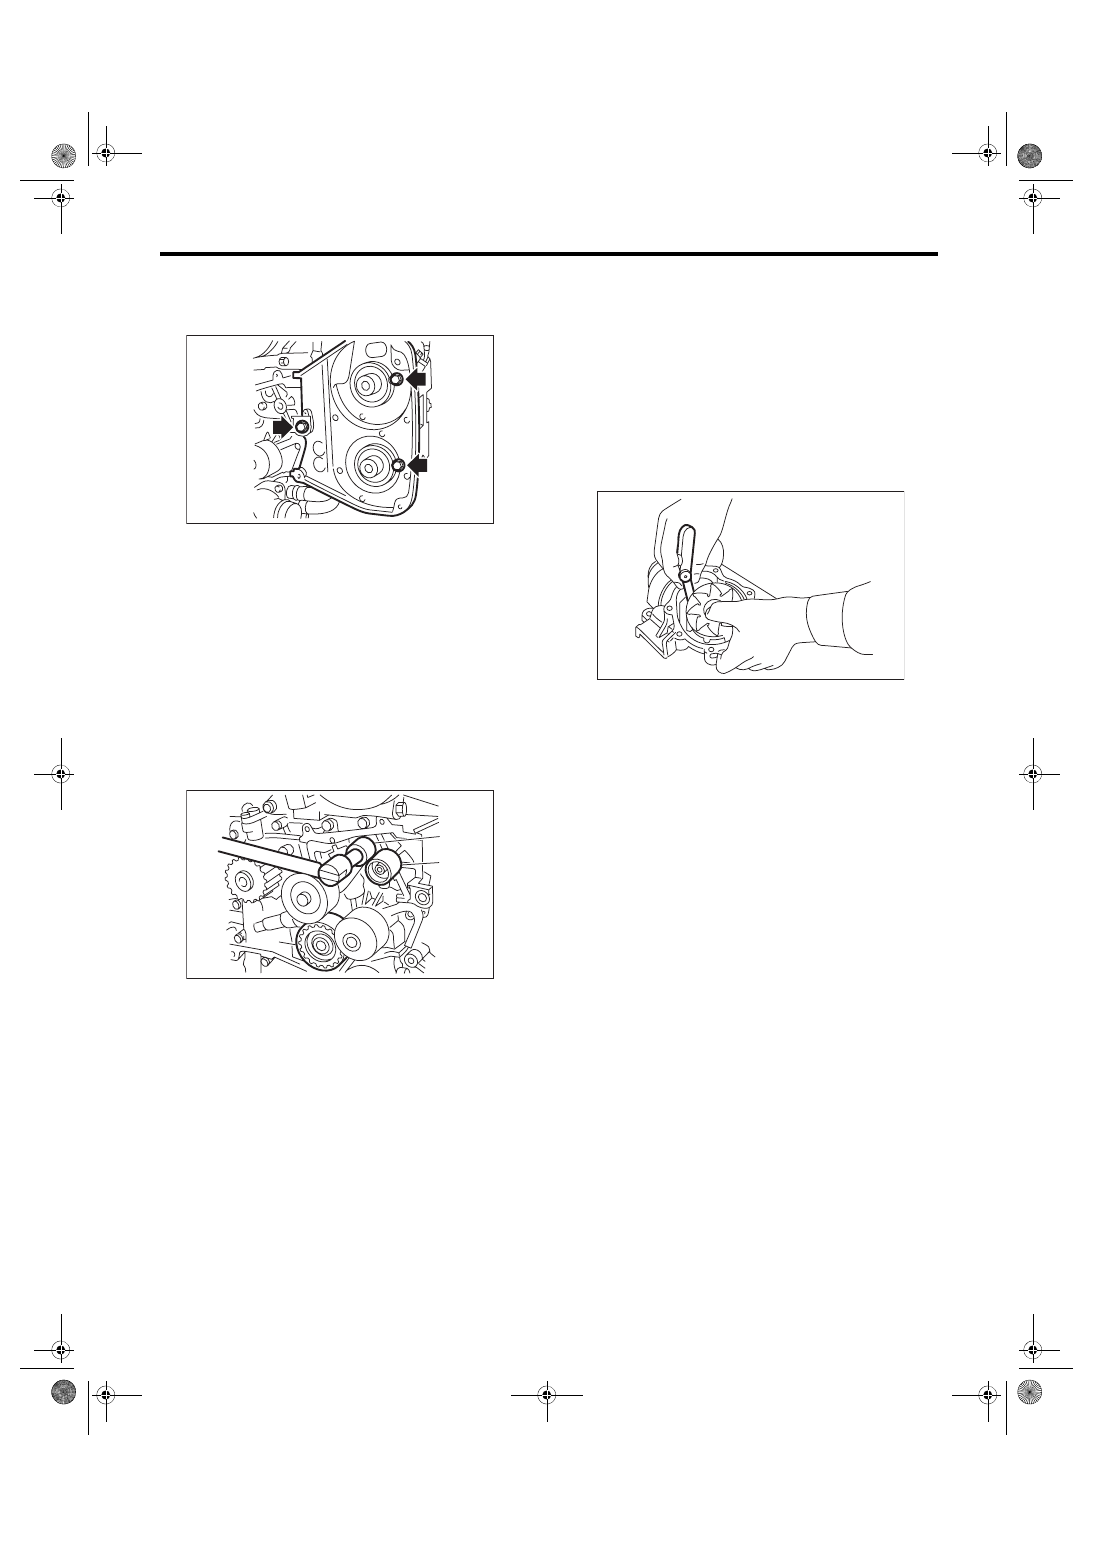
4) Install the belt cover No. 2 LH.
Tightening torque:

5 N·m (0.5 kgf-m, 3.7 ft-lb)

5) Install the cam sprocket LH. <Ref. to ME(STI)-

59, INSTALLATION, Cam Sprocket.>

6) Install the belt idler No. 2 (C).
Tightening torque:

39 N·m (4.0 kgf-m, 28.8 ft-lb)

7) Install the belt idler (B).
Tightening torque:

25 N·m (2.5 kgf-m, 18.4 ft-lb)

8) Install  the  automatic  belt  tension  adjuster  (A)

with  the  tension  rod  held  by  a  pin.  <Ref.  to

ME(STI)-52,  AUTOMATIC  BELT  TENSION  AD-

JUSTER ASSEMBLY AND BELT IDLER, INSTAL-

LATION, Timing Belt.>

9) Install the timing belt. <Ref. to ME(STI)-53, TIM-

ING BELT, INSTALLATION, Timing Belt.>

10) Install the timing belt cover. <Ref. to ME(STI)-

49, INSTALLATION, Timing Belt Cover.>

11) Install  the  crank  pulley.  <Ref.  to  ME(STI)-47,

INSTALLATION, Crank Pulley.>

12) Install  the  V-belts.  <Ref.  to  ME(STI)-40,  IN-

STALLATION, V-belt.>

13) Install  the  radiator.  <Ref.  to  CO(STI)-20,  IN-

STALLATION, Radiator.>

C: INSPECTION

1) Check the water pump bearing for smooth rota-

tion.

2) Check the water pump pulley for abnormalities.

3) Make  sure  the  impeller  is  not  abnormally  de-

formed or damaged.

4) Inspect  the  clearance  between  impeller  and

pump case.
Clearance between impeller and pump case:

Standard

0.5 — 1.5 mm (0.020 — 0.059 in)

5) After water pump installation, check pulley shaft

for engine coolant leaks or noise. If leaks or noise

are noted, replace the water pump assembly.

CO-02908

CO-02726

(A)

(B)

(C)

CO-00293

CO(STI)-17

Thermostat

COOLING

5. Thermostat

A: REMOVAL

1) Lift up the vehicle.

2) Remove  the  under  cover.  <Ref.  to  EI-28,  RE-

MOVAL, Front Under Cover.>

3) Drain  engine  coolant.  <Ref.  to  CO(STI)-13,

DRAINING  OF  ENGINE  COOLANT,  REPLACE-

MENT, Engine Coolant.>

4) Disconnect the radiator outlet hose from thermo-

stat cover.

5) Remove the thermostat cover, and then remove

the gasket and thermostat.

B: INSTALLATION

1) Install a gasket to thermostat.
NOTE:

Use a new gasket.

2) Install the thermostat and thermostat cover.
NOTE:

Install the parts with the jiggle pin facing upward.
Tightening torque:

12 N·m (1.2 kgf-m, 8.9 ft-lb)

3) Connect  the  radiator  outlet  hose  to  thermostat

cover.

4) Install the under cover. <Ref. to EI-28, INSTAL-

LATION, Front Under Cover.>

5) Lower the vehicle.

6) Fill engine coolant.  <Ref. to CO(STI)-13,  FILL-

ING  OF  ENGINE  COOLANT,  REPLACEMENT,

Engine Coolant.>

(A) Thermostat cover
(B) Gasket

(C) Thermostat

CO-02771

CO-02780

(B)

(A)

(C)

(A) Thermostat cover
(B) Gasket

(C) Thermostat
(D) Jiggle pin

CO-02781

(B)

(A)

(C)

(D)

CO(STI)-18

Thermostat

COOLING

C: INSPECTION

1) Check that the thermostat does not have defor-

mation, cracks or damage.

2) Check  that  the  thermostat  valve  closes  com-

pletely at an ambient temperature.

3) Immerse  the  thermostat  and  a  thermometer  in

water.  Raise  water  temperature  gradually,  and

check the temperature and valve lift when the valve

begins to open and when the valve is fully opened.

Replace the thermostat if faulty.
NOTE:

• During the test, agitate the water for even tem-

perature distribution.

• Leave the thermostat in the boiling water for five

minutes or more before measuring the valve lift.

• Hold  the  thermostat  with  a  wire  or  the  like  to

avoid contacting the container.
Starting temperature to open:

76 — 80°C (169 — 176°F)

Full open temperature:

91°C (196°F)

Total valve lift:

9.0 mm (0.354 in) or more

(A) Thermometer
(B) Thermostat

CO-02420

(A)

(B)

CO(STI)-19

Radiator

COOLING

6. Radiator

A: REMOVAL

CAUTION:

The  radiator  is  pressurized  when  the  engine

and radiator are hot. Wait until engine and radi-

ator cool down before working on the radiator.

1) Disconnect the ground cable from battery.

2) Lift up the vehicle.

3) Remove  the  under  cover.  <Ref.  to  EI-28,  RE-

MOVAL, Front Under Cover.>

4) Drain  engine  coolant.  <Ref.  to  CO(STI)-13,

DRAINING  OF  ENGINE  COOLANT,  REPLACE-

MENT, Engine Coolant.>

5) Disconnect the connector (A) from the main fan

motor and the connector (B) from the sub fan mo-

tor.

6) Disconnect the radiator outlet hose from thermo-

stat cover.

7) Lower the vehicle.

8) Remove the air intake duct. <Ref. to IN(STI)-10,

REMOVAL, Air Intake Duct.>

9) Remove the reservoir tank. <Ref. to CO(STI)-27,

REMOVAL, Reservoir Tank.>

10) Disconnect the radiator inlet hose from the ra-

diator.

11) Disconnect the two engine coolant hoses from

the radiator and over flow pipe.

12) Remove the radiator upper brackets.

IN-00203

(A)

CO-02727

(B)

CO-02728

CO-02771

CO-02712

CO-02713

CO-02407


Content   ..  94  95  96  97   ..