Subaru Legacy (2005 year). Manual - part 984


  Index      Subaru     Subaru Legacy - service repair manual 2005 year


Search            


Content   ..  982  983  984  985   ..


Subaru Legacy (2005 year). Manual - part 984


SR-11

SUNROOF/T-TOP/CONVERTIBLE TOP (SUNROOF)

Sunroof Motor

5. Sunroof Motor

A: REMOVAL

CAUTION:
• When removing the clip, use great care not to
damage the roof trim.
• Never rotate the sunroof motor after remov-
ing it.

1. SEDAN MODEL

1) Completely close the glass lid.
2) Disconnect the ground cable from battery.
3) Remove the spot map light. <Ref. to LI-34, RE-
MOVAL, Spot Map Light.>
4) Disconnect the harness connector, loosen the
TORX

®

 bolts, and then remove the motor assem-

bly.

CAUTION:
When removing the motor assembly, secure 
the cable wires to prevent moves.

2. WAGON MODEL

1) Fully close the glass lid (front) and glass lid
(rear).
2) Disconnect the ground cable from battery.
3) Remove the luggage room light. <Ref. to LI-36,
REMOVAL, Luggage Room Light.>
4) Remove the roof trim. <Ref. to EI-67, WAGON
MODEL, REMOVAL, Roof Trim.>

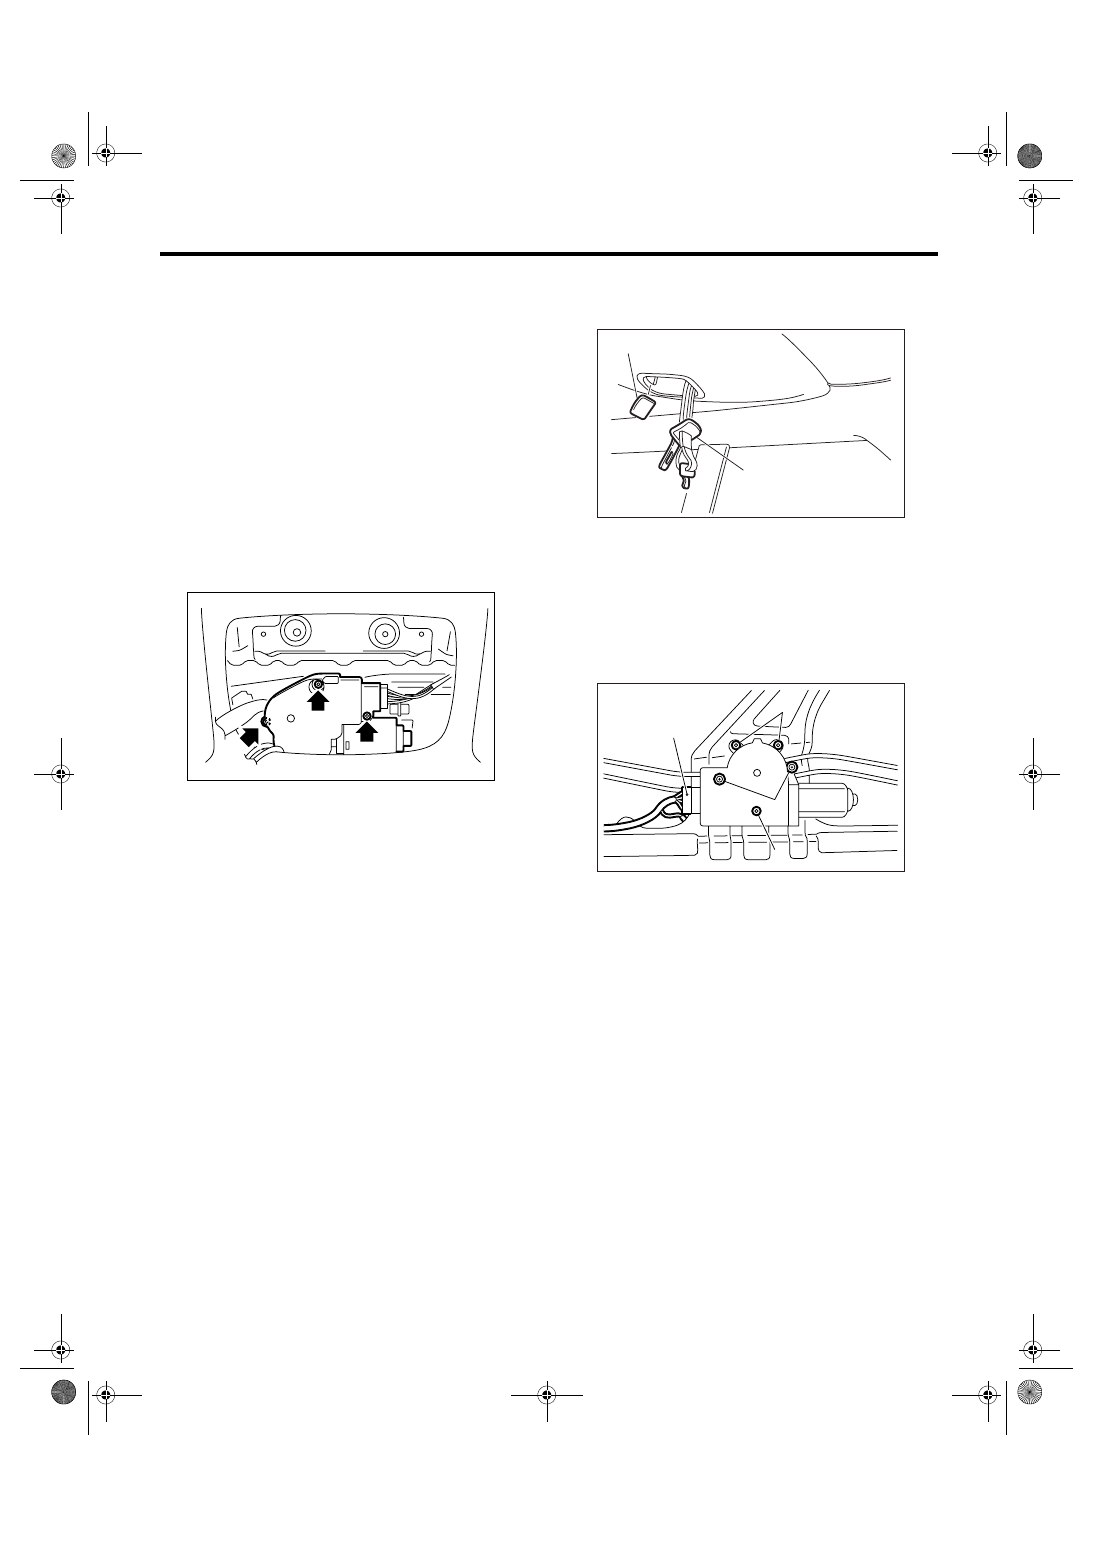
5) Pass the seat belt tongue located on center of
rear seat through the hole, and then pull it out to the
opposite side of trim.

6) Remove the clips, and then drop the rear end of
roof trim.
7) Disconnect the harness connector (A), and then
remove the motor assembly mounting bolt (B) and
nuts (C).

B: INSTALLATION

CAUTION:
When installing the motor assembly, be careful 
not to move the sunroof cable.

SR-00121

(A) Tongue

(B) Cover

SR-00036

(A)

(B)

(C)

SR-00089

(A)

(B)

(C)

SR-12

SUNROOF/T-TOP/CONVERTIBLE TOP (SUNROOF)

Sunroof Motor

1. SEDAN MODEL

1) Align the coulisse assembly and link assembly in the same position.

2) Install the motor assembly.
3) Connect the harness connector of motor assembly, and then connect the battery ground cable to battery.
4) Perform the initialize operation of motor.

(1) Tilt up the glass lid. 
(2) Release the switch once, and press the tilt up switch again for 15 seconds.
(3) When the glass lid is raised a little and on tilt up position, release the switch for the moment.
(4) Keep pressing the tilt up switch within 5 seconds from releasing the switch, glass lid tilts down 

slides open 

→ slides close operation automatically, and then initialize operation is completed.

5) Check the operation of sunroof with following table.

6) Install the trim in the reverse order of removal.

(1) Front

(2) Coulisse ASSY

(3) Link ASSY

(4) 4.7 mm (0.185 in)

SR-00094

(1)

(3)

(2)

(4)

Operation

Switch position

(1) Glass lid closes completely.

Close

(2) Glass lid tilt up to the top position.

Tilt up

(3) Glass lid closes completely.

Tilt down

(4) Glass lid opens completely.

Open

(5) Glass lid closes 150 mm (5.91 in) away from completely closed position.

Close

(6) Glass lid closes completely.

Close

SR-13

SUNROOF/T-TOP/CONVERTIBLE TOP (SUNROOF)

Sunroof Motor

2. WAGON MODEL

Check that the wedge of glass lid (front) bracket part is contacting in the direction of vehicle front.
At this time, the lid is at fully open position.

1) Install the motor assembly.
2) After the installation of motor assembly, check again that the wedge of glass lid (front) bracket part is con-
tacting in the direction of vehicle front.
3) Connect the harness connector of motor assembly, and then connect the battery ground cable to battery.
4) Perform the initialize operation of motor.
• When replacing the motor with a new one, fully close the glass once and perform the initialization of posi-
tion, because the movement of glass lid shifts to brink operation.
• When reusing the motor, operate the auto-reverse function five times in a row to shifts brink operation, and
then perform the initialization of position.
5) Check the operation of sunroof with following table.

6) Install the trim in the reverse order of removal.

(1) Front

(2) Wedge

(3) Glass lid (Front)

(4) Glass lid (Rear)

SR-00095

(3)

(2)

(1)

(4)

Operation

Switch position

(1) Glass lid (front) and glass lid (rear) closes completely.

Close

(2) Glass lid (front) tilt up to the ventilating position.

Open

(3) Glass lid (front) tilts up to top position, and glass lid (rear) opens near the completely 
open position.

Open

(4) Glass lid (rear) opens completely.

Open

(5) Glass lid (rear) closes on 150 mm (5.91 in) from rear end of tilted up glass lid (front).

Close

(6) Glass lid (rear) closes completely, and then glass lid (front) tilt down to the ventilating 
position.

Close

(7) Glass lid (front) lowers, and then glass lid (front) and glass lid (rear) closes completely.

Close

SR-14

SUNROOF/T-TOP/CONVERTIBLE TOP (SUNROOF)

Sunroof Switch

6. Sunroof Switch

A: REMOVAL

1) Disconnect the ground cable from battery.
2) Remove the spot map light lens (A) and sunroof
switch mounting screws (B).

3) Disconnect the harness connector, and then re-
move the sunroof switch.

B: INSTALLATION

Install in the reverse order of removal.

C: INSPECTION

1. SEDAN MODEL

Measure the sunroof switch resistance.

LI-00313

(A)

LI-00314

(B)

Switch position

Terminal No.

Standard

Connector 

No.

Open

1 and 3

Less than 

R128

Close

3 and 4

Less than 

Tilt up

4 and 5

Less than 

R187

Tilt down

3 and 4

Less than 

R128

3

4

5

1

2

SR-00098

R187

3

4

5

1

2


Content   ..  982  983  984  985   ..