содержание .. 27 28 29 30 ..
Scania 16 litre engine. Work Description - part 29
0120w13b.mkr
©
113
1
Unscrew the nut securing the outer lid.
2
Lift out the rotor. Wipe off the outside.
Undo the rotor nut and screw it about three
turns to protect the bearing.
0
11
2
86
x3
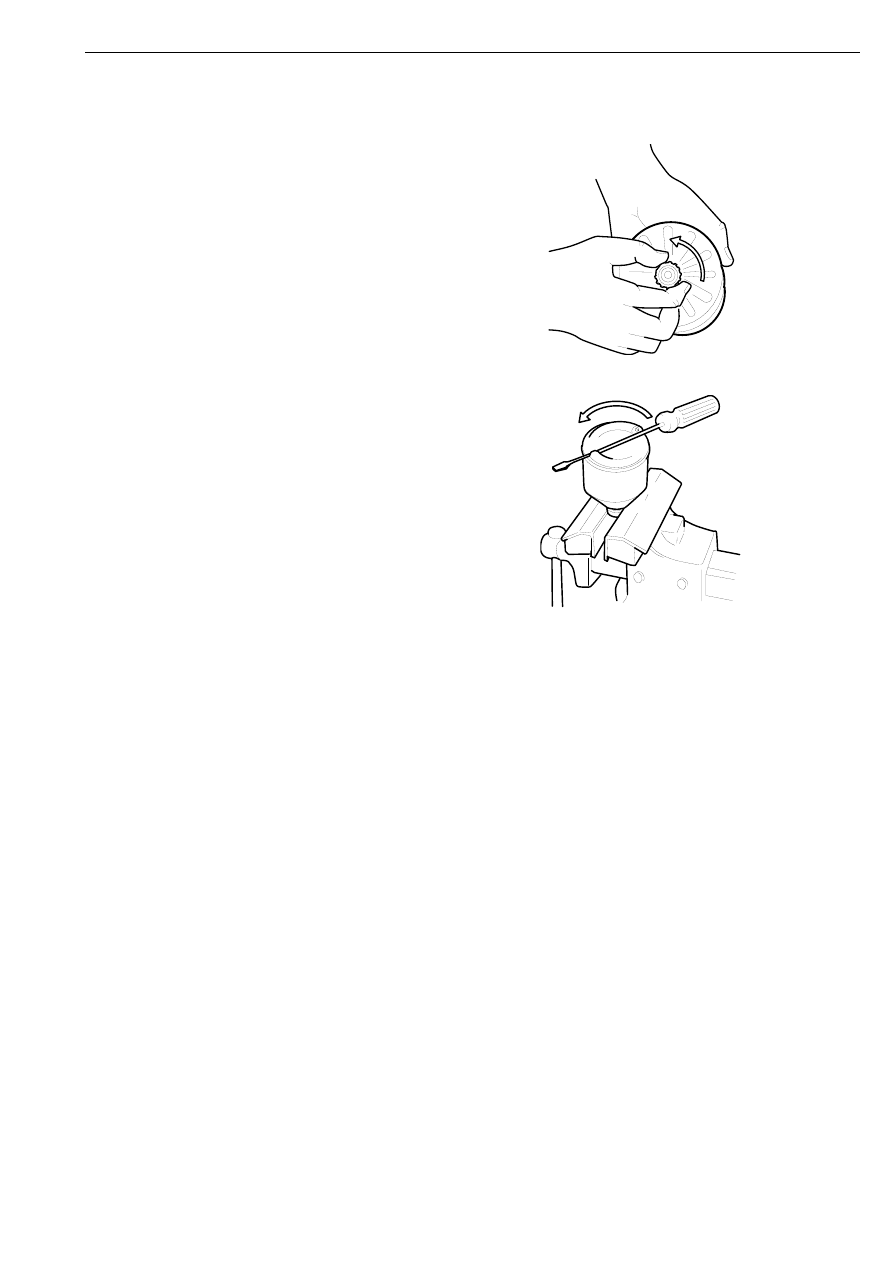
3
If the rotor nut is difficult to get loose, turn
the rotor upside down and fasten the rotor
nut in a vice. Turn the rotor
counterclockwise three turns by hand or if
this does not help, place a screwdriver
between the outlet holes.
x3
0
11
2
8
7
Oil cleaner
IMPORTANT! The rotor must not be put in a
vice. Never strike the rotor bowl. This may
cause damage resulting in imbalance.