SAAB 9000. Manual - part 1


  Index      Saab     SAAB 9000 4-cyl 1985 to 1998 (C to S registration) - Service and Repair Manual


Search            copyright infringement  


Content   ..  1  2  3   ..


SAAB 9000. Manual - part 1


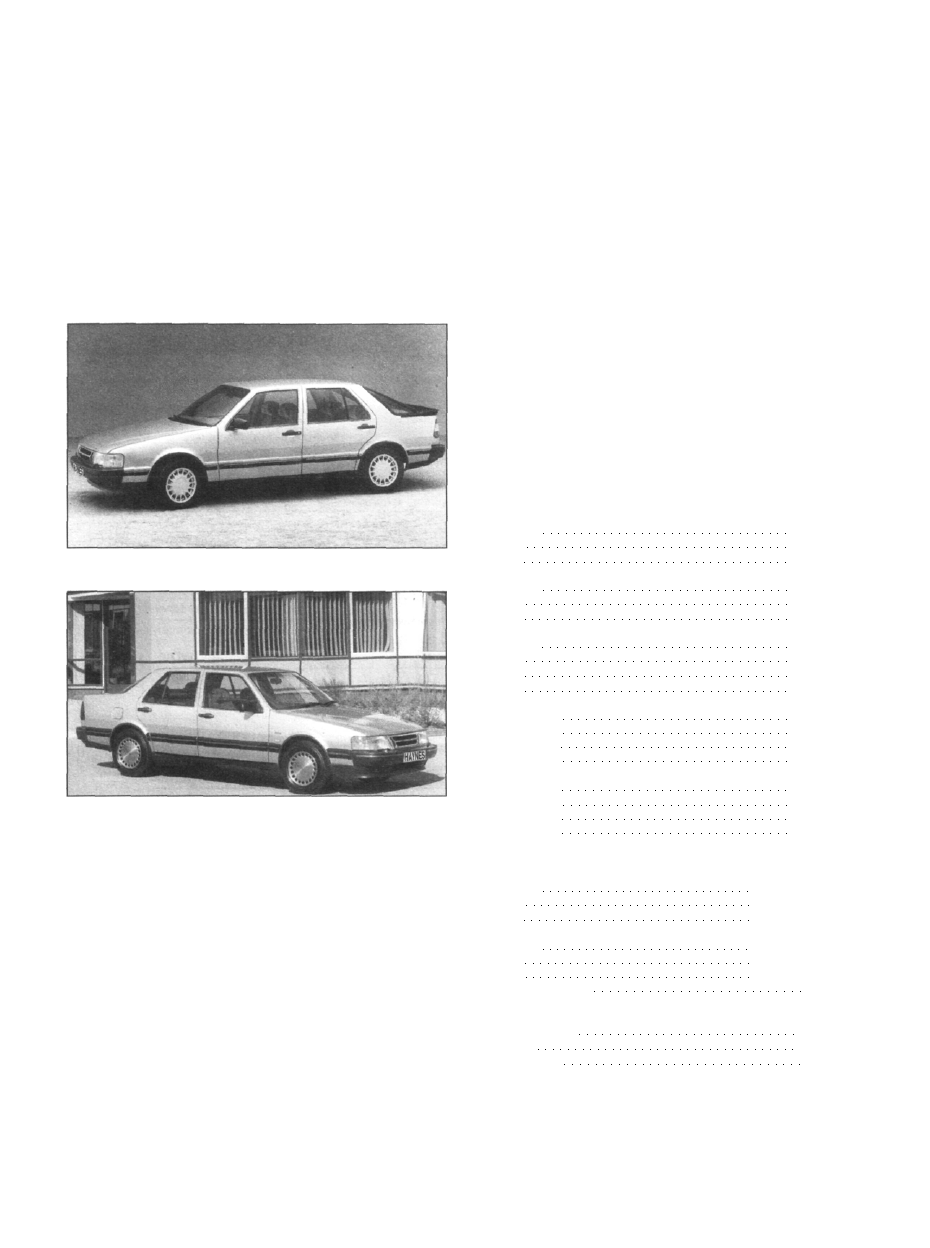
0•4

Introduction

Introduction to the Saab 9000

The Saab 9000 was introduced in the UK in October 1985 as a 5-

door Hatchback, with a turbocharged fuel-injected 16-valve 1985 cc
engine. The normally-aspirated engine followed in early 1986, and an
automatic transmission version in late 1986. A 4-door booted Saloon
version was introduced in early 1991.

All engines are of 16-valve double overhead camshaft design, the

2290 cc version being introduced in late 1989 on the 9000i and CDi.
This engine is fitted with the Saab Direct Ignition system, with
separate ignition coils for each spark plug together with a system
ECU, instead of the previous Hall-effect/distributor ignition system.

Initially, a Bosch LH-Jetronic fuel injection system was fitted. The

Saab 9000 Turbo 16

Saab 9000 CDi

Acknowledgements

Thanks are due to Champion Spark Plug, who supplied the

illustrations showing spark plug conditions. Thanks are also due to
Draper Tools Limited, who provided some of the workshop tools, and

to all those people at Sparkford who helped in the production of this
manual.

We take great pride in the accuracy of information given in this

manual, but vehicle manufacturers make alterations and design
changes during the production run of a
 particular vehicle of which they
do not inform us. No liability can be accepted by the authors or
publishers for loss, damage or injury caused by errors in, or omissions

from, the information given.

Saab-manufactured "Trionic" system fitted to the 2290 cc engine in
1993 is a full engine management system, controlling the fuel
injection, ignition and turbocharger. This system was later fitted to
non-turbo models. All engines are fitted with hydraulic tappets, and
later engines are fitted with balancer shafts.

The engine is mounted transversely, with the transmission mounted

on the left-hand side. A five-speed manual transmission or four-speed
automatic transmission is available.

All models have fully-independent front and rear suspension. The

rear suspension incorporates leading and trailing arms, shock
absorbers and a low-level Panhard rod.

A wide range of standard and optional equipment is available within

the Saab 9000 range to suit most tastes, including central locking and
electric windows. An anti-lock braking system, traction control system
and air conditioning system are available on certain models.

Provided that regular servicing is carried out in accordance with the

manufacturer's recommendations, the Saab 9000 should prove
reliable and economical.

General dimensions and weights

Note: All figures are approximate, and may vary according to model.
Refer to manufacturer's data for exact figures.

Dimensions

Overall length:

9000 5-door 4620 mm
9000 CD 4794 mm
9000 CS 4761 mm

Overall width:

9000 5-door 1806 mm
9000 CD 1806 mm
9000 CS 1788 mm

Overall height (unladen):

9000 5-door 1430 mm
9000 CD 1420 mm
9000 CS 1420 mm

Wheelbase 2672 mm
Front track:

5.5 inch wheels 1510 mm
6.0 inch wheels 1522 mm
6.5 inch wheels 1534 mm
7.0 inch wheels 1538 mm

Rear track:

5.5 inch wheels 1480 mm
6.0 inch wheels 1492 mm
6.5 inch wheels 1504 mm
7.0 inch wheels 1508 mm

Weights

Kerb weight:

9000 5-door 1390 to 1550 kg
9000 CD 1395 to 1550 kg
9000 CS 1410 to 1570 kg

Maximum gross vehicle weight:

9000 5-door 1780 to 1960 kg
9000 CD 1780 to 1960 kg
9000 CS 1830 to 1960 kg

Maximum roof rack load 100 kg
Maximum towing weight:

Braked trailer:

Except 9000 CS 1600 kg
9000 CS 1800 kg

Unbraked trailer 750 kg

Safety First!

0•5

Working on your car can be dangerous.

This page shows just some of the potential

risks and hazards, with the aim of creating a
safety-conscious attitude.

General hazards

Scalding

• Don't remove the radiator or expansion tank
cap while the engine is hot.
• Engine oil, automatic transmission fluid or
power steering fluid may also be dangerously
hot if the engine has recently been running.

Burning

• Beware of burns from the exhaust system
and from any part of the engine. Brake discs
and drums can also be extremely hot
immediately after use.

Crushing

• When working under or near
a raised vehicle, always
supplement the

jack with axle

stands, or use
drive-on ramps.
Never venture
under a car
which is only
supported by

a jack,

 Take care if loosening or tightening high-
torque nuts when the vehicle is on stands.
Initial loosening and final tightening should be
done with the wheels on the ground.

Fire

• Fuel is highly flammable; fuel vapour is
explosive.
• Don't let fuel spill onto a hot engine.
« Do not smoke or allow naked lights
(including pilot lights) anywhere near a vehicle
being worked on. Also beware of creating
sparks
(electrically or by use of tools).
• Fuel vapour is heavier than air, so don't
work on the fuel system with the vehicle over
an inspection pit.
• Another cause of fire is an electrical
overload or short-circuit. Take care when
repairing or modifying the vehicle wiring.
• Keep a fire extinguisher handy, of a type
suitable for use on fuel and electrical fires.

Electric shock

• Ignition HT
voltage can be

dangerous,
especially to
people with
heart problems
or a pacemaker.

Don't work on or
near the ignition

system with the
engine running or the
ignition switched on.

• Mains voltage is also dangerous. Make sure

that any mains-operated equipment is
correctly earthed. Mains power points should

be protected by a residual current device
(RCD) circuit breaker.

Fume or gas intoxication

• Exhaust fumes are
poisonous; they often
contain carbon
monoxide, which is
rapidly fatal if inhaled.
Never run the

engine in a
confined space
such as a garage
with the doors shut.
• Fuel vapour is also
poisonous, as are the vapours from some
cleaning solvents and paint thinners.

Poisonous or irritant substances

• Avoid skin contact with battery acid and
with any fuel, fluid or lubricant, especially

antifreeze, brake hydraulic fluid and Diesel
fuel. Don't syphon them by mouth. If such a
substance is swallowed or gets into the eyes,
seek medical advice.

• Prolonged contact with used engine oil can
cause skin cancer. Wear gloves or use a
barrier cream if necessary. Change out of oil-

soaked clothes and do not keep oily rags in
your pocket.
• Air conditioning refrigerant forms a
poisonous gas if exposed to a naked flame
(including a cigarette). It can also cause skin
burns on contact.

Asbestos

• Asbestos dust can cause cancer if inhaled
or swallowed. Asbestos may be found in
gaskets and in brake and clutch linings.
When dealing with such components it is
safest to assume that they contain asbestos.

Special hazards

Hydrofluoric acid

• This extremely corrosive acid is formed

when certain types of synthetic rubber, found
in some O-rings, oil seals, fuel hoses etc, are
exposed to temperatures above 400°C. The
rubber changes into a charred or sticky
substance containing the acid. Once formed,
the acid remains dangerous for years. If it

gets onto the skin, it may be necessary to
amputate the limb concerned.

 When dealing with a vehicle which has
suffered a fire, or with components salvaged
from such a vehicle, wear protective gloves
and discard them after use.

The battery

• Batteries contain sulphuric acid, which
attacks clothing, eyes and skin. Take care
when topping up or carrying the battery.
• The hydrogen gas given off by the battery is,
highly explosive. Never cause a spark or
allow a naked light nearby. Be careful when

connecting and disconnecting battery
chargers or jump leads.

Air bags

• Air bags can cause injury if they go off
accidentally. Take care when removing the

steering wheel and/or facia. Special storage
instructions may apply.

Diesel injection equipment

• Diesel injection pumps supply fuel at very
high pressure. Take care when working on the

fuel injectors and fuel pipes.

Warning: Never expose the hands,

face or any other part of the body
to injector spray; the fuel can

penetrate the skin with potentially fatal
results.

Remember...

DO

• Do use eye protection when using power

tools, and when working under the vehicle.

• Do wear gloves or use barrier cream to
protect your hands when necessary.

• Do get someone to check periodically

that all is well when working alone on the
vehicle.

• Do keep loose clothing and long hair well
out of the way of moving mechanical parts.

• Do remove rings, wristwatch etc, before

working on the vehicle - especially the
electrical system.

• Do ensure that any lifting or jacking

equipment has a safe working load rating
adequate for the job.

DON'T

• Don't attempt to lift a heavy component

which may be beyond your capability - get
assistance.

• Don't rush to finish a job, or take
unverified short cuts.

• Don't use ill-fitting tools which may slip
and cause injury.

• Don't leave tools or parts lying around
where someone can trip over them. Mop
up oil and fuel spills at once.

• Don't allow children or pets to play in or
near a vehicle being worked on.

0•6

Roadside Repairs

Jacking

The jack supplied with the vehicle tool kit

should only be used for changing the
roadwheels - see "Wheel changing" later in
this Section. When carrying out any other kind
of work, raise the vehicle using a hydraulic (or
"trolley") jack, and always supplement the jack
with axle stands positioned under the vehicle

jacking points at the front and rear of the sills

on each side of the car (see illustration).

To raise the front of the vehicle, position the

trolley jack head beneath the reinforced
subframe for the engine compartment. Do not
jack the vehicle under the sump, or any of the
steering or suspension components.

To raise the rear of the vehicle, position the

jack head beneath the reinforced member
adjacent to the rear towing eye. Do not jack
the vehicle under the rear axle.

The jack supplied with the vehicle locates in

the jacking points positioned at the front and
rear of the body sills on each side of the car.

Ensure that the jack head is correctly engaged
before attempting to raise the vehicle (see
illustration).

Never work under, around, or near a raised

vehicle, unless it is adequately supported in at

least two places.

H 28571

Hydraulic jack lifting points (1) and axle stand positions (2)

Using the vehicle jack to raise the rear of the car

Towing

Towing eyes are fitted to the front and rear

of the vehicle for attachment of a tow rope
(see illustrations). The front towing eye is
accessed by prising out the plastic cover.
Always turn the ignition key to the "OFF"
(accessory) position when the vehicle is being
towed, so that the steering lock is released,
and the direction indicators and brake lights
are working.

Before being towed, release the handbrake,

and select neutral on manual transmission

models, or "N" on automatic transmission
models. Note that greater-than-usual pedal
pressure will be required to operate the
brakes, since the vacuum servo unit is only
operational with the engine running. Similarly,
on models with power steering, greater-than-
usual steering effort will be required.

Where possible, models with automatic

transmission should ideally be towed with the
front wheels off the ground, particularly if a
transmission fault is suspected. If the vehicle

is to be towed with its front wheels on the
ground, it must always be towed forwards at
speeds not exceeding 30 mph (50 km/h) or for
a distance no further than 30 miles (50 km).
Also note that, to avoid damaging the
automatic transmission, the fluid level must
be topped-up to the dipstick maximum mark
as described in Chapter 1, then an extra
2.0 litres of fluid added. Note that the excess
fluid must be drained off before the vehicle is
driven again.

Front towing eye location

Rear towing eye location

Roadside Repairs

0•7

Wheel changing

The spare wheel is located beneath a panel

in the luggage compartment floor. The jack
and jack handle are stored together with the
spare wheel; the wheel brace is stored in the

tool kit located on the right-hand side trim. For
access to the spare wheel, proceed as follows:
a) Lift the luggage compartment floor panel,

and hold it in its raised position by
hooking the rubber strap to the peg on

the right-hand side of the panel.

b) Unscrew the plastic retainer, and lift the

spare wheel out of the floor well. On
some models, the brace may be used to
unscrew the spare wheel retainer.

c) The jack and handle are located beneath

the spare wheel.

To change a wheel, remove the spare

wheel, jack and wheel brace, as described
previously, then proceed as follows.

Apply the handbrake, and place chocks at

the front and rear of the wheel diagonally
opposite the one to be changed. Select first or
reverse gear on manual transmission models,
or select "P" on automatic transmission
models. Make sure that the vehicle is located
on firm, level ground. Prise off, and remove,
the trim from the centre of the wheel, using a
screwdriver. Slightly loosen the wheel bolts
with the brace provided (see illustrations).

Locate the jack head in the jacking point
nearest the wheel to be removed, and raise

the jack by turning the handle. When the
wheel is clear of the ground, remove the bolts
and lift off the wheel. On some models, a

plastic bag is provided in the tool kit to store

the removed wheel. Fit the spare wheel, and

moderately tighten the bolts. Lower the
vehicle, and then tighten the bolts fully in a
diagonal sequence. Refit the wheel trim. If
possible, check the tyre pressure on the
spare wheel, and adjust as necessary.
Remove the chocks, and stow the jack, tools
and the punctured tyre in the floor well.
Release the rubber strap, and lower the floor
panel.

On later models, the spare wheel is of

lightweight compact design, and should only
be used in an emergency situation. Do not
drive at speeds exceeding 50 mph, and do
not
 drive further than 2000 miles with the
compact spare wheel fitted.

Prising off the trim from the centre of the wheel

Loosening the wheel bolts with the brace provided in the tool kit

Radio/cassette unit anti-theft system - precaution

On later models, the radio/cassette unit

fitted as standard equipment by Saab has a
built-in security code, to deter thieves. If the
power source to the unit is cut, the anti-theft
system will activate. Even if the power source
is immediately reconnected, the

radio/cassette unit will not function until the

correct security code has been entered.
Therefore, if you do not know the correct
security code for the radio/cassette unit, do
not
 disconnect the battery negative terminal
of the battery, nor remove the radio/cassette

unit from the vehicle.

To enter the correct security code, follow

the instructions provided with the
radio/cassette player handbook.

If an incorrect code is entered, the unit will

become locked, and cannot be operated.

If this happens, or if the security code is lost

or forgotten, seek the advice of your Saab
dealer.


Content   ..  1  2  3   ..