Renault Espace (2016 year). Instruction - part 5
1.66
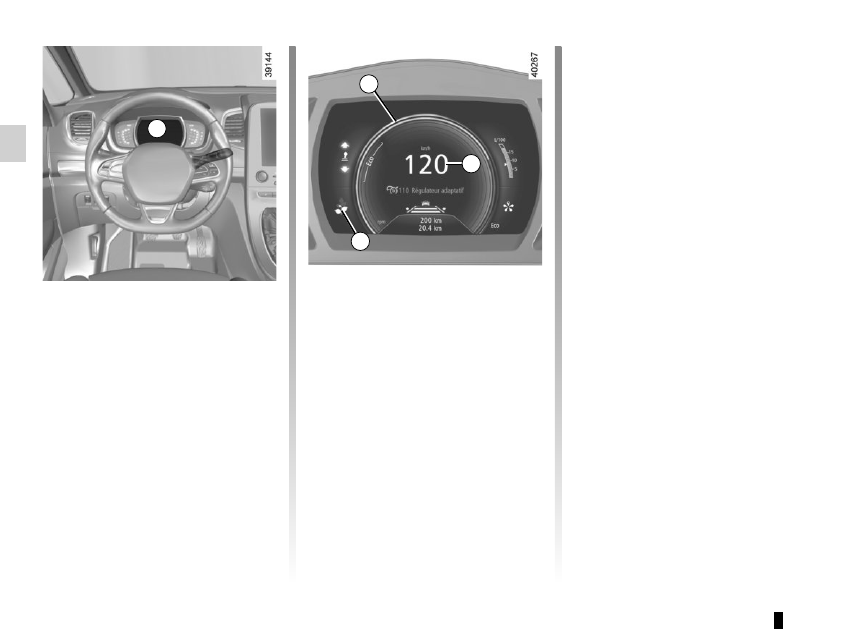
DISPLAYS AND INDICATORS
(1/4)
Instrument panel A
You can customise your instrument
panel with the content and colours of
your choice.
From the multifunction screen, select:
– one of the Multi-Sense modes.
Please refer to the information on
“Multi-Sense” in Section 3;
– menu “System” then “User profile”.
Refer to the handbook for the equip-
ment.
Rev counter 1
(graduations x 1000)
Speedometer 2
This is displayed differently according
to how the instrument panel is custom-
ised.
Overspeed buzzer
Depending on the vehicle and country,
a buzzer sounds for approximately
10 seconds every 40 seconds, as long
as the vehicle is travelling in excess of
72 mph (120 km/h).
2
1
3
A
Driving style indicator 3
Please refer to the information on “Eco-
driving” in Section 2.
Trip computer and warning
system
Refer to the information on the “Trip
computer and warning system” in
Section 1.