Renault Espace (2016 year). Instruction - part 4
1.50
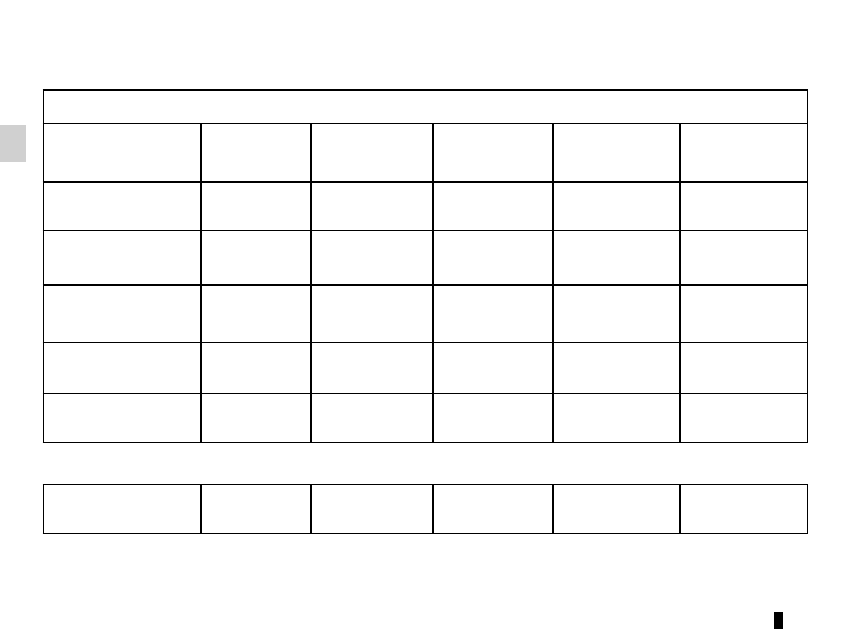
CHILD SEATS: attachment using the ISOFIX system
(2/6)
Five-seater version
Type of child seat
Weight of
the child
Seat size ISOFIX
Front passenger
seat
Rear side seats
Rear centre seat
Carrycot fitted across
the vehicle
Group 0
< 10 kg
F, G
X
X
X
Rear-facing shell
seat
Groups 0 or 0 +
< 10 kg and
< 13 kg
E
X
IL (1)
IL (1)
Shell seat/rear-facing
seat
Groups 0+ and 1
< 13 kg and 9 to
18 kg
C, D
X
IL (1)
IL (1)
Forward-facing seat
Group 1
9 to 18 kg
A, B, B1
X
IUF - IL (1) (2)
IUF - IL (1) (2)
Booster seat
Groups 2 and 3
15 to 25 kg and
22 to 36 kg
X
IUF - IL (1) (2)
IUF - IL (1) (2)
Seat i-Size
X
i-U
i-U
The table below summarises the information already shown on the diagram on the previous page, to ensure the regula-
tions in force are respected.