Renault Espace (2016 year). Instruction - part 3


  Index      Renault     Renault Espace - instruction 2016 year in english


Search            


Content   ..  1  2  3  4   ..


Renault Espace (2016 year). Instruction - part 3


1.34

STEERING WHEEL/POWER-ASSISTED STEERING

Power-assisted steering

Variable power-assisted steering
The variable power assisted steering 

system is equipped with an electronic 

control system which alters the level of 

assistance to suit the vehicle speed.
Steering is made easier during parking 

manoeuvres (for added comfort) while 

the force needed to steer increases 

progressively as the speed rises (for 

enhanced safety at high speeds).

Stop and Start feature
With the engine on standby, power-as-

sisted steering is no longer operational. 

It returns to its original state when the 

engine is restarted or when the speed 

moves above 1 mph or 1 km/h (hill, 

slope, etc.).

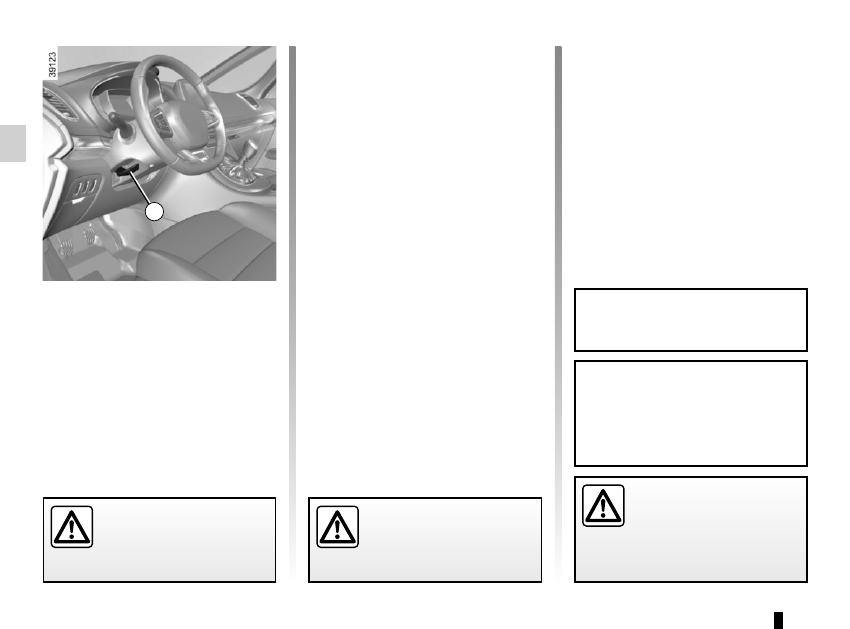
Adjusting the steering wheel 

height and depth

Lower the lever 1 and position the 

steering wheel in the required position.
Then, raise the lever fully, beyond the 

point of resistance to lock the steering 

wheel.
Make sure that the steering wheel is 

correctly locked.

For safety reasons, only 

adjust the steering wheel 

when the vehicle is station-

ary.

Never leave the steering wheel at 

full lock while stationary.

Do not switch off the engine 

when driving downhill and, 

as a general rule, when 

driving (the power-assisted 

steering and brake cannot operate 

normally).

With the engine switched off, or if 

there is a system fault, it is still pos-

sible to turn the steering wheel. The 

force required will be greater.

1

Engine on standby - power-

assisted steering is no 

longer operational.

NB: power-assisted steering depends 

on the mode selected in the “Multi-

Sense” menu (please refer to the infor-

mation in “Multi-Sense” in Section 3).

1.35

CHILD SAFETY: General information 

(1/2)

Carrying children

Children, and adults, must be correctly 

seated and strapped in for all journeys. 

The children being carried in your vehi-

cle are your responsibility.
A child is not a miniature adult. Children 

are at risk of specific injuries as their 

muscles and bones have not yet fin-

ished growing. The seat belt alone 

would not provide suitable protection. 

Use an approved child seat and ensure 

you use it correctly.

A collision at 30 mph 

(50 km/h) is the same as fall-

ing a distance of 10 metres. 

Transporting a child without 

a restraint is the equivalent of allow-

ing him or her to play on a fourth-

floor balcony without railings.

Never travel with a child held in your 

arms. In the event of an accident, 

you will not be able to keep hold of 

the child, even if you yourself are 

wearing a seat belt.

If your vehicle has been involved in 

a road accident, replace the child 

seat and have the seat belts and 

ISOFIX anchorage points checked.

To prevent the doors being 

opened, use the “Child 

safety” device (refer to the 

information on “Opening 

and closing the doors” in Section 1).

Driver’s responsibility 

when parking or stopping 

the vehicle
Never leave an animal, 

child or adult who is not self-suffi-

cient alone on your vehicle, even for 

a short time.
They may pose a risk to themselves 

or to others by starting the engine, 

activating equipment such as the 

electric windows or by locking the 

doors.
Also, in hot and/or sunny weather, 

please remember that the tempera-

ture inside the passenger compart-

ment increases very quickly.
RISK OF DEATH OR SERIOUS 

INJURY.

1.36

CHILD SAFETY: General information 

(2/2)

Using a child seat

The level of protection offered by the 

child seat depends on its ability to re-

strain your child and on its installation. 

Incorrect installation compromises the 

protection it offers the child in the event 

of harsh braking or an impact.
Before purchasing a child seat, check 

that it complies with the regulations for 

the country you are in and that it can 

be fitted in your vehicle. Consult an ap-

proved dealer to find out which seats 

are recommended for your vehicle.
Before fitting a child seat, read the 

manual and respect its instructions. If 

you experience any difficulties during 

installation, contact the manufacturer 

of the equipment. Keep the instructions 

with the seat.

Set a good example by always fas-

tening your seat belt and teaching 

your child:

–  to strap themselves in correctly;

–  to always get in and out of the car 

at the kerb, away from busy traf-

fic.

Do not use a second-hand child 

seat or one without an instruction 

manual.
Check that there are no objects in 

the vicinity of the child seat which 

could impede its operation.

Never leave a child unat-

tended in the vehicle.
Check that your child is 

always strapped in and that 

the belt or safety harness used is 

correctly set and adjusted. Avoid 

wearing bulky clothing which could 

cause the belts to slacken.
Never let your child put their head or 

arms out of the window.
Check that the child is in the correct 

position for the entire journey, espe-

cially if asleep.

1.37

CHILD SAFETY: choosing a child seat

Rear-facing child seats

A baby’s head is, proportionally, heavier 

than that of an adult and its neck is very 

fragile. Transport the child in this po-

sition for as long as possible (until the 

age of 2 at the very least). It supports 

both the head and the neck.

Choose a bucket type seat for best side 

protection and change it as soon as the 

child’s head is higher than the shell.

Forward-facing child seats

The child’s head and abdomen need to 

be protected as a priority. A forward-fac-

ing child seat which is firmly attached to 

the vehicle will reduce the risk of impact 

to the head. Ensure your child travels in 

a forward-facing seat with a harness for 

as long as their size permits.

Choose a bucket type seat for optimum 

side protection.

Booster cushions

From 15 kg or 4 years, the child can 

travel using a booster seat, which will 

enable the seat belt to be adapted to 

suit his/her size and shape. The boos-

ter seat cushion must be fitted with 

guides to position the seat belt on the 

child’s thighs rather than the stomach. 

It is recommended that you use a seat-

back fitted with a belt strap guide which 

can be adjusted in terms of height to 

position the seat belt in the centre of the 

shoulder. It must never rest on the neck 

or on the arm.

Choose a bucket type seat for optimum 

side protection.

1.38

CHILD SAFETY: choosing a child seat mounting 

(1/3)

There are two ways of attaching child 

seats: via the seat belt or using the 

ISOFIX system.

The seat belt must never 

be twisted or the tension 

relieved. Never pass the 

shoulder strap under the 

arm or behind the back.

Check that the seat belt has not 

been damaged by sharp edges.

If the seat belt does not operate nor-

mally, it will not protect the child. 

Consult an approved dealer. Do not 

use this seat until the seat belt has 

been repaired.

Do not use the child seat 

if it may unfasten the seat 

belt restraining it: the base 

of the seat must not rest on 

the buckle and/or catch of the seat 

belt.

Attachment via the seat belt
The seat belt must be adjusted to 

ensure that it is effective in the event of 

harsh braking or an impact.
Ensure that the strap paths indicated 

by the child seat manufacturer are re-

spected.
Always check that the seat belt is cor-

rectly fastened by pulling it up, then 

pulling it out fully whilst pressing on the 

child seat.
Check that the seat is correctly held by 

moving it from side to side and back 

to front: the seat should  remain firmly 

fixed.
Check that the child seat has not been 

installed at an angle and that it is not 

resting against a window.

1.39

Attachment using the ISOFIX 

system
Approved child seats ISOFIX are stand-

ardised in accordance with current reg-

ulations if any of the four cases below 

applies:
–  ISOFIX universal 3-point forward-

facing seat;

–  ISOFIX semi-universal 2-point seat;
– Specific;
–  i-Size Which has:

 –  

either a belt which attaches to the 

third ring of the seat concerned;

 –  

or a stay that rests on the vehi-

cle floor, compatible with the ap-

proved seat i-Size, the role of 

which is to prevent the child seat 

from moving in the event of a col-

lision.

In the latter three cases check that your 

child seat can be installed by consulting 

the list of compatible vehicles.

No modifications may be 

made to the component 

parts of the restraint system 

(ISOFIX seat belts, seats 

and their mountings) originally fitted.

Before using an ISOFIX 

child seat that you pur-

chased for another vehicle, 

check that its installation is 

authorised. Consult the list of ve-

hicles which can be fitted with the 

seat from the equipment manufac-

turer.

CHILD SAFETY: choosing a child seat mounting 

(2/3)

Attach the child seat with the ISOFIX 

locks, if these are provided. The ISOFIX 

system allows quick, easy, safe fitting.
The ISOFIX system consists of 2 rings 

and, in some cases, a third ring.

1.40

CHILD SAFETY: choosing a child seat mounting 

(3/3)

3

4

The third ring 34 or 5 is used to attach 

the upper strap on some seats ISOFIX.

The ISOFIX anchorage points have been exclusively designed for child 

seats with the ISOFIX system. Never fit a different type of child seat, seat 

belt or other objects to these anchorage points. Check that nothing is ob-

structing the anchorage points.

If your vehicle has been involved in a road accident, have the ISOFIX anchorage 

points checked and replace your child seat.

Attachment using the ISOFIX 

system (continued)

The two rings 1 are located between 

the seatback and the seat base of the 

seat and are identified by a marking.

To ensure your child seat can be easily 

fitted and locked on the rings 1, use 

access guides 2 on the child seat.

The rings are located on the rear seat-
backs and indicated by the symbol 

.

In all cases, attach the strap hook to 

the corresponding ring (3 and 5 for the 

rear side seats and 4 for the rear centre 

seat) and place the seat in the desired 

position.
Pull the belt so that the back of the child 

seat comes into contact with the back 

of the vehicle seat.

The child seat strap must 

be attached to the corre-

sponding ring.
Do not use any other 

mounting point.

1

2

5

Check that the seatback 

of the forward-facing child 

seat is in contact with the 

seatback of the vehicle 

seat. In this case, the child seat may 

not always rest on the seat base of 

the vehicle seat.

1.41

CHILD SAFETY: fitting a child seat, general information 

(1/2)

The types of child seat indicated may 

not be available. Before using a differ-

ent child seat, check with the manufac-

turer that it can be fitted. 

In the front seat
The laws concerning children travel-

ling in the front passenger seat differ in 

every country. Consult the legislation in 

force and follow the indications on the 

diagram on the following page.
Before fitting a child seat in this seat (if 

authorised):

–  lower the seat belt as far as possible;

–  move the seat as far back as possi-

ble;

–  gently tilt the seatback away from 

vertical (approximately 25°);

–  on equipped vehicles, raise the seat 

base as far as possible.

In all situations, reinsert the headrest to 

its full extent so that it does not interfere 

with the child seat (see the information 

on “Front headrests” in Section 1);

Some seats are not suitable for fitting 

child seats. The diagram on the follow-

ing page shows you how to attach a 

child seat.

Fit the child seat in a rear 

seat wherever possible.
Make sure that the child 

seat or the child’s feet do 

not prevent the front seat from lock-

ing correctly. Refer to the informa-

tion on the “Front seat” in Section 1.
Check that when installing the child 

seat in the vehicle it is not at risk of 

coming loose from its base.
If you have to remove the headrest, 

check that it is correctly stored so 

that it does not come loose under 

harsh braking or impact.
Always attach the child seat to the 

vehicle even if it is not in use so that 

it does not come loose under harsh 

braking or impact.

RISK OF DEATH OR 

SERIOUS INJURY: before 

fitting a rear-facing child 

seat to this seat, check 

that the air bag has been deacti-

vated (refer to the information on 

“Child safety: deactivating/activat-

ing the front passenger air bag” in 

Section 1).

After installing the child seat, if neces-

sary, the seat may be advanced (so as 

to leave enough space in the rear seats 

for passengers or other child seats). 

For a rear-facing child seat, do not let 

it touch the dashboard or move it to the 

furthest forward position.
Do not change other settings after in-

stalling the child seat.

1.42

CHILD SAFETY: fitting a child seat, general information 

(2/2)

In the rear seat
A carrycot can be installed across the 

vehicle and will take up at least two 

seats. Position the child with his or her 

feet nearest the door.
Move the front seat as far forward as 

possible to install a rear-facing child 

seat, then move back the seat in front 

as far as it will go, although without al-

lowing it to come into contact with the 

child seat.
For the safety of the child in the for-

ward-facing position:

–  move the relevant seat backwards 

as far as possible;

–  move the seat in front of the child 

forwards, and set the position of the 

seatback to avoid contact between 

the seat and the child’s legs.

Always remove the headrest from the 

rear seat used for the child seat (see 

“Rear headrests” in Section 3). If nec-

essary, position the vehicle seat as far 

back as possible. This must be done 

before fitting the child seat.

Check that the child seat is resting 

against the back of the vehicle seat.

Ensure that the child seat 

or the child’s feet do not 

prevent the front seat from 

locking correctly. Refer to 

the information on the “Front seat” 

in Section 1 or “Rear seat operation” 

in Section 3.

The floor of your vehicle 

has storage spaces. Before 

installing a child seat with 

a floor support, ensure that 

this seat can be correctly installed 

by consulting the list of compatible 

vehicles supplied with the child seat.
Risk of serious injury in the event of 

sudden braking or accident.

When fitting a child seat 

(Group 2 or 3 booster seat), 

check that the seat belts op-

erate (wind) correctly: refer 

to Section 1 “Rear seat belts”. If 

necessary, adjust the position of the 

vehicle seat.

For 7-seater vehicles, a 

child seat with a stay should 

never be installed on the 

third row rear seats.

For 7-seater vehicles, the second row 

rear seats must be pushed forward 

before a child is seated in the third row 

rear seats.

1.43

CHILD SEATS: attachment by seat belt 

(1/6)

Visual installation of the five-seater version

RISK OF DEATH OR 

SERIOUS INJURY: Before 

installing a child seat on the 

front passenger seat, check 

that the airbag has been deacti-

vated (please refer to “Child safety: 

front passenger airbag deactivation 

and activation” in Section 1).

Using a child safety system 

which is not approved for 

this vehicle will not correctly 

protect the baby or child. 

They risk serious or even fatal injury.

³

  Check the status of the airbag 

before fitting a child seat or allowing a 

passenger to use the seat.

²

Seat not suitable for fitting 

child seats.

Child seat attached using the belt

¬

  Seat which allows a child seat 

with “Universal” approval to be attached 

by a seat belt.

1.44

CHILD SEATS: attachment by seat belt 

(2/6)

Five-seater version

Type of child seat

Weight of the child

Front passenger 

seat (1)

Rear side seats

Rear centre seat

C a r r y c o t   f i t t e d 

across the vehicle

Group 0

< 10 kg

X

U (2)

X

Rear-facing shell 

seat

Groups 0 or 0 +

< 10 kg and < 13 kg

U (5)

U (3)

U (3)

Shell seat/rear-facing 

seat

Groups 0+ and 1

< 13 kg and 9 to 18 kg

U (5)

U (3)

U (3)

Forward-facing seat

Group 1

9 to 18 kg

X

U (3) (4)

U (3) (4)

Booster seat

Groups 2 and 3

15 to 25 kg and 22 to 

36 kg

X

U (3) (4)

U (3) (4)

(1) RISK OF DEATH OR SERIOUS INJURY: Before installing a child seat on the front passenger seat, check that 

the airbag has been deactivated (please refer to “Child safety: front passenger airbag deactivation and activation” in 

Section 1).

The table below summarises the information already shown on the diagram on the previous page, to ensure the applica-

ble regulations are respected.

1.45

X =  Seat not suitable for fitting child seats of this type.
U  =  Seat which allows a child seat with “Universal” approval to be installed using a seat belt; check that it can be fitted.
(2)  A carrycot can be installed across the vehicle and will take up at least two seats. Position the child with his or her feet nearest 

the door.

(3)  If necessary, position the vehicle seat as far back as possible. Move the front seat as far forward as possible to install a rear-

facing child seat, then move back the seat in front as far as it will go, although without allowing it to come into contact with the 

child seat.

(4)  In all situations, remove the rear headrest of the seat on which the child seat is positioned. This must be done before fitting the 

child seat. Please refer to the information on the “Rear headrests” in Section 3. Move the seat in front of the child forwards, 

move the seatback forward to avoid contact between the seat and the child’s legs.

(5) Raise the seat to the maximum and position it as far back as possible, tilting the seatback slightly (approximately 25°).

CHILD SEATS: attachment by seat belt 

(3/6)

1.46

CHILD SEATS: attachment by seat belt 

(4/6)

Seven-seat version

Type of child seat

Weight of the child

Front passenger 

seat (1)

Row 2 rear 

side seats

Row 2 rear 

centre seat

Row 3 rear 

centre seat (5)

C a r r y c o t   f i t t e d 

across the vehicle

Group 0

< 10 kg

X

U (2)

X

U

Rear-facing shell 

seat

Groups 0 or 0 +

< 10 kg and < 13 kg

U (6)

U (3)

U (3)

U

Shell seat/rear-facing 

seat

Groups 0+ and 1

< 13 kg and 9 to 18 kg

U (6)

U (3)

U (3)

U

Forward-facing seat

Group 1

9 to 18 kg

X

U (3) (4)

U (3) (4)

U

Booster seat

Groups 2 and 3

15 to 25 kg and 22 to 

36 kg

X

U (3) (4)

U (3) (4)

U

(1) RISK OF DEATH OR SERIOUS INJURY: Before installing a child seat on the front passenger seat, check that 

the airbag has been deactivated (please refer to “Child safety: front passenger airbag deactivation and activation” in 

Section 1).

The table below summarises the information already shown in the diagram on the following pages, to ensure the appli-

cable regulations are respected.

1.47

CHILD SEATS: attachment by seat belt 

(5/6)

X =  Seat not suitable for fitting child seats of this type.
U  =  Seat which allows a child seat with “Universal” approval to be installed using a seat belt; check that it can be fitted.
(2)  A carrycot can be installed across the vehicle and will take up at least two seats. Position the child with his or her feet nearest 

the door.

(3)  If necessary, position the vehicle seat as far back as possible. Move the front seat as far forward as possible to install a rear-

facing child seat, then move back the seat in front as far as it will go, although without allowing it to come into contact with the 

child seat.

(4)  In all situations, remove the rear headrest of the seat on which the child seat is positioned. This must be done before fitting the 

child seat. Please refer to the information on the “Rear headrests” in Section 3. Move the seat in front of the child forwards, 

move the seatback forward to avoid contact between the seat and the child’s legs.

(5)  Push the seat(s) in front of the child in a third row seat as far forward as possible.
(6)  Raise the seat to the maximum and position it as far back as possible, tilting the seatback slightly (approximately 25°).

1.48

³

  Check the status of the airbag 

before fitting a child seat or allowing a 

passenger to use the seat.

²

Seat not suitable for fitting 

child seats.

Child seat attached using the belt

¬

  Seat which allows a child seat 

with “Universal” approval to be attached 

by a seat belt.

Using a child safety system 

which is not approved for 

this vehicle will not correctly 

protect the baby or child. 

They risk serious or even fatal injury.

RISK OF DEATH OR 

SERIOUS INJURY: Before 

installing a child seat on the 

front passenger seat, check 

that the airbag has been deacti-

vated (please refer to “Child safety: 

front passenger airbag deactivation 

and activation” in Section 1).

CHILD SEATS: attachment by seat belt 

(6/6)

Installation diagram, 7-seater version

1.49

CHILD SEATS: attachment using the ISOFIX system 

(1/6)

Child seat fitted using the  ISOFIX 

mounting

 Seat which allows an ISOFIX 

child seat to be fitted.

±

 The rear seats are fitted with 

an anchorage point which allows a 

forward-facing ISOFIX child seat with 

universal approval to be attached. The 

anchorage points are located on the 

backs of the rear seats.
The size of the ISOFIX child seat is in-

dicated by a letter:
–  A, B and B1: for forward-facing seats 

in group 1 (9 to 18 kg);

–  C and D: shell seat or rear-facing 

seats in group 0+ (less than 13 kg) 

or group 1 (9 to 18 kg);

–  E: rear-facing shell seats in group 0 

(less than 10 kg) or 0+ (less than 

13 kg);

–  F and G: cots in group 0 (less than 

10 kg).

Using a child safety system 

which is not approved for 

this vehicle will not correctly 

protect the baby or child. 

They risk serious or even fatal injury.

²

Seat which does not allow a 

child seat to be fitted.

Visual installation of the five-seater version


Content   ..  1  2  3  4   ..