Peugeot 308 (2024 year). Manual in english - page 2
 

  Index      Manuals     Peugeot 308 (2024 year). Manual in english


Search            copyright infringement  


Content      ..      1      2      3      ..


Peugeot 308 (2024 year). Manual in english - page 2


34

Access

Automatic folding/unfolding of the door 

mirrors is configured in the touch screen.

For more information on 

Mirrors

, refer to the 

corresponding section.

As a safety measure, never leave the 

vehicle, even for a short time, without 

taking the Keyless Entry and Start system’s 

electronic key with you.

Be aware of the risk of theft of the vehicle if 

the key is present in one of the defined areas 

while the vehicle is unlocked.

In order to preserve the battery in the 

electronic key and the vehicle's battery:

–  The unlocking on approach function 

(zone 

C

) automatically switches to hibernation 

mode after several days (approximately one 

week) without being used. To unlock the 

vehicle, use the remote control or press on 

the driver’s door handle. The next time the 

vehicle is started, the automatic unlocking 

and locking functions will be reactivated.

–  If the welcome lighting is triggered 

several times in succession without the 

vehicle subsequently being started, it will be 

deactivated.

–  All "hands-free" functions switch to 

hibernation mode after 21 days without being 

used. To restore these functions, unlock the 

vehicle using the remote control and start the 

engine.

Electrical interference

The electronic key may not work if it is 

close to an electronic device (e.g. mobile 

telephone (switched on or on standby), laptop 

computer, strong magnetic fields). If this 

occurs, move the electronic key away from 

the electronic device.

Central locking


Manual

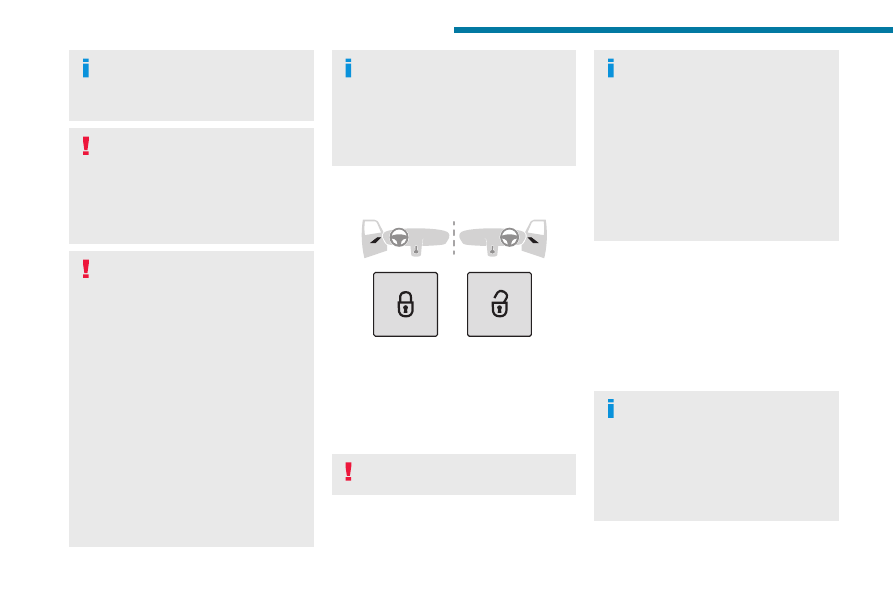
►  Press these buttons to lock/unlock the vehicle 

(doors and boot) from inside the passenger 

compartment. 

The indicator lamp comes on to confirm the 

central locking of the vehicle.

Central locking does not take place if any 

of the doors are open.

When locking/deadlocking from the 

outside

When the vehicle is locked or deadlocked 

from the outside, the indicator lamp in the 

locking button flashes and the buttons are 

inactive.

►  After normal locking, pull one of the 

interior door controls to unlock the vehicle.

►  After deadlocking, you must use the 

remote control, the "Keyless Entry and 

Start" system or the built-in key to unlock the 

vehicle.

Automatic (anti-intrusion 

security)

The doors and boot lock automatically while 

driving (speed above 6 mph (10 km/h)).

To deactivate/reactivate this function (activated 

by default):

►  Press the locking button until a confirmation 

message appears.

Transporting long or voluminous 

objects

Press the central locking control to drive 

with the boot open and the doors locked. 

Otherwise, every time the speed of the 

vehicle exceeds 6 mph (10 km/h), the sound 

of the locks rebounding will be heard and an 

alert will be displayed.
35

Access

2

Back-up procedures

Lost keys, remote control, 

electronic key

Go to a PEUGEOT dealer with the vehicle's 

registration certificate, your personal 

identification documents and if possible, the label 

bearing the key code.

The PEUGEOT dealer will be able to retrieve the 

key code and the transponder code, enabling a 

new key to be ordered.

Complete unlocking/locking 

of the vehicle with the key

Use this procedure in the following situations:

–  Remote control battery discharged.

–  Remote control malfunction.

–  Vehicle battery discharged.

–  Vehicle in an area subject to strong 

electromagnetic interference.

In the first case, change the remote control 

battery.

In the second case, reinitialise the remote 

control.

Refer to the corresponding sections.


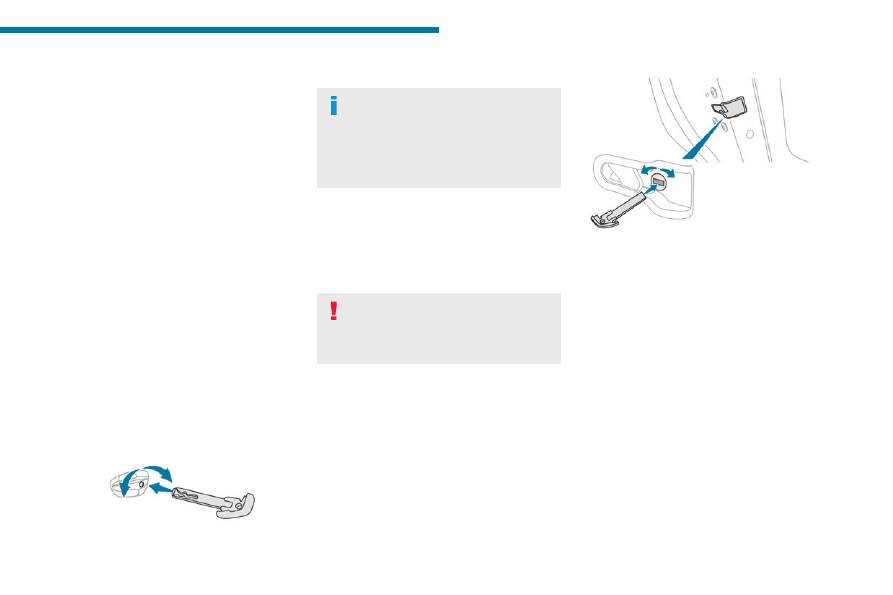
►  Insert the key into the door lock.

►  Turn the key towards the front or the rear to 

unlock or lock the vehicle.

If the vehicle is fitted with an alarm, it will 

not be activated when locking with the 

key.

If the alarm is activated, the siren sounds 

when the door is opened; switch on the 

ignition to stop it.

Central locking not 

functioning

Use these procedures in the following cases:

–  Central locking malfunction.

–  Battery disconnected or discharged.

In the event of a malfunction of the 

central locking system, the battery must 

be disconnected to ensure that the vehicle is 

locked fully.

Front left-hand door

►  Insert the key into the lock and turn it towards 

the front or rear of the vehicle to lock or unlock 

the door.

Other doors

Unlocking

►  Pull the interior door opening control.

Locking


►  Open the doors.

►  For the rear doors, check that the child lock 

is not on.

Refer to the corresponding section.

►  Gently insert the key into the latch located in 

the door lock, then turn the latch an eighth of a 

turn towards the outside of the door.

►  Close the doors and check from the outside 

that the vehicle is locked.

Changing the battery

A message is displayed on the instrument panel 

when the battery needs changing.

36

Access

Battery type: CR2032/3 volts.


►  Unclip the cover by inserting a small 

screwdriver in the slot and lift the cover.

►  Remove the flat battery from its housing.

►  Put the new battery in place, respecting the 

polarity. Start by inserting it into the contacts 

located in the corner, then clip the cover onto 

the unit.

►  Reinitialise the remote control.

For more information on 

Reinitialising the 

remote control

, refer to the corresponding 

section.

Do not throw remote control batteries 

away, as they contain metals that are 

harmful to the environment. Take them to an 

approved disposal point.

This equipment contains a button type 

battery.

Do not swallow the battery. Risk of chemical 

burns!

Swallowing the battery can cause serious 

internal burning in only 2 hours and can be 

fatal.

If batteries have been swallowed or inserted 

into a part of the body, seek immediate 

medical advice.

Keep new and used batteries out of the reach 

of children.

If the battery compartment does not close 

properly, stop using the product and keep it 

out of the reach of children.

Risk of explosion if the battery is 

replaced with an incorrect type!

Replace the battery with the same type.

Risk of explosion or leaking of 

inflammable liquid or gas!

Do not use in/store in/place in an environment 

where the temperature is extremely high or 

where the pressure is extremely low due to 

very high altitude.

Do not try to burn, crush or cut a used battery.

Reinitialising the remote 

control

Following replacement of the battery or in 

the event of a fault, it may be necessary to 

reinitialise the remote control.


►  Insert the mechanical key (incorporated into 

the remote control) into the lock to open the 

vehicle.

►  Place the electronic key against the back-up 

reader on the steering column and hold it there 

until the ignition is switched on.

► 

With a manual gearbox,

 place the gear lever 

in neutral then fully depress the clutch pedal.

► 

With an automatic gearbox or drive 

selector

, while in mode 

P

, depress the brake 

pedal.

►  Switch on the ignition by pressing the 

START/STOP

 button.

37

Access

2

If the fault persists after reinitialisation, contact 

a PEUGEOT dealer or a qualified workshop 

without delay.

Doors

Opening

From outside

►  After unlocking the vehicle or with the 

"Keyless Entry and Start" system electronic key 

in the recognition zone, pull the door handle.

From inside

►  Pull the interior opening control of a door; this 

unlocks the vehicle completely.

With selective unlocking activated:

–  Opening the driver's door unlocks 

the driver's door only (if the vehicle has not 

already been completely unlocked).

–  Opening one of the passenger doors 

unlocks the rest of the vehicle.

Boot

Opening the tailgate

►   With the vehicle unlocked or with the 

electronic key in the recognition zone, press the 

central tailgate control.

►  Raise the tailgate.

When selective unlocking is activated, 

the electronic key must be close to the 

rear of the vehicle.

The tailgate is not designed to hold a 

bicycle carrier.

Closing the tailgate

►  Lower the tailgate using the interior grips.

►  Release the grips and press down on the 

outside of the tailgate to close it.

In the event of a malfunction or if you 

experience difficulty opening or closing 

the tailgate, have it checked by a PEUGEOT 

dealer or a qualified workshop without delay, 

to avoid the issue deteriorating and prevent 

any risk of the tailgate dropping, potentially 

causing serious injury.

Back-up release

To manually unlock the boot in the event of a 

battery or central locking failure.

Unlocking

►  Fold the rear seats to gain access to the lock 

from inside the boot.


►  Insert a small screwdriver into hole 

A

 of the 

lock to unlock the boot.

►  Move the latch to the left.

Locking after closing

If the fault persists after closing again, the boot 

will remain locked.

Motorised tailgate (SW)

(Depending on version)

The motorised tailgate must only be operated 

with the vehicle stationary.


Check that there is enough space to 

allow for the movement of the motorised 

tailgate.


38

Access


Never insert a finger in the locking 

system of the motorised tailgate - risk of 

serious injury!

To avoid the risk of injury through 

pinching or trapping, before and during 

operation of the motorised tailgate:

–  ensure that there is no-one close to the 

rear of the vehicle.

–  monitor the activity of the rear passengers, 

particularly any children.

Bicycle carrier/Towing device

The motorised tailgate is not designed to support 

a bicycle carrier.

When installing a bicycle carrier on the towing 

device with connection of the cable to the trailer 

socket, the motorised operation of the tailgate 

will be automatically deactivated.

If using a towing device or bicycle carrier 

not recommended by PEUGEOT, it is 

essential to deactivate the motorised 

operation of the tailgate.

Motorised operation

The motorised operation of the tailgate is 

configured in the 

Settings > Vehicle


touch screen application.


There are several ways of operating the tailgate:

A.

Using the Keyless Entry and Start system’s 

electronic key

B.

Using the exterior tailgate control

C.

Using the interior tailgate control

D.

Using the control on the dashboard

If motorised operation is not activated, 

the request to open with this function 

release the tailgate (partially-open position).

Opening

►  A long press on the central button 

A

 of the 

electronic key.

or

►  A short press on the exterior tailgate control 

B

 (with the electronic key on your person, if the 

vehicle or the tailgate is locked).

or

►  Two consecutive presses on the control 

D

 of 

the dashboard.

The tailgate opens, either completely by 

default, or to the position memorised 

beforehand.

If motorised operation is not activated, these 

actions release the tailgate (partially-open 

position).

When the vehicle is locked, the request to 

open the boot with one of the controls 

A


or 

B

 unlocks the vehicle, or only the boot if 

selective unlocking is activated, prior to the 

opening of the boot.

Closing

►  A long press on the central button 

A

 of the 

electronic key.

or

►  A short press on the exterior tailgate control 

B

.

or

►  A short press on the interior tailgate control 

C

.

or

39

Access

2

►  Two consecutive presses on the control 

D

 of 

the dashboard.

It is possible to interrupt the operation of 

the tailgate at any point.

Pressing one of these controls again 

interrupts the movement that is underway.

Following the interruption of a movement, 

pressing one of these controls again reverses 

the movement.

If the tailgate is left open for an extended 

period of time, the tailgate may need to 

be closed manually to reset power tailgate 

functionality.

Hands-free function (Hands-

Free Tailgate Access)

With the electronic key on your person, this 

function allows the motorised tailgate to be 

opened, closed or stopped via a "kicking" 

movement under the rear bumper.

The "Handsfree Trunk Opening" function 

is configured in the 

Settings > Vehicle


touch screen application.

Ensure that you are steady on your feet 

before performing the "kicking" 

movement.

Take care not to touch the exhaust system 

which may be hot - risk of burns!

Rechargeable hybrid vehicles

The function is not available when the 

vehicle is connected.


►  Position yourself behind the vehicle by the 

number plate and perform a "kicking" movement 

in the "

OK

" detection zone.

The "kicking" movement must be given forwards, 

smoothly, not too fast and with a vertical 

movement from low to high. Raise the foot 

sufficiently and remove it immediately.

Acknowledgement of the "kicking" movement 

is confirmed by the lighting of the direction 

indicators.

"Sideward kicking" movements do not 

work. If the "kicking" movement has not 

been detected, wait at least 2 seconds before 

repeating the movement.

Do not perform repetitive "kicking" 

movements.

If the motorised tailgate has not started to open 

or close, check that:

–  the function is activated.

–  the electronic key is on your person, outside 

the vehicle in the rear recognition area.

–  the "kicking" movement was performed in the 

detection zone, close enough to the bumper.

–  the foot was removed from the bumper quickly 

enough.

When the vehicle is locked, the request 

to open the tailgate with this function 

unlocks the vehicle, or only the tailgate if 

selective unlocking is activated, prior to the 

opening of the tailgate.

Closing the tailgate with the "Hands-Free 

Tailgate Access" function enables you to lock 

the vehicle.

Recommendations on the hands-free 

function (Hands-Free Tailgate Access)

If it does not work, check that the electronic key 

is not exposed to a source of electromagnetic 

interference (e.g. smartphone).

The function may be deactivated or affected if 

there is rain or snow.

40

Access

The function may not work correctly with a 

prosthetic leg.

In some circumstances, the tailgate may open or 

close by itself, particularly when:

–  hitching up or removing a trailer.

–  operating a towing device.

–  fitting or removing a bicycle carrier.

–  loading or unloading bicycles on/from a bicycle 

carrier.

–  depositing or lifting something behind the 

vehicle.

–  an animal approaches the rear bumper.

–  washing the vehicle.

–  maintenance is performed on the vehicle.

–  accessing the spare wheel.

To avoid such operating problems, keep the 

electronic key away from the recognition zone or 

deactivate the hands-free function.

Towing device

The installation of a towing device may 

disturb the detection system.

►  Perform the "kicking" movement on the 

right side of the towing device.

Memorising an opening 

position

To limit the opening angle of the motorised 

tailgate:

►  move the tailgate to the desired position 

manually or by pressing the button.

►  press button 

C

 or the exterior control 

B

 for 

more than 3 seconds (memorisation is confirmed 

by a brief audible signal).

A new memorisation operation cancels the 

previous one.

Memorising is not available until the 

height of opening is more than or equal 

to 1 metre between the low position and the 

high position of the tailgate.

Manual operation

The tailgate can be manoeuvred by hand, even 

with motorised operation activated.

The tailgate must be stationary.

►  Move the tailgate as slowly and smoothly as 

possible.

When opening and closing the motorised tailgate 

manually, there is no assistance from gas struts. 

Resistance to opening and closing is therefore 

entirely normal.

In case of the motor overheating

Repeatedly opening and closing the 

motorised tailgate can cause overheating of 

its electric motor, after which opening and 

closing will not be possible.

Allow at least 10 minutes for the electric 

motor to cool down before operating the 

tailgate again.

If you are unable to wait, operate it manually.

Manual closing of the 

motorised tailgate in case of 

failure

This operation is 

only necessary in the case of 

failure or deinitialisation/loss of the tailgate 

motor

.

If the failure originates from the battery, it is 

recommended to recharge it or change it with the 

tailgate 

closed

.

In this situation, a significant force may be 

needed to close the tailgate.

►  Close it gently without slamming, as slowly as 

possible, by pushing at the centre of the tailgate.

Do not lower the tailgate by pushing at 

one of its sides - risk of damage!

Precautions in use

In wintry conditions

To avoid any operating problems, remove 

the snow or wait until the ice melts before 

requesting motorised opening of the tailgate.

When washing

When washing the vehicle in an 

automatic car wash, do not forget to lock and 

move away from the vehicle to prevent any 

risk of unwanted opening.

41

Access

2

Alarm

(Depending on version)


System which protects and provides a deterrent 

against theft and break-ins.

Exterior perimeter monitoring

The system checks for opening of the vehicle.

The alarm is triggered if anyone tries to open a 

door, the boot or the bonnet, for example.

Interior volumetric monitoring

The system checks for any variation in volume in 

the passenger compartment.

The alarm is triggered if anyone breaks a 

window, enters the passenger compartment or 

moves inside the vehicle.

Anti-tilt monitoring

The system checks for any change in the attitude 

of the vehicle.

The alarm goes off if the vehicle is lifted or 

moved.

When the vehicle is parked, the alarm 

will not be triggered if the vehicle is 

knocked.

Rechargeable hybrid or electric 

vehicles

Depending on version, interior volumetric 

and anti-tilt monitoring may be reduced or 

even suspended during temperature pre-

conditioning sequences.

Self-protection function

The system checks whether any of its 

components are out of service.

The alarm is triggered if the battery, the central 

control or the siren wiring is put out of service or 

damaged.

Work on the alarm system

Consult a PEUGEOT dealer or a 

qualified workshop.

Locking the vehicle with full 

alarm system

Activation

►  Switch off the ignition and exit the vehicle.

►  Lock or deadlock the vehicle using the 

remote control or by pressing on the driver's 

door handle.

The monitoring system is also activated when 

the driver moves away from the vehicle.

When the monitoring system is active, the red 

indicator lamp in the button flashes once per 

second and the direction indicators come on for 

about 2 seconds.

The exterior perimeter monitoring is activated 

after 5 seconds and the interior volumetric 

monitoring after 45 seconds.

Door, boot or bonnet

If an opening is not properly closed, 

the vehicle is not locked, but the exterior 

perimeter monitoring will be activated after 

45 seconds, at the same time as the interior 

volumetric monitoring.

Sunroof

If the sunroof remains open, the vehicle 

is locked with exterior perimeter monitoring 

activated but without interior volumetric or 

anti-tilt monitoring.

Deactivation

►  Press one of the remote control unlocking 

buttons:

Short press. 

Long press. 

or

►  Unlock the vehicle by pressing the driver’s 

door handle.

42

Access

The monitoring system is also deactivated when 

the driver approaches the vehicle.

The monitoring system is deactivated: the 

indicator lamp in the button goes off and the 

direction indicators flash for about 2 seconds.

After unlocking using the remote 

control

If the vehicle automatically locks itself again 

(as happens if a door or the boot is not 

opened within 30 seconds of unlocking), the 

monitoring system is automatically activated.

Locking the vehicle 

with exterior perimeter 

monitoring only

Deactivate the interior volumetric and anti-tilt 

monitoring to avoid the unwanted triggering of 

the alarm, in certain cases such as:

–  Presence of an occupant or a pet.

–  Slightly open window.

–  Washing the vehicle.

–  Changing a wheel.

–  Towing the vehicle.

–  Transport on a ship or ferry.

Deactivating the interior volumetric 

and anti-tilt monitoring

►  Switch off the ignition and within 10 seconds 

press the alarm button until its red indicator lamp 

is on fixed.

►  Get out of the vehicle.

►  Immediately lock the vehicle using the remote 

control or the Keyless Entry and Start system.

Only the exterior perimeter monitoring is 

activated; the button's red indicator lamp flashes 

once every second.

To take effect, this deactivation must be 

carried out after each time the ignition is 

switched off.

Reactivating the interior volumetric 

and anti-tilt monitoring

►  Deactivate the exterior perimeter monitoring 

by unlocking the vehicle using the remote control 

or the Keyless Entry and Start system.

The indicator lamp in the button goes off.

►  Reactivate all monitoring by locking the 

vehicle using the remote control or the Keyless 

Entry and Start system.

The red indicator lamp in the button once again 

flashes every second.

Triggering of the alarm

This is indicated by sounding of the siren 

and flashing of the direction indicators for 30 

seconds.

Depending on the country of sale, certain 

monitoring functions remain active until the alarm 

has been triggered eleven times consecutively.

When the vehicle is unlocked using the remote 

control or the Keyless Entry and Start system, 

rapid flashing of the red indicator lamp in the 

button informs you that the alarm was triggered 

during your absence. When the ignition is 

switched on, this flashing stops.

Failure of the remote control

To deactivate the monitoring functions:

►  Unlock the vehicle using the key in the front 

left-hand door lock.

►  Open the door; the alarm is triggered.

►  Switch on the ignition; this stops the alarm. 

The indicator lamp in the button goes off.

Locking the vehicle without 

activating the alarm

►  Lock the vehicle using the key (built-in the 

remote control) in the front left-hand door lock.

Automatic activation

(Depending on version)

The system is activated automatically 2 minutes 

after the last door or the boot is closed.

►  To avoid triggering the alarm on entering the 

vehicle, first press the unlocking button on the 

remote control or unlock the vehicle using the 

"Keyless Entry and Start" system.

Malfunction

When the ignition is switched on, the fixed 

lighting of the red indicator lamp in the button 

indicates a system malfunction.

Have it checked by a PEUGEOT dealer or a 

qualified workshop.

43

Access

2

Electric windows


1.

Left-hand front

2.

Right-hand front

3.

Left-hand rear

4.

Right-hand rear

5.

Deactivation of electric window controls 

located by rear seats

Manual operation

►  To open/close the window, press/pull the 

switch without passing the point of resistance; 

the window stops as soon as the switch is 

released.

Automatic operation

►  To open/close the window, press/pull the 

switch past its resistance point: the window 

opens/closes completely when the switch is 

released.

Operating the switch again stops the movement 

of the window.

The electric window controls remain 

operational for approximately 45 seconds 

after switching off the ignition.

After that time, the controls are disabled. To 

reactivate them, switch the ignition on again.

Anti-pinch

If the window meets an obstacle while rising, it 

stops and immediately partially lowers again.

Overtaking of the anti-pinch

After triggering the anti-pinch, check 

that there are no obstacles blocking the 

movement of the window.

Try to close the window again.

If the window closing is interrupted by the 

anti-pinch 3 times in a row (max. 10 seconds 

between each action), the anti-pinch function 

becomes inoperable.

Without this protection, the window can only 

be closed manually - risk of injury!

Deactivating the rear 

controls for the rear electric 

windows

For your children's safety, ignition on or 

engine on, press control 

5

 to deactivate 

the controls for the rear electric windows, 

irrespective of their positions.

The red indicator lamp in the button comes on.

The rear electric windows can still be controlled 

using the driver's controls.

Reinitialising the electric 

windows

After reconnecting the battery, or in the event 

of abnormal window movement, the anti-pinch 

function must be reinitialised.

Automatic window closing is no longer 

available, only manual closing is 

possible.

Remote window closing with the electronic 

key is also no longer available in this case.

The anti-pinch function is inoperable during 

the following sequence of operations.

For each window:

►  Pull the control until the window is fully 

closed.

►  Release the control, then pull it again for at 

least one second.

If an electric window meets an obstacle 

during operation, the movement of the 

window must be reversed. To do this, press 

the relevant control.

When the driver operates the passengers’ 

electric window controls, it is important to 

ensure that nothing can prevent the window 

from closing properly.

It is important to ensure that passengers use 

the electric windows correctly.

44

Access

Pay particular attention to children when 

operating the windows.

Be aware of passengers and/or other persons 

present when closing windows remotely using 

the electronic key.

Do not put your head or arms through the 

open windows when the vehicle is moving - 

risk of serious injury!

Sunroof

The sunroof consists of a movable glass panel 

that slides over the roof and a blind that can 

be opened independently. Opening the sunroof 

automatically opens the blind.

►  To operate the panoramic sunroof, use the 

button in the roof console.


The sunroof can be operated when the ignition 

is turned on (if the battery is charged enough), 

with the engine running, in STOP mode of Stop 

& Start, and up to 45 seconds after turning off 

the ignition.

Precautions

Do not put your head or arms through the 

sunroof while the vehicle is moving - risk 

of serious injury!

Do not operate the sunroof if transverse 

roof bars are fitted - risk of serious 

damage!

Do not place heavy loads on the movable 

glass panel of the sunroof.

If the sunroof is wet, following a rain 

shower or washing the vehicle, wait until 

it is completely dry before operating it.

Do not operate the sunroof if it is covered by 

snow or ice - risk of damage!

Use only plastic scrapers to remove snow or 

ice from the sunroof.

Regularly check the condition of the 

sunroof seals (e.g. presence of dust, 

dead leaves).

If using a car wash, check first that the roof is 

correctly closed and keep the high-pressure 

jet at least 30 centimetres from the seals.

Never leave the vehicle with the sunroof 

open.

Operation

When opening the sunroof fully, the movable 

glass moves to a partially open position, then 

slides over the roof. Any intermediate position is 

possible.

Before operating the sunroof control 

button, ensure that no object or person 

might prevent the movement.

Pay particular attention to children when 

operating the sunroof.

If something is trapped when operating the 

sunroof, reverse the movement of the sunroof 

by pressing the control button in question.

The driver must ensure that passengers use 

the sunroof correctly.

Any manual intervention on the position of 

the sunroof may disturb the anti-pinch device. 

Perform a reinitialisation.

Anti-pinch system

If the sunroof encounters an obstacle when 

closing, the movement is automatically reversed.

Opening/Closing the sunroof

►  To open the sunroof, use the part of the 

button located towards the rear.

►  To close the sunroof, use the part of the 

button located towards the front.

Operating the button

►  Pressing the button beyond its point of 

resistance opens or closes the sunroof fully.

45

Access

2

►  Pressing the button again stops the 

movement in progress.

►  By keeping the button pressed (without going 

beyond the point of resistance), the movement of 

the glass stops when this button is released.

►  When the sunroof is closed: pressing once 

without passing the point of resistance moves it 

to the partially open position.

The sunroof and windows can be closed 

by holding down the remote control 

locking button.

Press again to stop the manoeuvre.

Opening/Closing the blind

►  To open the blind, pull its handle backwards 

until the desired position is reached.

►  To close the blind, push its handle forwards 

until the desired position is reached.

Reinitialisation

Reinitialisation is required after reconnecting the 

battery, or if the sunroof malfunctions or moves 

in a jerky manner.

►  Check that nothing is affecting the movement 

of the sunroof and that the seals are clean.

Automatic sunroof closing is no longer 

available, only manual closing is 

possible.

Remote sunroof closing with the electronic 

key is also no longer available in this case.

►  With the ignition on, press and hold 

the front part of the button to close the 

sunroof.

The sunroof closes step by step. When fully 

closed, it performs a slight opening/closing 

movement.

►  Release the button 1 second after the end of 

the movement.

46

Ease of use and comfort

Driving position

Correct seating position

Adopting a good driving position contributes to 

improving driver comfort and protection.

It also optimises interior and exterior visibility as 

well as access to controls.

Certain seat adjustments described in this 

section depend on the trim level and the country 

in which the vehicle is sold.

Driver’s side


Sit fully back in the seat with your pelvis, back 

and shoulders in contact with the seat backrest.

Adjust the seat cushion height so that your eyes 

are level with the centre of the windscreen.

The head should be at a minimum distance of 

10 cm from the roof.

Adjust the longitudinal position of the seat so 

that you can fully depress the pedals with legs 

slightly flexed.

The distance between the knees and the 

dashboard should be at least 10 cm, for easy 

access to the dashboard controls.

Adjust the backrest angle to as vertical a position 

as possible; never tilt it more than 25°.

Adjust the head restraint so that its upper edge is 

level with the top of the head.

Adjust the length of the seat cushion to support 

your thighs.

Adjust the lumbar support so that it conforms to 

the shape of the spine.

Adjust the steering wheel reach so that it is at 

least 25 cm from the sternum and you can hold it 

with your arms slightly bent.

Adjust the steering wheel height so that it does 

not obstruct the information displayed on the 

instrument panel.

As a safety precaution, adjust the seats 

only when the vehicle is stationary.

Electrically-adjustable seats

Switch the ignition on to enable the 

adjustments to be made.

Passenger’s side


Sit fully back in the seat with the pelvis, back and 

shoulders in contact with the seat backrest.

Adjust the longitudinal position of the seat so that 

you are at a distance of at least 25 cm from the 

dashboard.

Adjust the head restraint so that its upper edge is 

level with the top of the head.

Before moving off

Adjust the interior and exterior door mirrors to 

reduce blind spots.

Fasten the seat belt: place the diagonal belt in 

the middle of the shoulder and adjust the lap belt 

so that it is tightened across the pelvis.

Ensure that all passengers have fastened their 

seat belts correctly.

Electric door mirrors

Switch the ignition on to enable the 

adjustments to be made.

47

Ease of use and comfort

3

When driving

Maintain a good driving position and hold the 

steering wheel with both hands at the 'quarter to 

three' position, so that you can easily and quickly 

reach the controls behind and near the steering 

wheel.

Never adjust the seats or steering wheel 

when driving.

Always keep your feet on the floor.

Front seats

Before moving the seat backwards, 

ensure that there is no person or object 

that might prevent the full travel of the seat.

There is a risk of trapping or pinching 

passengers if present in the rear seats or of 

jamming the seat if large objects are placed 

on the floor behind the seat.

Front head restraints

Adjusting the height


Upwards:

►  Pull the head restraint up to the desired 

position; you can feel the head restraint clicking 

into position.

Downwards:

►  Depending on equipment, press lug 

A

 or 

button 

B

 and then, while still pressing, lower the 

head restraint.

The head restraint is correctly adjusted 

when its upper edge is level with the top 

of the head.

Removing a head restraint

►  Pull the head restraint fully up.

►  Press lug 

A

 to release the head restraint and 

raise it fully.

►  Stow the head restraint securely.

Refitting a head restraint

►  Insert the head restraint rods into the guides 

in the corresponding seat backrest.

►  Push the head restraint fully down.

►  Press the lug 

A

 to release the head restraint 

and push it down.

►  Adjust the height of the head restraint.

Never drive with the head restraints 

removed; they should be in place and 

adjusted for the occupant of the seat.

Manual adjustments

Longitudinal


►  Raise the control bar and slide the seat 

forwards or backwards.

►  Release the control bar to lock the seat in 

position on one of the notches.

48

Ease of use and comfort

Height


►  Pull the control upwards to raise or push it 

downwards to lower, until you obtain the position 

required.

Backrest angle


►  Turn the knob to obtain the desired angle.

Lumbar


►  Turn the knob to obtain the desired level of 

lumbar support.

Seat cushion length


►  Pull the handle forwards to release the 

cushion, then move the front part of the cushion 

forwards or backwards.

Electric adjustments

Longitudinal


►  Push the control forwards or backwards to 

slide the seat.

Cushion height and angle


►  Tilt the rear of the control upwards or 

downwards to obtain the required height.

►  Tilt the front of the control upwards or 

downwards to obtain the required angle.

Backrest angle


►  Tilt the control forwards or rearwards.

49

Ease of use and comfort

3

Lumbar


The control allows independent adjustment of 

the depth and vertical position of the lumbar 

support.

►  Press and hold the front or rear of the 

control to increase or reduce the lumbar 

support.

►  Press and hold the top or bottom of the 

control to raise or lower the lumbar support area.

Seat cushion angle

This electric adjustment control is present on 

"AGR" certified manually-adjustable seats.


►  Press and hold the front or rear of the 

button to raise or lower the front part of the seat 

cushion.

Memorising driving 

positions

Associated with the electrically-adjusted driver’s 

seat, this function allows two driving positions 

to be memorised, to make these adjustments 

easier if there are frequent driver changes.

It records the electric adjustments made to the 

seat and door mirrors.


Using buttons 1/2/M

►  Enter the vehicle and switch the ignition on.

►  Adjust the seat and the door mirrors.

►  Press button 

M

, then press button 

1

 or 

2


within 4 seconds.

An audible signal confirms the memorisation.

Memorising a new position cancels the previous 

position.

Recalling a stored position

While the seat is moving, take care that 

no person or object hinders the 

automatic movement of the seat.

With the ignition on or engine running

►  Press button 

1

 or 

2

 to recall the 

corresponding position.

An audible signal sounds when adjustment is 

complete.

You can interrupt the current movement by 

pressing button 

M

1

 or 

2

 or by using one of the 

seat adjustment controls.

A stored position cannot be recalled while 

driving.

The recalling of stored positions is deactivated 

45 seconds after switching off the ignition.

Heated seats

Without i-Toggles

On/Off


►  Press the button corresponding to the seat.

►  Each press changes the heating level; the 

corresponding number of indicator lamps come 

on.

►  To switch off the heating, press the button 

until all of the indicator lamps are off.

50

Ease of use and comfort

The system status is memorised when the 

ignition is switched off.

With i-Toggles

Activation/Deactivation

In the 

Seats

 touch screen application, 

select the 

Seats

 tab.

►  Select the driver or passenger seat.

The corresponding page is displayed with the 

last memorised settings.

If the settings are suitable, press to 

activate/deactivate the function in the 

Seats

 application.

If no action is taken, the display returns to its 

initial state.

The function status is not memorised when the 

ignition is switched off.

Changing settings

►  In the 

Seats

 page, select the seat concerned.

►  Select an intensity from the three preset 

levels: "

1

" (Low), "

2

" (Normal) or "

3

" (High).

The settings are memorised when the ignition is 

switched off.

Do not use the function when the seat 

is not occupied.

Reduce the heating intensity as soon as 

possible.

When the seat and passenger compartment 

have reached a satisfactory temperature, 

switch the function off; reducing electrical 

consumption in turn decreases energy 

consumption.

Prolonged use of heated seats is not 

recommended for people with sensitive 

skin.

There is a risk of burns for people whose 

perception of heat is impaired (e.g. illness, 

taking medication).

To keep the heated pad intact and to prevent 

a short circuit:

–  Do not place heavy or sharp objects on the 

seat.

–  Do not kneel or stand on the seat.

–  Do not spill liquids onto the seat.

–  Never use the heating function if the seat 

is damp.

Multipoint massage

System with a choice of type of massage and 

adjustment of its intensity.

This system operates with the engine running, as 

well as in STOP mode of the Stop & Start.

Activation/Deactivation

In the 

Seats

 touch screen application, 

select the 

Massage

 tab.

►  Select the driver or passenger seat.

The corresponding page is displayed with the 

last memorised settings.

If the settings are suitable, press to 

activate/deactivate the function in the 

Seats

 application.

If no action is taken, the display returns to its 

initial state.

The function status is not memorised when the 

ignition is switched off.

Changing settings

►  In the 

Massage

 page, select the seat 

concerned.

►  Select a massage intensity from the three 

preset levels: "

1

" (Low), "

2

" (Normal) or "

3

(High).

►  Select another type of massage from those 

offered.

The modifications are taken into account 

immediately and memorised when the ignition is 

switched off.

Once activated, the system starts a one hour 

massage cycle, made up of sequences of 6 

minutes of massage followed by 3 minutes at 

rest.

The system stops automatically at the end of the 

cycle.

51

Ease of use and comfort

3

Steering wheel 

adjustment


►  When stationary, pull the control to release 

the steering wheel.

►  Adjust the height and reach to suit your 

driving position.

►  Push the control to lock the steering wheel.

For safety reasons, these adjustments 

must only be carried out with the vehicle 

stationary.

PEUGEOT i-Cockpit®

The instrument panel information is 

visible above the steering wheel, for greater 

safety and driving comfort.

Adjust the steering wheel height so that it 

does not obstruct the instrument panel.

Heated steering wheel

In cold weather, this function heats the circular 

part of the steering wheel.

It can be activated when the outside temperature 

is below 20°C.

Without i-Toggles


►  With the engine running, press this button to 

activate/deactivate the function (confirmed by the 

indicator lamp coming on/going out).

The system is automatically deactivated every 

time the engine is switched off.

With i-Toggles

In the 

Climate

 touch screen application, 

select the 

Seats and Steering Wheel


tab.

Press to activate/deactivate the function. 

The function is memorised each time the engine 

is switched off.

Mirrors

Door mirrors

Demisting/Defrosting

The demisting/defrosting of the door 

mirrors works with the demisting/

defrosting of the rear screen.

For more information on 

Rear screen 

demisting/defrosting

, refer to the 

corresponding section.

As a safety measure, the mirrors should 

be adjusted to reduce the "blind spots".

The objects that you see in the mirrors are 

in fact closer than they appear. Take this 

into account in order to correctly judge the 

distance of vehicles approaching from behind.

52

Ease of use and comfort

Adjustment


►  Move control 

A

 to the right or to the left to 

select the corresponding mirror.

►  Move control 

B

 in any of the four directions 

to adjust.

►  Return control 

A

 to its central position.

Manual folding

The mirrors can be folded manually (parking 

obstruction, narrow garage, etc.).

►  Turn the mirror towards the vehicle.

Electric folding

Depending on equipment, the door mirrors can 

be folded electrically.

►  From the inside, with the 

ignition on, place control 

A

 in the 

central position.

►  Pull control 

A

 backwards.

►  Lock the vehicle from the outside.

If the mirrors are folded using control 

A

they will not unfold when the vehicle is 

unlocked.

Electric unfolding

►  From outside: unlock the vehicle.

►  From inside: with the ignition on, place 

control 

A

 in the central position and then pull it 

rearwards.

The automatic folding/unfolding of the 

door mirrors is configured in the 

Settings > Vehicle

 touch screen application.

Before using an automatic car wash, fold the 

mirrors.

Automatic tilting in reverse gear

Depending on version, this function allows you to 

automatically tilt the mirrors downwards to assist 

with parking manoeuvres in reverse gear.

With the engine running, on engaging reverse 

gear, the mirror glasses tilt downwards.

They each return to their original positions:

–  A few seconds after coming out of reverse 

gear.

–  Once the vehicle speed exceeds 6 mph 

(10 km/h).

–  When the engine is switched off.

It can be activated/deactivated in the 

Settings > Vehicle

 touch screen 

application.

Electrochrome interior rear 

view mirror


The electrochrome system uses a sensor that 

detects the level of exterior brightness and that 

coming from the rear of the vehicle, in order to 

automatically and gradually switch between day 

and night usage.

To ensure optimum visibility while 

manoeuvring, the mirror automatically 

brightens when reverse gear is engaged.

The system is inoperative if the load in the 

boot exceeds the height of the load space 

53

Ease of use and comfort

3

cover or if the load space cover has items 

placed on it.

Rear bench seat

Rear head restraints


They have two positions:

– A 

high position

, for when the seat is in use:

►  Pull the head restraint fully up.

– A 

low position

, for stowing, when the seat is 

not in use:

►  Press the lug 

A

 to release the head 

restraint and push it down.

The rear head restraints can be removed.

Removing a head restraint

►  Release the backrest using control 

1

.

►  Tilt the backrest slightly forwards.

►  Pull the head restraint fully up.

►  Press the lug 

A

 to release the head restraint 

and remove it completely.

Refitting a head restraint

►  Insert the head restraint rods into the guides 

in the corresponding backrest.

►  Push the head restraint fully down.

►  Press the lug 

A

 to release the head restraint 

and push it down.

Never drive with passengers seated at 

the rear when the head restraints are 

removed; the head restraints should be in 

place and in the high position.

The head restraint for the centre seat 

and those for the outer seats are not 

interchangeable.

Folding the backrests


Each section of the backrest has one or two 

release controls:

–  A grip 

1

 on the outer edge of the backrest.

–  A lever 

2

 on the boot side trim (SW).

The backrests should only be 

manoeuvred when the vehicle is 

stationary.

First steps:

►  Lower the head restraints, or remove them 

when carrying heavy loads.

►  Lift up the rear armrest.

►  If necessary, move the front seats forward.

►  Check that no person or object might interfere 

with the folding of the backrests (e.g. clothing, 

luggage).

►  Check that the outer seat belts are lying flat 

on the backrests.

The folding of the backrest is 

accompanied by a slight lowering of the 

corresponding cushion.

To obtain a flat surface, it is necessary to 

place the adjustable boot floor in the high 

position.

When the backrest is released, the red 

indicator in the release grip is visible.

54

Ease of use and comfort

From the passenger compartment


►  Press backrest release handle 

1

.


►  Guide the backrest 

3

 down to the horizontal 

position.

From the boot (SW)


►  Pull the backrest release lever 

2

 towards you.

The backrest 

3

 folds fully onto the cushion.

On the left-hand side, the lever is also 

used for folding down the central section 

of the backrest.

Central backrest (SW)

The central section of the backrest may be 

folded down independently of the side sections.


►  Check in advance that the rear armrest is not 

folded down and that the central head restraint 

is not raised.

►  From inside the passenger compartment or 

from the boot, pull on the strap to release.

►  Fold the backrest onto the seat cushion.

►  When repositioning, lift up the backrest fully 

until it locks.

Repositioning the backrests

First check that the outer seat belts are 

lying vertically flat alongside the backrest 

latching rings.


►  Straighten the backrest 

3

 and push it firmly to 

latch it into place.

►  Check that the red indicator is no longer 

visible in the release grip 

1

.

►  Ensure that the outer seat belts were not 

trapped during the operation.

Please note: an incorrectly latched 

backrest compromises the safety of 

passengers in the event of sudden braking or 

an accident.

The contents of the boot may be thrown 

forwards - risk of serious injury!

55

Ease of use and comfort

3

Heating and Ventilation

Air intake

The air circulating in the passenger compartment 

is filtered and originates either from the 

exterior, via the grille located at the base of the 

windscreen, or from the inside in air recirculation 

mode.

Controls

Depending on version, certain controls 

are accessible in the 

Climate

 touch 

screen application and/via the control panel on 

the centre console.

Air distribution


1.

Windscreen demisting/de-icing vents

2.

Front side window demisting/de-icing vents

3.

Adjustable and closable side air vents

4.

Adjustable and closable central air vents

5.

Air outlets to the front footwells

6.

Air outlets to the rear footwells

7.

Adjustable and closable air vents

Advice

Using the ventilation and air 

conditioning system

►  To ensure that air is distributed evenly, 

keep the external air intake grilles at the base 

of the windscreen, the nozzles, the vents, the 

air outlets and the air extractor in the boot 

free from obstructions.

►  Do not cover the sunshine sensor located 

on the dashboard; this sensor is used to 

regulate the automatic air conditioning 

system.

►  Operate the air conditioning system for at 

least 5 to 10 minutes once or twice a month to 

keep it in good working order.

►  If the system does not produce cold air, 

switch it off and contact a PEUGEOT dealer 

or a qualified workshop.

When towing a large load on a steep gradient 

in high temperatures, switching off the air 

conditioning increases the available engine 

power, enhancing the towing capacity.

Avoid driving for too long with the 

ventilation off or with prolonged operation 

of interior air recirculation. Risk of misting and 

deterioration of the air quality!

If the interior temperature is very high 

after the vehicle has stood for a long 

time in the sunshine, air the passenger 

compartment for a few moments.

Put the air flow control at a setting high 

enough to quickly change the air in the 

passenger compartment.

Condensation created by the air 

conditioning results in a discharge of 

water underneath the vehicle. This is perfectly 

normal.

Servicing the ventilation and air 

conditioning system

►  Ensure that the passenger compartment 

filter is in good condition and have the filter 

elements replaced regularly.

We recommend using a composite passenger 

compartment filter. Its specific active additive 

helps protect against polluting gases and bad 

smells.

►  To ensure correct operation of the 

air conditioning system, have it checked 

according to the recommendations in the 

Manufacturer’s service schedule.

56

Ease of use and comfort

Stop & Start / e-Auto mode

The heating and air conditioning systems 

only operate when the engine is running.

Temporarily deactivate the corresponding 

system to maintain a comfortable temperature 

in the passenger compartment.

For more information, refer to the 

corresponding section.

Rechargeable hybrid vehicles

Intensive use of the air conditioning 

reduces the vehicle range in 

Electric

 mode.

Electric vehicles

Selecting the 

ECO

 driving mode reduces 

electrical energy consumption, but restricts 

the performance of the heating and air 

conditioning systems, although it does not 

deactivate them.

Ventilation with the ignition on

When the ignition is switched on, the ventilation 

system and the air flow 

2

 and air distribution 

3

 settings in the passenger compartment are 

activated, for a period which depends on the 

battery charge.

This function does not include the air 

conditioning system.

Dual-zone automatic air 

conditioning

This system automatically controls the activation 

of the air conditioning system, regulating the 

temperature, air flow and air distribution inside 

the passenger compartment.

This system works with the engine running, but 

access to the ventilation and its controls remains 

possible with the ignition on.

Press the 

Climate

 application button to 

display the system controls page.


Without i-Toggles


With i-Toggles

1.

Temperature adjustment

2.

Air flow adjustment

3.

Air distribution adjustment

4.

Air conditioning on/off

5.

Automatic air conditioning on/off and setting 

(AUTO SOFT/AUTO NORMAL/AUTO 

FAST)

6.

Driver/front passenger temperature 

synchronisation

7.

AQS function only or Clean Cabin 

(depending on version).

8.

Front demisting/de-icing

9.

Interior air recirculation

10.

Maximum A/C (depending on version)

11.

Rear screen demisting/de-icing

12.

Switching the system off

Temperature adjustment

The driver and front passenger can each choose 

their own temperature setting.

The value indicated corresponds to a level of 

comfort and not to a precise temperature.

Depending on version:

►  Turn one of the knobs 

1

 towards 

+

 or 

-

 to 

increase or decrease the value.

57

Ease of use and comfort

3

►  Press one of the buttons 

1

 (

+

 or 

-

) or drag 

vertically to increase or decrease the value.

It is possible to go beyond the minimum and 

maximum values by selecting respectively 

Low


or 

High

.

It is recommended that you avoid a difference of 

more than 3°C in the settings for left and right.

Temperature 

synchronisation

The driver side temperature setting is applied to 

the passenger side.

►  Press button 

6-SYNC

 to activate/deactivate 

the function.

The function is automatically deactivated if the 

passenger uses their temperature adjustment 

buttons.

Automatic air conditioning

This automatic mode ensures optimum 

management of the passenger compartment 

temperature, air flow and air distribution, based 

on the selected comfort level.

►  Press button 

5-AUTO

 to activate/deactivate 

the automatic mode of the air conditioning 

system.

The indicator lamp in the button lights up 

when the air conditioning system is operating 

automatically.

The intensity of the automatic air conditioning 

is modulated by choosing one of the following 

settings:

– 

AUTO SOFT

: provides soft and quiet 

operation by limiting air flow.

– 

AUTO NORMAL

: offers the best compromise 

between a comfortable temperature and quiet 

operation (default setting).

– 

AUTO FAST

: provides dynamic and efficient 

air distribution.

To change the AUTO mode, press button 

5-AUTO

 successively.

To ensure passenger comfort in the rear seats, 

favour settings 

AUTO NORMAL

 and 

AUTO 

FAST

.

In cold weather with the engine cold, the 

air flow is increased gradually until the 

comfort setting has been reached, in order to 

limit the delivery of cold air into the passenger 

compartment.

On entering the vehicle, if the interior 

temperature is much colder or warmer than 

the comfort setting requested, there is no 

need to alter the value displayed to more 

quickly reach the required level of comfort. 

The system automatically corrects the 

temperature difference as quickly as possible.

Automatic air conditioning 

manual settings

It is possible to manually adjust one or more 

of these functions, while the system retains 

automatic control of the other functions:

–  air flow.

–  air distribution.

The indicator lamp in the "

AUTO

” button goes 

out if a setting is changed.

►  Press button 

5-AUTO

 again to reactivate 

automatic air conditioning.

Adjusting the air flow

Depending on version:

►  Press one of the buttons 

2

 (

fan

) to decrease 

or increase the air flow.

►  Press one of the buttons 

2

 (

fan

) or drag 

horizontally to increase or decrease air flow.

It is also possible to directly press one of the 

values.

Switching off the air conditioning 

system

When the air flow is reduced to a minimum, 

ventilation stops.

OFF

" is displayed alongside the fan.

Adjusting the air distribution

►  Press the buttons 

3

 to adjust the air flow 

distribution inside the passenger compartment.

Windscreen and side windows 

Central and side air vents 

Footwells 

A symbol is activated to display the presence of 

blown air in the direction indicated.

58

Ease of use and comfort

It is possible to activate all three buttons 

simultaneously, for uniform distribution 

throughout the passenger compartment.

Clean Cabin function

It includes the AQS (Air Quality System) and 

Clean Air functions.

►  To activate/deactivate the function, press 

button 

7

.

AQS function

Using an exterior pollution sensor, this function 

automatically activates the recirculation of 

interior air when a certain level of pollutants in 

the exterior air is detected.

When the air quality returns to a satisfactory 

level, recirculation of interior air is automatically 

deactivated.

This function is not designed to detect 

unpleasant odours.

Recirculation is automatically activated when the 

windscreen wash is used or when reverse gear 

is engaged.

The function is inactive if the outside temperature 

is below 5°C to prevent the risk of misting on the 

windscreen and side windows.

Clean Air function

Using an interior pollution sensor, this function 

detects fine particles (e.g. cigarette smoke, 

mould, bacteria).

The management of the recirculation of interior 

air makes it possible to return to a purified 

passenger compartment in just a few minutes, 

thanks to the passage of air through the high-

performance passenger compartment filter.

If the air quality appears to be reduced, contact 

a PEUGEOT dealer or a qualified workshop 

to change the high-performance passenger 

compartment filter.

Air conditioning on/off

The air conditioning system is designed to 

operate effectively in all seasons, with the 

windows closed:

–  It lowers the temperature in summer.

–  It increase the effectiveness of the demisting, 

in winter, above 3°C.

►  Press button 

4-A/C

 to switch the air 

conditioning on/off.

When the system is switched on, the indicator 

lamp in the button comes on or “

A/C

” changes 

colour (depending on version).

Air conditioning does not operate when 

the air flow is deactivated.

To obtain cool air more quickly, enable interior 

air recirculation for a brief period. Then return 

to the intake of exterior air.

Switching off the air conditioning may result in 

some discomfort (humidity or misting).

Maximum air conditioning

This function automatically adjusts the 

temperature setting to the lowest possible, the 

air distribution towards the central and side air 

vents, the air flow to maximum and, if necessary, 

activates interior air recirculation.

►  Press this button to activate/deactivate 

the function (confirmed by the 

illumination/extinction of the indicator lamp).

Once the function is deactivated, the system 

returns to the previous settings.

Switching off the air 

conditioning system

►  Press button 

12-OFF

.

Its indicator lamp lights up and all the other 

indicator lamps of the air conditioning system 

go off.

This action deactivates all of the functions of the 

air conditioning system.

The temperature is no longer regulated. A slight 

flow of air can still be felt, due to the forward 

movement of the vehicle.

Interior air recirculation

The intake of exterior air prevents the formation 

of mist on the windscreen and side windows.

Recirculating the interior air isolates the 

passenger compartment from outside odours 

and fumes and allows the desired passenger 

compartment temperature to be achieved more 

rapidly.

►  Press this button to activate/deactivate 

the function (confirmed by the 

illumination/extinction of the indicator lamp).

59

Ease of use and comfort

3

This function is activated automatically 

when the front screenwash is used or 

reverse gear is engaged.

Front demisting/defrosting

This mode allows the windscreen and side 

windows to be demisted or defrosted as quickly 

as possible.

►  Press this button to activate/deactivate 

the mode (confirmed by the illumination/

extinction of the indicator lamp).

The mode automatically manages the air 

conditioning, air flow, air intake and distributes 

ventilation optimally to the windscreen and side 

windows.

The air flow can be changed manually without 

deactivating this mode.

With Stop & Start, when demisting has 

been activated, STOP mode is not 

available.

In wintry conditions, before moving off, it 

is essential to remove any snow or ice 

from the windscreen around the camera.

Otherwise, the operation of the equipment 

using the camera may be affected.

Rear screen demisting/

defrosting

This demisting/de-icing only works with the 

engine running.

Depending on version, it also demists/de-ices 

the door mirrors.

►  Press this button to activate/deactivate 

the function (confirmed by the indicator 

lamp coming on/switching off).

The function can be activated whatever the 

outside temperature may be.

The period of operation depends on the outside 

temperature.

Demisting/defrosting therefore switches 

off automatically to prevent an excessive 

consumption of electrical current.

Heated windscreen


In cold weather, this function heats the entire 

windscreen and complements the Automatic 

Visibility programme to speed up the evacuation 

of elements that interfere with visibility (e.g. dew, 

mist, frost, snow), located on either side of the 

windscreen.

It can be used both before setting off and while 

driving.

Switching on/

off


►  With the engine running, press this button to 

activate/deactivate the function (confirmed by an 

indicator lamp).

The period of operation depends on the outside 

temperature.

The function switches off automatically to 

prevent excessive power consumption.

Temperature 

pre-conditioning 

(Rechargeable hybrid or 

Electric)

This function allows you to programme the 

temperature in the passenger compartment to 

reach a pre-defined, non-modifiable temperature 

60

Ease of use and comfort

(approx. 21°C) before you enter the vehicle, on 

the days and at the times of your choice.

This function is available when the vehicle is 

connected or not connected.

Programming

In the 

Climate

 touch screen application, 

select the 

Preconditioning

 tab.

►  Press 

+

 to add a programme.

►  Select the time of entry into the vehicle and 

the desired days. Press 

OK

.

►  Press 

ON

 to activate this programming.

The pre-conditioning sequence begins 

approximately 45 minutes before the 

programmed time when the vehicle is connected 

(20 minutes when it is not connected) and is 

maintained for 10 minutes after.


For rechargeable hybrid vehicles, this indicator 

lamp comes on fixed when a temperature pre-

conditioning cycle is programmed. It flashes 

when temperature pre-conditioning is in 

progress.

You can set multiple programmes.

Each one is saved in the system.

To optimise the driving range, we recommend 

starting a programme while the vehicle is 

connected.

The programming can also be carried out 

from a smartphone via the 

MYPEUGEOT 

APP

 application.

For more information on 

Remotely operable 

additional functions

, refer to the corresponding 

section.

The fan noise that occurs during 

temperature pre-conditioning is perfectly 

normal.

Vehicles equipped with an alarm 

system

Depending on version, interior volumetric 

and anti-tilt monitoring may be reduced or 

even suspended during temperature pre-

conditioning sequences.

Operating conditions

–  The function is only activated when the 

ignition is switched off

 and the 

vehicle 

locked

.

–  When the vehicle is not connected, the 

function is only activated if the battery charge 

level is greater than 20% (Rechargeable hybrid) 

or 30% (Electric).

–  When the vehicle is not connected and a 

recurring programme is active (e.g. from Monday 

to Friday), if two temperature pre-conditioning 

sequences are run without the vehicle being 

used, the programme will be deactivated.

Front fittings


1.

Sun visor

2.

Coin holder (depending on version)

3.

Illuminated glove box

4.

Door pockets

5.

Storage compartment or Wireless 

smartphone charger

6.

Front USB socket/12 V socket

7.

Cup holder

8.

Storage compartment or Smartphone 

storage

61

Ease of use and comfort

3

9.

Front armrest with storage (depending on 

version)

Front USB socket (depending on version)

10.

Rear USB sockets (depending on version)

Sun visor

►  With 

the ignition on, raise the concealing 

flap; depending on the version, the mirror is 

illuminated automatically.

This sun visor is also equipped with a ticket 

holder.

Glove box

►  To open 

the glove box, lift the handle.

With the ignition on, the glove box is lit when 

open.

Depending on version, it contains an adjustable 

ventilation nozzle, distributing the same 

conditioned air as the vents in the passenger 

compartment.

Never drive with the glove box open 

when a passenger is at the front. It may 

cause injury during sharp deceleration!

12 V accessory socket


►  Plug in 

a 12 V accessory (with a maximum 

rated power of 120 W) using a suitable adapter.

Observe the maximum power rating to 

avoid damaging the accessory.

The connection of an electrical device 

not approved by PEUGEOT, such as a 

USB charger, may adversely affect the 

operation of vehicle electrical systems, 

causing faults such as poor radio reception or 

interference with displays in the screens.

USB sockets

These symbols determine the type of use of a 

USB socket:

Power supply and recharging. 

Likewise, plus exchange of multimedia 

data with the audio system.

Likewise, plus use of smartphone 

applications with the touch screen.


USB sockets allow the connection of a portable 

device.

The USB socket located at the 

front of the centre console also 

allows a smartphone to be connected by Android 

Auto

®

 or CarPlay

®

, enabling certain smartphone 

applications to be used on the touch screen.

For best results, use a cable made or approved 

by the device manufacturer.

These applications can be managed using the 

steering-mounted controls or the audio system 

controls.

When the USB socket is used, the 

portable device charges automatically.

While charging, a message is displayed if the 

power drawn by the portable device exceeds 

the current supplied by the vehicle.

For more information about how to use this 

equipment, refer to the sections describing 

the audio and telematics systems.

62

Ease of use and comfort

Wireless smartphone 

charger


This system allows wireless charging of a 

portable device such as a smartphone, using the 

magnetic induction principle, in accordance with 

the Qi 1.1 standard.

The portable device to be charged must be 

compatible with the Qi standard, either by design 

or by using a compatible holder or shell.

A mat can also be used provided that it is 

approved by the Manufacturer.

The charging area is identified by the Qi symbol.

The charger works with the engine running and 

with the Stop & Start system in STOP mode.

Charging is managed by the smartphone.

With the Keyless Entry and Start system, the 

charger’s operation may be briefly disrupted 

when a door is opened or the ignition is switched 

off.

Charging

►  With the charging area clear, place a device 

in its centre.


When the portable device is detected, the 

charger’s indicator lamp lights up green. It 

remains lit for the whole time that the battery is 

being charged.

The system is not designed to charge 

multiple devices simultaneously.

Do not leave metal objects (e.g. coins, 

keys, vehicle remote control) in the 

charging area while a device is being charged 

- Risk of overheating or interrupting the 

charging!

When using applications for a long time 

in combination with wireless charging, 

some smartphones may switch to thermal 

safety and cause some functions to stop.

Checking operation

The state of the indicator lamp allows the 

operation of the charger to be monitored.

State of the 

indicator lamp

Meaning

Off

Engine switched off.

No compatible devices 

detected.

Charging complete.

Fixed green

Compatible portable 

device detected.

Charging.

Flashing orange

Foreign object detected in 

the charging zone.

Portable device not well 

centred in the charging 

zone.

Fixed orange

Malfunction of the 

portable device's battery 

meter.

Device battery 

temperature too high.

Charger malfunction.


If the indicator lamp is fixed orange:

–  remove the device, then place it back in the 

centre of the charging zone.

or

–  remove the device and try again in a quarter 

of an hour.

If the problem persists, have the system checked 

by a PEUGEOT dealer or a qualified workshop.

63

Ease of use and comfort

3

Front armrest

It includes a storage space and is illuminated 

when the cover is opened (depending on 

version).

Opening


►  Press 

the lever beneath the cover.

The cover opens in two parts.

Closing


►  Fold back the two parts of the cover.

FOCAL

®

 Hi-Fi system

The vehicle is equipped 

with a high-fidelity audio 

system from the French brand FOCAL

®

.

10 speakers incorporating exclusive FOCAL

®


technologies offer the pleasure of special 

musical experience inside the vehicle:

–  12 channel full active amplification - 690 Watts 

Class D booster technology: significant audio 

power available at all times despite low power 

consumption.

–  Polyglass central speaker: sound immersion 

and spatialisation.

–  Polyglass woofers/mid-range speakers with 

TMD suspension: balance, dynamics and 

precision of sound.

–  Aluminium TNF inverted dome tweeter: 

optimal sound dispersion, detailed treble.

–  Subwoofer with high excursion Power 

Flower

TM

 triple coil: deep and controlled 

reproduction of low frequencies.

Two customisable listening modes are available:

–  "All passengers": an optimised service for 

each occupant of the vehicle, both front and rear.

–  "Optimised for the front": an immersive and 

augmented experience, shared between the 

driver and the front passenger.

Mats

Fitting


When 

fitting it on the driver's side, only use 

the mountings present on the carpet (a "click" 

indicates proper locking).

The other mats are simply laid over the carpet.

Removing/refitting

►  To

 remove it on the driver's side, move the 

seat backwards and unclip the fasteners.

►  To refit it, position the mat and secure it by 

pressing down.

►  Check that the mat is secured correctly.

To avoid any risk of jamming the pedals:

–  Only use mats which are suited to the 

fixings already present in the vehicle; these 

fixings must be used.

–  Never fit one mat on top of another.

The use of mats not approved by PEUGEOT 

may interfere with access to the pedals and 

64

Ease of use and comfort

hinder the operation of the cruise control/

speed limiter.

The approved mats have two fasteners 

located underneath the seat.

Courtesy lamps


Reading lamps

►  With 

the ignition on, operate the 

corresponding switch.

Do not place anything against the 

courtesy lamps.

Interior ambient lighting

The interior ambient lighting casts soft, coloured 

lighting in the passenger compartment, when low 

lighting conditions are detected.

By default, the colour of the interior ambient 

lighting is linked to that of the screens, 

depending on the driving mode selected.

Activation/deactivation and adjustment of 

the brightness are set via the 

Settings > 

Brightness

 touch screen application.

The colour is selected via the 

Settings > 

Customization

 touch screen application.

Rear fittings

USB sockets


Each USB socket is used only to power or 

recharge a portable device.

Rear armrest


The armrest incorporates two cup holders.

The cup holders have a removable reducer to 

be used depending on the diameter of the cans 

and cups.

The pen holder can also hold a smartphone.

Ski flap (Hatchback)

Device for storing and transporting long objects.

Opening

►  With the rear armrest lowered, open the flap 

by pulling its handle downwards.

On the SW version, the ski flap is replaced by 

the folding of the central backrest.

For more information on the 

Rear bench seat

in particular the central backrest, refer to the 

corresponding section.


65

Ease of use and comfort

3


►  Load the objects from inside the boot.

Shark fin antenna


A ventilation grille is present at the rear of the 

roof for cooling the shark fin antenna.

Any ventilation noise produced, with the ignition 

on or the engine running, is completely normal.

Boot fittings

Hatchback


1.

Load space cover shelf

2.

Boot lamp

3.

Storage net

4.

Stowing rings

5.

Rigid boot floor or hinged boot carpet 

(Rechargeable hybrid or Electric)

6.

Storage well under the carpet

SW


1.

Load space cover roller

2.

Rear seat folding controls

3.

Bag hook

4.

12 V socket

Boot lamp

5.

Storage nets


Content      ..      1      2      3      ..