Peugeot 5008 (2017 year). Instruction - part 17
7
255
Practical information
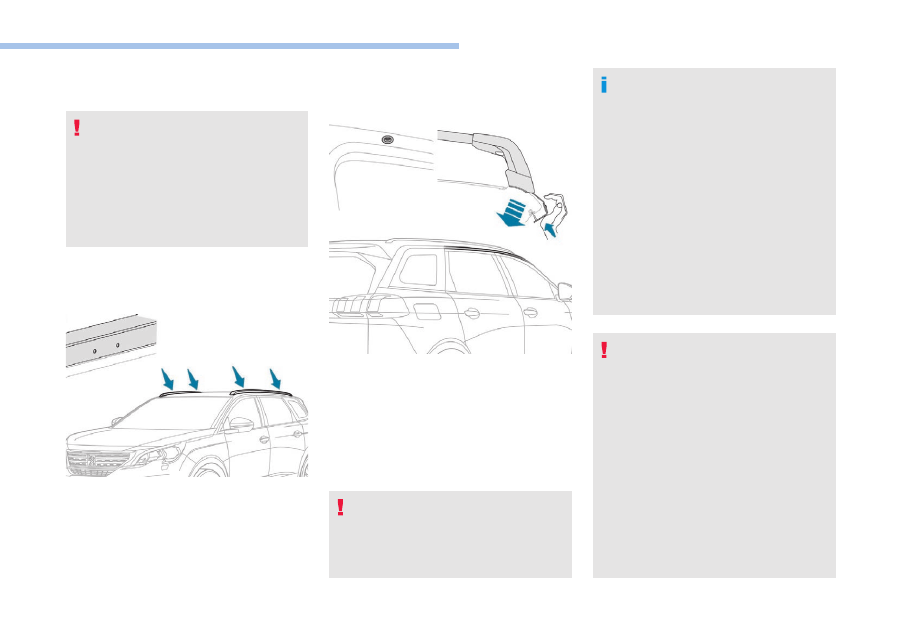
Fitting roof bars
As a safety measure and to avoid
damaging the roof, it is essential to use
the transverse bars approved for your
vehicle.
Observe the instructions on fitting and use
contained in the guide supplied with the
roof bars.
Fitting on longitudinal bars
Fitting directly to the roof
Sunroof
Check that the load does not pass below
the roof bars so that it does not impede
the movements of the sunroof.
The transverse bars must be fixed at the
engraved markings on the longitudinal bars.
You must only attach the transverse bars to
the four fixing points located in the roof frame.
These points are concealed by the vehicle
doors when the doors are closed.
You must attach the transverse bars only at the
four anchorage points located at the edge of
the roof.
Recommendations
Distribute the load uniformly, taking care
to avoid overloading one of the sides.
Arrange the heaviest part of the load as
close as possible to the roof.
Lash the load securely.
Drive gently: the vehicle will be more
susceptible to the effects of side winds
and the stability of the vehicle may be
affected.
On a long journey, check the security of
the load at every stop.
Remove the roof bars once they are no
longer needed.
Maximum load distributed across the
transverse roof bars, for a load height
not exceeding 40 cm (except bicycle
carrier): 80 kg.
For more information, contact a
PEUGEOT dealer or a qualified workshop.
If the height exceeds 40 cm, adapt the
speed of the vehicle to the profile of the
road to avoid damaging the roof bars and
the vehicle's anchorage points.
For transporting objects which are longer
than the vehicle, refer to local legislation.