Peugeot 206 S Dag (2008 year). Instruction - part 3
 

  Index      Peugeot     Peugeot 206 S Dag - instruction 2008 year in english


Search            


Content   ..  1  2  3  4   ..


Peugeot 206 S Dag (2008 year). Instruction - part 3


AUDIO EQUIPMENT

34 -

  Selecting a track 

  Shuffl e (RDM) 
 When  the  CD  changer  is  selected, 
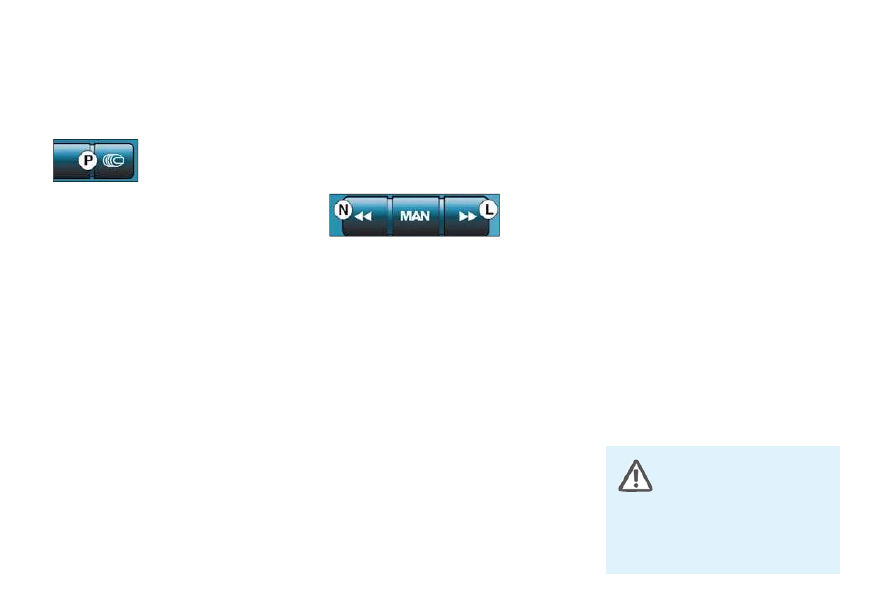
press and hold button  P  for two sec-
onds. 
 The  tracks  will  be  played  in  random 
sequence. Pressing the button again 
for  two  seconds  returns  you  to  nor-
mal play. 

 CD CHANGER  

 Press button  P .  

  Selecting a disc 
 Press buttons  "1"  to  "5"  on the radio 
to select the corresponding disc.  

  Accelerated play 
 Press  and  hold  button   L   or   N   for 
forwards  or  backwards  accelerated 
play. 
 Accelerated  play  stops  as  soon  as 
the button is released.  

 Press  button   L   to  select  the  next 
track. 
 Press  button   N   to  return  to  the  start 
of  the  current  track  or  to  select  the 
previous track.  

 The  use  of  copied  com-
pact  discs  may  cause 
faults. 
  Insert  circular  compact 
discs only.   

  Selecting CD changer mode 

35

AUDIO EQUIPMENT -

 RADIO RECEPTION (AERIAL 
ADJUSTMENT) 

 Your radio will be subject to phenom-
ena  which  do  not  affect  domestic 
radio sets. Both MW/LW and FM re-
ception  are  subject  to  various  forms 

of  interference,  which  are  no  refl ec-

tion on the quality of your equipment 
but are due  to the nature  of the sig-
nals  and  the  way  in  which  they  are 
transmitted. 

 On MW/LW, interference may be no-
ticed when passing underneath high 
voltage power lines, under bridges or 
in tunnels. 
 On  FM,  interference  may  be  the  re-
sult  of  increasing  distance  from  the 

transmitter,  defl ection  of  the  signal 

by obstacles (mountains, hills, build-
ings, etc.), or of being in an area not 
covered by a transmitter. 

 Recommended  position  for  the  front 
aerial for best reception. 

COMFORT

36 -

37

COMFORT -

             VENTILATION 

   1.   Windscreen de-icing or 

demisting vents. 

  2.   Front door windows de-icing or 

demisting vents. 

  3.   Side vents. 
  4.   Centre vents. 
  5.   Air outlet to front footwells. 
  6.   Air outlet to rear footwells (with 

automatic air conditioning only).  

  Advice on operation 
and notes 

 In  certain  cases  of  particularly  ardu-
ous  use  (towing  the  maximum  load 
on a steep gradient in a high tempera-
ture),  cutting  off  the  air  conditioning 
permits recovery of the engine pow-
er and, therefore improvement of the 
towing capacity. 
 Ensure  that  the  passenger  com-

partment  fi lter,  located  by  the  wind-

screen, under the bonnet, is in good 

condition.  Have  the  fi lter  elements 

replaced  regularly.  If  you  drive  in  a 
dusty  environment,  change  them 
twice as often. 
 The air conditioning system does not 
contain chlorine and does not present 
any danger to the ozone layer. 
 Operate  the  air  conditioning  system 
for  5  to  10  minutes,  once  or  twice  a 
month  to  keep  it  in  perfect  working 
order. 
 The water formed by the condensa-

tion of the air conditioning system is 
discharged  via  an  opening  provided 
for  this  purpose.  Therefore,  a  pud-
dle may form underneath the vehicle 
when stationary. 
   If the system does not produce cold air, 
do not use it and contact a  PEUGEOT  
dealer.  

 Place  the  air  fl ow  control  at  a  level 

suffi cient to ensure an adequate re-

newal  of  air  in  the  passenger  com-
partment. 
 When  the  air  fl ow  control  is  in  the 

 OFF   position  (system  switched  off), 
temperature-related  comfort  is  no 
longer guaranteed. However, a slight 

fl ow  of  air,  due  to  the  movement  of 

the vehicle, can still be felt. 

 Select  the  air  distribution  which  is 

most suited to your requirements and 

the weather conditions. 
 Change the temperature setting pro-
gressively for greater comfort. 
 Place  the  air  intake  control  in  the 
"Exterior  air"  position,  this  facilitates 
demisting. 
 If  the  interior  temperature  remains 
very  high  following  a  long  period 
parked in the sun, do not hesitate to 
ventilate the passenger compartment 
for a few minutes. 
 To obtain a perfectly uniform distribu-

tion  of  air,  do  not  cover  the  exterior 
air intake grille, the vents, the air pas-
sages and the air outlets in the foot-
wells. 

COMFORT

38 -

 DE-ICING AND DEMISTING 

 When the engine is running, 

pressing  this  button  de-ices 

the  rear  screen  and  exterior 
mirrors. 
 It  switches  off  automati-

cally,  after  approximately  twelve 
minutes * ,  to  prevent  an  excessive 
consumption of current. Pressing the 

button  again  restarts  operation  for 

twelve minutes. 
 It is possible to stop the operation of 

the de-icing before it is switched off 

automatically by pressing the button 

again. 

  Manual demisting *  

 To quickly demist the windscreen and 

side windows: 
   -  

switch on the air conditioning, 

  -  

place the temperature and air 

fl ow controls in the maximum 

position, 

  -  

close the central vents, 

  -  

place the exterior air intake con-
trol on the left, in the "Exterior 
Air" position.   

  Automatic demisting, 
visibility programme *  

 In some cases, the AUTO programme 

may  not  be  suffi cient  to  demist  the 

windscreen  and  side  windows  (hu-
midity, several passengers, ice...). 

  *   According to version or country.  

 Select  the   "visibility"   de-

misting programme by press-

ing  this  button  to  clear  the 

windows quickly. 
 To exit from this programme 

and return to the AUTO programme, 
press the  AUTO

  button.  

 Switch  off  the  de-icing  as 
soon  as  you  consider  this 
necessary  as  low  current 
consumption  reduces  fuel 
consumption.  

  De-icing the rear screen and 
mirrors 

39

COMFORT -

             HEATING/VENTILATION 

 The heating and ventilation can only operate when the engine is running.  

  2. Air distribution adjustment 

  1. Temperature adjustment 
 Turn  the  control  from  blue  (cold)  to 

red (hot) to adjust the temperature to 

suit your requirements.  

 Windscreen  and  side  win-
dows (de-icing/demisting). 

 Windscreen,  side  windows 
and footwells. 

 Footwells. 

 Centre and side vents. 

 These settings are recommended for 
cold climates. 

 This setting is recommended for hot 
climates. 
 The  air  distribution  can  be  adjusted 

by placing the control in an interme-

diate position.  

  3. Air fl ow adjustment 

 Turn the control from position  1 
to position  4

  to obtain an air 

fl ow suffi cient to ensure your 

comfort.  

  4. Air intake/Air recirculation 
 The  recirculation  of  interior  air  pre-
vents exterior odours and smoke en-
tering the passenger compartment. 
 The  intake  of  exterior  air  prevents 
and  eliminates  misting  of  the  wind-
screen and side windows. 

 Air intake. 

 Air recirculation. 

 Move  the  manual  control   4   to  the 
right for the "Interior air recirculation" 
position. 
 Move the manual control  4  to the left 
to  return  to  the  "Exterior  air  intake" 

position as soon as possible to pre-

vent deterioration of the air quality.   

COMFORT

40 -

             AIR CONDITIONING 

 The air conditioning can only operate when the engine is running.  

  The air conditioning does not ope-

rate while the air fl ow adjustment 

control is in the "OFF" position.  

  1. Air conditioning On/Off 
 The  air  conditioning  is  designed  to 
operate  effectively  in  all  seasons, 
with the windows closed. In summer, 
it permits lowering of the temperature 

and in winter, above 0 °C, it increases 

the effectiveness of the demisting. 

  2. Temperature adjustment 
 Turn  the  control  from  blue  (cold)  to 

red (hot) to adjust the temperature to 

suit your requirements.  

 Windscreen  and  side  win-
dows (de-icing/demisting). 

 Windscreen,  side  windows 
and footwells. 

 Press the switch, the indica-
tor light comes on. 

 Footwells. 

  3. Air distribution adjustment 

 Centre and side vents. 

 These settings are recommended for 
cold climates. 

 This setting is recommended for hot 
climates. 
 The  air  distribution  can  be  adjusted 

by placing the control in an interme-

diate position.  

 To guarantee correct opera-
tion  of  your  air  conditioning 
system, we also recommend 
that  you  have  it  checked 
regularly.  

41

COMFORT -

  4. Air fl ow adjustment 

 Turn  the  control  from  posi-
tion  1   to  position   4

  to obtain 

an  air  fl ow  suffi cient  to  en-

sure your comfort.  

 Intake of exterior air. 

 Air recirculation. 

 The  recirculation  of  interior  air  pre-
vents exterior odours and smoke en-
tering the passenger compartment. 
 The  intake  of  exterior  air  prevents 
and  eliminates  misting  of  the  wind-
screen and side windows. 
 Used simultaneously with the air con-
ditioning,  air  recirculation  improves 
air conditioning performance. 
 Used in a damp climate, air recircula-
tion may result in misting of the win-
dows. 

  5. Air intake/Air recirculation 

 Move  the  manual  control   5   to  the 
right to the "Interior air recirculation" 
position. 

 Move the manual control  5  to the left 
to the "Exterior air intake" position as 

soon as possible to prevent deterio-

ration of the air quality.   

COMFORT

42 -

       AUTOMATIC AIR CONDITIONING 

 The air conditioning can only operate when the engine is running. 

  Automatic operation 

  2.  Control by the AUTO 

programme 

 Press the  "AUTO"

  button. 

 We recommend that you use 
this  mode:  it  provides  opti-
mised  automatic  control  of 

all  of  the  functions,  passenger  com-

partment  temperature,  air  fl ow,  air 

distribution  and  air  recirculation,  in 

accordance  with  the  comfort  value 
that you have chosen. This system is 
designed to operate effectively in all 
seasons, with the windows closed. 

  Note:  for your comfort, the values set 
when the engine is switched off are re-
tained on re-starting if the temperature 
in the passenger compartment has not 

changed signifi cantly; otherwise, ope-

ration resumes in automatic mode. 

  Manual operation 

 If you wish, you can make a different 

choice from that offered by the sys-

tem by changing a setting. The other 

functions will still be controlled auto-

matically. 
 Pressing  the   AUTO

   button  returns 

the  system  to  completely  automatic 
operation. 

  1. Temperature adjustment 

 The  value  indicated  on  the 
display  corresponds  to  a 
level  of  comfort  and  not  to 
a  temperature  in  degrees 
Celsius or Fahrenheit. 

 Press the arrows  1  (up and down) to 
change  this  value.  A  setting  around 

21  enables  a  comfortable  tempera-

ture to be obtained.  

 When the engine is cold, to 
prevent  too  great  a  distri-

bution  of  cold  air,  the  ven-

tilation  will  only  reach  its 
optimum level gradually. 

 On entering the vehicle, if the interior 
temperature is much colder or warmer

than is comfortable, there is no need 

to  change  the  value  displayed  in 

order  to  reach  the  required  level  of 

comfort.  The  system  eliminates  the 
temperature difference automatically 

and as quickly as possible.   

43

COMFORT -

  3. Air conditioning On/Off 

 Press  this  button  to  stop  air 

cooling. 

  4. Air distribution 

 Pressing  this  button  several 

times in succession enables 

the air fl ow to be directed in 

turn towards: 

   -  

the windscreen 
(de-icing or demisting), 

  -  

the windscreen and the 
footwells, 

  -  

the footwells, 

  -  

the centre and side vents and 
the footwells, 

  -  

the centre and side vents.   

  5. Air fl ow 

 Press buttons  "+"  and 

 "-"   respectively  to  in-
crease  or  decrease 

the air fl ow.  

  6. Air intake/Air recirculation 

  7. Switching the system off 

 The  OFF

  button switches off 

all  the  functions  of  the  sys-
tem. 
 Temperature-related  comfort 

and demisting are no longer guaran-

teed but a slight fl ow of air is main-

tained. 
 Pressing  the   OFF ,   AUTO ,  or   "visi-
bility"

   button  again  reactivates  the 

system  with  the  values  set  before  it 

was switched off. 
  Note:

   if  you  wish  to  cut  off  the  fl ow 

of air completely, press the air intake 

button  7 .   

 Press  this  button  for  recir-

culation  of  the  interior  air. 
Recirculation,  shown  on  the 

display,  enables  the  pas-

senger compartment to be insulated 

from exterior odours and smoke. 
 Avoid prolonged recirculation of inte-
rior air (risk of condensation and de-

terioration of the air quality). 

 Press the button again to resume au-

tomatic management of the intake of 
air.  

  Notes  
 To  prevent  condensation  on  the  in-
side  of  the  vehicle  in  cold  or  wet 
weather,  you  are  advised  to  avoid 
using the  ECO  mode. 
 To  guarantee  correct  operation  of 
your air conditioning system, we also 
recommend that you have it checked 
regularly.  

 The symbol  ECO  is displayed. 
 Automatic operation of the air condi-

tioning  is  resumed  when  the  button 

is pressed again. The symbol  A/C  is 

displayed. 

COMFORT

44 -

45

COMFORT -

         FRONT SEATS  

  3 -  Driver's seat height 

adjustment 

 Pull the handle upwards. 
 Remove your weight from the seat to 
raise, or press on the seat to lower.  

  Rear head restraints 
 These have a high position for when 
they are in use and a low position for 
when  they  are  stored.  They  are  re-

movable. 
 To  lower  the  head  restraints,  press 
the lug. 
 To remove them, pull upwards as far 
as  the  stop,  then  press  the  release 
control.  

 Never drive with the head 

restraints  removed;  they 

must be in place and cor-

rectly adjusted.  

  1 -  Forwards-backwards 

adjustment 

 Lift the control and slide the seat to-
wards the front or the rear.  

  2 -  Head restraint height and 

angle adjustment 

 To  raise  the  restraint,  pull  it  up-
wards. 
  

The adjustment is correct when the 

upper edge of the head restraint is 

level with the top of the head.  
 The  head  restraint  has  a  frame  with 
notches, which prevent the head re-
straint dropping down (this is a safety 
device in the event of an impact). 
 To lower the head restraint, it is neces-
sary to push simultaneously: 
   -   the button located on the left 

guide at the base of the head 

restraint, 

  -  

the head restraint downwards.  

 To  remove  the  head  restraint,  press 
the lug. 
 The  angle  of  the  head  restraint  can 

also be adjusted. 

  4 - Seat back angle adjustment 
 Push one of the two handles towards 
the rear.   

COMFORT

46 -

  -   position the seat belt under the 

belt holder  2 , 

  -  

pull the controls  3  to unlock the 

seat back  4 , 

  -  

remove or lower the head re-
straints, 

  -   tilt the seat back  4 .  

 To fold the bench seat: 
   -  

lift the front of the seat cushion  1 , 

  -  

tilt the seat cushion  1  against the 
front seats, 

 When repositioning: 
   -   return the seat back to the 

upright position, 

  -   fold back the seat cushion, 
  -  

reposition the buckles before locking 

the front of the seat cushion.  


Always  start  with  the  seat,  never 

the seat back (risk of damage).  

  Take  care  not  to  trap  the  seat 
belts.
  

47

COMFORT -

     TRANSPORTING LONG 
OBJECTS 

  Front seat:  
   -   Fold  the  seat  back  towards 

the  front  using  the  control   5  
(see corresponding paragraph).  

  Removing the rear seat 

   -  

Tilt  the  seat  cushion  against  the 
front seats. 

  -   Squeeze  the  seat  fasteners  to 

release  them  from  their  attach-
ments. 

  -  

Remove the seat cushion.   

  Folding seat back 

   -  

Remove  the  head  restraint  for 
complete  folding  of  the  seat 

back. 

  -  

Push handle  5  towards the rear to 

tilt the seat back.   

  Rear seat:  
   -  

Remove the seat cushion. 

  -   Tilt the seat back.  

COMFORT

48 -

  "Forwards-facing" 
 When  a  "forwards-facing"  child  seat 
is  installed  on  the   front  passenger 
seat
 , adjust the vehicle's seat to the 
intermediate 

longitudinal 

position 

with the seat back upright and leave 

the passenger air bag armed.  

  INSTALLING A CHILD SEAT 
USING A THREE POINT SEAT 
BELT 

         GENERAL POINTS RELATING 
TO CHILD SEATS 

  *    The  rules  for  transporting  children 

are  specifi c  to  each  country.  Con-

sult  the  current  legislation  in  your 
country.  

  Intermediate longitudinal 

position 


   Although  one  of   PEUGEOT's   main 
criteria when designing your vehicle, 
the  safety  of  your  children  also  de-
pends on you. 
 For  maximum  safety,  please  follow 
these precautions: 
   -  

in 

accordance 

with 

Directive 

2003/20,   all  children  under  the 
age of 12 or less than one metre 

fi fty   tall must travel in approved 

child seats suited to their weight , 

on  seats  fi tted  with  a  seat  belt  or 

ISOFIX   * mountings , 

  -  

 statistically, the safest seats in 
your  vehicle  for  the  transpor-
tation  of  children  are  the  rear 
seats,
  

  -  


a child weighing less than 9 kg 

must  travel  in  the  "rearwards-

facing"  position  both  in  the 
front and in the rear.
   

  PEUGEOT      recommends   that  chil-
dren  should  travel  in  the   rear  seats  
of your vehicle: 
   -  


"rearwards-facing"  up to the 

age of 2, 

  -  


"forwards-facing"  over the age 

of 2.  

  "Rearwards-facing" 
 When a "rearwards-facing" child seat 
is  installed  on  the   front  passenger 
seat
 ,  it  is  essential  that  the  passen-

ger  air  bag  is  disarmed.  Otherwise, 


the  child  would  risk  being  seri-

ously injured or killed if the air bag 

were to infl ate.   

49

COMFORT -

   Passenger air bag OFF   

  CHILD SEATS RECOMMENDED BY  PEUGEOT  

  PEUGEOT   offers  a  complete  range  of  recommended  child  seats  which  are 
 secured using a three point seat belt : 

   Group 0: from birth to 10 kg  

Group 0+: from birth to 13 kg   


   L1    

"ROMER Baby-Safe Plus"  

Installed in the rear-facing position 


Groups 1, 2 and 3: from 9 to 36 kg   


   L2     

"KIDDY Life"  

For the safety of young children 

(from 9 to 18 kg),  PEUGEOT  

recommends use of the 

restraining cushion.  

   Groups 2 and 3: from 15 to 36 kg   


   L3    

"RECARO 

Start''  


   L4     

"KLIPPAN 

Optima"  

From the age of 6 years

 (approximately 22 kg), 

the booster is used 

on its own.  


Content   ..  1  2  3  4   ..