Peugeot 405 Haynes (petrol). Manual - part 25
30 Slacken the hose clip, and disconnect the
fluid hose from the pump. If the hose clip is of
the crimped type, discard it and fit a new
worm-drive clip on refitting.
31 Unscrew the two front pump mounting
bolts, which can be accessed through the
holes in the pump pulley.
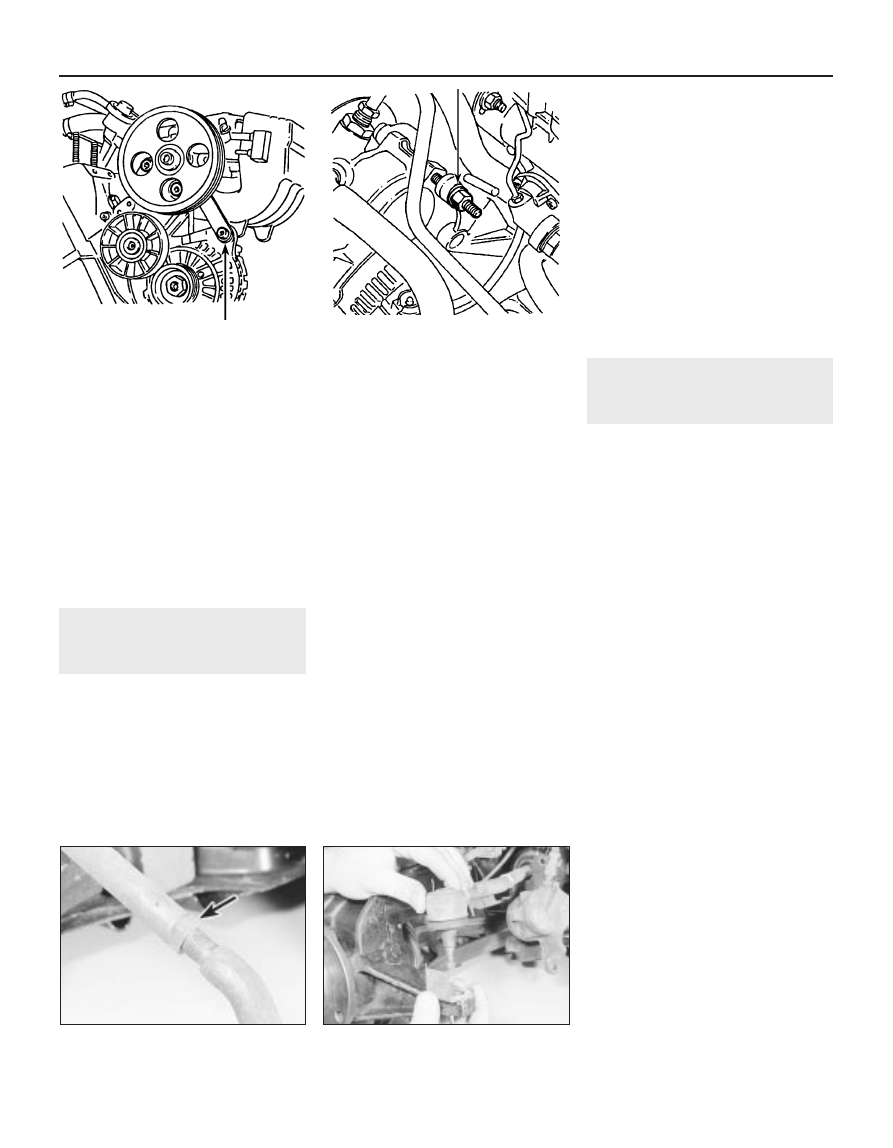
32 Unscrew the bolt securing the pump
mounting bracket to the alternator (see
illustration).
33 Unscrew the rear pump bolt, then withdraw
the pump from the engine (see illustration).
Refitting
34 Refer to paragraph 11.
23 Track rod end -
removal and refitting
3
Removal
Note: A new track rod end-to-hub carrier nut
must be used on refitting.
1 Apply the handbrake, then jack up the front
of the vehicle and support it on axle stands
(see “Jacking and Vehicle Support”). Remove
the appropriate front roadwheel.
2 If the balljoint is to be re-used, use a
straight-edge and a scriber, or similar, to mark
its relationship to the track rod.
3 Hold the track rod, and unscrew the track
rod end locknut by a quarter of a turn. Do not
move the locknut from this position, as it will
serve as a handy reference mark on refitting
(see illustration).
4 Slacken and partially unscrew the track rod
end-to-hub carrier nut (unscrew the nut as far
as the end of the threads on the balljoint to
prevent damage to the threads as the joint is
released), then release the balljoint using a
balljoint separator tool (see illustration).
Remove the nut.
5 Counting the exact number of turns
necessary to do so, unscrew the track rod
end from the track rod.
6 Count the number of exposed threads
between the end of the track rod end and the
locknut, and record this figure. If a new track
rod end is to be fitted, unscrew the locknut
from the old track rod end.
7 Carefully clean the balljoint and the threads.
Renew the track rod end if its balljoint
movement is sloppy or too stiff, if excessively
worn, or if damaged in any way; carefully
check the stud taper and threads. If the
balljoint gaiter is damaged, the complete track
rod end assembly must be renewed; it is not
possible to obtain the gaiter separately.
Refitting
8 If a new track rod end is to be fitted, screw
the locknut onto its threads, and position it so
that the same number of exposed threads are
visible, as were noted prior to removal.
9 Screw the track rod end onto the track rod
by the number of turns noted on removal. This
should bring the locknut to within a quarter of
a turn of the end face of the track rod, with the
alignment marks that were made on removal
(if applicable) lined up.
10 Engage the balljoint taper with the hub
carrier, then fit a new retaining nut and tighten
it to the specified torque.
11 Refit the roadwheel, then lower the
vehicle to the ground and tighten the
roadwheel bolts to the specified torque.
12 Check and, if necessary, adjust the front
wheel toe setting as described in Section 25,
then securely tighten the track rod end
locknut.
24 Track rod -
removal and refitting
4
Removal
Note: A new inner balljoint lockwasher must
be used on refitting.
1 Remove the track rod end as described in
Section 23.
2 Either release the retaining clips and slide
the steering gear gaiter off the end of the track
rod, or release the track rod balljoint dust
cover from rack, and slide it off the track rod
(as applicable). Refer to Section 20 for further
information.
3 Unscrew the track rod inner balljoint from
the steering rack end, preventing the steering
rack from turning by holding the balljoint lock
washer with a pair of grips. Take great care
not to mark the surfaces of the rack and
balljoint.
4 Remove the track rod assembly, and
discard the lock washer - a new one must be
used on refitting.
5 Examine the track rod inner balljoint for
signs of slackness or tight spots, and check
that the track rod itself is straight and free
from damage. If necessary, renew the track
rod; it is also recommended that the steering
gear gaiter/dust cover is renewed.
Refitting
6 Locate the new lock washer assembly on
the end of the steering rack, and apply a few
drops of locking fluid to the track rod inner
balljoint threads.
7 Screw the balljoint into the steering rack,
and tighten it whilst retaining the lock washer
with a pair of grips. Again, take great care not
to damage or mark the track rod balljoint or
steering rack.
8 Where a gaiter was removed, carefully slide
on the new gaiter, and locate it on the steering
gear housing. Turn the steering fully from
lock-to-lock, to check that the gaiter is
correctly positioned on the track rod, then
secure it in position with new retaining clips.
10•16 Suspension and steering
22.32 Unscrew the bolt (arrowed) securing
the pump mounting bracket to the
alternator - XU7 and XU10 engine models
with air conditioning
23.3 Track rod end locknut (arrowed)
23.4 Disconnecting the track rod end from
the hub carrier
22.33 Unscrew the rear pump securing
bolt (arrowed) - XU7 and XU10 engine
models with air conditioning