Nissan Juke (2017 year). Instruction - part 19
AWD shift tips
. The oil temperature of power train parts will
increase if the vehicle is continuously
operated under conditions where the differ-
ence in rotation between the front and rear
wheels is large (wheel slip), such as when
driving the vehicle on rough roads through
sand or mud or when freeing a stuck vehicle.
In these cases, the AWD warning light blinks
rapidly and the AWD mode changes to the
2WD mode to protect the power train parts.
If you stop driving with the engine idling and
wait until the warning light stops blinking,
the AWD returns to the AWD-V or AWD
mode.
. Brake distance in the AWD mode is the
same as 2WD.
CAUTION
. Do not start the engine with the
AWD mode switch in any mode in
the following cases:
— when the vehicle is placed on a
free-roller or jacking up the
vehicle with the front tires
raised and the rear tires on the
ground.
— when towing the vehicle with the
rear tires raised from the
ground.
. Operate the AWD mode switch only
when driving straight. Do not oper-
ate the AWD mode switch when
making a turn or backing up. If the
AWD mode switch is operated while
making a turn, accelerating or de-
celerating, or if the ignition switch is
turned off while in the AWD-V or
AWD mode, you may feel a jolt. This
is not a malfunction.
. Do not operate the AWD mode
switch with the front wheel spin-
ning.
. Engine idling speed is high while
warming up the engine. Be espe-
cially careful when starting or driv-
ing on slippery surfaces with the
AWD mode switch set in the AWD-V
or AWD mode.
SSD0336-D
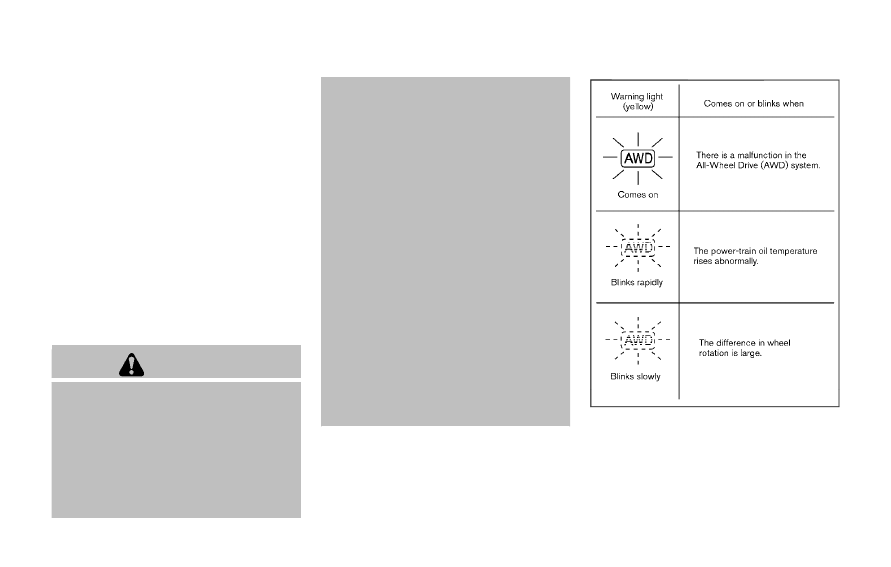
AWD WARNING LIGHT
The AWD warning light located in the instrument
panel illuminates when the ignition switch is
placed in the ON position. It turns off soon after
the engine is started.
If any malfunction occurs in the AWD system
while the engine is running, or while driving, the
Starting and driving
5-31