Nissan Silvia. Manual - part 227
SEM365EA
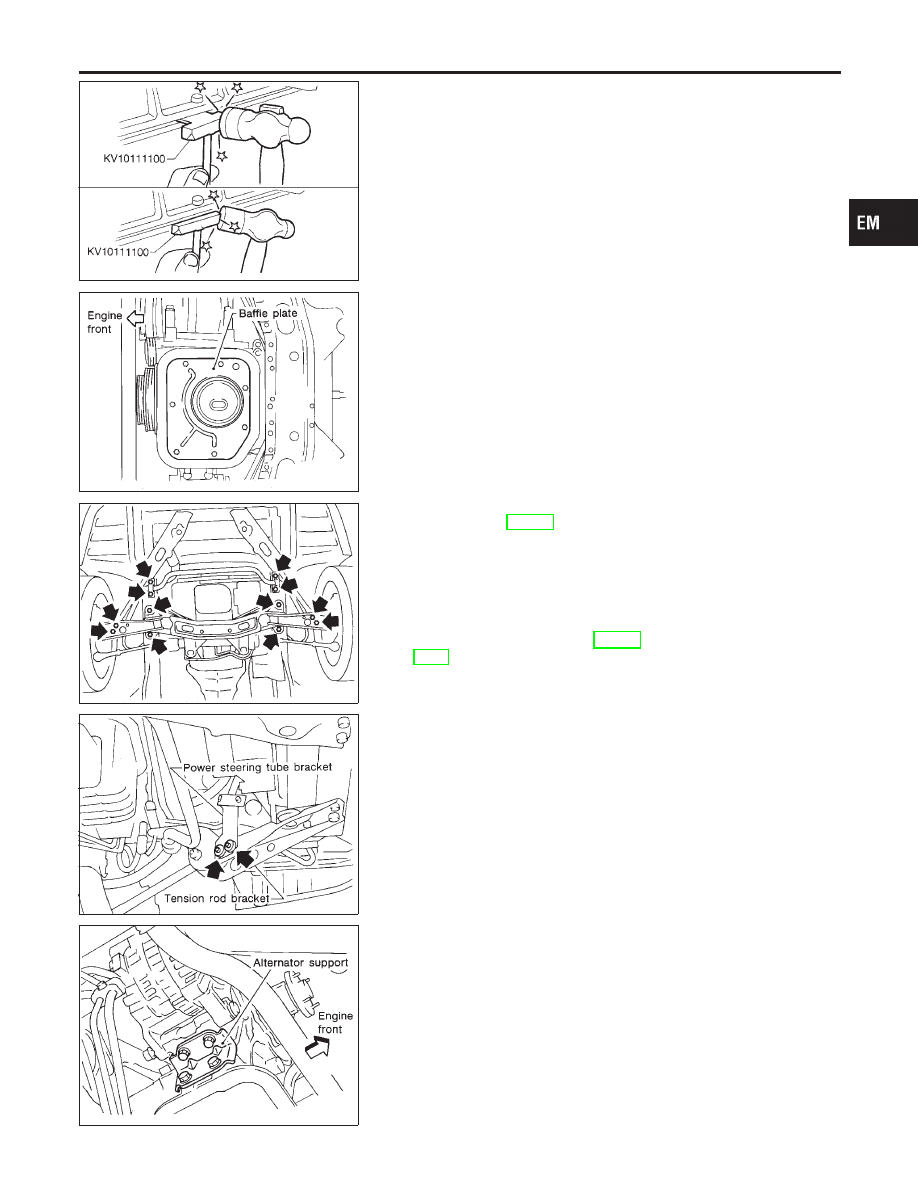
4.
Remove steel oil pan.
a.
Insert Tool between aluminum oil pan and steel oil pan.
I
Be careful not to damage aluminum mating surface.
I
Do not insert screwdriver, or oil pan flange will be dam-
aged.
b.
Slide Tool by tapping on the side of the Tool with a hammer.
c.
Remove steel oil pan.
SEM976E
d.
Remove baffle plate.
SEM977E
5.
Install engine slingers to cylinder head. Refer to “ENGINE
ASSEMBLY” (EM-65).
6.
Set a suitable hoist on engine slinger and hold the engine.
7.
Remove the following parts.
I
Tension rod bolts at transverse links
I
Front stabilizer bar securing bolts and nuts from side member.
I
Both left and right side engine mounting bolts. Refer to
“ENGINE ASSEMBLY” (EM-65) and “Front Suspension”
(SU-9.
8.
Disconnect steering shaft lower joint.
SEM790E
9.
Remove power steering tube bracket securing bolts at left ten-
sion rod bracket.
10. Remove front suspension member securing bolts while sup-
porting with a jack.
11. Lower front suspension member by around 60 mm (2.36 in).
SEM978E
12. Remove alternator support.
GI
MA
LC
EC
FE
CL
MT
AT
PD
AX
SU
BR
ST
RS
BT
HA
SC
EL
IDX
OIL PAN
Removal (Cont’d)
EM-21