Mazda B2300 (2003 year). Instruction - part 3
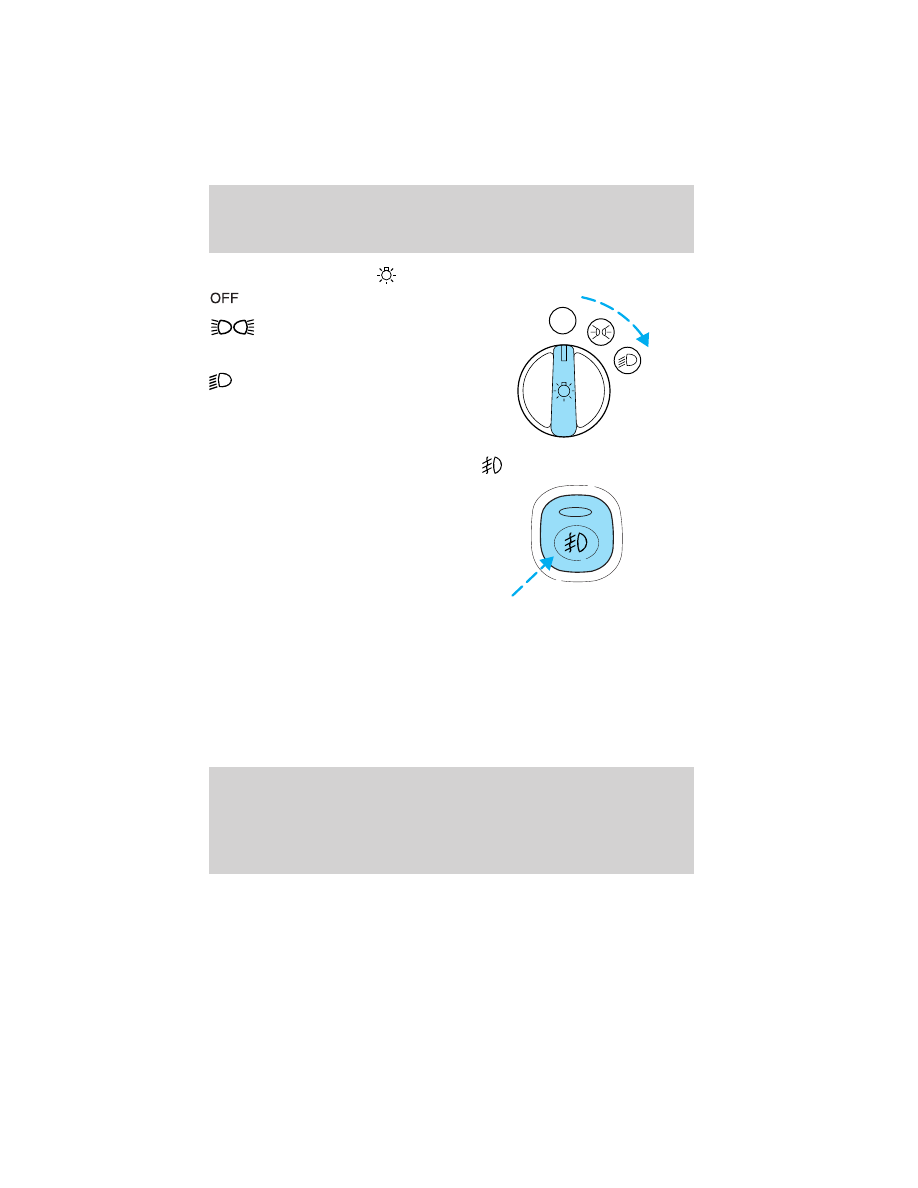
HEADLAMP CONTROL
Turns the lamps off.
Turns on the parking
lamps, instrument panel lamps,
license plate lamps and tail lamps.
Turns the headlamps on.
FOG LAMP CONTROL (IF EQUIPPED)
The fog lamps can only be turned
on when the headlamp control is in
the low beams position.
Press the foglamp control to activate
the fog lamps. The fog lamp
indicator light will illuminate. When
the highbeams are activated, the fog
lamps will not operate.
Press the fog lamp control again to deactivate the fog lamps.
Daytime running lamps (DRL) (if equipped)
Turns the headlamps on with a reduced output.
To activate:
• the ignition must be in the ON position and
• the headlamp control is in the OFF or parking lamp position.
WARNING: Always remember to turn on your headlamps at
dusk or during inclement weather. The Daytime Running Lamp
(DRL) system does not activate with your parking lights or side
marker lights and generally may not provide adequate lighting
during these conditions. Failure to activate your headlamps
under these conditions may result in a collision.
OFF
Lights
38