Lexus SC300 / Lexus SC400. Manual - part 114
3.
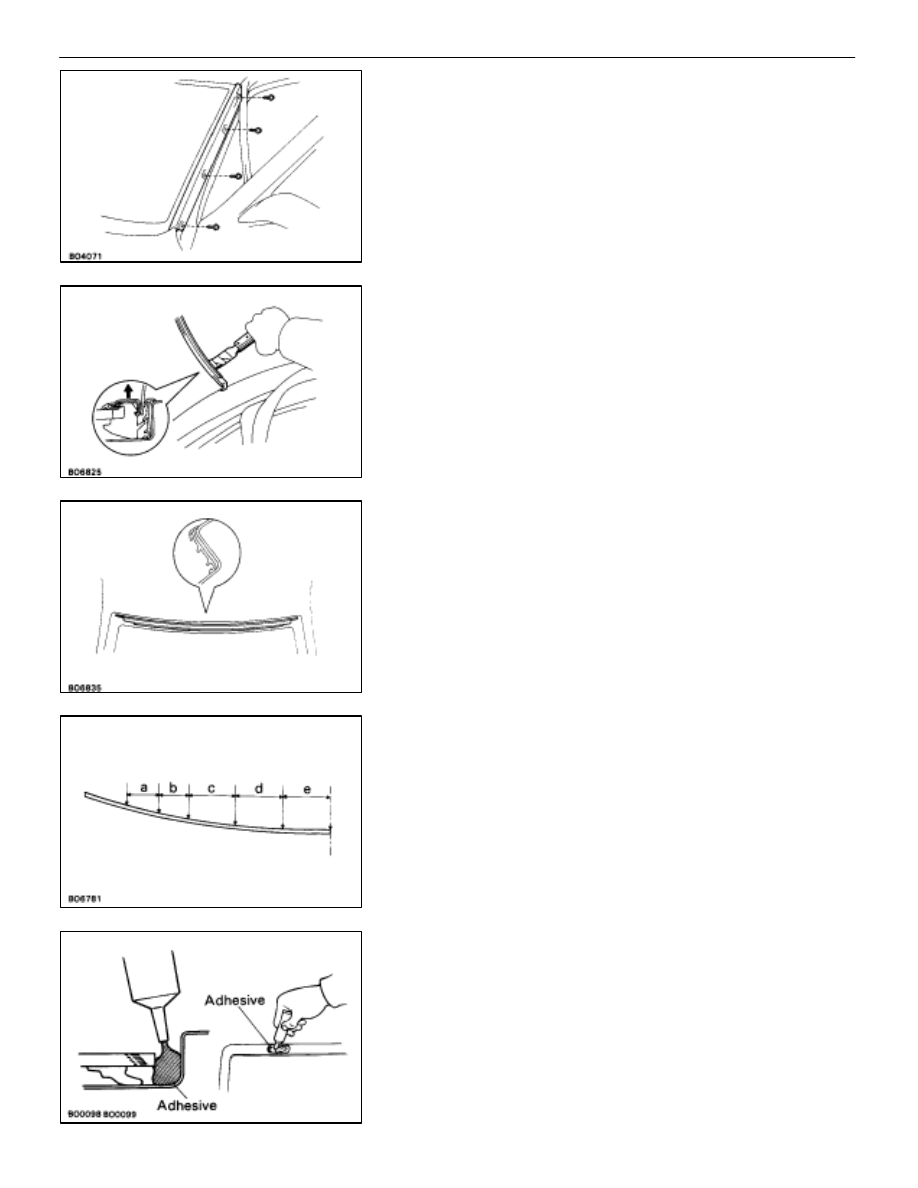
REMOVE SIDE MOULDING
Remove four screws and the side moulding.
4.
REMOVE UPPER MOULDING
(a) Insert
the
top of
scraper between the body and
moulding.
HINT:
Tape the scraper tip before use.
(b) Pry up the scraper to loosen the moulding from the
claws of the clips and the retainer.
(c) Remove the moulding.
REPLACEMENT OF FASTENER
REPLACE FASTENER
(a) Remove the damaged fastener.
(b) Cut off the old adhesive around the fastener installation
area.
HINT:
Be careful not to damage the body.
(c) Clean the installation area.
(d) Install the new fastener onto the body.
HINT:
Before installing, peel off the backing paper at the
fastener. Install the fastener with the atmospheric tempera-
ture between 20 – 40
°
C (68 – 104
°
F).
INSTALLATION OF WINDSHIELD
MOULDING
(See page
1.
ADJUST CLIPS INTO UPPER MOULDING
Install the clip to the appropriate place on the moulding.
a:
75.7 mm (2.98 in.)
b:
71.0 mm (2.80 in.)
c:
109.0 mm (4.29 in.)
d:
110.0 mm (4.33 in.)
e:
110.0 mm (4.33 in.)
2.
APPLY ADHESIVE AT NEW CLIP INSTALLATION AREA
(a) When
the
clip being
engaged with the moulding is
removed, cut out the old adhesive around the clip
installation area.
NOTICE: Do not damage the body and fastener.
(b) Apply adhesive at the clip installation area so water
does not collect there.
–
BODY
Moulding (Windshield Moulding)
BO–97