Lexus SC300 / Lexus SC400. Manual - part 44
 

  Index      Lexus     Lexus SC300 / Lexus SC400 - service repair manual


Search            


Content   ..  42  43  44  45   ..


Lexus SC300 / Lexus SC400. Manual - part 44


WATER TEMPERATURE SENSOR

REMOVAL OF WATER TEMPERATURE
SENSOR

1. 

REMOVE A/C UNIT
See page 

AC–107

2. REMOVE 

SENSOR

After taking off the clamp, take out the sensor.

INSPECTION OF WATER TEMPERATURE
SENSOR

See page 

AC–51

INSTALLATION OF WATER
TEMPERATURE SENSOR

1. 

INSTALL SENSOR TO A/C UNIT
Install the sensor with the clamp.

2. 

INSTALL A/C UNIT
See page 

AC–108

PRESSURE SWITCH

INSPECTION OF PRESSURE SWITCH

See page 

AC–57

REMOVAL OF PRESSURE SWITCH

1. 

RECOVER REFRIGERANT IN REFRIGERANT SYSTEM
See page 

AC–16

2. 

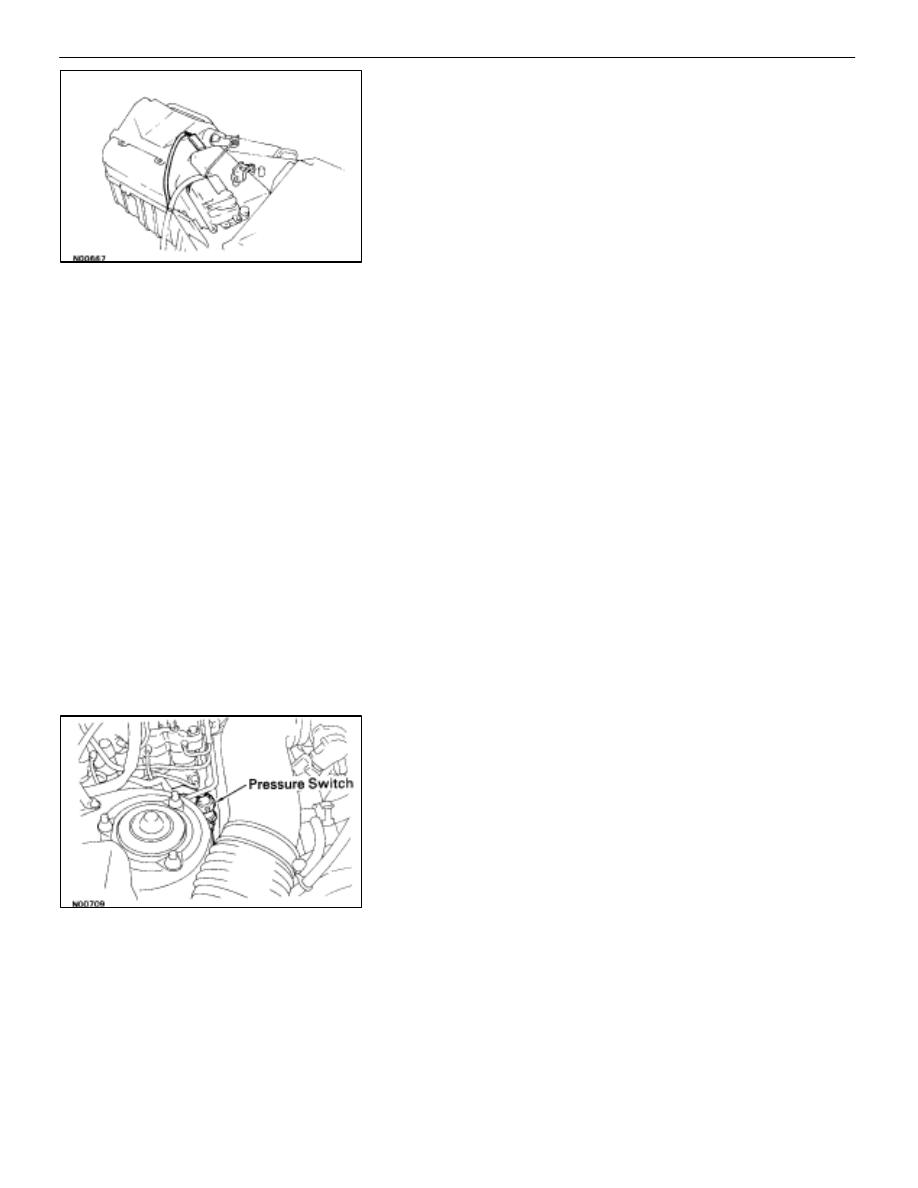
REMOVE PRESSURE SWITCH

(a)  Disconnect the connector.
(b)  Remove the pressure switch from the liquid tube.

HINT: Lock the switch mount on the tube with an open end
wrench, being careful not to deform the tube, and remove the
switch.

AC–136

AIR CONDITIONING SYSTEM

Water Temperature Sensor, Pressure Switch

INSTALLATION OF PRESSURE SWITCH

1. 

INSTALL PRESSURE SWITCH

(a)  Install the pressure switch to the liquid tube.

Specified torque: 10 N

m (100 kgf

cm, 7 ft

lbf)

HINT: Lock the switch mount on the tube with an open end
wrench, being careful not to deform the tube, and install the
switch.

(b)  Connect the connector.
2. EVACUATE 

AIR 

IN 

REFRIGERATION 

SYSTEM 

AND

CHARGE WITH REFRIGERANT
See page 

AC–17

Specified amount: 950 

±

 50 g (33.44 

±

 1.76 oz)

3. 

INSPECTION FOR LEAKAGE OF REFRIGERANT
Using a gas lead tester, check for leakage of refrigerant from
the pressure switch mount.

4. 

INSPECT A/C OPERATION

POWER TRANSISTOR

REMOVAL OF POWER TRANSISTOR

1. 

REMOVE GLOVE BOX

2. 

REMOVE POWER TRANSISTOR

(a) Disconnect 

connectors.

(b)  Remove the two screws and the power transistor.

INSPECTION OF POWER TRANSISTOR

See page 

AC–79

INSTALLATION OF POWER
TRANSISTOR

1. 

INSTALL POWER TRANSISTOR

(a)  Install power transistor with two screws.
(b) Connect 

connectors.

2. 

INSTALL GLOVE BOX
See page 

BO–112

AIR CONDITIONING SYSTEM

Pressure Switch, Power Transistor

AC–137

INSTALLATION OF PRESSURE SWITCH

1. 

INSTALL PRESSURE SWITCH

(a)  Install the pressure switch to the liquid tube.

Specified torque: 10 N

m (100 kgf

cm, 7 ft

lbf)

HINT: Lock the switch mount on the tube with an open end
wrench, being careful not to deform the tube, and install the
switch.

(b)  Connect the connector.
2. EVACUATE 

AIR 

IN 

REFRIGERATION 

SYSTEM 

AND

CHARGE WITH REFRIGERANT
See page 

AC–17

Specified amount: 950 

±

 50 g (33.44 

±

 1.76 oz)

3. 

INSPECTION FOR LEAKAGE OF REFRIGERANT
Using a gas lead tester, check for leakage of refrigerant from
the pressure switch mount.

4. 

INSPECT A/C OPERATION

POWER TRANSISTOR

REMOVAL OF POWER TRANSISTOR

1. 

REMOVE GLOVE BOX

2. 

REMOVE POWER TRANSISTOR

(a) Disconnect 

connectors.

(b)  Remove the two screws and the power transistor.

INSPECTION OF POWER TRANSISTOR

See page 

AC–79

INSTALLATION OF POWER
TRANSISTOR

1. 

INSTALL POWER TRANSISTOR

(a)  Install power transistor with two screws.
(b) Connect 

connectors.

2. 

INSTALL GLOVE BOX
See page 

BO–112

AIR CONDITIONING SYSTEM

Pressure Switch, Power Transistor

AC–137

A/C CONTROL ASSEMBLY
(A/C ECU)

REMOVAL OF A/C CONTROL ASSEMBLY

1. 

REMOVE RADIO AND A/C CONTROL ASSEMBLY
See page 

BO–112

2. 

REMOVE A/C CONTROL ASSEMBLY
Remove four screws and the A/C control assembly.

INSPECTION OF A/C CONTROL
ASSEMBLY

Judge whether the system is satisfactory or not based on the
”Troubleshooting” procedure on page 

AC–21

.

INSTALLATION OF A/C CONTROL
ASSEMBLY

1. 

INSTALL A/C CONTROL ASSEMBLY TO RADIO
Install the A/C control assembly to the radio with four screws.

2. 

INSTALL RADIO AND A/C CONTROL ASSEMBLY
See page 

BO–112

AC–138

AIR CONDITIONING SYSTEM

A/C  Control Assembly (A/C ECU)


Content   ..  42  43  44  45   ..