Range Rover Classic. Manual - part 181
86
ELECTRICAL
12
REPAIR
HEATER/VENTILATION AND AIR CONDITIONING
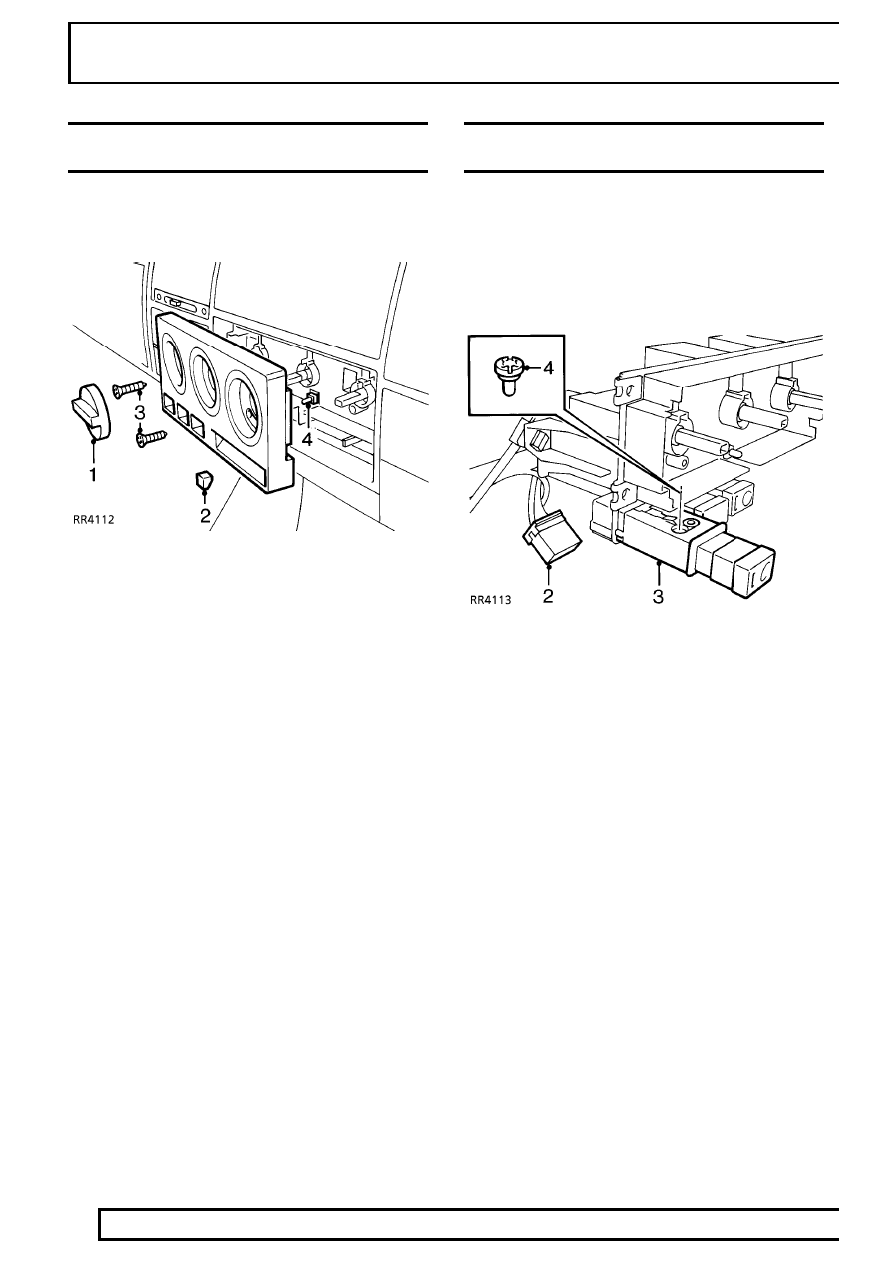
CONTROL PANEL BULB
Service repair no - 86.45.73
Remove
1. Carefully pull 3 rotary knobs off switches.
2. Prise blower speed control knob off lever.
3. Remove 2 screws securing panel, ease panel
away from fascia.
4. Pull bulb from holder.
5. Insert new bulb in holder.
Refit
6. Reverse removal procedure.
HEATER/VENTILATION AND AIR CONDITIONING
CONTROL PANEL SWITCHES AND BULBS
Service repair no - 82.20.49 - Air conditioning
switch
Service repair no - 86.10.27 - Recirculation switch
1. Remove centre dash panel.
See CHASSIS
AND BODY, Repair, Dash Panel Central
Louvre Panel
2. Disconnect multiplug from appropriate switch.
3. Depress retaining lugs, withdraw switch from
panel.
Bulb replacement
4. Rotate bulb holder, withdraw holder and bulb.
Refit
5. Reverse removal procedure.