Range Rover Classic. Manual - part 124


  Index      Land Rover     Range Rover Classic - service manual 1995 year


Search            


Content   ..  122  123  124  125   ..


Range Rover Classic. Manual - part 124


BRAKES

3

REPAIR

Repair

WARNING: Use only unused brake fluid to
clean any part of brake system. DO NOT
use petrol, kerosene or other mineral

based fluids.

7. Thoroughly clean master cylinder and inspect

outer surfaces for damage and condition, renew
complete assembly if necessary.

8. Using two soft jaws, clamp master cylinder

flange in a suitable vice. Remove water ingress
’O’ ring seal from master cylinder to servo flange
and discard.

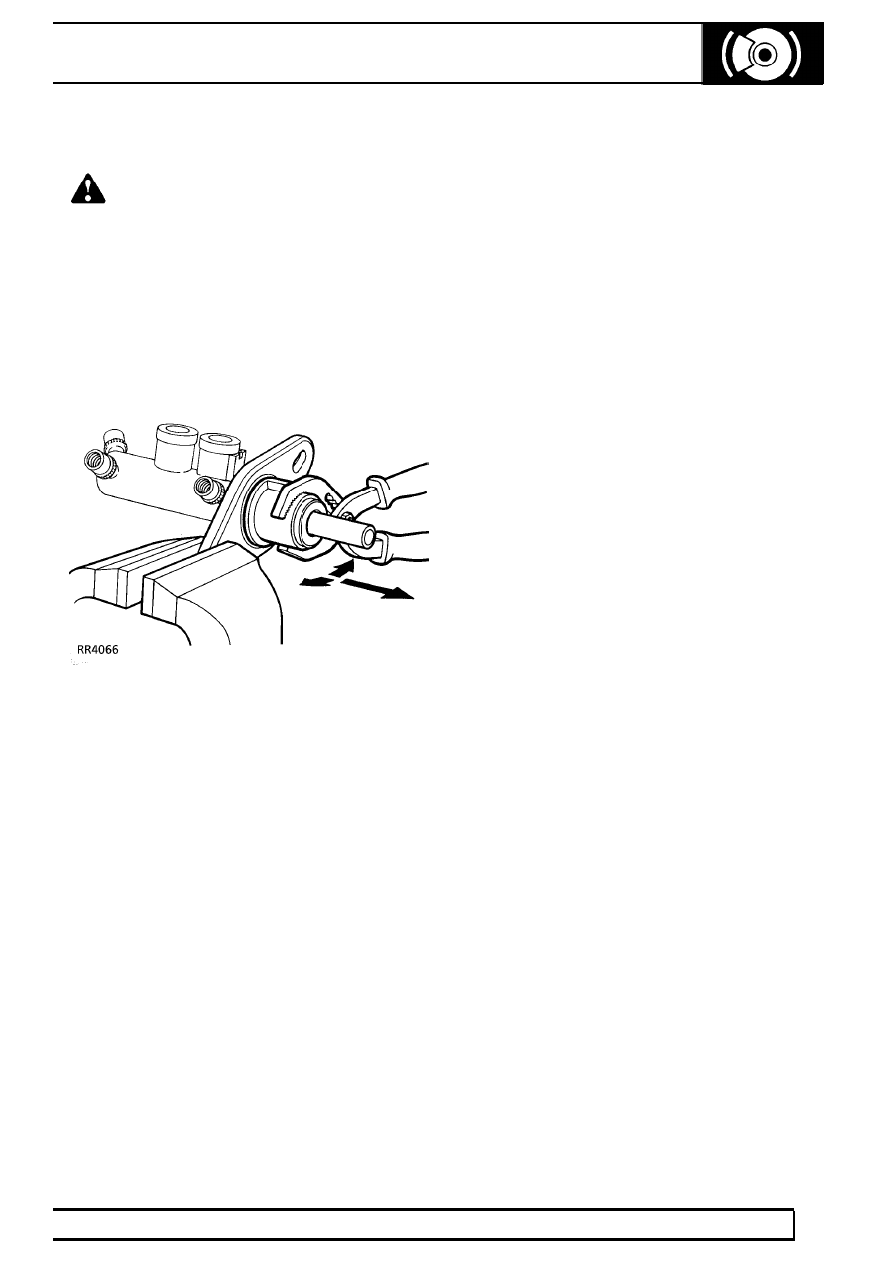
9. Grip outside of transfer housing with a suitable

pair of pliers, carefully pull, working pliers in a
backwards and forwards rocking motion to ease
housing off master cylinder. Discard housing and
vacuum seal.

70

BRAKES

4

REPAIR

10. Ease reservoir out of master cylinder taking care

to ensure that two outlet ports on bottom of
reservoir do not become damaged during this
process.

11. Withdraw two reservoir seals from master

cylinder inlet ports. Note for reassembly these
seals are different. Discard seals.

12. Remove retaining ring and ’O’ ring seal from

machined outer surface of master cylinder.
Discard both seal and retaining ring.

BRAKES

5

REPAIR

13. Remove guide ring, which supports primary

plunger assembly, from mouth of master
cylinder. Place to one side for reassembly, note
this component is not part of service kit.

14. Pull primary plunger assembly out of master

cylinder.

NOTE: The primary plunger assembly
cannot be broken down any further and is
serviced as a complete unit. Discard

assembly.

15. The secondary plunger assembly will remain at

bottom of master cylinder bore. Remove, tapping
assembly on a piece of wood until plunger
appears at cylinder mouth, carefully pull plunger
out of master cylinder.

16. If swirl tube was not expelled at same time as

secondary plunger, repeat above operation to
remove it from bottom of master cylinder bore
and discard.

17. Clean all parts with unused brake fluid. Place

cleaned parts onto a clean sheet of paper.
Inspect cylinder bore and plungers for signs of
corrosion, ridges and score marks. Provided
working surfaces are in perfect condition, new
seals from a Girling Service repair kit may be
used.

Renewing secondary plunger seals

18. Remove following components from secondary

plunger and discard:

NOTE: A small screwdriver with end
rounded off and polished is required to
remove ’L’ seal. DO NOT damage

secondary plunger.

(A) Springs
(B) Seal retainer

(C) Recuperating seal (primary cup)
(D) Washer

(E) ’L’ seal

70

BRAKES

6

REPAIR

MASTER CYLINDER ASSEMBLY

Key to master cylinder

1. Water ingress seal
2. Transfer housing
3. Vacuum seal
4. Guide ring
5. Retaining ring
6. ’O’ ring seal

7. Primary plunger assembly
8. ’L’ seal
9. Secondary plunger

10. Washer
11. Recuperating seal (primary

cup)

12. Seal retainer

13. Springs (2 off)
14. Swirl tube
15. Master cylinder body
16. Reservoir seals
17. Reservoir
18. Low fluid level switch and

cap

NOTE: Thoroughly check that no debris is lodged in fluid passageways and drillings. If debris is
found, carefully remove, re-clean cylinder and re-check.


Content   ..  122  123  124  125   ..