Range Rover. Manual - part 203


  Index      Land Rover     Range Rover P38 - service manual 1995 year


Search            


Content   ..  201  202  203  204   ..


Range Rover. Manual - part 203


ABS

1

ADJUSTMENT

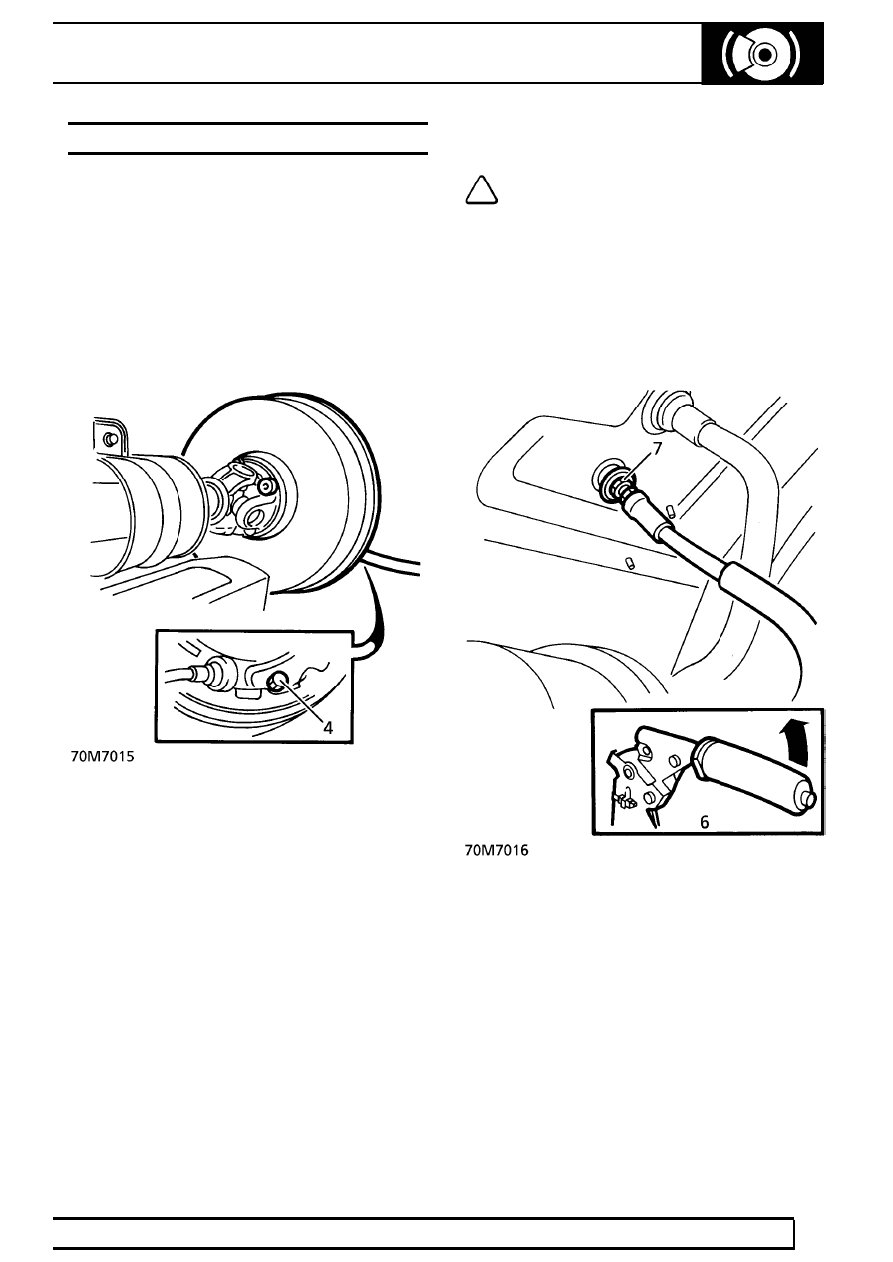
PARKING BRAKE - ADJUST

Service repair no - 70.45.09

Adjust

Shoes

1. Raise vehicle on four post lift.
2. Ensure brake lever is released. Raise lift.
3. Raise one rear wheel clear of lift.
4. Tighten brake shoe adjusting bolt to

25 Nm.

(18 lbf.ft). Ensure brake drum is locked.

5. Back off adjusting bolt by 1.5 turns. Check brake

drum is free to rotate.

Cable

NOTE: Ensure brake shoes are correctly
adjusted before adjusting cable. Cable
adjustment is for new cable or to

compensate for cable stretch. Cable adjustment
must not be used to take up brake shoe wear.

6. Parking brake should be fully operational on the

third notch of ratchet with a pull of 15 kg. (30 lbs)
on end of the brake lever.

7. To achieve this, release brake lever. From under

vehicle, adjust length of outer cable.

8. Lower vehicle.

ABS

1

REPAIR

GENERAL SERVICE INFORMATION

NOTE: ABS components ARE NOT
serviceable. Replace components found to
be faulty.

Brake fluid precautions

WARNING: Do not allow brake fluid to
come into contact with eyes or skin.

CAUTION: Brake fluid can damage
paintwork, if spilled wash off immediately
with plenty of clean water.

WARNING: Use only correct brake fluid. If
an assembly fluid is required use ONLY
brake fluid. Do NOT use mineral oil, i.e.

engine oil etc.

WARNING: THOROUGHLY CLEAN ALL
BRAKE COMPONENTS, CALIPERS, PIPES
AND FITTINGS BEFORE COMMENCING

WORK ON BRAKE SYSTEM. FAILURE TO DO SO
COULD CAUSE FOREIGN MATTER TO ENTER
SYSTEM AND DAMAGE SEALS AND PISTONS,
WHICH WILL SERIOUSLY IMPAIR BRAKE
SYSTEM EFFICIENCY.

WARNING: ENSURE THAT ONLY NEW
FLUID IS USED AND THAT IT IS TAKEN
FROM A CLEAN SEALED CONTAINER.

DO NOT USE BRAKE FLUID PREVIOUSLY BLED
FROM SYSTEM.

DO NOT USE OLD OR STORED BRAKE FLUID.

Brake system must be drained and flushed at
recommended service intervals.

DO NOT flush brake system with any fluid other
than recommended brake fluid.

DEPRESSURISE SYSTEM - Fluid pressure of 190
bar is produced by hydraulic pump. It is essential
that the system is depressurised where
instructed.

See this section.

FLUID LEVEL CHECK/TOP UP

1. Park vehicle on level ground.
2. Turn ignition ON, to activate hydraulic pump. If

pump does not operate depress brake pedal
several times until pump operates.

3. When pump stops, check level is between ’MIN’

and ’MAX’ marks.

WARNING: Clean reservoir body and filler
cap before removing cap. Use only fluid
from a sealed container.

4. If level is below ’MIN’ mark top up fluid level to

’MAX’ mark on reservoir, using correct fluid.

See

LUBRICANTS, FLUIDS AND CAPACITIES,
Information.

DO NOT OVER FILL RESERVOIR

DEPRESSURISE SYSTEM

WARNING: Before bleeding the system or
working on any component in the brake
system the following procedure MUST be

carried out to depressurise the accumulator.

1. Switch off ignition.
2. Operate the brake pedal 30 times. Pedal travel

will increase slightly and reduced resistance will
be felt as pressure decreases.

3. Wait for 60 seconds, press the brake pedal four

more times. This procedure will ensure that all
pressure is evacuated from the system.

70

BRAKES

NEW RANGE ROVER

2

REPAIR

BRAKE SYSTEM BLEED

Service repair no - 70.25.02

Equipment: Bleed tube and a clean bottle
containing a small amount of clean brake fluid.

CAUTION: Thoroughly clean all bleed
screws, filler cap and connections using
only clean brake fluid. DO NOT USE

MINERAL OIL I.E. ENGINE OIL ETC.
MAINTAIN CLEANLINESS THROUGHOUT.

NOTE: Do not allow reservoir fluid level to
fall below ’MIN’ level during bleeding.
Regularly check level and keep topped up

to ’MAX’ level.

WARNING: Do not use previously used
brake fluid. Ensure only new fluid is used,
taken from a clean sealed container.

Carefully dispose of unwanted fluid in a sealed
container, marked USED BRAKE FLUID.

1. Depressurise system.

See this section.

NOTE: Ensure ignition remains OFF until
instruction 13.

2. Fill fluid reservoir with specified fluid to ’MAX’

level.

3. Bleed master cylinder as follows: Open bleed

screw on booster, when fluid appears, close
bleed screw.

4. Fit tube to bleed screw.
5. Open bleed screw, depress pedal slowly and

progressively.

6. Close bleed screw. Release brake pedal.
7. Repeat instructions 5. and 6. until fluid is clear of

air bubbles.

8. Open bleed screw, fully depress pedal, close

bleed screw.

9. Bleed front calipers, driver’s side caliper first, as

follows: Open bleed screw, depress brake pedal
slowly and progressively, Close bleed screw at
bottom of each stroke, release pedal.

10. Repeat instruction 9. until fluid is clear of air

bubbles.

11. Open bleed screw again. Fully depress brake

pedal, close bleed screw.

12. Repeat instructions 9. to 11. for passenger side

caliper.

13. Bleed two booster bleed screws, starting at the

front bleed screw, as follows: Open bleed screw,
depress brake pedal, switch ignition on.

14. Allow fluid to flow until clear of air bubbles.

Switch ignition off, close bleed screw, release
pedal.

15. Repeat instructions 13. and 14. for the rear

booster bleed screw.


Content   ..  201  202  203  204   ..