Freelander 1. Manual - part 287


  Index      Land Rover     Freelander 1 - service manual 2002 year


Search            


Content   ..  285  286  287  288   ..


Freelander 1. Manual - part 287


HARNESSES

REPAIRS 86-7-11

63. Connect engine harness multiplugs to main 

harness.

64. Fit harness retaining clips.
65. Models with cruise control: Connect 

multiplug to vacuum pump.

66. Connect Lucar connector to starter motor.
67. Connect multiplug to LH ABS speed sensor.
68. Fit LH earth header and secure with nut.
69. Connect multiplug to harness.
70. Connect multiplugs to LH headlamp and 

headlamp levelling motor.

71. Secure harness to cooling fan clips.
72. Connect multiplugs to cooling fan pack and 

cooling fans.

73. Position bonnet release cable to harness and 

secure with cable ties.

74. Fit battery carrier.


 + 

 CHARGING AND STARTING, 

REPAIRS, Carrier - battery.

75. With assistance feed harness through bulk 

head into engine bay.

76. Fit earth header to bulk head and secure with 

nut.

77. Fit front screen washer tube to harness.
78. Fit harness retaining clips.
79. Fit PAS and coolant reservoir support bracket 

and secure with bolt and nuts.

80. Connect multiplug to bonnet switch.
81. Connect multiplug to brake fluid low level 

indicator switch.

82. Fit jack to holder in engine bay.
83. Connect multiplugs to horn, refrigerant 

pressure sensor and compressor.

84. Connect multiplugs to RH headlamp and 

headlamp levelling motor.

85. Connect multiplug to RH ABS speed sensor 

and secure to clips.

86. Connect multiplug to ABS modulator.
87. Fit earth header to RH inner wing and secure 

with nut.

88. Position harness to windscreen washer 

reservoir.

89. Fit windscreen washer reservoir.


 + 

 WIPERS AND WASHERS, REPAIRS, 

Reservoir - washer.

90. Fit engine acoustic cover.


 + 

 ENGINE - Td4, REPAIRS, Cover - 

engine acoustic.

91. Fit carpet.

Harness - tailgate

$% 86.70.19

Remove

1. Remove RH rear quarter lower trim casing.


 + 

 INTERIOR TRIM COMPONENTS, 

REPAIRS, Trim casing - rear quarter - lower 
- 5 door.

2. Remove tail door plastic sheet.


 + 

 DOORS, REPAIRS, Plastic sheet - 

tail door.

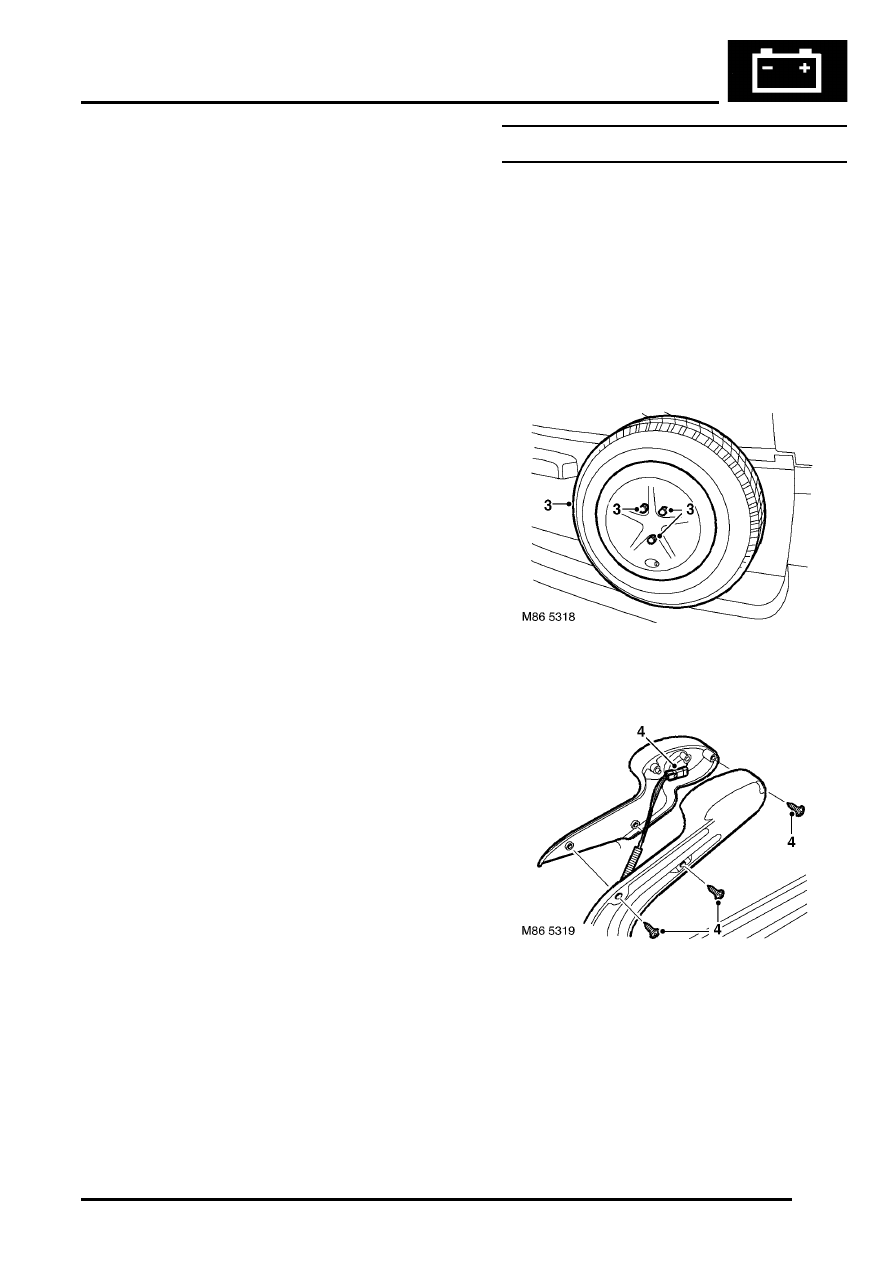
3. Remove 3 nuts and remove spare wheel.

4. Remove 3 screws securing CHMSL, 

disconnect multiplug and remove CHMSL.

5. Release 2 harness clips.

HARNESSES

86-7-12 REPAIRS

6. Disconnect rear washer tube from behind the 

spare wheel carrier.

7. Remove 3 nuts from number plate lamp 

housing and release housing.

8. Disconnect 2 Lucars and multiplug from 

housing.

9. Collect 2 spacers and housing seal.

10. Remove housing.

11. Disconnect 2 Lucars from rear screen element.
12. Remove 4 screws from door latch, release door 

latch to access multiplugs and harness clips.

13. Disconnect 2 multiplugs from door lock.

HARNESSES

REPAIRS 86-7-13

14. Disconnect multiplug from rear wiper motor.
15. Disconnect multiplug from rear window motor.

16. Release and disconnect 3 multiplugs and 

washer tube from main harness at 'E' post.

17. Release tail door harness from 13 retaining 

clips.

18. Release harness sheath from tail door and 'E' 

post.

19. Remove harness from vehicle.

Refit

1. Position harness to vehicle and secure in 

retaining clips.

2. Secure harness sheath to tail door and 'E' post.
3. Connect multiplugs and washer tube to main 

harness, secure multiplugs to body.

4. Connect multiplugs to window motor, wiper 

motor and door lock.

5. Position door latch, fit and tighten screws.
6. Connect Lucars to heated rear screen.
7. Position number plate lamp housing, locate 

seal and fit spacers.

8. Connect multiplug and Lucars to housing.
9. Fit housing and secure with nuts.

10. Connect washer tube behind spare wheel 

carrier.

11. Secure harness clips to spare wheel carrier, 

connect multiplug to CHMSL, fit CHMSL and 
secure with screws.

12. Fit spare wheel and secure with nuts.
13. Fit tail door plastic sheet.


 + 

 DOORS, REPAIRS, Plastic sheet - 

tail door.

14. Fit rear lower trim casing .


 + 

 INTERIOR TRIM COMPONENTS, 

REPAIRS, Trim casing - rear quarter - lower 
- 5 door.

HARNESSES

86-7-14 REPAIRS

Harness - interior lights - 5 door

$% 86.70.44

Remove

1. Remove fascia.


 + 

 INTERIOR TRIM COMPONENTS, 

REPAIRS, Fascia.

2. Remove headlining.


 + 

 INTERIOR TRIM COMPONENTS, 

REPAIRS, Headlining - 5 door.

3. Disconnect aerial connection and interior light 

harness from main harness.

4. Disconnect multiplug from volumetric sensor.
5. Release 10 harness clips.
6. Remove harness.

Refit

1. Position harness and secure harness clips.
2. Connect multiplug to volumetric sensor.
3. Connect multiplug and aerial connection to 

main harness.

4. Fit headlining.


 + 

 INTERIOR TRIM COMPONENTS, 

REPAIRS, Headlining - 5 door.

5. Fit fascia.


 + 

 INTERIOR TRIM COMPONENTS, 

REPAIRS, Fascia.

Harness - front door - 5 door

$% 86.70.65

Remove

1. Remove front door plastic sheet.


 + 

 DOORS, REPAIRS, Plastic sheet - 

front door - 5 door.

2. Disconnect multiplugs from door lock, door 

mirror and window motor.

3. Release 8 clips securing door harness to door.
4. Release 2 multiplugs from location at base of 

'A' post and disconnect multiplugs.

5. Release sheath from front edge of door, and 

pull harness from door.

6. Release sheath from 'A' post and pull harness 

from 'A' post.

7. Remove door harness.

Refit

1. Position harness to 'A' post and feed harness 

partly into 'A' post.

2. Feed sheath onto harness and locate sheath to 

'A' post.

3. Feed harness through front edge of door and 

secure sheath to door.

4. Connect and secure multiplugs at base of 'A' 

post.

5. Position harness to door and secure with clips.
6. Connect multiplugs to door mirror, door lock 

and window motor.

7. Fit front door plastic sheet.


 + 

 DOORS, REPAIRS, Plastic sheet - 

front door - 5 door.


Content   ..  285  286  287  288   ..