Defender (1993+). Manual - part 120
BODY
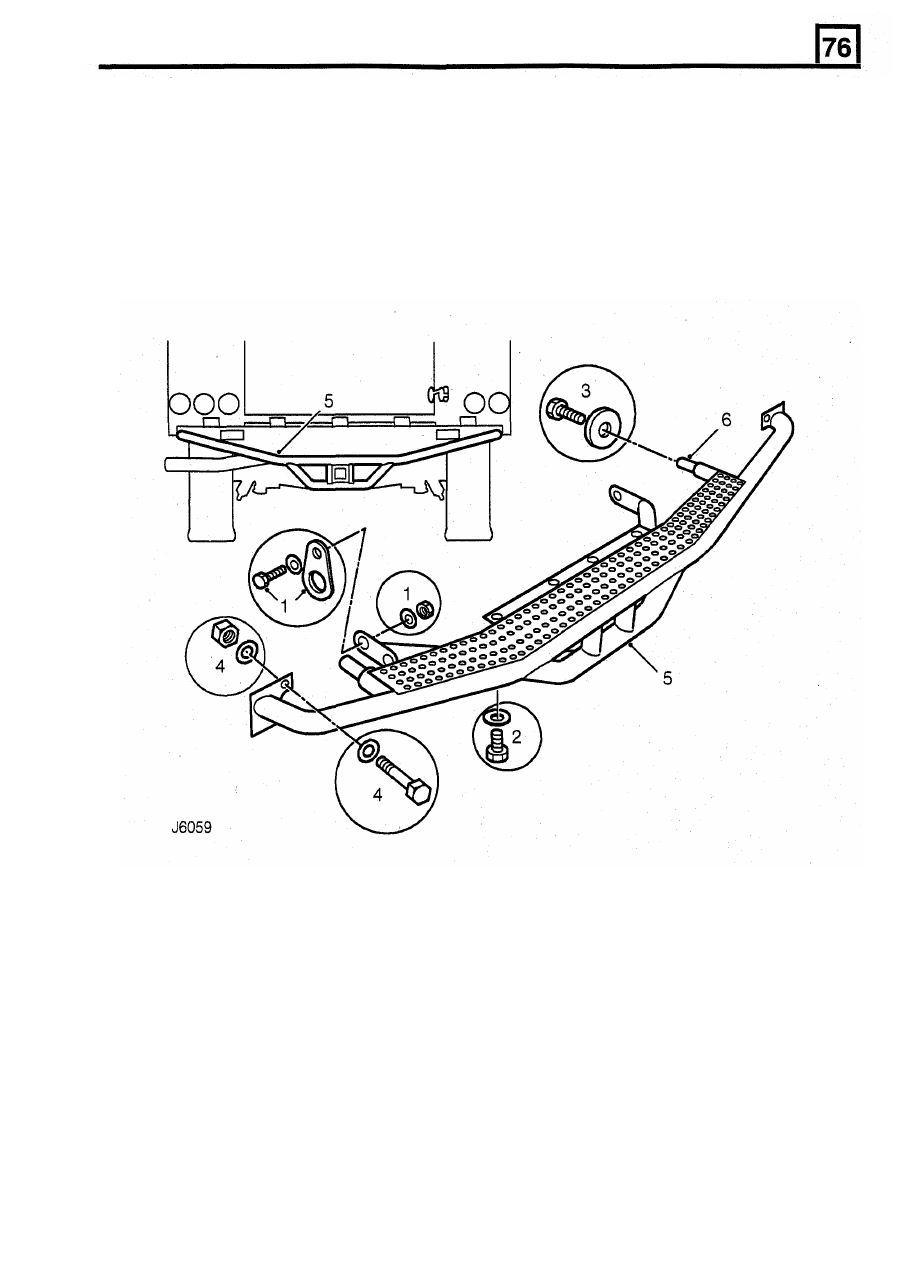
2.
Remove
4
bolts and spring washers securing
tow bar centre mounting bracket
to chassis.
3. Remove both bolts securing the two tow bar
locating tubes in rear chassis cross member.
4.
Remove 2 bolts securing tow bar top mounting
brackets to chassis.
5.
With assistance, withdraw tow bar assembly
from chassis.
REAR
TOW BAR
Service repair no - 76.11.41
Remove
1.
Remove bolt, washer and nut from both sides,
securing tow bar lower mounting brackets and
towing eyes to chassis.
9.
Secure tow bar centre mounting bracket to
Refit
underside of chassis and tighten bolts to
25
Nm
(18 Ibf.ft).
10. Position towing eyes to lower mounting brackets
and secure to chassis and tighten bolts to 25 Nm
(18 Ibf.ft).
11.
Fully tighten tow bar top mounting bracket bolts
to 25 Nm (18 Ibf.ft).
6.
With assistance, lift the tow bar assembly and
locate both tubes in the chassis crossmember.
7.
Secure top tow bar mounting brackets to chassis
but do not fully tighten fixings.
8. Secure tow bar locating tubes to rear
of chassis
and tighten bolts to 25 Nm (18 Ibf.ft).
15