Defender (1993+). Manual - part 118
BODY
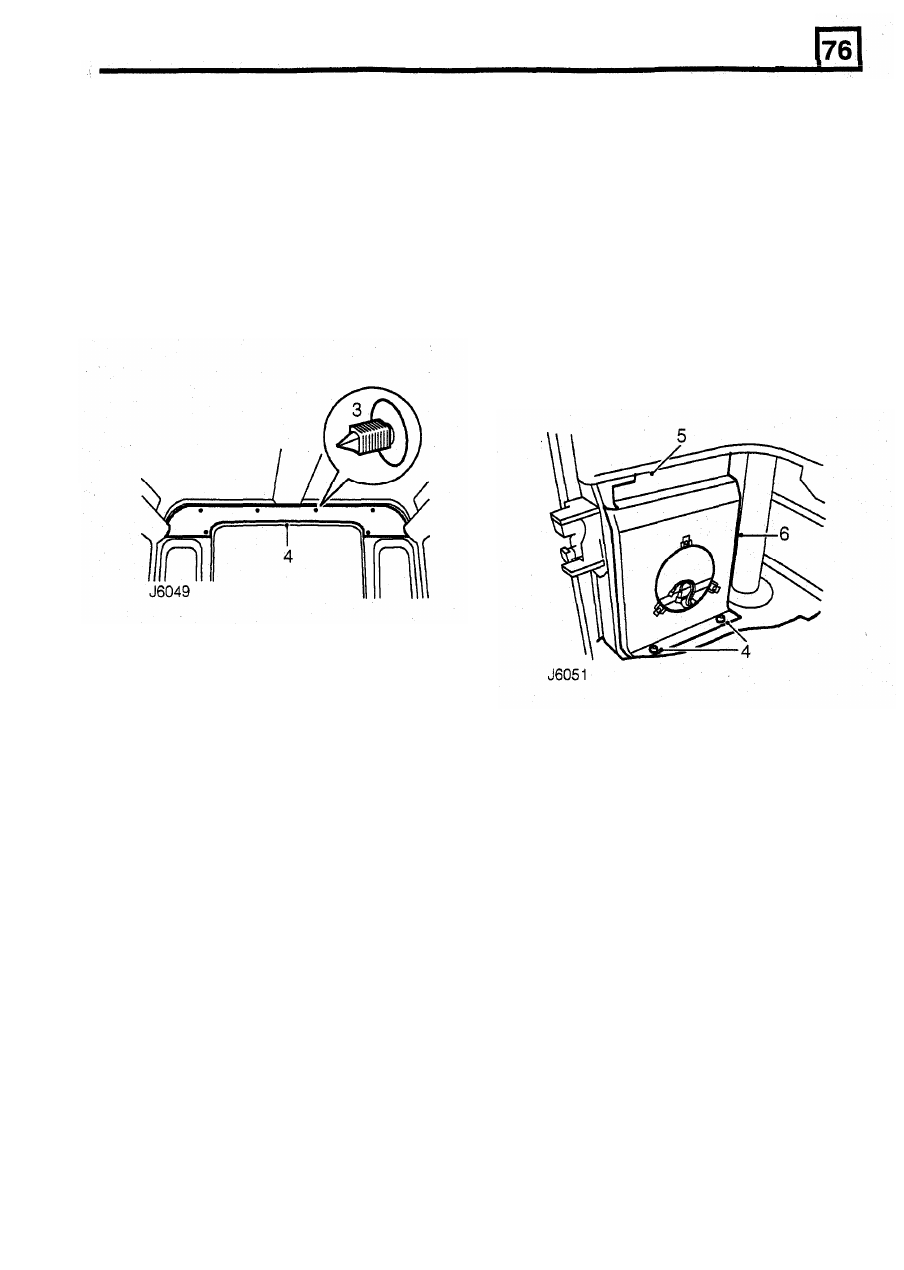
REAR END LINING
REAR SPEAKER PANEL
Service repair
no - 76.64.12
Remove
Remove
Service repair
no - 76.13.13
1. Remove rear end trim panel. See this Section.
2. Remove rear grab handles. See this Section.
3. Carefully prise out 6 trim studs securing rear end
4. Remove rear end lining.
1.
Raise seat cushion and fit stowage strap.
2.
Remove rear end trim panel. See this Section.
3. Remove rear speaker. See Electrical.
4.
Peel back carpet and remove two screws
securing speaker panel to wheelarch.
5.
Prise top edge of panel down to release from
body channel.
6.
Remove speaker panel.
lining to mounting brackets.
Refit
5.
Position rear end lining on mounting brackets
6. Fit rear grab handles See this Section.
7. Fit rear end trim panel See this Section.
and secure with
6
trim studs.
Refit
7. Position speaker panel on wheel arch.
8.
Press top edge of panel down firmly and locate
9. Secure speaker panel to wheel arch with 2
under body channel.
screws and reposition carpet.
10. Fit rear speaker. See Electrical.
11.
Fit rear end trim panel.
See
this
Section
.
7