Defender (1993+). Manual - part 117
BODY
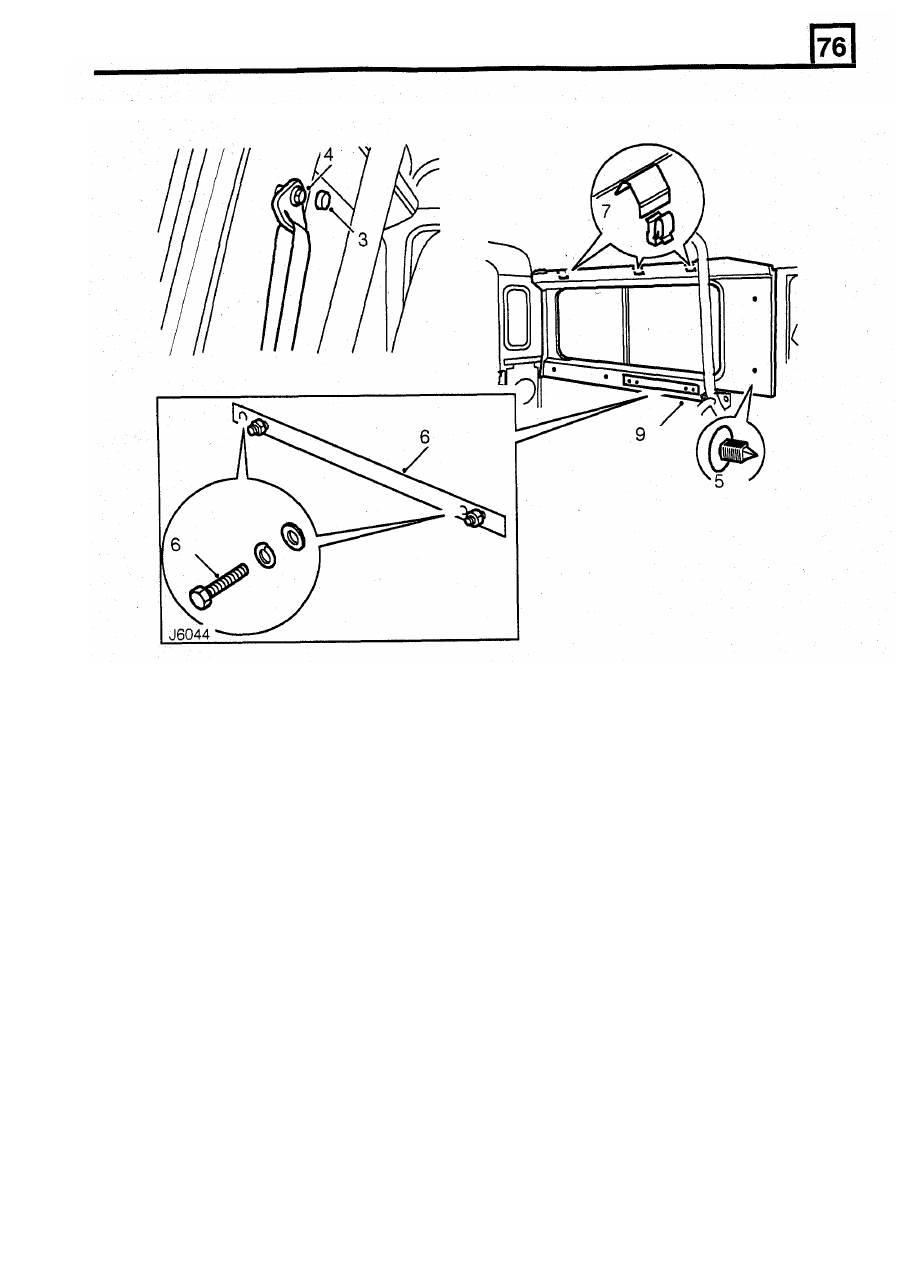
SIDE
TRIM PANEL
Refit
Service repair no - 76.13.70
Remove
10. Fit new spring clips to the three brackets on top
11. Carefully pull trim panel behind interior roll-over
12. Align trim panel, ensuring it is correctly
13. Locate trim panel spring clips on inner cant rail
edge of side trim panel.
bar.
positioned around side window.
and press firmly down to secure top edge of trim
panel.
support bracket with body side fixing holes and
secure with four bolts and washers.
Do not fully
tighten at this stage.
15. Fit trim stud to secure bottom edge
of
trim panel
to 'B/C' post.
16. Secure seat belt guide to ‘B/C' post, tighten bolt
to 32 Nm (24 Ibf.ft) and fit cap.
18. Fit rear seat squab. See this Section
.
1.
Remove rear seat squabs. See this Section.
2. Remove rear end trim panel. See this Section.
3. Prise cap from front seat belt upper guide
retaining bolt.
4. Unscrew retaining bolt and remove seat belt
from 'B/C’ post.
5.
Carefully prise trim stud from 'B/C' post.
6.
Remove four bolts securing side trim panel and
forward seat support bracket to body side.
Collect support bracket.
7. Release top edge of side trim panel by striking
8. Carefully pull trim panel rearwards to clear
9.
Remove side trim panel from vehicle.
14. Align bosses of trim panel and forward seat
upwards with the hand to disengage three spring
17. Fit rear end trim panel. See this Section
clips.
interior roll- over bar.
3