Defender. Manual - part 184


  Index      Land Rover     Land Rover Defender - service manual 2007 year


Search            


Content   ..  182  183  184  185   ..


Defender. Manual - part 184


1. NOTE: Clean the component mating faces.

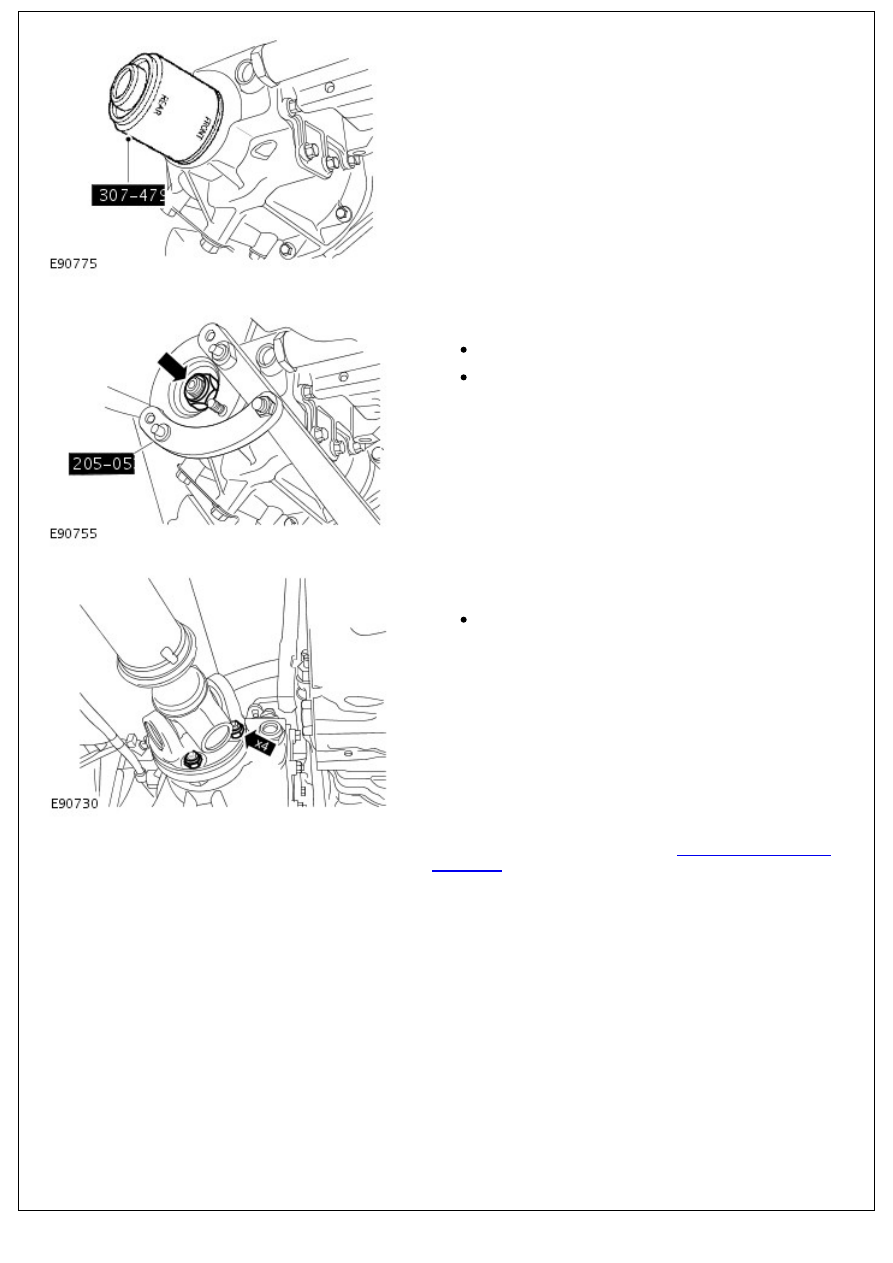
• NOTE: Use end of tool marked 'FRONT' to fit seal.

Using the special tool, install a new transfer case front

output shaft seal.

2. NOTE: Install a new felt washer.

Install the transfer case front output flange.

Install the washer.

Install a new nut and tighten to 162 Nm (120 lb.ft).

3. NOTE: Install new nuts.

Tighten to 45 Nm (33 lb.ft).

Align the position of the driveshaft in relation to the

drive pinion flange.

4. Fill the transfer case. 

For additional information, refer to: 

Transfer Case Draining

and Filling

 (308-07A Transfer Case - 2.4L Duratorq-TDCi

HPCR (103kW/140PS) - Puma, General Procedures).

Transfer Case - 2.4L Duratorq-TDCi HPCR (103kW/140PS) - Puma -

Transfer Case High/Low Range Linkage

In-vehicle Repair

Removal

1. Remove the floor console. 

For additional information, refer to: 

Floor Console

 (501-12

Instrument Panel and Console, Removal and Installation).

2. Reposition the LH carpet.

3. Release the parking brake lever gaiter.

Remove the 3 clips.

4. Release the parking brake lever.

1. Disconnect the electrical connector.

2. Remove the 2 bolts.

5. Remove the transmission cover panel floor covering.

5. Remove the transmission cover panel floor covering.

6. NOTE: Do not detach the gaiter from the selector knobs.

Detach the gaiter from the transmission cover panel.

7. 

WARNING: The gearshift lever knob will be released

suddenly, keep face clear during removal. Failure to follow

this instruction may result in personal injury.

Release the gearshift lever knob.

Release the 2 clips.

8. 

WARNING: The high/low range lever knob will be

released suddenly, keep face clear during removal. Failure to

follow this instruction may result in personal injury.

Remove the gaiter and selector levers.

Detach the high/low range selector lever.

9. Remove the transmission cover panel.

9. Remove the transmission cover panel.

Remove the 11 screws.

10. NOTE: To reduce tension on the insulation, position the

differential lock lever to the left.

Remove the insulation pad.

11. Remove the insulation pad support bracket.

12. Disconnect the high/low range selector rod.

Press the button to release the fitting before

disconnecting the rod.

13. Remove the high/low range linkage.


Content   ..  182  183  184  185   ..