Jeep Grand Cherokee (2023 year). Manual in english - page 21
 

  Index      Manuals     Jeep Grand Cherokee (2023 year). Manual in english


Search            copyright infringement  


Content      ..     19      20      21      22     ..


Jeep Grand Cherokee (2023 year). Manual in english - page 21


332

SERVICING AND MAINTENANCE


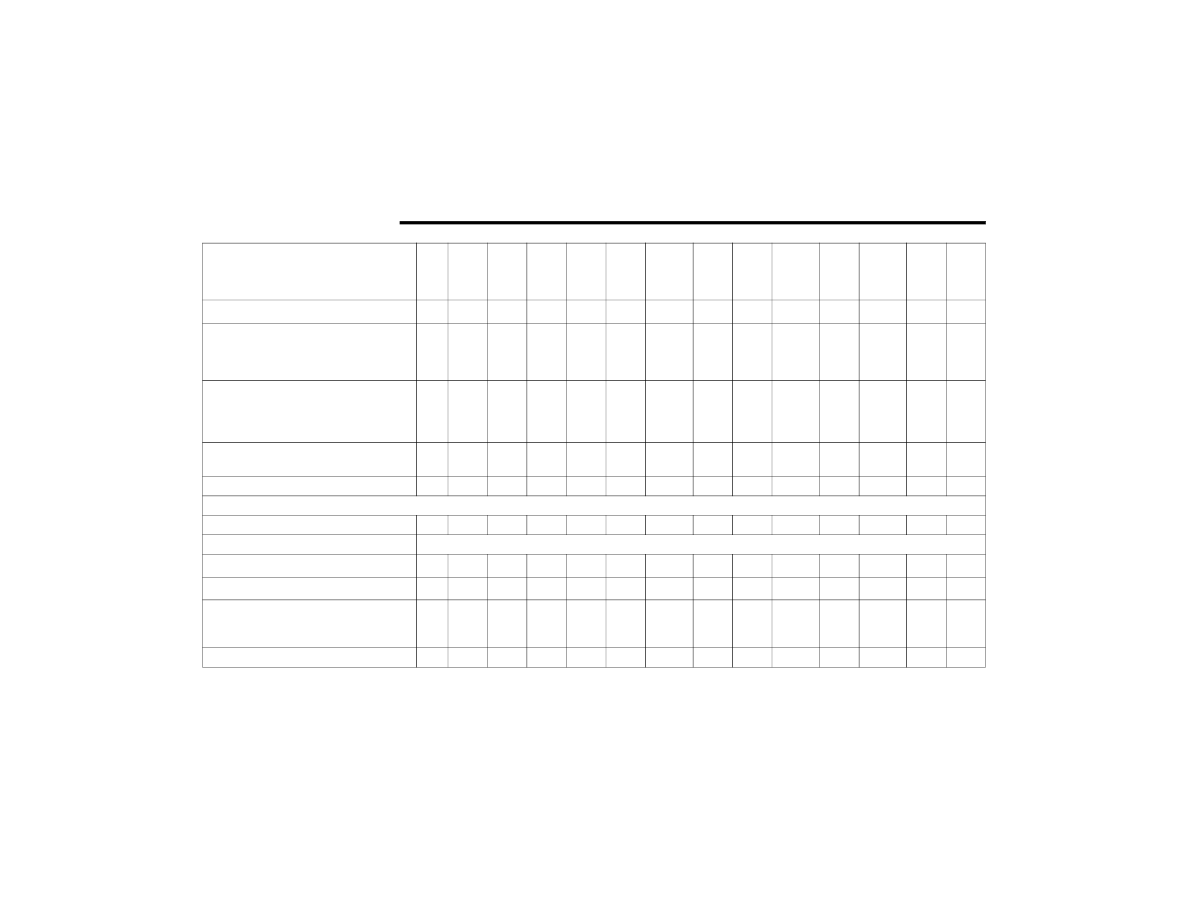
Inspect the front and rear axle fluid, 

change if using your vehicle for police, 

taxi, fleet, off-road or frequent trailer 

towing.

X

X

X

X

X

Inspect the brake linings, parking brake 

function.

X

X

X

X

X

X

X

Inspect transfer case fluid.

X

X

X

X

X

Additional Maintenance
Replace engine air cleaner filter.

X

X

X

X

X

Replace the cabin air filter.

To be replaced every 12,000 miles (19,000 km).

Replace spark plugs — 2.0L.

1

X

X

Replace spark plugs — 3.6L & 5.7L.

1

X

Flush and replace the engine coolant at 

10 years or 150,000 miles (240,000 km) 

whichever comes first.

X

X

Replace accessory drive belt.

X

Mileage Or Time Passed

(Whichever Comes First)

20,000

30,000

40,000

50,000

60,000

70,000

80,000

90,000

100,000

110,000

120,000

130,000

140,000

150,000

Or Years:

2

3

4

5

6

7

8

9

10

11

12

13

14

15

Or Kilometers:

32,000

48,000

64,000

80,000

96,000

112,000

128,000

144,000

160,000

176,000

192,000

208,000

224,000

240,000

SERVICING AND MAINTENANCE

333

Inspect accessory drive belt tensioner 

and pulley, replace if necessary.

X

Change transfer case fluid - Normal 

Usage.

X

Change transfer case fluid — Severe 

Usage (police, taxi, fleet, off-road, or 

frequent trailer towing.)

X

X

Replace PCV valve.

X

1. The spark plug change interval is mileage-based only, yearly intervals do not apply.

Mileage Or Time Passed

(Whichever Comes First)

20,000

30,000

40,000

50,000

60,000

70,000

80,000

90,000

100,000

110,000

120,000

130,000

140,000

150,000

Or Years:

2

3

4

5

6

7

8

9

10

11

12

13

14

15

Or Kilometers:

32,000

48,000

64,000

80,000

96,000

112,000

128,000

144,000

160,000

176,000

192,000

208,000

224,000

240,000

WARNING!

You can be badly injured working on or around a motor vehicle. Do only service work for which you have the knowledge and the right equipment. If you have 

any doubt about your ability to perform a service job, take your vehicle to a competent mechanic.

Failure to properly inspect and maintain your vehicle could result in a component malfunction and affect vehicle handling and performance. This could cause 

an accident.

8

334

SERVICING AND MAINTENANCE


ENGINE COMPARTMENT  

2.0L E

NGINE


1 — Washer Fluid Reservoir Cap

5 — Brake Fluid Reservoir Access

2 — Power Distribution Center (Fuses)

6 — Engine Coolant Pressure Cap

3 — Engine Oil Dipstick

7 — Intercooler Coolant Reservoir Cap

4 — Engine Oil Fill

8 — Engine Air Cleaner Filter

SERVICING AND MAINTENANCE

335

3.6L E

NGINE

1 — Washer Fluid Reservoir Cap

5 — Engine Oil Filter Access

2 — Power Distribution Center (Fuses)

6 — Engine Oil Fill

3 — Engine Coolant Pressure Cap

7 — Brake Fluid Reservoir Access

4 — Engine Oil Dipstick

8 — Engine Air Cleaner Filter

8

336

SERVICING AND MAINTENANCE


5.7L E

NGINE

1 — Washer Fluid Reservoir Cap

5 — Brake Fluid Reservoir Access

2 — Power Distribution Center (Fuses)

6 — Engine Oil Dipstick

3 — Engine Coolant Pressure Cap

7 — Engine Air Cleaner Filter

4 — Engine Oil Fill

SERVICING AND MAINTENANCE

337

C

HECKING

 O

IL

 L

EVEL


To ensure proper engine lubrication, the engine oil 

must be maintained at the correct level. Check the 

oil level at regular intervals, such as every fuel 

stop. The best time to check the engine oil level is 

about five minutes after a fully warmed up engine 

is shut off.
Checking the oil while the vehicle is on level ground 

will improve the accuracy of the oil level readings.
There are four possible dipstick types:

Crosshatched zone.

Crosshatched zone marked SAFE.

Crosshatched zone marked with MIN at the low 

end of the range and MAX at the high end of the 

range.

Crosshatched zone marked with dimples at the 

MIN and the MAX ends of the range.

NOTE:

Always maintain the oil level within the crosshatch 

markings on the dipstick.
Adding 1 qt (1.0 L) of oil when the reading is at the 

low end of the dipstick range will raise the oil level 

to the high end of the range marking.

NOTE:

Always maintain the oil level within the crosshatch 

markings on the dipstick.

NOTE:

Use care when filling under hood fluids such as 

engine oil, washer fluid, antifreeze, etc., to 

minimize spillage onto the top of the engine. Any 

excess fluid that is spilled onto the top of the 

engine should be removed using compressed air 

or an absorbent cloth.

A

DDING

 W

ASHER

 F

LUID


The instrument cluster display will indicate when 

the washer fluid level is low. When the sensor 

detects a low fluid level, the Low Washer Fluid 

Warning Light will illuminate and the “Washer Fluid 

Low” message will display.
The fluid reservoir for the windshield washers and 

the rear window washer is shared. The fluid 

reservoir is located in the engine compartment, be 

sure to check the fluid level at regular intervals. Fill 

the reservoir with windshield washer solvent only 

(not radiator antifreeze). When refilling the washer 

fluid reservoir, take some washer fluid and apply it 

to a cloth or towel and wipe clean the wiper blades, 

this will help blade performance. To prevent 

freeze-up of your windshield washer system in cold 

weather, select a solution or mixture that meets or 

exceeds the temperature range of your climate. 

This rating information can be found on most 

washer fluid containers.

NOTE:

Use care when filling under hood fluids such as 

engine oil, washer fluid, antifreeze, etc., to 

minimize spillage onto the top of the engine. Any 

excess fluid that is spilled onto the top of the 

engine should be removed using compressed air 

or an absorbent cloth.

WARNING!

Commercially available windshield washer 

solvents are flammable. They could ignite and 

burn you. Care must be exercised when filling or 

working around the washer solution.

CAUTION!

Do not travel with the windshield washer fluid 

reservoir empty: the windshield washers are 

essential for improving visibility.

8

338

SERVICING AND MAINTENANCE


M

AINTENANCE

-F

REE

 B

ATTERY


Your vehicle is equipped with a maintenance-free 

battery. Water will never have to be added, and 

periodic maintenance is not required.

P

RESSURE

 W

ASHING

Cleaning the engine compartment with a high 

pressure washer is not recommended.

VEHICLE MAINTENANCE

An authorized dealer has the qualified service 

personnel, special tools, and equipment to 

perform all service operations in an expert 

manner. Service Manuals are available which 

include detailed service information for your 

vehicle. Refer to these Service Manuals before 

attempting any procedure yourself.

NOTE:

Intentional tampering with emissions control 

systems may void your warranty and could result in 

civil penalties being assessed against you.

E

NGINE

 O

IL


Engine Oil Selection

Use only the manufacturer's recommended fluid  

Ú

page 401.

WARNING!

Battery fluid is a corrosive acid solution and 

can burn or even blind you. Do not allow 

battery fluid to contact your eyes, skin, or 

clothing. Do not lean over a battery when 

attaching clamps. If acid splashes in eyes or 

on skin, flush the area immediately with large 

amounts of water. Refer to Jump Starting 

Procedure  

Ú

page 320.

Battery gas is flammable and explosive. Keep 

flame or sparks away from the battery. Do not 

use a booster battery or any other booster 

source with an output greater than 12 Volts. 

Do not allow cable clamps to touch each 

other.

Battery posts, terminals, and related accesso

-

ries contain lead and lead compounds. Wash 

hands after handling.

CAUTION!

It is essential when replacing the cables on 

the battery that the positive cable is attached 

to the positive post and the negative cable is 

attached to the negative post. Battery posts 

are marked positive (+) and negative (-) and 

are identified on the battery case. Cable 

clamps should be tight on the terminal posts 

and free of corrosion.

If a “fast charger” is used while the battery is 

in the vehicle, disconnect both vehicle battery 

cables before connecting the charger to the 

battery. Do not use a “fast charger” to provide 

starting voltage.

CAUTION!

Precautions have been taken to safeguard all 

parts and connections however, the pressures 

generated by these machines is such that 

complete protection against water ingress 

cannot be guaranteed.

WARNING!

You can be badly injured working on or around a 

motor vehicle. Only do service work for which 

you have the knowledge and the proper 

equipment. If you have any doubt about your 

ability to perform a service job, take your vehicle 

to a competent mechanic.

SERVICING AND MAINTENANCE

339

NOTE:

Hemi engines at times can tick right after startup 

and then quiet down after approximately 30 

seconds. This is normal and will not harm the 

engine. This characteristic can be caused by short 

drive cycles. For example, if the vehicle is started 

then shut off after driving a short distance. Upon 

restarting, you may experience a ticking sound. 

Other causes could be if the vehicle is unused for 

an extended period of time, incorrect oil, extended 

oil changes or extended idling. If the engine 

continues to tick or if the Malfunction Indicator 

Light (MIL) comes on, see the nearest authorized 

dealer.

American Petroleum Institute (API) 

Approved Engine Oil

These symbols mean that the oil has been certified 

by the API. The manufacturer only recommends API 

trademark oils.

The API Starburst trademark certifies 

0W-20, 0W-30 and 5W-30 engine oils.

The API Donut trademark certifies 0W-40 

and 5W-40 engine oil.

Synthetic Engine Oils  

Your engine was designed for synthetic engine oils, 

only use synthetic API approved engine oils.
Synthetic engine oils which do not have both the 

correct API trademark and the correct SAE viscosity 

grade numbers should not be used.

Materials Added To Engine Oil 

The manufacturer strongly recommends against 

the addition of any additives (other than leak 

detection dyes) to the engine oil. Engine oil is an 

engineered product and its performance may be 

impaired by supplemental additives.

Disposing Of Used Engine Oil And Oil 

Filters 

Care should be taken in disposing of used engine 

oil and oil filters from your vehicle. Used oil and oil 

filters, indiscriminately discarded, can present a 

problem to the environment. Contact an 

authorized dealer, service station or governmental 

agency for advice on how and where used oil and 

oil filters can be safely discarded in your area.

E

NGINE

 O

IL

 F

ILTER


The engine oil filter should be replaced with a new 

filter at every engine oil change.
Engine Oil Filter Selection
A full-flow type disposable oil filter should be used 

for replacement. The quality of replacement filters 

varies considerably. Only high quality Mopar® 

filters should be used. If a Mopar® Engine Oil Filter 

is unavailable only use filters that meet or exceed 

SAE/USCAR-36 Filter Performance Requirements.

E

NGINE

 A

IR

 C

LEANER

 F

ILTER


For the proper maintenance intervals  

Ú

page 331.

CAUTION!

Do not use chemical flushes in your engine oil as 

the chemicals can damage your engine. Such 

damage is not covered by the New Vehicle 

Limited Warranty.

WARNING!

The air induction system (air cleaner, hoses, 

etc.) can provide a measure of protection in the 

case of engine backfire. Do not remove the air 

induction system (air cleaner, hoses, etc.) unless 

such removal is necessary for repair or 

maintenance. Make sure that no one is near the 

engine compartment before starting the vehicle 

with the air induction system (air cleaner, hoses, 

etc.) removed. Failure to do so can result in 

serious personal injury.

8

340

SERVICING AND MAINTENANCE


Engine Air Cleaner Filter Selection
The quality of replacement engine air cleaner 

filters varies considerably. Only high quality 

Mopar® filters should be used.

Engine Air Cleaner Filter Inspection and 

Replacement

Engine Air Cleaner Filter Removal
1. With a suitable tool, fully loosen fasteners on 

the engine air cleaner filter cover.

2. Lift the engine air cleaner filter cover and 

rotate hinge to access the air cleaner filter.

Engine Air Cleaner Filter Cover

3. Remove the engine air cleaner filter from the 

housing assembly.

Engine Air Cleaner Filter Installation

NOTE:

Inspect and clean the housing assembly if signif

-

icant dirt or debris is present before replacing the 

engine air cleaner filter.
1. Install the engine air cleaner filter into the 

housing assembly with the engine air cleaner 

filter inspection surface facing downward.

2. Install the engine air cleaner filter cover onto 

the housing assembly locating tabs.

3. Tighten the fasteners on the engine air cleaner 

filter assembly.

A

IR

 C

ONDITIONER

 M

AINTENANCE


For best possible performance, your air conditioner 

should be checked and serviced by an authorized 

dealer at the start of each warm season. This 

service should include cleaning of the condenser 

fins and a performance test. Drive belt tension 

should also be checked at this time.

1 — Engine Air Cleaner Filter Cover
2 — Fasteners

CAUTION!

Do not overtighten the engine air cleaner filter 

cover lid screws or damage may result.

WARNING!

Use only refrigerants and compressor lubri

-

cants approved by the manufacturer for your 

air conditioning system. Some unapproved 

refrigerants are flammable and can explode, 

injuring you. Other unapproved refrigerants or 

lubricants can cause the system to fail, 

requiring costly repairs. Refer to Warranty 

Information Book, for further warranty infor

-

mation.

The air conditioning system contains refrig

-

erant under high pressure. To avoid risk of 

personal injury or damage to the system, 

adding refrigerant or any repair requiring lines 

to be disconnected should be done by an 

experienced technician.

CAUTION!

Do not use chemical flushes in your air 

conditioning system as the chemicals can 

damage your air conditioning components. Such 

damage is not covered by the New Vehicle 

Limited Warranty.

SERVICING AND MAINTENANCE

341

Refrigerant Recovery And Recycling — 

R–1234yf 

R–1234yf Air Conditioning Refrigerant is a 

Hydrofluoroolefin (HFO) that is endorsed by the 

Environmental Protection Agency and is an 

ozone-friendly substance with a low 

global-warming potential. The manufacturer 

recommends that air conditioning service be 

performed by an authorized dealer using recovery 

and recycling equipment.

NOTE:

Use only manufacturer approved A/C system PAG 

compressor oil, and refrigerants.

Cabin Air Filter Replacement

For the proper maintenance intervals  

Ú

page 331.

The cabin air filter is located in the fresh air inlet 

behind the glove compartment. Perform the 

following procedure to replace the filter:
1. Open the glove compartment and remove all 

contents.

2. There is a glove compartment travel stop on 

the right side of the glove compartment door. 

Partially close the glove compartment door 

and pull the travel stop toward you to release 

the glove compartment travel stop.

Glove Compartment

3. With the glove compartment door loose, 

remove the glove compartment tension tether 

and tether clip by sliding the clip toward the 

face of the glove compartment door and lifting 

the clip out of glove compartment door.

Side Of Glove Compartment

4. Lower the glove compartment door to the floor.
5. Squeeze the retaining tabs together that 

secures the cabin air filter cover to the HVAC 

housing. Unhinge the filter cover on the right 

side to fully remove the cover.

WARNING!

Do not remove the cabin air filter while the 

vehicle is running, or while the ignition is in the 

ON/RUN mode. With the cabin air filter removed 

and the blower operating, the blower can 

contact hands and may propel dirt and debris 

into your eyes, resulting in personal injury.

1 — Glove Compartment Travel Stop
2 — Glove Compartment Door

1 — Glove Compartment Tension Tether
2 — Glove Compartment Door

8

342

SERVICING AND MAINTENANCE


Cabin Air Filter Cover

6. Remove the cabin air filter by pulling it straight 

out of the housing.

7. Install the cabin air filter with the arrow on the 

filter pointing toward the floor. When installing 

the filter cover, make sure the retaining tabs 

fully engage into the HVAC housing.

8. Lift the glove compartment door up and 

reattach the tension tether by inserting the 

tether clip in the glove compartment and 

sliding the clip away from the face of the glove 

compartment door.

9. Push the door to the near closed position to 

reengage the glove compartment travel stops.

NOTE:

Ensure the glove compartment travel stops are 

fully engaged.

A

CCESSORY

 D

RIVE

 B

ELT

 I

NSPECTION

When inspecting accessory drive belts, small 

cracks that run across ribbed surface of belt from 

rib to rib, are considered normal. These are not a 

reason to replace belt. However, cracks running 

along a rib (not across) are not normal. Any belt 

with cracks running along a rib must be replaced. 

Also have the belt replaced if it has excessive wear, 

frayed cords or severe glazing.

Accessory Belt (Serpentine Belt)

Conditions that would require replacement:

Rib chunking (one or more ribs has separated 

from belt body)

Rib or belt wear

Longitudinal belt cracking (cracks between two 

ribs)

Belt slips

Groove jumping (belt does not maintain correct 

position on pulley)

1 — Retaining Tabs

CAUTION!

The cabin air filter is identified with an arrow to 

indicate airflow direction through the filter. 

Failure to properly install the filter will result in 

the need to replace it more often.

WARNING!

Do not attempt to inspect an accessory drive 

belt with vehicle running.

When working near the radiator cooling fan, 

disconnect the fan motor lead. The fan is 

temperature controlled and can start at any 

time regardless of ignition mode. You could be 

injured by the moving fan blades.

You can be badly injured working on or around 

a motor vehicle. Only do service work for which 

you have the knowledge and the proper equip

-

ment. If you have any doubt about your ability 

to perform a service job, take your vehicle to a 

competent mechanic.

SERVICING AND MAINTENANCE

343

Belt broken (identify and correct problem before 

new belt is installed)

Noise (objectionable squeal, squeak, or rumble 

is heard or felt while drive belt is in operation)

Some conditions can be caused by a faulty 

component such as a belt pulley. Belt pulleys 

should be carefully inspected for damage and 

proper alignment.
Belt replacement on some models requires the 

use of special tools, we recommend having your 

vehicle serviced at an authorized dealer.

B

ODY

 L

UBRICATION


Locks and all body pivot points, including such 

items as seat tracks, door hinge pivot points and 

rollers, liftgate, tailgate, decklid, sliding doors and 

hood hinges, should be lubricated periodically with 

a lithium-based grease, such as Mopar® Spray 

White Lube to ensure quiet, easy operation and to 

protect against rust and wear. Prior to the 

application of any lubricant, the parts concerned 

should be wiped clean to remove dust and grit; 

after lubricating excess oil and grease should be 

removed. Particular attention should also be given 

to hood latching components to ensure proper 

function. When performing other underhood 

services, the hood latch, release mechanism and 

safety catch should be cleaned and lubricated.

The external lock cylinders should be lubricated 

twice a year, preferably in the Autumn and Spring. 

Apply a small amount of a high quality lubricant, 

such as Mopar® Lock Cylinder Lubricant directly 

into the lock cylinder.

W

INDSHIELD

 W

IPER

 B

LADES


Clean the rubber edges of the wiper blades and the 

windshield periodically with a sponge or soft cloth 

and a mild nonabrasive cleaner. This will remove 

accumulations of salt or road film.
Operation of the wipers on dry glass for long 

periods may cause deterioration of the wiper 

blades. Always use washer fluid when using the 

wipers to remove salt or dirt from a dry windshield.
Avoid using the wiper blades to remove frost or ice 

from the windshield. Keep the blade rubber out of 

contact with petroleum products such as engine 

oil, gasoline, etc.

NOTE:

Life expectancy of wiper blades varies depending 

on geographical area and frequency of use. Poor 

performance of blades may be present with chat

-

tering, marks, water lines or wet spots. If any of 

these conditions are present, clean the wiper 

blades or replace as necessary.

The wiper blades and wiper arms should be 

inspected periodically, not just when wiper 

performance problems are experienced. This 

inspection should include the following points:

Wear or uneven edges

Foreign material

Hardening or cracking

Deformation or fatigue

If a wiper blade or wiper arm is damaged, replace 

the affected wiper arm or blade with a new unit. Do 

not attempt to repair a wiper arm or blade that is 

damaged.

Front Wiper Blade Removal/Installation

CAUTION!

Do not allow the wiper arm to spring back 

against the glass without the wiper blade in 

place or the glass may be damaged.

8

344

SERVICING AND MAINTENANCE


1. Lift the wiper arm to raise the wiper blade off 

of the glass, until the wiper arm is in the full 

up position.

Wiper Blade With Release Tab In Locked Position

2. To disengage the wiper blade from the wiper 

arm, flip up the release tab on the wiper blade 

and while holding the wiper arm with one 

hand, slide the wiper blade down towards the 

base of the wiper arm.

Wiper Blade With Release Tab In Unlocked Position

3. With the wiper blade disengaged, remove the 

wiper blade from the wiper arm by holding the 

wiper arm with one hand and separating the 

wiper blade from the wiper arm with the other 

hand (move the wiper blade toward the right 

side of the vehicle to separate the wiper blade 

from the wiper arm).

Wiper Blade Removed From Wiper Arm

4. Gently lower the wiper arm onto the glass.

Installing The Front Wipers
1. Lift the wiper arm off of the glass, until the 

wiper arm is in the full up position.

2. Position the wiper blade near the hook on the 

tip of the wiper arm with the wiper release tab 

open and the blade side of the wiper facing up 

and away from the windshield.

3. Insert the hook on the tip of the arm through 

the opening in the wiper blade under the 

release tab.

1 — Wiper
2 — Release Tab
3 — Wiper Arm

1 — Wiper Blade
2 — Release Tab
3 — Wiper Arm

1 — Wiper Blade
2 — Release Tab
3 — Wiper Arm

SERVICING AND MAINTENANCE

345

4. Slide the wiper blade up into the hook on the 

wiper arm and rotate the wiper blade until it is 

flush against the wiper arm. Fold down the 

latch release tab and snap it into its locked 

position. Latch engagement will be 

accompanied by an audible click.

5. Gently lower the wiper blade onto the glass.

Rear Wiper Blade Removal/Installation

1. Lift the rear wiper arm fully off the glass.

Wiper Blade In Folded Out Position

2. To remove the wiper blade from the wiper arm, 

grab the bottom end of the wiper blade 

nearest to wiper arm with your left hand. With 

your right hand, hold the wiper arm as you pull 

the wiper blade away from the wiper arm past 

its stop (far enough to unsnap the wiper blade 

pivot from the receptacle on the end of the 

wiper arm).

NOTE:

Resistance will be accompanied by an 

audible snap.

The wiper arm does not stay in the service 

up position.

3. Still grabbing the bottom end of the wiper 

blade, move the wiper blade upward and away 

from the wiper arm to disengage.

Wiper Blade Removed From Wiper Arm

4. Gently lower the tip of the wiper arm onto the 

glass.

Installing The Rear Wiper
1. Lift the rear wiper arm fully off the glass.
2. Insert the wiper blade pivot pin into the 

opening on the end of the wiper arm. Grab the 

bottom end of the wiper arm with one hand, 

and press the wiper blade flush with the wiper 

arm until it snaps into place.

3. Lower the wiper blade onto the glass.

E

XHAUST

 S

YSTEM


The best protection against carbon monoxide entry 

into the vehicle body is a properly maintained 

engine exhaust system.
If you notice a change in the sound of the exhaust 

system; or if the exhaust fumes can be detected 

inside the vehicle; or when the underside or rear of 

the vehicle is damaged; have an authorized 

technician inspect the complete exhaust system 

and adjacent body areas for broken, damaged, 

deteriorated, or mispositioned parts. Open seams 

or loose connections could permit exhaust fumes 

to seep into the passenger compartment. In 

addition, have the exhaust system inspected each 

time the vehicle is raised for lubrication or oil 

change. Replace as required.

1 — Wiper Blade
2 — Wiper Arm

1 — Wiper Blade
2 — Wiper Arm

8

346

SERVICING AND MAINTENANCE


(Continued)

(Continued)

Under normal operating conditions, the catalytic 

converter will not require maintenance. However, it 

is important to keep the engine properly tuned to 

ensure proper catalyst operation and prevent 

possible catalyst damage.

NOTE:

Intentional tampering with emissions control 

systems can result in civil penalties being 

assessed against you.
In unusual situations involving grossly 

malfunctioning engine operation, a scorching odor 

may suggest severe and abnormal catalyst 

overheating. If this occurs, stop the vehicle, turn off 

the engine and allow it to cool. Service, including a 

tune-up to manufacturer's specifications, should 

be obtained immediately.

To minimize the possibility of catalytic converter 

damage:

Do not interrupt the ignition when the transmis

-

sion is in gear and the vehicle is in motion.

Do not try to start the vehicle by pushing or 

towing the vehicle.

Do not idle the engine with any ignition compo

-

nents disconnected or removed, such as when 

diagnostic testing, or for prolonged periods 

during very rough idle or malfunctioning oper

-

ating conditions.

C

OOLING

 S

YSTEM

WARNING!

Exhaust gases can injure or kill. They contain 

Carbon Monoxide (CO), which is colorless and 

odorless. Breathing it can make you uncon

-

scious and can eventually poison you. To 

avoid breathing CO  

Ú

page 303.

A hot exhaust system can start a fire if you 

park over materials that can burn. Such mate

-

rials might be grass or leaves coming into 

contact with your exhaust system. Do not park 

or operate your vehicle in areas where your 

exhaust system can contact anything that can 

burn.

CAUTION!

The catalytic converter requires the use of 

unleaded fuel only. Leaded gasoline will 

destroy the effectiveness of the catalyst as an 

emissions control device and may seriously 

reduce engine performance and cause 

serious damage to the engine.

Damage to the catalytic converter can result if 

your vehicle is not kept in proper operating 

condition. In the event of engine malfunction, 

particularly involving engine misfire or other 

apparent loss of performance, have your 

vehicle serviced promptly. Continued opera

-

tion of your vehicle with a severe malfunction 

could cause the converter to overheat, 

resulting in possible damage to the converter 

and vehicle.

CAUTION!

WARNING!

You or others can be badly burned by hot 

engine coolant (antifreeze) or steam from your 

radiator. If you see or hear steam coming from 

under the hood, do not open the hood until the 

radiator has had time to cool. Never open a 

cooling system pressure cap when the radi

-

ator or coolant bottle is hot.

Keep hands, tools, clothing, and jewelry away 

from the radiator cooling fan when the hood is 

raised. The fan starts automatically and may 

start at any time, whether the engine is 

running or not.

SERVICING AND MAINTENANCE

347

Engine Coolant Checks

Check the engine coolant (antifreeze) protection 

every 12 months (before the onset of freezing 

weather, where applicable). If the engine coolant is 

dirty, the system should be drained, flushed, and 

refilled with fresh Organic Additive Technology 

(OAT) coolant (conforming to MS.90032) by an 

authorized dealer. Check the front of the A/C 

condenser for any accumulation of bugs, leaves, 

etc. If dirty, clean by gently spraying water from a 

garden hose vertically down the face of the 

condenser.
Check the engine cooling system hoses for brittle 

rubber, cracking, tears, cuts, and tightness of the 

connection at the coolant recovery bottle and 

radiator. Inspect the entire system for leaks. DO 

NOT REMOVE THE COOLANT PRESSURE CAP 

WHEN THE COOLING SYSTEM IS HOT.

Cooling System — Drain, Flush And Refill

NOTE:

Some vehicles require special tools to add coolant 

properly. Failure to fill these systems properly 

could lead to severe internal engine damage. If any 

coolant is needed to be added to the system 

please contact an authorized dealer.
If the engine coolant (antifreeze) is dirty or 

contains visible sediment, have an authorized 

dealer clean and flush with Organic Additive 

Technology (OAT) coolant (conforming to 

MS.90032).
For the proper maintenance intervals  

Ú

page 331.

Selection Of Coolant 

Refer to Engine Fluids And Lubricants  

Ú

page 401.

NOTE:

Mixing of engine coolant (antifreeze) other than 

specified Organic Additive Technology (OAT) 

engine coolant, may result in engine damage 

and may decrease corrosion protection. OAT 

engine coolant is different and should not be 

mixed with Hybrid Organic Additive Technology 

(HOAT) engine coolant or any “globally compat

-

ible” coolant. If a non-OAT engine coolant is 

introduced into the cooling system in an emer

-

gency, the cooling system will need to be 

drained, flushed, and refilled with fresh OAT 

coolant (conforming to MS.90032), by an autho

-

rized dealer as soon as possible.

Do not use water alone or alcohol-based engine 

coolant products. Do not use additional rust 

inhibitors or antirust products, as they may not 

be compatible with the radiator engine coolant 

and may plug the radiator.

This vehicle has not been designed for use with 

propylene glycol-based engine coolant. Use of 

propylene glycol-based engine coolant is not 

recommended.

Some vehicles require special tools to add 

coolant properly. Failure to fill these systems 

properly could lead to severe internal engine 

damage. If any coolant is needed to be added to 

the system please contact an authorized dealer.

Adding Coolant 

Your vehicle has been built with an improved 

engine coolant (OAT coolant conforming to 

MS.90032) that allows extended maintenance 

intervals. This engine coolant (antifreeze) can be 

used up to 10 years or 150,000 miles 

(240,000 km) before replacement. To prevent 

reducing this extended maintenance period, it is 

important to use the same engine coolant (OAT 

coolant conforming to MS.90032) throughout the 

life of your vehicle.

When working near the radiator cooling fan, 

disconnect the fan motor lead or turn the igni

-

tion to the OFF position. The fan is tempera

-

ture controlled and can start at any time the 

ignition is in the ON position.

WARNING!

8


Content      ..     19      20      21      22     ..