Hyundai Elantra Hybrid (2024 year). Manual in english - page 8
 

  Index      Manuals     Hyundai Elantra Hybrid (2024 year). Manual in english


Search            copyright infringement  


Content      ..     6      7      8      9     ..


Hyundai Elantra Hybrid (2024 year). Manual in english - page 8


05

5-79

Welcome System (if equipped)

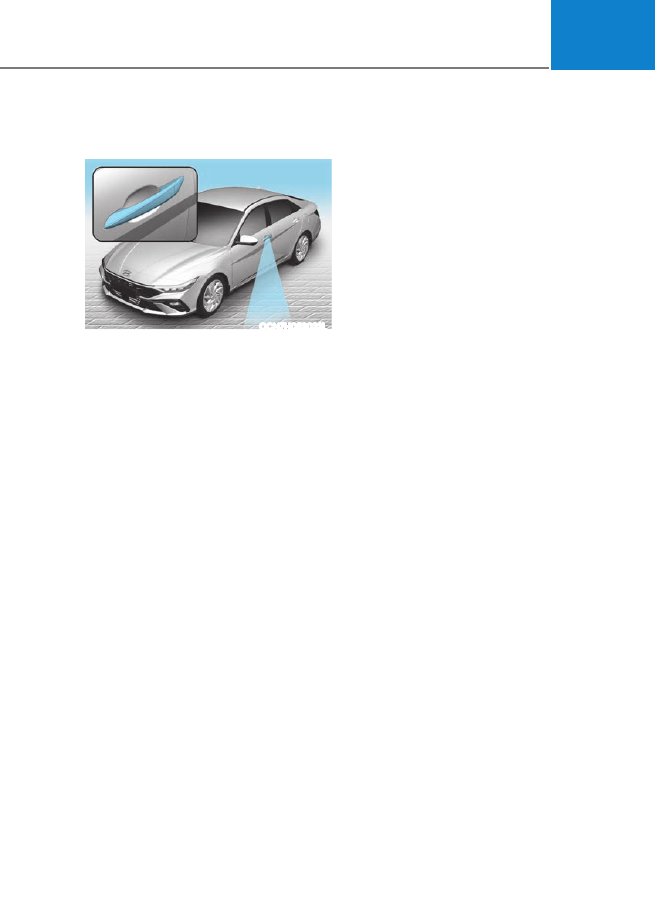
Welcome light

OCN7H053032L

Door handle lamp (if equipped) 

When all the doors (and trunk) are closed 

and locked, the door handle lamp will 

come on for about 15 seconds if any of 

the below is performed.

• 

When the door unlock button is 

pressed on the remote key or smart 

key.

• 

When the button of the outside door 

handle is pressed.

• 

When the vehicle is approached with 

the smart key in possession.

Headlight and parking lamp

When the headlight (lamp switch in the 

headlight or AUTO position) is on and all 

doors (and trunk) are locked and closed, 

the headlight and parking lamp will come 

on for 15 seconds if/or any of the below is 

performed.

• 

When the door unlock button is 

pressed on the remote key or smart 

key.

At this time, if you press the door lock or 

unlock button, the headlight and parking 

lamp will turn off immediately.

You can activate or deactivate the 

welcome Light from the User Settings 

Mode on the cluster display. 

For more 

details, refer to “Cluster Display” in 

chapter 4. If your vehicle is equipped 

with additional navigation, please refer 

to the infotainment system manual 

separately supplied.

Interior lamp

When the interior lamp switch is in the 

DOOR position and all doors (and trunk) 

are closed and locked, the room lamp 

will come on for 30 seconds if any of the 

below is performed.

• 

When the door unlock button is 

pressed on the remote key or smart 

key.

• 

When the button of the outside door 

handle is pressed.

At this time, if you press the door lock or 

unlock button, the room lamp will turn 

off immediately.

Convenience Features

5-80

WIPERS AND WASHERS

OCN7050090N

A. 

Wiper speed control

• 

MIST – Single wipe

• 

OFF – Off

• 

INT / --- – Intermittent wipe  

• 

LO– Low wiper speed

• 

HI – High wiper speed

B. 

Intermittent control wipe time 

adjustment

C. 

Wash with brief wipes  

(pull lever towards you)

Windshield Wipers

Operates as follows when the ignition 

switch is in the ON position.
MIST: For a single wiping cycle, push 

the lever upward and release. The 

wipers will operate continuously if 

the lever is held in this position.

OFF: Wiper is not in operation. 
INT: Wiper operates intermittently at 

the same wiping intervals. To vary 

the speed setting, move the speed 

control lever. The top most setting 

will run the wipers most frequently 

(for more rain). The bottom setting 

will run the wipers the least 

frequently (for less rain).

LO: The wiper runs at a lower speed.
HI: The wiper runs at a higher speed.

 Information

If there is heavy accumulation of snow 

or ice on the windshield, defrost the 

windshield for about 10 minutes, or until 

the snow and/or ice is removed before 

using the windshield wipers to ensure 

proper operation.

If you do not remove the snow and/or ice 

before using the wiper and washer, it may 

damage the wiper and washer system.

05

5-81

Windshield Washers

ODN8059209K

In the OFF position, pull the lever gently 

toward you to spray washer fluid on the 

windshield and to run the wipers 1-3 

cycles. The spray and wiper operation 

will continue until you release the lever. If 

the washer does not work, you may need 

to add washer fluid to the washer fluid 

reservoir.

 WARNING

When the outside temperature is below 

freezing, ALWAYS warm the windshield 

using the defroster to help prevent 

the washer fluid from freezing on the 

windshield and obscuring your vision 

which could result in an accident and 

serious injury or death.

NOTICE

• 

To prevent possible damage to the 

washer pump, do not operate the 

washer when the fluid reservoir is 

empty.

• 

To prevent possible damage to the 

wipers or windshield, do not operate 

the wipers when the windshield is 

dry.

• 

To prevent damage to the wiper 

arms and other components, do 

not attempt to move the wipers 

manually.

• 

To prevent possible damage to the 

wipers and washer system, use anti-

freezing washer fluids in the winter 

season or cold weather.

Convenience Features

5-82

AUTOMATIC CLIMATE CONTROL SYSTEM

OCN7050110L

1.  Driver’s temperature control knob 
2.  Passenger’s temperature control knob 
3.  AUTO (automatic control) button 
4.  SYNC button 
5.  OFF button 
6.  Front windshield defroster button 
7.  Air conditioning button 
8.  Air intake control button 
9.  Rear window defroster button 
10. Fan speed control button 
11. Mode selection button 
12. Climate control information screen

05

5-83

Automatic Heating and Air 

Conditioning

OCN7050112

1.  Press the AUTO button
The modes, fan speeds, air intake and 

air-conditioning will be controlled 

automatically according to the 

temperature setting you select.

OCN7050113

You can control the blower strength in 

three stages by pushing the AUTO button 

during automatic operation.


- HIGH : Provide rapid air conditioning 

and heating with strong blower


- MEDIUM : Provide air conditioning 

and heating with medium strength 

blower


- LOW : Is suitable for drivers that prefer 

lower air speeds

When you select the temperature to HI 

or LO in AUTO mode, the fan speed is set 

to ‘HIGH’.

„

„

Driver’s seat

„

„

Passenger’s seat

OCN7050114

2.  Turn the temperature control knob 

to set the desired temperature. If 

the temperature is set to the lowest 

setting (Lo), the air conditioning 

system will operate continuously.

• 

To turn the automatic operation off, 

select any button of the following:


- Mode selection button


- Front windshield defroster button

(Press the button one more time 

to deselect the front windshield 

defroster function. The ‘AUTO’ sign 

will illuminate on the information 

screen once again.)


- Fan speed control toggle switch

The selected function will be 

controlled manually while other 

functions operate automatically.

• 

For your convenience and overall 

system efficiency, use the AUTO 

button and set the temperature to 

72°F (22°C).

Convenience Features

5-84

OCN7050133

 Information

Never place anything near the sensor to 

ensure better control of the heating and 

cooling system.

Manual Heating and Air 

Conditioning

The heating and cooling system can be 

controlled manually by pushing buttons 

other than the AUTO button. In this case, 

the system works sequentially according 

to the order of buttons selected. When 

pressing any button except the AUTO 

button while using automatic operation, 

the functions not selected will be 

controlled automatically.
1.  Start the engine.
2.  Set the mode to the desired position.

To improve the effectiveness of 

heating and cooling, select the mode 

according to the following:


- Heating: 


- Cooling: 

3.  Set the temperature control to the 

desired position.

4.  Set the air intake control to fresh 

mode.

5.  Set the fan speed control to the 

desired speed.

6.  If air conditioning is desired, turn the 

air conditioning system on.

7.  Press the AUTO button in order to 

convert to full automatic control of 

the system.

05

5-85

Mode selection

OCN7H053100N

Convenience Features

5-86

OCN7050115

The mode selection toggle switch 

controls the direction of the air flow 

through the ventilation system.
The air flow outlet direction is cycled as 

follows:

Face-level (B, D)

Air flow is directed toward the upper 

body and face. Additionally, each outlet 

can be controlled to direct the air 

discharged from the outlet.

Bi-Level (B, C, D, E)

Air flow is directed towards the face and 

the floor.

Floor-Level (C, E)

Most of the air flow is directed to the 

floor, with a small amount of the air 

being directed to the windshield and side 

window defrosters.

Floor & Defrost (A, C, D, E)

Most of the air flow is directed to the 

floor and the windshield with a small 

amount directed to the side window 

defrosters.

05

5-87

OCN7050116

Defrost-Level (A, D)

Most of the air flow is directed to the 

windshield with a small amount of air 

directed to the side window defrosters.

OCN7050106

Instrument panel vents

The instrument panel vent air flow can be 

directed up/down or left/right using the 

vent adjustment lever.
To close the vent, push the air vent 

lever in the opposite direction of the 

passenger. To open the vent, push the 

air vent lever in the same direction of the 

passenger.

Temperature control

„

„

Driver’s seat

„

„

Passenger’s seat

OCN7050114

The temperature will increase by turning 

the knob to the right.
The temperature will decrease by turning 

the knob to the left.
The temperature will increase or 

decrease by 1°F (0.5°C) for each 

incremental location. When set to the 

lowest temperature setting, the air 

conditioning will operate continuously.

Convenience Features

5-88

OCN7050117

Adjusting the driver and passenger side 

temperature equally

• 

Press the “SYNC” button to adjust 

the driver and passenger side 

temperature equally.

• 

The passenger side temperature will 

be set to the same temperature as the 

driver side temperature.

• 

Turn the driver side temperature 

control knob. The driver and 

passenger side temperature will be 

adjusted equally.

• 

If you rotate the passenger’s 

temperature control knob, the SYNC 

button is off and the passenger 

side temperature can be operated 

individually.

Adjusting the driver and passenger side 

temperature individually

Press the “SYNC” button again to 

adjust the driver and passenger side 

temperature individually. The button 

indicator will turn off.

Temperature conversion

If the battery connector has been 

discharged or disconnected, the 

temperature mode display will reset to 

Centigrade.
To change the temperature unit from °C 

to °F or °F to °C :


- Automatic climate control system

Press the AUTO button for 3 seconds 

while pressing the OFF button.


- Instrument clusterAutomatic climate 

control system

Go to User Settings → Other → 

Temperature Unit.
The temperature unit on both the 

cluster LCD display and the climate 

control screen will change.

 Information

When starting the vehicle in cold weather 

using manual temperature control, 

operate the system in the following method 

to improve heating.


-

Turn off or lower the blower, right after 

starting the engine.


-

Allow the engine to warm up during 

this time since the air flow from the 

heater is still cold.


-

After a few minutes of engine warm up, 

turn on or set the fan to a higher level 

and adjust the temperature setting to 

hot.

05

5-89

Air intake control

Recirculated air position

With the recirculated air 

position selected, air from the 

passenger compartment will 

be drawn through the heating 

system and heated or cooled 

according to the function 

selected.

Outside (fresh) air position

With the outside (fresh) air 

position selected, air enters 

the vehicle from outside and 

is heated or cooled according 

to the function selected.

 Information

Operating the system primarily in Fresh 

mode is recommended. Use Recirculation 

mode temporarily only when needed.

Prolonged operation of the heater in 

Recirculation mode and without the A/C 

ON can cause fogging of the windshield.

In addition, prolonged use of the A/C 

ON in Recirculation mode may result in 

excessively dry, dehumidified air in the 

cabin and may promote formation of 

musty vent odor due to stagnant air.

 WARNING

• 

Continued use of the climate control 

system operation in Recirculation 

mode for a prolonged period of 

time may cause drowsiness to the 

occupants in the cabin. This may lead 

to loss of vehicle control which may 

lead to an accident.

• 

Continued use of the climate control 

system operation in Recirculation 

mode with the A/C OFF may allow 

humidity to increase inside the cabin.

This may cause condensation to 

accumulate on the windshield and 

obscure visibility.

• 

Do not sleep in your vehicle or 

remain parked in your vehicle with 

the windows up and either the 

heater or the air conditioning ON for 

prolonged periods of time. Doing so 

may increase the levels of carbon 

dioxide in the cabin which may lead 

to serious injury or death.

Fan speed control

OCN7050118

The fan speed can be set to the desired 

speed by using the fan speed control 

button.
More air is delivered with higher fan 

speeds.
Pressing the OFF button turns off the fan.

NOTICE

Operating the fan speed when the 

ignition switch is in the ON position 

could cause the battery to discharge. 

Operate the fan speed when the engine 

is running.

Convenience Features

5-90

Air conditioning

OCN7050119

Push the A/C button to manually turn 

the air conditioning system on (indicator 

light will illuminate).
Push the button again to turn the air 

conditioning system off.

OFF mode

OCN7050121

Push the OFF button of the front to 

turn off the air climate control system. 

However, you can still operate the mode 

and air intake buttons as long as the 

ignition switch is in the ON position.

System Operation

Ventilation

1.  Select the Face Level 

 mode.

2.  Set the air intake control to fresh 

mode.

3.  Set the temperature control to the 

desired position.

4.  Set the fan speed control to the 

desired speed.

Heating

1.  Select the Floor Level 

 mode.

2.  Set the air intake control to fresh 

mode.

3.  Set the temperature control to the 

desired position.

4.  Set the fan speed control to the 

desired speed.

5.  If desired, turn the air conditioning ON 

with the temperature control knob set 

to heat in order to dehumidify the air 

before it enters into the cabin.

If the windshield fogs up, select the Front 

& Deforst 

 mode or press the Front 

Defrost 

 mode.

Operation Tips

• 

To help keep dust or unpleasant fumes 

from entering the vehicle through the 

ventilation system, temporarily set the 

air intake control to the recirculation 

mode. Be sure to return the control 

to fresh mode position when the 

irritation has passed to keep fresh air 

in the vehicle. This will help keep the 

driver alert and comfortable.

• 

To help prevent interior fog on the 

windshield, set the air intake control 

to fresh mode and fan speed to 

the desired position, turn on the 

air conditioning system, and adjust 

the temperature control to desired 

temperature.

05

5-91

Air conditioning

HYUNDAI Air Conditioning Systems are 

filled with R-1234yf refrigerant.
1.  Start the vehicle.
2.  Push the air conditioning button.
3.  Select the Face Level 

 mode.

4.  Set the air intake control to 

Recirculation mode temporarily to 

allow the cabin to cool quickly. When 

the desired temperature in the cabin 

is reached, change the air intake 

control back to Fresh mode.

5.  Adjust the fan speed control and 

temperature control to maintain 

maximum comfort.

 Information

Your vehicle is filled with R-1234yf 

according to the regulation in your 

country at the time of production. You can 

find out which air conditioning refrigerant 

is applied to your vehicle on the label 

located inside of the hood.

NOTICE

When using the air conditioning system, 

monitor the temperature gauge closely 

while driving up hills or in heavy traffic 

when outside temperatures are high. 

Air conditioning system operation may 

cause engine overheating. Continue 

to use the blower fan but turn the 

air conditioning system off if the 

temperature gauge indicates engine 

overheating.

Air conditioning system operation tips

• 

If the vehicle has been parked in 

direct sunlight during hot weather, 

open the windows for a short time 

to let the hot air inside the vehicle 

escape.

• 

After sufficient cooling has been 

achieved, switch back from 

recirculation mode to fresh mode.

• 

To help reduce moisture inside of 

the windows on rainy or humid 

days, decrease the humidity inside 

the vehicle by operating the air 

conditioning system with the windows 

and sunroof closed.

• 

During air conditioning system 

operation, you may occasionally 

notice a slight change in engine speed 

as the air conditioning compressor 

cycles. This is a normal system 

operation characteristic.

• 

Use the air conditioning system 

every month only for a few minutes 

to ensure maximum system 

performance.

• 

When using the air conditioning 

system, you may notice clear water 

dripping (or even puddling) on the 

ground under the passenger side of 

the vehicle. This is a normal system 

operation characteristic.

• 

If you operate the air conditioner 

excessively, the difference between 

the temperature of the outside air and 

that of the windshield could cause 

the outer surface of the windshield to 

fog up, causing loss of visibility. In this 

case, set the mode selection button to 

the 

 position and set the fan speed 

control knob to the lowest speed 

setting.

Convenience Features

5-92

System Maintenance

Cabin air filter

OIK047401L

[A] : Outside air, [B] : Recirculated air
[C] : Cabin air filter, [D] : Blower
[E] : Evaporator core, [F] : Heater core

The cabin air filter is installed behind 

the glove box. It filters the dust or other 

pollutants that enter the vehicle through 

the heating and air conditioning system.
Have the cabin air filter replaced by an 

authorized HYUNDAI dealer according to 

the maintenance schedule. If the vehicle 

is being driven in severe conditions such 

as dusty or rough roads, more frequent 

cabin air filter inspections and changes 

are required.
If the air flow rate suddenly decreases, 

the system should be checked at an 

authorized HYUNDAI dealer.

 Information

• 

Replace the filter according to the 

Maintenance Schedule. 

• 

If the car is being driven in severe 

conditions such as dusty, rough 

roads, more frequent cabin air filter 

inspections and changes are required. 

• 

When the air flow rate suddenly 

decreases, have the system checked by 

an authorized HYUNDAI dealer.

Checking the amount of air 

conditioner refrigerant and 

compressor lubricant

When the amount of refrigerant is low, 

the performance of the air conditioning 

is reduced. Overfilling also reduces the 

performance of the air conditioning 

system.
Therefore, if abnormal operation is 

found, have the system inspected by an 

authorized HYUNDAI dealer.

NOTICE

It is important that the correct type and 

amount of oil and refrigerant are used. 

Otherwise, damage to the compressor 

and abnormal system operation may 

occur. To prevent damage, the air 

conditioning system in your vehicle 

should only be serviced by trained and 

certified technicians. 

NOTICE

• 

The refrigerant system should only 

be serviced by trained and certified 

technicians to insure proper and safe 

operation.

• 

The refrigerant system should be 

serviced in a well-ventilated place.

• 

The air conditioning evaporator 

(cooling coil) shall never be repaired 

or replaced with one removed from 

a used or salvaged vehicle and new 

replacement MAC evaporators shall 

be certified (and labeled) as meeting 

SAE Standard J2842.

05

5-93

 WARNING

Vehicles equipped with R-1234yf

Since the refrigerant is 

mildly flammable and 

operated at high pressure, 

the air conditioning system 

should only be serviced 

by trained and certified 

technicians. It is important 

that the correct type 

and amount of oil and 

refrigerant are used. 

All refrigerants should be reclaimed 

with proper equipment.
Venting refrigerants directly to the 

atmosphere is harmful to individuals 

and environment. Failure to heed these 

warnings can lead to serious injuries.

OCN7H053035L

Air conditioning refrigerant label

You can find out which air conditioning 

refrigerant is applied to your vehicle on 

the label located inside of the hood.

„

„

Example

OHYK059002

Each symbols and specification on 

the air conditioning refrigerant label is 

represented as below:
1.  Classification of refrigerant
2.  Amount of refrigerant
3.  Classification of Compressor lubricant
4.  Caution
5.  Flammable refrigerant
6.  To require registered technician to 

service air conditioning system

Convenience Features

5-94

 WARNING

Windshield heating
Do not use the 

 or 

 position 

during cooling operation in extremely 

humid weather. The difference between 

the temperature of the outside air and 

that of the windshield could cause the 

outer surface of the windshield to fog 

up, causing loss of visibility. In this case, 

set the mode selection knob or button 

to the 

 position and fan speed control 

knob or button to lower speed.

• 

For maximum defrost performance, 

set the temperature control knob 

to the highest temperature setting 

(rotated all the way to the right) and 

the fan speed control to the highest 

setting.

• 

If warm air to the floor is desired while 

defrosting or defogging, set the mode 

to the floor-defrost position.

• 

Before driving, clear all snow and ice 

from the windshield, rear window, 

side view mirrors, and all side 

windows.

• 

Clear all snow and ice from the 

hood and air inlet in the cowl grill 

to improve heater and defroster 

efficiency and to reduce the 

probability of fogging up inside of the 

windshield.

Automatic Climate Control 

System

To defog inside windshield

OCN7050124L

1.  Select desired fan speed.
2.  Select desired temperature.
3.  Press the defroster button (

).

4.  The air-conditioning will turn on 

according to the detected ambient 

temperature, fresh mode and 

higher fan speed will be selected 

automatically.

If the air-conditioning, fresh mode 

and higher fan speed are not selected 

automatically, adjust the corresponding 

button or knob manually.
If the 

 position is selected, lower fan 

speed is controlled to higher fan speed.

WINDSHIELD DEFROSTING AND DEFOGGING

05

5-95

To defrost outside windshield

OCN7050125L

1.  Set fan speed to the highest position.
2.  Set temperature to the extreme hot 

(HI) position.

3.  Press the defroster button (

).

4.  The air-conditioning will turn on 

according to the detected ambient 

temperature and fresh mode will be 

selected automatically.

If the 

 position is selected, lower fan 

speed is controlled to higher fan speed.

Defogging Logic 

To help reduce the probability of fogging 

up the inside of the windshield, the air
intake or air conditioning are controlled 

automatically according to certain 

conditions such as 

 or 

 position. To 

cancel or return the defogging logic, do 

the following

Manual climate control system

1.  Turn the ignition switch to the ON 

position.

2.  Select defroster mode (

).

3.  Press the air intake control button at 

least 5 times within 3 seconds. The 

process should be completed within 

10 seconds after the defroster mode (

) is selected.

The LED indicator on the air intake 

button will blink 3 times to indicate that 

the defogging logic has been disabled.
Repeat the steps again to re-enable the 

defogging logic.

If the battery has been discharged or 

disconnected, it resets to the defog logic 

status.

Automatic climate control system

1.  Turn the ignition switch to the ON 

position.

2.  Press the defroster button (

).

3.  While pressing the air conditioning 

button (A/C), press the air intake 

control button at least 5 times within 

3 seconds.

The automatic climate control 

information screen will blink 3 times to 

indicate that the defogging logic has 

been disabled.
Repeat the steps again to re-enable the 

defogging logic.
If the battery connector has been 

discharged or disconnected, it resets to 

the defog logic status.

Convenience Features

5-96

Auto Defogging System

OCN7050061

Auto defogging helps reduce the 

possibility of fogging up the inside of the 

windshield by automatically sensing the 

moisture on inside the windshield.
The auto defogging system operates 

when the heater or air conditioning is on.

When the Auto Defogging 

System operates, the indicator 

will illuminate.

If a high amount of humidity is detected 

in the vehicle, the Auto Defogging 

System will be enabled.

The following steps will be performed 

automatically:
Step 1) The A/C button will turn ON.
Step 2) The air intake control will change 

to Fresh mode under low outside 

temperature.

Step 3) The mode will be changed to 

defrost to direct airflow to the 

windshield.

Step 4) The fan speed will be increased.

To cancel or reset the Auto Defogging 

System

Press the front windshield defroster 

button for 3 seconds when the ignition 

switch is in the ON position.
When the Auto Defogging System is 

canceled, defrost button indicator will 

blink 3 times.
When the Auto Defogging System is 

reset, defrost button indicator will blink 6 

times without a signal.

 Information

• 

When the air conditioning is turned 

on by Auto defogging system, if you 

try to turn off the air conditioning, the 

indicator will blink 3 times and the air 

conditioning will not be turned off.

• 

To maintain the effectiveness and 

efficiency of the Auto Defogging 

System, do not select Recirculation 

mode while the system is operating.

• 

When the Auto Defogging System is 

operating, the fan speed adjustment 

knob, the temperature adjustment 

knob, and the air intake control button 

are all disabled.

NOTICE

Do not remove the sensor cover located 

on the upper end of the driver side 

windshield glass.
Damage to system parts could occur 

and may not be covered by your vehicle 

warranty.

05

5-97

Defroster

NOTICE

To prevent damage to the conductors 

bonded to the inside surface of the rear 

window, never use sharp instruments or 

window cleaners containing abrasives 

to clean the window.

 Information

If you want to defrost and defog the 

front windshield, refer to “Windshield 

Defrosting and Defogging” in this chapter.

Rear window defroster

OCN7050136L

The defroster heats the window to 

remove frost, fog and thin ice from the 

interior and exterior of the rear window, 

while engine is running.

• 

To activate the rear window defroster, 

press the rear window defroster 

button located in the center facia 

switch panel. The indicator on the rear 

window defroster button illuminates 

when the defroster is ON.

• 

To turn off the defroster, press the rear 

window defroster button again.

 Information

• 

If there is heavy accumulation of snow 

on the rear window, brush it off before 

operating the rear defroster.

• 

The rear window defroster 

automatically turns off after 

approximately 20 minutes or when the 

ignition switch is in the LOCK/OFF 

position.

Outside mirror defroster (if 

equipped)

If your vehicle is equipped with the 

outside mirror defrosters, they will 

operate at the same time you turn on the 

rear window defroster.

Convenience Features

5-98

Sunroof Inside Air Recirculation 

(if equipped)

When the sunroof is opened, outside 

(fresh) air will be automatically selected. 

At this time, if you press the air intake 

control button, recirculated air position 

will be selected but will change back 

to outside (fresh) air after 3 minutes. 

When the sunroof is closed, the air 

intake position will return to the original 

position that was selected.

Auto Comfort Control (for 

driver’s seat) (if equipped)

The temperature of the driver’s seat 

warmer, air ventilation seat and 

heated steering wheel is automatically 

controlled depending on the inside and 

outside temperature of the vehicle when 

the engine is running.
To use this function, it must be 

activated from the Settings menu in the 

Infotainment system screen. Select:


-

All menus → Setup → Vehicle → Heated 

/ Ventilated Features

For more details on Auto Comfort 

Control, refer to “Seat warmers and 

air ventilation seat” in chapter 3, and 

“Heated steering wheel” in chapter 5.

Automatic Ventilation (if 

equipped)

The system automatically selects the 

fresh mode when the climate control 

system operates over a certain period of 

time (approximately 30 minutes) in low 

temperature with the recirculation mode 

selected.

To cancel or reactivate the 

Automatic Ventilation

When the air conditioning system is on, 

select Face Level 

 mode and press the 

air recirculation mode button at least 5 

times within 3 seconds while pressing 

the A/C button.
When the automatic ventilation is 

canceled, the indicator blinks 3 times. 

When the automatic ventilation is 

activated, the indicator blinks 6 times.

CLIMATE CONTROL ADDITIONAL FEATURES

05

5-99

STORAGE COMPARTMENT

 WARNING

Never store cigarette lighters, propane 

cylinders, or other flammable/explosive 

materials in the vehicle. These items 

may catch fire and/or explode if the 

vehicle is exposed to hot temperatures 

for extended periods.

 WARNING

ALWAYS keep the storage compartment 

covers closed securely while driving. 

Items inside your vehicle are moving as 

fast as the vehicle. If you have to stop 

or turn quickly, or if there is a crash, the 

items may fly out of the compartment 

and may cause an injury if they strike 

the driver or a passenger.

NOTICE

To avoid possible theft, do not leave 

valuables in the storage compartments.

Center Console Storage

OCN7050062

To open:
Grab and hold the latch on the armrest 

then lift the lid.

Glove Box

OCN7050064

To open:
Pull the lever (1).

 WARNING

ALWAYS close the glove box door after 

use.
An open glove box door can cause 

serious injury to the passenger in an 

accident, even if the passenger is 

wearing a seat belt.

Convenience Features

5-100

Cup Holder (if equipped)

Front

OCN7050065

Rear

OCN7050066

Cups or small beverages cups may be 

placed in the cup holders.

 WARNING

• 

Avoid abrupt starting and braking 

when the cup holder is in use to 

prevent spilling your drink. If hot 

liquid spills, you could be burned. 

Such a burn to the driver could cause 

loss of vehicle control resulting in an 

accident.

• 

Do not place uncovered or unsecured 

cups, bottles, cans, etc., in the cup 

holder containing hot liquid while 

the vehicle is in motion. Injuries may 

result in the event of a sudden stop 

or collision.

• 

Only use soft cups in the cup holders. 

Hard objects can injure you in an 

accident.

 WARNING

Keep cans or bottles out of direct sun 

light and do not put them in a hot 

vehicle. It may explode.

NOTICE

• 

Keep your drinks sealed while driving 

to prevent spilling your drink. If liquid 

spills, it may get into the vehicle’s 

electrical/electronic system and 

damage electrical/electronic parts.

• 

When cleaning spilled liquids do not 

use hot air to blow out or dry the cup 

holder. This may damage the interior.

INTERIOR FEATURES

05

5-101

Sunvisor

OCN7050067

To use a sunvisor, pull it downward.
To use a sunvisor for a side window, pull 

it downward, unsnap it from the bracket 

(1) and swing it to the side (2).
To use the vanity mirror, pull down the 

sunvisor and slide the mirror cover (3).
Adjust the sunvisor forward or backward 

(4, if equipped) as needed.
Use the ticket holder (5) to hold tickets.
Close the vanity mirror cover securely 

and return the sunvisor to its original 

position after use.

NOTICE

Close the vanity mirror cover securely 

and return the sunvisor to its original 

position after use.

 WARNING

For your safety, do not block your view 

when using the sunvisor.

NOTICE

Do not put several tickets in the ticket 

holder at one time. This could cause 

damage to the ticket holder.

Power Outlet

OCN7053068

The power outlet is designed to provide 

power for mobile telephones or other 

devices designed to operate with vehicle 

electrical systems. The devices should 

draw less than 180 W with the engine 

running.

 WARNING

Avoid electrical shocks. Do not place 

your fingers or foreign objects (pin, etc.) 

into a power outlet or touch the power 

outlet with a wet hand.

Convenience Features

5-102

 CAUTION

To prevent damage to the Power 

Outlets:

• 

Use the power outlet only when the 

engine is running and remove the 

accessory plug after use. Using the 

accessory plug for prolonged periods 

of time with the engine off could 

cause the battery to discharge.

• 

Only use 12 V electric accessories 

which are less than 15 A in electric 

capacity.

• 

Adjust the air-conditioner or heater 

to the lowest operating level when 

using the power outlet.

• 

Close the cover when not in use.

• 

Some electronic devices can 

cause electronic interference 

when plugged into a vehicle’s 

power outlet. These devices may 

cause excessive audio static and 

malfunctions in other electronic 

systems or devices used in your 

vehicle.

• 

Push the plug in as far as it will go. If 

good contact is not made, the plug 

may overheat and the fuse may open.

• 

Plug in battery equipped electrical/

electronic devices with reverse 

current protection. The current 

from the battery may flow into the 

vehicle’s electrical/electronic system 

and cause system malfunction.

USB Charger

„

„

Front seat

OCN7053069

„

„

Rear seat

OCN7H053042N

The USB charger is designed to recharge 

batteries of small size electronic devices 

using a USB cable.
The electrical devices can be charged 

when the ignition switch is in the ON or 

START position.

 Information

• 

Disconnect the USB cable from the 

USB port after use.

• 

The battery charging state may be 

monitored on the electrical device.

• 

A smartphone or a tablet PC may get 

warmer during the charging process. It 

does not indicate any malfunction with 

the charging system.

• 

A smartphone or a tablet PC that does 

not use a USB cable to charge should be 

charged using its own charger.

05

5-103

• 

Charging may not be possible when 

using a Type-C to A converter sold 

by a mobile phone manufacturer or 

commercially available.

• 

Do not attempt to use the charging 

terminal to turn ON an audio or to play 

media with the infotainment system.

• 

Use the USB charger when the engine 

is running. Using the USB charger 

for prolonged periods of time with 

the ignition switch in the ON position 

(engine off) may cause the battery to 

discharge.

• 

To prevent damage to the USB charger:


-

Do not insert foreign objects or 

spill liquid into the outlet. The USB 

charging terminal may be damaged.


-

Do not use devices with working 

current exceeding 3,000 mA (3.0 A).

Wireless Cellular Phone 

Charging System (if equipped)

OCN7053070

[A] : Charging pad 

There is a wireless cellular phone charger 

inside the front console. 
The system is available when all doors 

are closed, and when the ignition switch 

is in the ON position. 

To charge a cellular phone 

The wireless cellular phone charging 

system charges only the Qi-enabled 

cellular phones. Read the label on the 

cellular phone accessory cover or visit 

your cellular phone manufacturer’s 

website to check whether your cellular 

phone supports the Qi technology. 
The wireless charging process starts 

when you put a Qi-enabled cellular 

phone on the wireless charging unit. 
1.  Remove other items, including the 

smart key, from the wireless charging 

unit. If not, the wireless charging 

process may be interrupted. Place 

the cellular phone on the center of 

the charging pad (

). The indicator 

light is orange when the smart phone 

is charging. The indicator light will 

turn blue when phone charging is 

complete.

2.  When charging starts, a charging 

icon is displayed on the infotainment 

system screen. However, depending 

on the infotainment system screen, 

the wireless charging icon may not be 

displayed. See the infotainment web 

manual for details.

3.  You can turn ON or OFF the wireless 

charging function in the user settings 

mode on the instrument cluster. 

For further information, refer to 

the “Cluster Display Modes” in this 

chapter.

The system warns you with a message on 

the cluster display if the cellular phone 

is still on the wireless charging unit after 

the engine is turned OFF and the front 

door is opened.

5-104

Convenience Features

 Information

For some manufacturers’ cellular phones, 

the system may not warn you even though 

the cellular phone is left on the wireless 

charging unit. This is due to the particular 

characteristic of the cellular phone and 

not a malfunction of the wireless charging.

NOTICE

• 

The wireless cellular phone charging 

system may not support certain 

cellular phones, which are not 

verified for the Qi specification ( ). 

• 

When placing your cellular phone 

on the charging mat, position the 

phone in the middle of the mat for 

optimal charging performance.  If 

your cellular phone is off to the side, 

the charging rate may be less and in 

some cases the cellular phone may 

experience higher heat conduction.

• 

In some cases, the wireless charging 

may stop temporarily when the 

Remote Key or Smart Key is used, 

either when starting the vehicle or 

locking/unlocking the doors, etc.

• 

The wireless charging process may 

temporarily stop, when temperature 

abnormally increases inside the 

wireless cellular phone charging 

system. Stop the charging cellular 

phone and wait until temperature 

falls to a certain level.

• 

The wireless charging process may 

temporarily stop when there is 

any metallic item, such as a coin, 

between the wireless cellular phone 

charging system and the cellular 

phone. 

• 

When charging some cellular phones 

with a  self-protection feature, 

the wireless charging speed may 

decrease and the wireless charging 

may stop.

• 

If the cellular phone has a thick 

cover, the wireless charging may not 

be possible.

• 

If the cellular phone is not 

completely contacting the charging 

pad, wireless charging may not 

operate properly.

• 

Some magnetic items like credit 

cards, phone cards or rail tickets may 

be damaged if left with the cellular 

phone during the charging process.

• 

When any cellular phone without 

a wireless charging function or a 

metallic object is placed on the 

charging pad, a small noise may 

sound. This small sound is due to the 

vehicle discerning compatibility of 

the object placed on the charging 

pad. It does not affect your vehicle or 

the cellular phone in any way.

 Information

If the ignition switch is in the LOCK/ OFF 

position, the charging also stops. 

 Information

This device complies with part 15 of the 

FCC Rules. 

Operation is subject to the following two 

conditions: 

1. 

 This device may not cause harmful 

interference, and 

2. 

 This device must accept any 

interference received, including 

interference that may cause undesired 

operation.

05

5-105

Clock

 WARNING

Do not attempt to adjust the clock 

while driving. Doing so may result in 

distracted driving which may lead to 

an accident involving personal injury or 

death.

For more information, please refer to 

the manual that was supplied with your 

vehicle.

Clothes Hanger

OTM048095

These hangers are not designed to hold 

large or heavy items.

 WARNING

OCN7050071

Do not hang other objects such 

as hangers or hard objects except 

clothes. Also, do not put heavy, sharp 

or breakable objects in the clothes 

pockets. In an accident or when the 

curtain air bag is inflated, it may cause 

vehicle damage or personal injury.

Convenience Features

5-106

INFOTAINMENT SYSTEM

NOTICE

• 

If you install an aftermarket HID 

head lamp, your vehicle’s audio and 

electronic devices may not function 

properly.

• 

Prevent chemicals such as perfume, 

cosmetic oil, sunscreen, hand 

cleaner, and air freshener from 

contacting the interior parts 

because they may cause damage or 

discoloration.

USB Port

OCN7053074

The USB port can be used while the 

engine is running.

• 

Small electronic devices can be 

charged.

• 

After connecting a media storage 

device such as a MP3 or USB to the 

USB port, you can listen to music 

through the vehicle’s speakers or play 

it on the infotainment system.

 Information

• 

Some devices may not be charged 

through USB port.

• 

When using a portable audio device 

connected to the power outlet, noise 

may occur during playback. If this 

happens, disconnect the USB cable and 

use the portable audio device’s power 

source.

05

5-107

Antenna

OCN7050072

Shark fin antenna (1, if equipped)

The shark fin antenna receives data 

transmitted from base stations and 

satelliltes (for example: GPS, Sirus XM, 

LTE) and also transmits to base stations 

(for example: LTE). 

Glass antenna (2)

Your vehicle uses a glass antenna to 

receive both AM and FM signals.

 WARNING

• 

Do not clean the inside of the rear 

window glass with a cleaner or 

scraper to remove foreign deposits 

as this may cause damage to the 

antenna elements.

• 

To prevent damage to the rear 

glass antenna, never use sharp 

instruments or window cleaner 

containing abrasives to clean the 

window. Clean the inside surface of 

the rear glass window with a piece of 

soft cloth.

• 

Avoid adding metallic coatings such 

as Nickel, Cadmium, etc. These can 

degrade the receiving AM and FM 

broadcast signals.

• 

When putting a sticker on the inside 

surface of the rear window, be 

careful not to damage the rear glass 

antenna.

• 

Do not put sharp instruments nearby 

the rear glass antenna.

• 

Tinted rear window may affect the 

proper functioning of the antenna.

Convenience Features

5-108

Steering Wheel Audio Control

OCN7053073

The steering wheel audio control 

switches are installed for your 

convenience.

NOTICE

Do not operate audio remote control 

buttons simultaneously.

VOLUME (VOL + / VOL -) (1)

• 

Rotate the VOLUME scroll up to 

increase volume.

• 

Rotate the VOLUME scroll down to 

decrease volume.

SEEK/PRESET (

 / 

) (2)

If the SEEK/PRESET toggle switch is 

moved up or down and held for 0.8 

second or more, it will function in the 

following modes.

• 

RADIO mode

It will function as the AUTO SEEK 

select switch. It will SEEK until you 

release the switch.

• 

MEDIA mode

It will function as the FF/REW switch.

If the SEEK/PRESET toggle switch is 

moved up or down, it will function in the 

following modes.

• 

RADIO mode

It will function as the PRESET STATION 

UP/DOWN switch.

• 

MEDIA mode

It will function as the TRACK UP/ 

DOWN switch.

MODE (3)

Press the MODE button to select Audio 

Source. 

MUTE ( ) (4)

Press the MUTE button to mute or 

activate the sound.

Custom button ( ) (5)

• 

Custom function

• 

Press and hold to move to the 

function setting screen.

 Information

For more information, refer to the 

separately supplied infotainment system 

manual.

05

5-109

Infotainment System (if equipped)

The infotainment system may change 

after software updates. For more 

information, refer to the user’s manual 

provided in the infotainment system and 

the quick reference guide.

Voice Recognition (if equipped)

OCN7050081

A wide range of infotainment functions 

can be commanded with voice 

recognition. 

See additional information in supplied 

Infotainment Manual.

Bluetooth® Wireless Technology 

hands-free (if equipped)

OCN7053075

OCN7053208

(1)  Call/Answer/Call end button
(2)  Left Microphone
(3)  Right Microphone (if equipped)
For more information, refer to the 

infotainment system manual.

 WARNING

To prevent driver distraction, minimize 

your use of these features while driving. 

Distraction may cause a collision, 

resulting in serious injury or death.

Convenience Features

5-110

How Vehicle Radio Works

FM reception

OJF045308L

AM and FM radio signals are broadcast 

from transmitter towers located around 

your city. They are intercepted by the 

radio antenna on your vehicle. This signal 

is then received by the radio and sent to 

your vehicle speakers.
When a strong radio signal has reached 

your vehicle, the precise engineering 

of your audio system ensures the best 

possible quality reproduction. However, 

in some cases the signal coming to your 

vehicle may not be strong and clear.
This can be due to factors, such as 

the distance from the radio station, 

closeness of other strong radio stations 

or the presence of buildings, bridges or 

other large obstructions in the area.

AM (MW, LW) reception

OJF045309L

AM broadcasts can be received at 

greater distances than FM broadcasts. 

This is because AM radio waves are 

transmitted at low frequencies. These 

long, low frequency radio waves can 

follow the curvature of the earth rather 

than travelling straight out into the 

atmosphere. In addition, they curve 

around obstructions so that they can 

provide better signal coverage.


Content      ..     6      7      8      9     ..