Honda Pilot (2024 year). Manual in english - page 15
 

  Index      Manuals     Honda Pilot (2024 year). Manual in english


Search            copyright infringement  


Content      ..     13      14      15      16     ..


Honda Pilot (2024 year). Manual in english - page 15


485

uu

Bluetooth

®

 HandsFreeLink

®

u

HondaLink

®

 Assist

Continued

Features

HondaLink

®

 Assist

Automatic collision notification

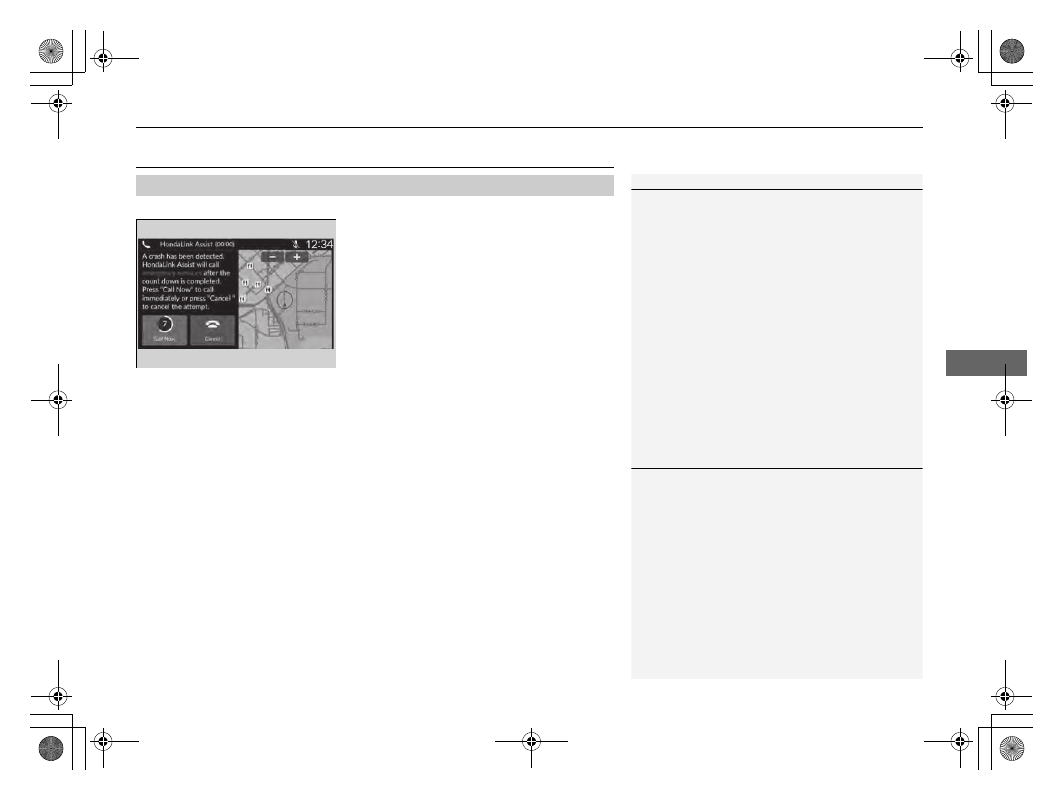
If your vehicle’s airbags deploy or if the unit 
detects that the vehicle is severely impacted, 
your vehicle automatically will attempt to 
connect to the HondaLink operator. If 
connected, information about your vehicle, its 
location, and its condition can be sent to the 
operator

*1

; you also can speak to the operator 

when connected.

IMPORTANT: 

For vehicles equipped with HondaLink Assist, owner activation 

constitutes authorization for Honda to collect information from your vehicle needed 
to provide the service, and agreement to the Terms of Use at 

https://

mygarage.honda.com/resource/AutoLinkLegalTerms/HondaLinkLegalTerms/
HondaLinkTermsAndConditions.pdf

. In a crash, HondaLink Assist will attempt to 

notify emergency services but NEITHER HONDA NOR ITS SERVICE PROVIDERS 
GUARANTEE THAT SUCH NOTIFICATION WILL OCCUR.

Honda reserves the right to terminate HondaLink Assist services at any time or for 
any reason, and in the future may not be able to provide services due to changes in, 
or obsolescence of, technology integral to the service or changes in governmental 
regulation.

*1: Depending on your phone and adequate cellular coverage, your vehicle’s location may not 
be sent to the operator.

In Case of Emergency

1

In Case of Emergency

Your vehicle may not be able to connect to the 
operator if the battery level is low, the line is 
disconnected, or you do not have adequate cellular 
coverage.

You cannot use this emergency service when:

You travel outside the HondaLink service coverage 
areas.

There is a problem with the connecting devices, 
such as the microphones, speakers, or the unit 
itself.

You cannot operate other phone-related functions 
using the screen while talking to the operator.
Select 

Hang Up

 to terminate the connection to your 

vehicle.

1

Automatic collision notification

If the unit fails to connect to the operator, it 
repeatedly tries until it succeeds.

uu

Bluetooth

®

 HandsFreeLink

®

u

HondaLink

®

 Assist

486

Features

To enable notification

1.

Go to the phone settings screen.

2

Phone settings screen

 P. 471

2.

Select 

HondaLink Assist

.

3.

Select 

Yes

 or 

No

.

1

To enable notification

Setting options:

Yes:

 Notification is available.

No:

 Disable the feature.

487

Features

Refuel Recommend

Your vehicle is equipped with a feature that automatically calculates when to refuel. 
This feature will notify you when refueling is recommended as well as enable you to 
search for gas stations that are located in the vicinity of your vehicle.

1.

When it is time to refuel the vehicle, a 
notification is displayed and a notification 
icon is displayed in the header. 

2.

Touch the box that contains the icon.

3.

Select 

Find Gas Station Now

.

4.

Choose a gas station from the search 
screen of the navigation system.

u

For instructions on how to use the 
navigation system, refer to the 
navigation system manual.

1

Refuel Recommend

You can turn the 

Refuel Recommend

 function on 

and off.

2

Customized Features

 P. 426

When you turn off this feature, the refuel 
recommend notification will not display.

This feature can only be used when the fuel level in 
the tank is below 30 percent.

If you select 

Find Gas Station Now

 or put more 

than 5 liters (1.3 gallons) of gasoline into the gas 
tank, the notification for refueling will disappear. If 
you prefer not to be notified, select 

OFF

 in the 

settings for 

Refuel Recommend

When you drive on a rough road or ascend or 
descend a hill for an extended period of time, the 
notification may disappear or may not be displayed at 
all.

Models with navigation system

Notification 
icon

488

Features

CabinTalk

®

*

Your audio system allows your, or the front passenger’s voice to be broadcast to the 
second and third row seat’s passengers using the rear speakers. 

1.

Press the 

 button.

2.

Select 

CabinTalk

.

u

Select 

 to mute your voice.

How to use

1

CabinTalk

®

*

You can adjust the speaker volume by turning the 
volume knob.

* Not available on all models

489

Driving

This chapter discusses driving and refueling.

Before Driving

....................................... 490

Towing a Trailer

.................................... 496

Off-Highway Driving Guidelines

......... 507

When Driving

Starting the Engine .......................... 512
Precautions While Driving................. 519
Automatic Transmission ................... 520
Shifting ............................................ 521
Auto Idle Stop.................................. 530
Drive Mode System .......................... 536
Hill Descent Control System ............. 542

Vehicle Stability Assist

TM

 (VSA

®

), aka Electronic 

Stability Control (ESC), System..............544

Agile Handling Assist ....................... 546

Intelligent Variable Torque Management (i-

VTM4

TM

) AWD System

*

.................. 547

Tire Pressure Monitoring System (TPMS) 

with Tire Fill Assist.......................... 548

Tire Pressure Monitoring System (TPMS) - 

Required Federal Explanation ......... 550

Blind Spot Information System

*

....... 552

Honda Sensing

®

.................................... 556

Collision Mitigation Braking System

TM

 (CMBS

TM

)....561

Low Speed Braking Control

*

............ 573

Road Departure Mitigation System.. 579

Adaptive Cruise Control (ACC) with Low Speed Follow.. 587
Lane Keeping Assist System (LKAS) .. 609
Traffic Jam Assist ............................. 622

Traffic Sign Recognition System.... 631

Front Sensor Camera ....................... 637
Radar Sensor ................................... 639

Sonar Sensors

*

............................. 640

Braking

Brake System ................................... 641
Anti-lock Brake System (ABS) ........... 648
Brake Assist System ......................... 649

Parking Your Vehicle

When Stopped ................................ 650
Parking Sensor System

*

................... 652

Cross Traffic Monitor

*

..................... 657

Multi-View Rear Camera

*

.....................661

Surround View Camera System

*

..........663

Refueling

........................................... 675

Fuel Economy and CO

2

 Emissions

.... 678

* Not available on all models

490

Driving

Before Driving

Driving Preparation

Check the following items before you start driving.

Make sure there are no obstructions on the windows, door mirrors, exterior 
lights, or other parts of the vehicle.

u

Remove any frost, snow, or ice.

u

Remove any snow on the roof, as this can slip down and obstruct your field of 
vision while driving. If frozen solid, remove ice once it has softened.

u

When removing ice from around the wheels, be sure not to damage the wheel 
or wheel components.

Make sure the hood is securely closed.

u

If the hood opens while driving, your front view will be blocked.

Make sure the tires are in good condition.

u

Check air pressures, and check for damage and excessive wear.

2

Checking and Maintaining Tires

 P. 716

Make sure there are no people or objects behind or around the vehicle.

u

There are blind spots from the inside.

Exterior Checks

1

Exterior Checks

NOTICE

When doors are frozen shut, use warm water around 
the door edges to melt any ice. Do not try to force 
them open, as this can damage the rubber trim 
around the doors. When done, wipe dry to avoid 
further freezing.

Do not pour warm water into the key cylinder.
You will be unable to insert the key if the water 
freezes in the hole.

Heat from the engine and exhaust can ignite 
flammable materials left under the hood, causing a 
fire. If you’ve parked your vehicle for an extended 
period, inspect and remove any debris that may have 
collected, such as dried grass and leaves that have 
fallen or have been carried in for use as a nest by a 
small animal.  Also, check under the hood for leftover 
flammable materials after you or someone else has 
performed maintenance on your vehicle.

Continued

491

uu

Before Driving

u

Driving Preparation

Driving

Store or secure all items on board properly.

u

Carrying too much cargo, or improperly storing it, can affect your vehicle’s 
handling, stability, stopping distance, and tires, and make it unsafe.

2

Maximum Load Limit

 P. 493

Do not pile items higher than the seat height.

u

They can block your view and may be thrown forward in the event of sudden 
braking.

Do not place anything in the front seat footwells. Make sure to secure the floor 
mat.

u

An object or unsecured floor mat can interfere with your brake and accelerator 
pedal operation while driving.

If you have any animals on board, do not let them move around in the vehicle.

u

They may interfere with driving and a crash could occur.

Securely close and lock all doors and the tailgate.

2

Locking/Unlocking the Doors from the Inside

 P. 192

Adjust your seating position properly.

u

Adjust the head restraint, too.

2

Seats

 P. 239

2

Adjusting the Front and Second Row Outer Seat Head Restraint Positions


P. 253

Adjust the mirrors and steering wheel properly.

u

Adjust them while sitting in the proper driving position.

2

Adjusting the Steering Wheel

 P. 235

2

Mirrors

 P. 236

Interior Checks

1

Interior Checks

The headlight aim is set by the factory, and does not 
need to be adjusted. However, if you regularly carry 
heavy items in the cargo area or tow a trailer, have 
the aiming readjusted at a dealer or by a qualified 
technician.

492

uu

Before Driving

u

Driving Preparation

Driving

Be sure items placed on the floor behind the front seats cannot roll under the 
seats.

u

They can interfere with the driver’s ability to operate the pedals, the operation 
of the seats, or the operation of the sensors under the seats.

Everyone in the vehicle must fasten their seat belt.

2

Fastening a Seat Belt

 P. 52

Make sure that the indicators in the instrument panel come on when you start the 
vehicle, and go off soon after.

u

Always have a dealer check the vehicle if a problem is indicated.

2

Indicators

 P. 98

493

uu

Before Driving

u

Maximum Load Limit

Continued

Driving

Maximum Load Limit

The maximum load for your vehicle is 1,173 lbs (532 kg).

The maximum load for your vehicle is 1,340 lbs (608 kg).

See the Tire and Loading Information label attached to the driver’s 
doorjamb.

This figure includes the total weight of all occupants, cargo, and 
accessories, and the tongue load if you are towing a trailer.

Steps for Determining Correct Load Limit -

(1)

Locate the statement “The combined weight of occupants and 
cargo should never exceed XXX kg or XXX lbs.” on your 
vehicle’s placard.

(2)

Determine the combined weight of the driver and passengers 
that will be riding in your vehicle.

(3)

Subtract the combined weight of the driver and passengers 
from XXX kg or XXX lbs.

1

Maximum Load Limit

Gross Vehicle Weight Rating (GVWR):
The maximum allowable weight of the vehicle, all 
occupants, all accessories, all cargo, and the tongue 
load.

2

Specifications

 P. 778

Gross Axle Weight Rating (GAWR):
The maximum allowable weight of the vehicle axle.

2

Specifications

 P. 778

3

WARNING

Overloading or improper loading 
can affect handling and stability 
and cause a crash in which you 
can be hurt or killed.

Follow all load limits and other 
loading guidelines in this manual.

Second row captain seat models

Second row bench seat models

All models

Label Example

494

uu

Before Driving

u

Maximum Load Limit

Driving

(4)

The resulting figure equals the available amount of cargo and 
luggage load capacity. For example, if the “XXX” amount 
equals 1,400 lbs. and there will be five 150 lb. passengers in 
your vehicle, the amount of available cargo and luggage load 
capacity is 650 lbs.
(1,400 - 750 (5 x 150) = 650 lbs.)

(5)

Determine the combined weight of luggage and cargo being 
loaded on the vehicle. That weight may not safely exceed the 
available cargo and luggage load capacity calculated in step 4.

(6)

If your vehicle will be towing a trailer, load from your trailer will 
be transferred to your vehicle. Consult this manual to 
determine how this reduces the available cargo and luggage 
load capacity of your vehicle.

495

uu

Before Driving

u

Maximum Load Limit

Driving

In addition, the total weight of the vehicle, all occupants, 
accessories, cargo, and trailer tongue load must not exceed the 
Gross Vehicle Weight Rating (GVWR) or the Gross Axle Weight 
Rating (GAWR). Both are on a label on the driver’s doorjamb.

1

Maximum Load Limit

Towing a Trailer:
See Towing a Trailer to determine whether your 
vehicle is designed to tow a tailer.

2

Towing a Trailer

 P. 496

Load Limits Example

Example1

Max Load 

1,173 lbs 

(532 kg)

Passenger Weight 

150 lbs x 2 = 300 lbs 

(68 kg x 2 = 136 kg)

Cargo Weight 

873 lbs 

(396 kg)

Example2

Max Load 

1,173 lbs 

(532 kg)

Passenger Weight 

150 lbs x 5 = 750 lbs 

(68 kg x 5 = 340 kg)

Cargo Weight 

423 lbs 

(192 kg)

496

Driving

Towing a Trailer

Towing Preparation

Your vehicle can tow a trailer if you carefully observe the load limits, use the proper 
equipment, and follow the towing guidelines. Check the load limits before driving.

Total trailer weight

Do not exceed the maximum allowable 
weight of the trailer, cargo, and everything in 
or on it shown in the table.
Towing loads in excess of this can seriously 
affect vehicle handling and performance and 
can damage the engine and drivetrain.

Each weight limit is calculated based on the following conditions:

Occupants fill seats from the front of the vehicle to the back.

Each occupant weighs 150 lbs (68 kg).

Each occupant has 17.6 lb (8 kg) cargo in the cargo area.

Any additional weight, cargo or accessories reduce the maximum trailer weight and 
maximum tongue load.

Towing Load Limits

1

Towing Load Limits

Check if all loads are within limits at a public scale.
If a public scale is not available, add the estimated 
weight of your cargo load to the weight of your 
trailer (as quoted by the manufacturer), and then 
measure the tongue load with an appropriate scale or 
tongue gauge or estimate it based on cargo 
distribution.

Refer to the trailer owner’s manual for additional 
information.

Break-in Period
Avoid towing a trailer during your vehicle’s first 600 
miles (1,000 km).

Never exceed the gross weight ratings.
Gross weight information

2

Vehicle Specifications

 P. 778

3

WARNING

Exceeding any load limit or improperly 
loading your vehicle and trailer can cause a 
crash in which you can be seriously hurt or 
killed.

Check the loading of your vehicle and 
trailer carefully before starting to drive.

Total Load

Number of 

occupants

AWD models

2WD models

2

5,000 lbs (2,268 kg)

3,500 lbs (1,588 kg)

3

4,750 lbs (2,155 kg)

3,250 lbs (1,474 kg)

4

4,500 lbs (2,041 kg)

3,000 lbs (1,361 kg)

5

4,250 lbs (1,928 kg)

2,750 lbs (1,247 kg)

6

4,000 lbs (1,814 kg)

2,400 lbs (1,089 kg)

7

2,500 lbs (1,134 kg)

1,150 lbs (522 kg)

8

*

Towing not recommended

* Not available on all models

497

uu

Towing a Trailer

u

Towing Preparation

Continued

Driving

Tongue load

The weight of the tongue with a fully loaded 
trailer on the hitch should be approximately:
Boat trailers: 5 – 15% of the total trailer 
weight
Other trailers: 10 – 15% of total trailer weight

Ton

g

ue Loa

d

Tongue Load

Number of 

occupants

AWD models

2WD models

2

500 lbs (227 kg)

350 lbs (159 kg)

3

475 lbs (215 kg)

325 lbs (147 kg)

4

450 lbs (204 kg)

300 lbs (136 kg)

5

375 lbs (170 kg)

275 lbs (125 kg)

6

250 lbs (113 kg)

240 lbs (109 kg)

7

125 lbs (57 kg)

115 lbs (52 kg)

8

*

Towing not recommended

* Not available on all models

uu

Towing a Trailer

u

Towing Preparation

498

Driving

How to weigh the trailer loads using the public scale

Check each weight in the order indicated as shown.
Refer to the table on the right for each weight’s limit except for the tongue load.

2

Tongue load

 P. 497

If you cannot weigh the rear axle, subtract 1 from 2.

The maximum gross combined weight (4) decreases by 2% for every 1,000 feet 
(305 meters) of elevation.

To calculate the tongue load, subtract 5 from 6.

Refer to the trailer owner’s manual for additional information.

1

How to weigh the trailer loads using the public scale

Fully load the vehicle and trailer. An attendant who 
watches the scale is needed as all occupants should 
stay in the vehicle.

If a public scale is not available, add the estimated 
weight of your cargo load to the weight of your 
trailer (as quoted by the manufacturer), and then 
measure the tongue load with an appropriate scale or 
tongue gauge or estimate it based on cargo 
distribution.

Weight limit for

2WD models

AWD models

Front gross axle

2,976 lbs 

(1,350 kg)

2,998 lbs 

(1,360 kg)

Gross vehicle

5,963 lbs 

(2,705 kg)

6,195 lbs 

(2,810 kg)

Rear gross axle

3,164 lbs 

(1,435 kg)

3,340 lbs 

(1,515 kg)

Gross combined

8,444 lbs 

(3,830 kg)

10,141 lbs 

(4,600 kg)

Weight limit for

Models with trailer hitch

Front gross axle

2,998 lbs 

(1,360 kg)

Gross vehicle

6,195 lbs 

(2,810 kg)

Rear gross axle

3,384 lbs 

(1,535 kg)

Gross combined

10,141 lbs 

(4,600 kg)

1. Front gross axle weight.

2. Gross vehicle weight.

4. Gross combined weight.

3. Rear gross axle weight.

5. Hitched trailer weight.
6. Unhitched trailer weight.

Continued

499

uu

Towing a Trailer

u

Towing Preparation

Driving

Towing generally requires a variety of supplemental equipment.
To ensure the best quality, we recommend that you purchase Honda equipment 
whenever possible.

Your vehicle has a class 3 trailer hitch as 
standard equipment.

2

Trailer brakes

 P. 500

Towing Equipment and Accessories

1

Towing Equipment and Accessories

Make sure that all equipment is properly installed and 
maintained, and that it meets federal, state, province/
territory, and local regulations.

Consult your trailer maker for proper installation and 
setup of the equipment.
Improper installation and setup can affect the 
handling, stability, and braking performance of your 
vehicle.

Consult your trailer sales or rental agency if any other 
items are recommended or required for your towing 
situation.

The lighting and wiring of trailers can vary by type 
and brand. If a connector is required, it should only 
be installed by a qualified technician.

Trailer packages and products available at a dealer.

Ball mount kit.

Hitch harness kit

Trailer hitch kit

2

Trailer brakes

 P. 500

Models with trailer hitch

Trailer hitch

uu

Towing a Trailer

u

Towing Preparation

500

Driving

Trailer brakes

Recommended for any trailer with a total weight of 1,000 lbs (450 kg) or more:
There are two common types of trailer brakes: surge and electric. Surge brakes are 
common for boat trailers, since the brakes will get wet.
If you choose electric brakes, be sure they are electronically actuated. Do not 
attempt to attach trailer brakes to your vehicle’s hydraulic system, as it will lower 
braking effectiveness and create a potential hazard.
The 4-pin gray connector installed in your vehicle has all of the circuits required to 
install most electric trailer brake controllers.

Have a qualified mechanic install your trailer 
brake controller following the trailer brake 
controller manufacturer’s instructions. Failure 
to properly install the trailer brake controller 
may increase the distance it takes for you to 
stop your vehicle when towing a trailer.

The trailer hitch harness is used to install the 
controller for the electric trailer brakes.
Insert the trailer brake fuse into the engine 
compartment fuse box.

2

Engine Compartment Fuse Box

 P. 766

1

Trailer brakes

The 4-pin gray connector is located under the 
dashboard near the driver’s side interior fuse box.

Electric Brake 
(Pink)

Ground (Black)

+B (Green) (20A)

Stop (Violet)

Trailer brake controller 
connector’s terminals:

Electric Brake 
(Brown)

+B (20A) 
(Blue)

Ground 
(Black)

Brake Lights 
(Sky Blue)

Continued

501

uu

Towing a Trailer

u

Towing Preparation

Driving

Trailer light

Trailer lights and equipment must comply with federal, state, province/territory, and 
local regulations. Check with your local trailer sales or rental agency for the 
requirements in the area where you plan to tow.

We recommend that you have a dealer install a Honda wiring harness and converter. 
They are designed for your vehicle.
The lighting and wiring of trailers can vary by type and brand. If a connector is 
required, it should only be installed by a qualified technician.

Hitches

The hitch must be of an approved type and properly bolted to the underbody.

1

Trailer light

The trailer lighting connector is located behind the 
left side panel in the cargo area.
Even if you are planning to use the non-Honda trailer 
lighting harness and converter, ask a dealer for the 
correct connector and pins.

Trailer Brake
(Pink)

+B Trailer Main
(Light Blue)

+B Trailer Charge
(Yellow)

IG2 Option
(Red)

Back Light
(Gray)

Trailer Small Light
(Light Green)
Brake Signal
(Purple)

Pins’ wiring color codes and their purposes:

Right Turn Signal
(Brown)

Left Turn Signal
(Blue)

Models without trailer hitch

502

uu

Towing a Trailer

u

Towing Preparation

Driving

Weight distribution hitches

Your vehicle is designed to tow without the need for a load distributing hitch. If you 
wish to use one, please consult your trailer maker for proper installation and set-up.
Improper set-up could degrade the handling, stability, and braking performance of 
your vehicle.

Safety chains

Always use safety chains when you tow a trailer. Leave enough slack to allow the 
trailer to turn corners easily, but do not allow the chains to drag on the ground.

Sway control

This device can be used if your trailer tends to sway. Your trailer maker can tell you 
what kind of sway control you need and how to install it. Improper installation could 
degrade the handling and stability of your vehicle.

Trailer mirrors

Many states, provinces and territories require special exterior mirrors when towing a 
trailer. Install special mirrors whenever you cannot clearly see behind you, or if the 
trailer creates a blind spot.

503

uu

Towing a Trailer

u

Trailer Stability Assist

Driving

Trailer Stability Assist

Helps stabilize the vehicle and trailer when the trailer severely sways.

How trailer stability assist works

When the vehicle and trailer become unstable while driving, trailer stability assist 
determines the cause. If the trailer oscillation is detected as the cause, and the 
swaying increases, the system applies the brakes or controls engine output to reduce 
vehicle speed.
Both the vehicle and trailer brake lights come on automatically if you brake to 
reduce vehicle speed.

1

Trailer Stability Assist

Trailer stability assist is not a function that prevents 
the vehicle and trailer from swaying. Avoid high 
speeds, abrupt steering, improper trailer load, and 
sudden braking to keep the trailer from swaying. 
When swaying too severely, the system becomes 
ineffective, and you may lose control of your vehicle, 
causing the trailer to roll over or get damaged.

2

Driving Safely with a Trailer

 P. 504

Trailer towing sway is caused by:

Crosswinds

Improper tongue load

Excessive Speed

The VSA

®

 system indicator blinks during the trailer 

stability assist operation.

2

VSA

®

 Operation

 P. 544

504

uu

Towing a Trailer

u

Driving Safely with a Trailer

Driving

Driving Safely with a Trailer

Have the trailer properly serviced and keep it in good condition.

Make sure that all the weights and load in the vehicle and trailer are within limits.

2

Towing Load Limits

 P. 496

Securely attach the hitch, safety chains, and other necessary parts to the trailer.

Securely store all the items in and on the trailer so that they do not shift while 
driving.

Check if the lights and brakes on the trailer are working properly.

Check the pressures of the trailer tires, including the spare.

Turn off the Auto Idle Stop system using the Auto Idle Stop 

OFF

 button. The 

trailer weight can affect your vehicle's brake effectiveness if Auto Idle Stop is 
activated on a hill while towing a trailer.

2

Auto Idle Stop System ON/OFF

 P. 531

Select 

TOW

 mode for optimized transmission operation when towing a trailer.

2

Drive Mode System

 P. 536

Turn off the rear parking sensor system.

2

Parking sensor system on and off

 P. 653

Turn off the Low Speed Braking Control system. It may activate if it detects the 
towed object as an obstacle.

2

System On and Off

 P. 576

Things You Need To Know Before Towing a Trailer

1

Driving Safely with a Trailer

Operating speed when towing a trailer must not 
exceed 62 mph (100 km/h).

Parking
In addition to the normal precautions, place wheel 
chocks at each of the trailer’s tires.

Remember to unhitch the trailer before changing a 
flat tire. Ask the trailer sales or rental agency where 
and how to store the trailer’s spare tire.

Models with Parking Sensor System

Models with Low Speed Braking Control

505

uu

Towing a Trailer

u

Driving Safely with a Trailer

Driving

Drive slower than normal.

Obey posted speed limits for vehicles with trailers.

Use the 

(

D

 position when towing a trailer on level roads.

Turn more slowly and with a wider turning arc than normal.

Allow more time and distance for braking.

Do not brake or turn suddenly.

If the 

Engine temperature near limit. Avoid heavy acceleration and high 

speed.

 message appears on the driver information interface, turn off the climate 

control system and reduce speed.
If the 

Engine temperature too hot. Do not drive. Allow engine to cool.


message appears on the driver information interface, pull to the side of the road 
safely to cool down the engine.

Change the gear position to 

(

S

 position if the transmission shifts frequently.

When retrieving a boat from the water, the sequential shift mode 

(

S

 is 

recommended to utilize the transmissions lower gears.

Towing Speeds and Gears

Turning and Braking

Driving in Hilly Terrain

Retrieving a Boat

1

Towing Speeds and Gears

When towing a fixed-sided trailer (e.g., camper), do 
not exceed 55 mph (88 km/h). 
At higher speeds, the trailer may sway or affect 
vehicle handling.

1

Driving in Hilly Terrain

If the automatic transmission fluid temperature 
exceeds the specified limit, the transmission will also 
automatically up shift, even in the sequential shift 
mode. 

506

uu

Towing a Trailer

u

Towing Behind a Motorhome

Driving

Towing Behind a Motorhome

Your vehicle is not designed to be towed behind a motor home. If your vehicle needs 
to be towed in an emergency, refer to the emergency towing information.

2

Emergency Towing

 P. 773

507

Driving

Off-Highway Driving Guidelines

General Information

Your vehicle has been designed primarily for use on pavement, however, its higher 
ground clearance allows you to occasionally travel on unpaved roads. It is not 
designed for trail-blazing, or other challenging off-highway activities.

If you decide to drive on unpaved roads, you will find that it requires somewhat 
different driving skills and that your vehicle will handle somewhat differently than it 
does on pavement. Pay attention to the precautions and tips in this section, and get 
acquainted with your vehicle before leaving the pavement.

Important Safety Precautions

To avoid loss of control or rollover, be sure to follow all precautions and 
recommendations:

Be sure to store cargo properly and do not exceed your cargo load limits.

2

Maximum Load Limit

 P. 493

Whenever you drive, make sure you and your passengers always wear seat belts.

Keep your speed low, and never go faster than the conditions allow.

It’s up to you to continually assess the situation and drive within the limits.

1

Off-Highway Driving Guidelines

Failure to operate your vehicle correctly might result 
in a crash or a rollover.

2

Important Handling Information

 P. 40

2

Precautions While Driving

 P. 519

Spinning the tires excessively can also damage the 
Intelligent VTM4 (i-VTM4

TM

) system

*

.

3

WARNING

Improperly operating this vehicle on or off-
pavement can cause a crash or rollover in 
which you and your passengers could be 
seriously injured or killed.

Follow all instructions and guidelines in 
this owner’s manual.

Keep your speed low, and don’t drive 
faster than conditions permit.

* Not available on all models

508

uu

Off-Highway Driving Guidelines

u

Avoiding Trouble

Driving

Avoiding Trouble

Check Out Your Vehicle

 before you leave the pavement and make sure that all 

scheduled maintenance has been completed. Pay special attention to the 
condition of the tires, and check the tire pressures.

Remember

 the route you choose presents limits (too steep or bumpy), you have 

limits (driving skill and comfort), and your vehicle has limits (traction, stability, and 
power). Failing to recognize these limits will likely put you and your passengers in 
a hazardous situation.

Accelerating and Braking

 should be done slowly and gradually. Trying to start 

or stop too fast can cause a loss of traction and you could lose control.

Avoiding Obstacles and Debris

 in the road reduces the likelihood of a rollover 

or damage to your suspension or other components.

Driving on Slopes

 increases your risk of a rollover, particularly if you attempt to 

drive across a slope that is too steep. Going straight up or down a slope is usually 
the safest. If you can’t clearly see all conditions or obstacles on a slope, walk it 
before you drive it. If there is any doubt whether you can safely pass, don’t try it. 
Find another route. If you get stuck when climbing, do not try to turn around. 
Back down slowly following the same route you took up the hill.

Crossing a Stream

 - Avoid driving through deep water. If you encounter water 

in your route (a small stream or large puddle, for example), evaluate it carefully 
before going ahead. Make sure it is shallow, flowing slowly, and has firm ground 
underneath. If you are not sure of the depth or the ground, turn around and find 
another route. Driving through deep water can also damage your vehicle. When 
driving in water that reaches around half of the wheel height, water can get into 
the transmission and differential, diluting the lubricant and causing an eventual 
failure. It can also wash the grease out of the wheel bearings.

If You Get Stuck

, carefully go in the direction that you think will get you 

unstuck. Do not spin the tires as this will only make things worse and could 
damage the transmission. If you are unable to free yourself, your vehicle will need 
to be towed. Front tow hook

*

 and trailer hitch

*

 are provided for this purpose.

1

Avoiding Trouble

Spinning the tires can also damage the Intelligent 
VTM4 (i-VTM4

TM

) system.

Front Tow Hook:
The front tow hook is lacated by the underside of the 
front bumper.

Rear Tow Hook:
Trailer Hitch safety chain loops and receiver are rated 
for off-road recovery

Models with trailer hitch

Front Tow 
Hook

Rear Tow Hook

* Not available on all models

509

uu

Off-Highway Driving Guidelines

u

Off-Highway Driving

Continued

Driving

Off-Highway Driving

Your vehicle is designed, built and equipped with systems and features to provide 
you with exceptional driving performance off-highway. However, due to the risks to 
both you and other road users, including the risk of injury or death from loss of 
control or crash, if you engage in off-highway driving, it is important to take 
precautions before doing so.

When driving off-highway, you should always obey the posted speed limits and 
other traffic laws, reduce speed as needed for traffic and environmental conditions, 
and not engage in driving behaviors that may create heightened risks for yourself 
and any other off-highway users who may be present (even if you are unaware of 
them).

Your vehicle’s 

TRAIL or SAND

 mode and other systems are designed for increased 

performance off-highway. Use of these systems may delay the intervention of 
vehicle safety systems designed to minimize the risk of a loss of traction or steering 
control, and can cause your vehicle to handle differently than you might expect or 
would experience under normal driving conditions on pavement. Use of these 
systems will not make up for a lack of appropriate driver experience and skill, and 
will not allow the driver to overcome risks created by:

A lack of proper vehicle maintenance

Less than ideal road conditions and/or unfamiliarity with the driving environment

Other traffic or off-highway users

1

Off-Highway Driving

NOTICE

The vehicle warranty does not cover any damage or 
failure resulting from off-highway driving, crawling, 
competitive climbing of any sort whatsoever, or use 
on an off-road course or similar-type venue. See 
warranty book for details.

2

TRAIL Mode

*

 P. 539

Models with TRAIL and SAND mode

* Not available on all models

510

uu

Off-Highway Driving Guidelines

u

Off-Highway Driving

Driving

Off-highway driving requires special skills, knowledge and experience, as the safety 
risks are greatly increased when the your vehicle is operated at its upper 
performance abilities. As a responsible driver, you should not drive above your skill 
limits or training, even if your vehicle’s performance levels would otherwise allow 
you to do so. If you intend to engage in off-highway driving, Honda strongly 
recommends that:

You first obtain appropriate, professional training

Turn off any devices or systems that may distract you from the driving task

Off-highway driving in general, results in greater wear and tear on the vehicle. If 
your vehicle is not in top condition or if certain components, such as the brakes or 
tires, have undue wear, those components could experience a loss of performance, 
or fail, when engaging in off-highway driving. Therefore, Honda highly recommends 
that you undertake more proactive and frequent maintenance than that required 
under normal use and have your vehicle inspected at an authorized dealer (and all 
necessary repairs or adjustments made) before you engage in any off-highway 
driving. In addition to any required maintenance, there are specific items and 
protocols that you should pay special attention to before, during and after engaging 
in any off-highway driving. Ultimately, the decision whether to engage in off-
highway driving is yours, and depending on your vehicle’s condition and prior usage, 
the items and protocols listed below may or may not be sufficient to ensure a safe 
driving experience.

BEFORE DRIVING

Before off-highway driving, fill the engine oil up to the upper level.

Recommend starting with full fuel tank and not allowing fuel to drop below ¼ 
tank while driving off-highway.

511

uu

Off-Highway Driving Guidelines

u

Off-Highway Driving

Driving

INSPECT YOUR VEHICLE

Driving off-highway can be hard on a vehicle. Before you leave the pavement, be 
sure all scheduled maintenance and service has been carried out, and that you 
have inspected your vehicle and each of its relevant components to make sure 
that it still is in a safe operating condition (example: wheel lug bolt torque, skid 
plate

*

 and/or under body component damage, tire pressure, etc.). We 

recommend repeating the BEFORE DRIVING protocol, and if any item shows 
excessive wear or appears to be in an unusual condition, have it replaced, or 
exercise appropriate caution when driving and see your authorized dealer.

For more information, please contact your authorized dealer, and/or Honda 
Customer Service.

2

Customer Service Information

 P. 791

AFTER DRIVING

After off-highway driving, it is critical to allow your vehicle to properly cool down.

Check underneath your vehicle and each of its relevant components, including 
the skid plates

*

, to make sure that it still is in a safe operating condition (example: 

wheel lug bolt torque, tire pressure, skid plate

*

 damage, dirt and debris 

accumulation on skids, and suspension components, etc.). We recommend 
repeating the BEFORE DRIVING protocol, and if any item shows excessive wear or 
appears to be in an unusual condition, have it replaced, or exercise appropriate 
caution when driving and see your authorized dealer

If operated in dirty conditions, clean brakes of abrasion materials to prevent 
excessive wear or/and unpredictable braking.

* Not available on all models

512

Driving

When Driving

Starting the Engine

1.

Make sure the parking brake is applied.

u

The parking brake and brake system 
indicator (red) comes on for 30 seconds 
when you pull up the electric parking 
brake switch.

2.

Depress the brake pedal.

1

Starting the Engine

Keep your foot firmly on the brake pedal when 
starting the engine.

The engine is harder to start in cold weather and in 
thinner air found at altitudes above 8,000 feet 
(2,400 meters).

When starting the engine in cold weather, turn off all 
electrical accessories such as the lights, climate 
control system and rear defogger in order to reduce 
battery drain.

If you live in a region where winter is extremely cold, 
an engine block heater will improve starting and 
warming of the engine. Consult a dealer for details.

If the exhaust system sounds abnormal or you can 
smell exhaust gas inside the vehicle, have your vehicle 
checked by a dealer. There may be a problem with 
the engine or exhaust system.

Bring the keyless remote close to the 

ENGINE 

START/STOP

 button if the battery in the keyless 

remote is weak.

2

If the Keyless Remote Battery is Weak


P. 752

The engine may not start if the keyless remote is 
subjected to strong radio waves.

Electric Parking Brake Switch

Brake Pedal

Continued

513

uu

When Driving

u

Starting the Engine

Driving

3.

Press the 

ENGINE START/STOP

 button 

without depressing the accelerator pedal.

1

Starting the Engine

Do not hold the 

ENGINE START/STOP

 button to 

start the engine.
If the engine does not start, wait at least 30 seconds 
before starting the engine again.

The immobilizer system protects your vehicle from 
theft.
If an improperly coded device is used, the engine’s 
fuel system is disabled.

2

Immobilizer System

 P. 207

uu

When Driving

u

Starting the Engine

514

Driving

You can remotely start the engine using the keyless remote.

To start the engine

Press the 

 button, then press and hold 

the  

button.

u

Some exterior lights flash once.

If the engine starts successfully, some exterior 
lights flash six times.

Remote Engine Start

*

1

Remote Engine Start

*

The remote engine start may violate local laws.
Before using the remote engine start, check your 
local laws.

If there are buildings and obstacles between your 
vehicle and the keyless remote, the range will be 
reduced.
This distance may vary by external electrical 
interference.

3

WARNING

Carbon monoxide gas is toxic and can 
rapidly accumulate in closed or even partly 
enclosed areas.

Breathing it can cause unconsciousness and 
even kill you.

Never use the remote engine starter with 
the vehicle parked in a garage or other 
areas with limited ventilation.

LED: Blinks when any 
button is pressed.

* Not available on all models

515

uu

When Driving

u

Starting the Engine

Continued

Driving

If the engine does not start, exterior lights will 
not flash.

u

Go within the range, and try again.

uu

When Driving

u

Starting the Engine

516

Driving

When started remotely, the engine automatically shuts off after 10 minutes of idling 
and/or the brake pedal and 

ENGINE START/STOP

 button have not been pressed 

simultaneously.
To extend the run time for another 10 minutes during the first run, press the 


button, then press and hold the 

 button.

u

Some exterior lights flash six times if a 10-minute extension request was 
transmitted successfully.

1

Remote Engine Start

*

The engine may not start by the remote engine start 
if:

You have disabled a remote engine start setting.

2

Settings

*

 P. 140

2

Customized Features

 P. 426

The power mode is not in VEHICLE OFF.

The transmission is in a position other than 

(

P

.

The hood is open, or any door or the tailgate is 
unlocked.

You have already used the keyless remote twice to 
start the engine.

Another registered keyless remote is in the vehicle.

There is any antenna failure.

The door is unlocked with the built-in key.

The engine oil pressure is low.

The engine coolant temperature is extremely high.

The telematics unit malfunctions.

*

The security system alarm is not set.

The 12-volt battery charge is too low.

* Not available on all models


Content      ..     13      14      15      16     ..