Honda Pilot (2022 year). Manual in english - page 30
 

  Index      Manuals     Honda Pilot (2022 year). Manual in english


Search            copyright infringement  


Content      ..     28      29      30      31     ..


Honda Pilot (2022 year). Manual in english - page 30


478

uu

When Driving

u

Vehicle Stability Assist

TM

 (VSA

®

), aka Electronic Stability Control (ESC), System

Driving

Vehicle Stability Assist

TM

 (VSA

®

), aka Electronic 

Stability Control (ESC), System

VSA

®

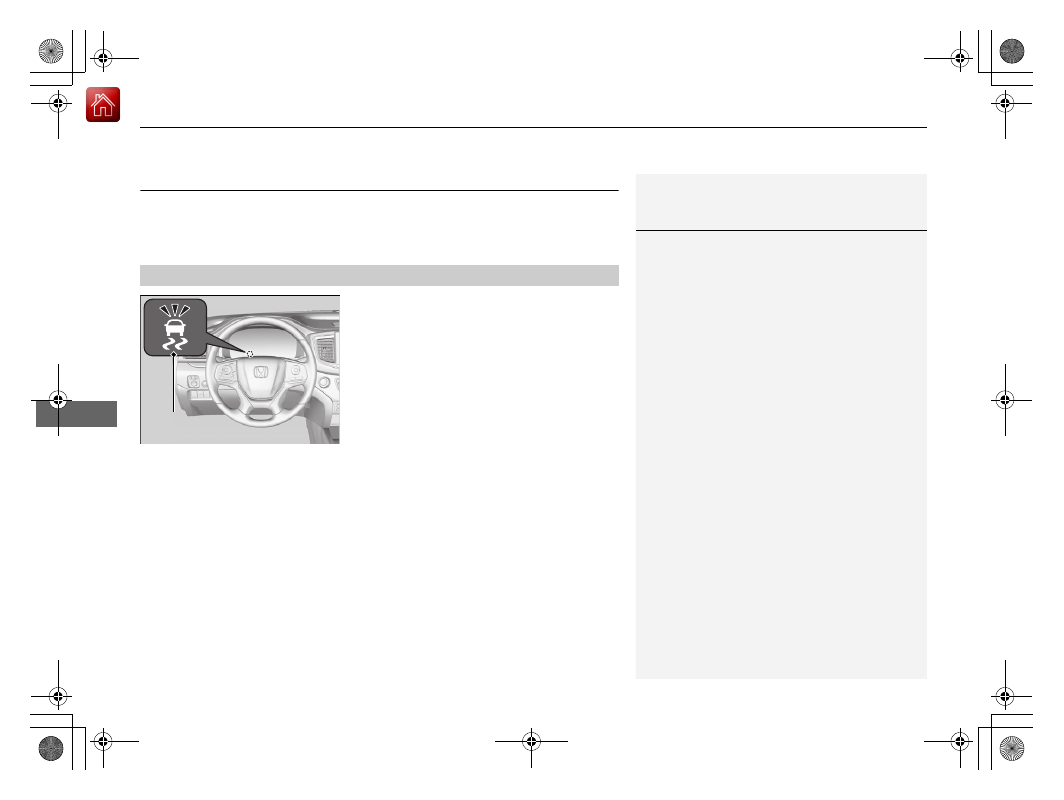
 helps to stabilize the vehicle during cornering if the vehicle turns more or less 

than what was intended. It also assists in maintaining traction on slippery surfaces. 
It does so by regulating engine output and selectively applying the brakes.

When VSA

®

 activates, you may notice that the 

engine does not respond to the accelerator. 
You may also notice some noise from the 
hydraulic brake system. You will also see the 
indicator blink.

VSA

®

 Operation

1

Vehicle Stability Assist

TM

 (VSA

®

), aka Electronic Stability Control 

(ESC), System

The VSA

®

 may not function properly if tire type and 

size are mixed. Make sure to use the same size and 
type of tire, and the air pressures as specified.

When the VSA

®

 system indicator comes on and stays 

on while driving, there may be a problem with the 
system. While this may not interfere with normal 
driving, have your vehicle checked by a dealer 
immediately.

VSA

®

 cannot enhance stability in all driving situations 

and does not control the entire braking system. You 
still need to drive and corner at speeds appropriate 
for the conditions and always leave a sufficient 
margin of safety.

The main function of the VSA

®

 system is generally 

known as Electronic Stability Control (ESC). The 
system also includes a traction control function.

VSA

®

 System 

Indicator

479

uu

When Driving

u

Vehicle Stability Assist

TM

 (VSA

®

), aka Electronic Stability Control (ESC), System

Driving

This button is on the driver side control panel. 
To partially disable VSA

®

 functionality/

features, press and hold it until you hear a 
beep.

The traction control stops fully functioning, 
allowing the wheels to spin more freely at low 
speed. The VSA

®

 OFF indicator will also come 

on and a message on the driver information 
interface informs you that the mode is 
changed.

Traction control mode cannot be changed 
during Mud or Sand modes. If you are driving 
on mud or sand, Mud or Sand Intelligent 
Traction Management modes can also be 
used to free a stuck vehicle. On other road 
surfaces, change to Normal or Snow mode, 
then press and hold the 

 (VSA

®

 OFF) button.

To restore VSA

®

 functionality/features, press 

the  

(VSA

®

 OFF) button until you hear a 

beep. 

VSA

®

 is turned on every time you start the 

engine, even if you turned it off the last time 
you drove the vehicle.

VSA

®

 On and Off

1

Vehicle Stability Assist

TM

 (VSA

®

), aka Electronic Stability Control 

(ESC), System

With the 

 button pressed, your vehicle will have 

normal braking and cornering ability, but VSA

®


traction and stability enhancement becomes less 
effective.

In certain unusual conditions when your vehicle gets 
stuck in shallow mud or fresh snow, it may be easier 
to free it with the VSA

®

 temporarily switched off.

When the 

 button is pressed, the traction control 

function becomes less effective. This allows for the 
wheels to spin more freely at low speed. You should 
only attempt to free your vehicle with the VSA

®

 off if 

you are not able to free it when the VSA

®

 is on.

Immediately after freeing your vehicle, be sure to 
switch VSA

®

 on again. We do not recommend driving 

your vehicle with the VSA

®

 system switched off.

You may hear a motor sound coming from the 
engine compartment while system checks are being 
performed immediately after starting the engine or 
while driving. This is normal.

VSA

®

 OFF Indicator

AWD models

480

uu

When Driving

u

Agile Handling Assist

Driving

Agile Handling Assist

Lightly brakes each of the front and rear wheels, as needed, when you turn the 
steering wheel, and helps support the vehicle’s stability and performance during 
cornering.

1

Agile Handling Assist

The agile handling assist cannot enhance stability in 
all driving situations. You still need to drive and 
corner at speeds appropriate for the conditions and 
always leave a sufficient margin of safety.

When the VSA

®

 system indicator comes on and stays 

on while driving, the agile handling assist does not 
activate.

You may hear a sound coming from the engine 
compartment while the agile handling assist is 
activated. This is normal.

481

uu

When Driving

u

Blind spot information System

*

Continued

Driving

Blind spot information System

*

Is designed to detect vehicles in specified alert zones adjacent to your vehicle, 
particularly in harder to see areas commonly known as “blind spots”.

When the system detects vehicles approaching from behind in adjacent lanes, the 
appropriate indicator comes on for a few seconds, providing assistance when you 
change lanes.

How the system works

1

Blind spot information System

*

Important Safety Reminder

Like all assistance systems, blind spot information 
system has limitations. Overreliance on blind spot 
information system may result in a collision.

The system is for your convenience only. Even if an 
object is within the alert zone, the following 
situations may occur.

The blind spot information system alert indicator 
may not come on due to obstruction (splashes, 
etc.) even without the 

Blind Spot Info Not 

Available

 driver information interface appearing.

The blind spot information system alert indicator 
may come on even with the message appearing.

3

WARNING

Failure to visually confirm that it is safe to 
change lanes before doing so may result in 
a crash and serious injury or death.
Do not rely only on the blind spot 
information system when changing lanes.

Always look in your mirrors, to either side 
of your vehicle, and behind you for other 
vehicles before changing lanes.

Alert zone range

A: Approx. 1.6 ft. (0.5 m)
B: Approx. 10 ft. (3 m)
C: Approx. 10 ft. (3 m)

Radar Sensors:
underneath the 
rear bumper 
corners

Alert Zone

A

B

C

The transmission is in 

(

D

.

Your vehicle speed is 
between 20 mph (32 km/h) 
and 100 mph (160 km/h)

* Not available on all models

uu

When Driving

u

Blind spot information System

*

482

Driving

When the system detects a vehicle

Blind spot information System Alert Indicator:
Located near the pillar on both sides.
Comes on when:

A vehicle enters the alert zone from behind 
to overtake you with a speed difference of 
no more than 31 mph (50 km/h) from your 
vehicle.

You pass a vehicle with a speed difference 
of no more than 12 mph (20 km/h).

Blinks and a beeper sounds when:
You move the turn signal lever in the direction 
of the detected vehicle. The beeper sounds 
three times.

1

Blind spot information System

*

The blind spot information system alert indicator may 
not come on under the following conditions:

A vehicle does not stay in the alert zone for more 
than two seconds.

A vehicle is parked in a side lane.

The speed difference between your vehicle and the 
vehicle you are passing is greater than 6 mph 
(10 km/h).

An object not detected by the radar sensors 
approaches or passes your vehicle.

A vehicle running in the adjacent lane is a 
motorcycle or other small vehicle.

The system does not operate when in 

(

R

.

You can turn off the audible alert, or all the blind spot 
information system alert using the audio/information 
screen.

2

Customized Features

 P. 385

Turn the system off when towing a trailer.
The system may not work properly for the following 
reasons:

The added mass tilts the vehicle and changes the 
radar coverage.

The trailer itself can be detected by the radar 
sensors, causing the blind spot information system 
alert indicators to come on.

Comes On

Blinks

* Not available on all models

483

uu

When Driving

u

Blind spot information System

*

Driving

1

Blind spot information System

*

Blind spot information system may be adversely 
affected when:

Objects (guard rails, poles, trees, etc.) are detected.

An object that does not reflect radio waves well, 
such as a motorcycle, is in the alert zone.

Driving on a curved road.

A vehicle is moving from a far lane to the adjacent 
lane.

The system picks up external electrical interference.

The rear bumper or the sensors have been improperly 
repaired or the rear bumper has been deformed.

The orientation of the sensors has been changed.

In bad weather (Heavy rain, snow, and fog).

For a proper blind spot information system operation:

Always keep the rear bumper corner area clean.

Do not cover the rear bumper corner area with 
labels or stickers of any kind. 

Take your vehicle to a dealer if you need the rear 
bumper corner area or the radar sensors to be repaired, 
or the rear bumper corner area is strongly impacted.

* Not available on all models

484

uu

When Driving

u

LaneWatch

TM

*

Driving

LaneWatch

TM

*

LaneWatch is an assistance system that allows you to check the passenger side rear 
areas displayed on the audio/information screen when the turn signal is activated to 
the passenger’s side. A camera in the passenger side door mirror monitors these 
areas and allows you to check for vehicles, in addition to your visual check and use 
of the passenger door mirror. You can also keep the system on for your convenience 
while driving.

1

LaneWatch

TM

*

Important Safety Reminder

Like all assistance systems, LaneWatch has 
limitations. Overreliance on LaneWatch may result in 
a collision.

The LaneWatch function can be affected by weather, 
lighting (including headlights and low sun angle), 
ambient darkness, camera condition, and loading.

The LaneWatch may not provide the intended display 
of traffic to the side and rear under the following 
conditions:

Your vehicle’s suspension has been altered, 
changing the height of the vehicle. 

Your tires are over or under inflated.

Your tires or wheels are of varied size or construction.

3

WARNING

Failure to visually confirm that it is safe to 
change lanes before doing so may result in 
a crash and serious injury or death.

Do not rely only on LaneWatch while 
driving.

Always look in your mirrors, to either side 
of your vehicle, and behind you for other 
vehicles before changing lanes.

Camera

Audio/Information Screen

Move the turn signal 
lever to the passenger 
side.

Press the LaneWatch 
button.

Pull the turn signal 
lever back.

Press the LaneWatch 
button again.

The passenger side view 
display appears on the 
audio/information screen.

The system activates when you:

The system deactivates when you:

* Not available on all models

485

uu

When Driving

u

LaneWatch

TM

*

Driving

Customizing the LaneWatch settings

You can customize the following items using the audio/information screen.

Show with Turn Signal

: Selects whether LaneWatch monitor comes on when 

you operate the turn signal lever.

Show Reference Line

: Selects whether the reference lines appear on the 

LaneWatch monitor.

Display

: Adjusts display settings.

2

Customized Features

 P. 385

Reference Lines

Three lines that appear on the screen can give 
an idea of how far the vehicles or objects on 
the screen are from your vehicle, respectively. 
If an object is near line 1 (in red), it indicates 
that it is close to your vehicle whereas an 
object near line 3 is farther away.

1

LaneWatch

TM

*

The LaneWatch camera view is restricted. Its unique 
lens makes objects on the screen slightly look 
different from what they are.

LaneWatch display does not come on when the gear 
position is in 

(

R

.

For proper LaneWatch operation:

The camera is located in the passenger side door 
mirror. Always keep this area clean. If the camera 
lens is covered with dirt or moisture, use a soft, 
moist cloth to keep the lens clean and free of debris.

Do not cover the camera lens with labels or stickers 
of any kind.

Do not touch the camera lens.

1

Reference Lines

The area around the reference line 1 (red) is very close to 
your vehicle. As always, make sure to visually confirm 
the safety of a lane change before changing lanes.

The distance between your vehicle and lines 1, 2 and 
3 on the screen vary depending on road conditions 
and vehicle loading. For example, the reference lines 
on the screen may seem to appear closer than the 
actual distances when the rear of your vehicle is more 
heavily loaded.

Consult a dealer if:

The passenger side door mirror, or area around it is 
severely impacted, resulting in changing the 
camera angle.

The LaneWatch display does not come on at all.

2

3

1

* Not available on all models

486

uu

When Driving

u

Intelligent Variable Torque Management (i-VTM4

TM

) AWD System

*

Driving

Intelligent Variable Torque Management (i-VTM4

TM

) AWD System

*

The intelligent variable torque management (i-VTM4

TM

) AWD system is a full time all 

wheel drive system that automatically controls and transfers varying amount of 
engine torque to all wheels independently according to the driving conditions.

You still need to exercise the same care when accelerating, steering, and braking 
that you would in a two wheel drive vehicle.

Avoid continuously driving on slippery surfaces where a wheel is likely to spin out, 
and do not drive if the 

AWD

 indicator starts blinking. Driving continuously under 

such conditions can damage the system's torque distribution unit.

If the 

AWD

 indicator blinks while driving, it indicates the differential temperature is 

too high. If this happens, pull to the side of the road when it is safe, shift to park, an 
idle the engine idle until the indicator goes out. If the indicator does not go out, take 
your vehicle to a dealer to have it checked.

1

Intelligent Variable Torque Management (i-VTM4

TM

) AWD System

*

NOTICE

Do not continuously spin the front tires of your 
vehicle. Continuously spinning the front tires can 
cause transmission or rear differential damage.

The intelligent variable torque management 
(i-VTM4

TM

) AWD system may not function properly if 

tire type and size are mixed. Make sure to use the 
same size and type of tire, and the air pressures as 
specified.

2

Tire and Wheel Replacement

 P. 594

* Not available on all models

487

uu

When Driving

u

Tire Pressure Monitoring System (TPMS) with Tire Fill Assist

Continued

Driving

Tire Pressure Monitoring System (TPMS) with Tire 
Fill Assist

Monitors the tire pressure while you are 
driving. If your vehicle’s tire pressure becomes 
significantly low, the Low Tire Pressure/TPMS 
indicator comes on and a message appears on 
the driver information interface.

1

Tire Pressure Monitoring System (TPMS) with Tire Fill Assist

Conditions such as low ambient temperature and 
altitude change directly affect tire pressure and can 
trigger the Low Tire Pressure/TPMS indicator to come 
on.

2

If the Low Tire Pressure/Tire Pressure 
Monitoring System (TPMS) Indicator 
Comes On or Blinks

 P. 632

Tire pressure checked and inflated in:

Warm weather can become under-inflated in 
colder weather.

Cold weather can become overinflated in warmer 
weather.

The Low Tire Pressure/TPMS indicator will not come 
on as a result of overinflation.

The TPMS audibly and visually informs you of 
changes in tire pressure of the individual tire that you 
are adjusting using audible and visual indications.

If a change in tire pressure has been significant, the 
system beeps and the hazard lights flash continuously 
for five seconds when the specified tire pressure is 
reached. Stop filling the tire.

Low Tire Pressure/
TPMS Indicator

uu

When Driving

u

Tire Pressure Monitoring System (TPMS) with Tire Fill Assist

488

Driving

To select the tire pressure monitor, please follow 
the following steps using the buttons on the 
steering wheel.

1.

Set the power mode to ON.

2.

Press the 

 (home) button.

3.

Press the 

/

 button repeatedly until 

Maintenance

 appears.

4.

Press the 

ENTER

 button and select 

Tire 

Pressure

 by pressing the 

/

 button.

5.

Press the 

ENTER

 button and the tire 

pressure appears on the driver information 
interface.

The pressure for each tire is displayed in psi.

Tire Pressures Low

 is displayed when a tire 

has significantly low pressure. The specific tire 
is displayed on the screen.

Tire Pressure Monitor

1

Tire Pressure Monitor

The pressure displayed on the driver information 
interface can be slightly different from the actual 
pressure as measured by a gauge. If there is a 
significant difference between the two values, or if 
the Low Tire Pressure/TPMS indicator and the 
message on the driver information interface do not 
go off after you have inflated the tire to the specified 
pressure, have the system checked by a dealer.

Tire Pressure Monitor Problem

 may appear if you 

drive with the compact spare tire, or there is a 
problem with the TPMS.

3 4

3 4

489

uu

When Driving

u

Tire Pressure Monitoring System (TPMS) - Required Federal Explanation

Continued

Driving

Tire Pressure Monitoring System (TPMS) - Required 
Federal Explanation

Each tire, including the spare (if provided), should be checked 
monthly when cold and inflated to the inflation pressure 
recommended by the vehicle manufacturer on the vehicle placard 
or tire inflation pressure label.

(If your vehicle has tires of a different size than the size indicated 
on the vehicle placard or tire inflation pressure label, you should 
determine the proper tire inflation pressure for those tires.)

As an added safety feature, your vehicle has been equipped with 
a tire pressure monitoring system (TPMS) that illuminates a low 
tire pressure telltale 

when one or more of your tires is significantly under-inflated.

Accordingly, when the low tire pressure telltale illuminates, you 
should stop and check your tires as soon as possible, and inflate 
them to the proper pressure.

Driving on a significantly under-inflated tire causes the tire to 
overheat and can lead to tire failure. Under-inflation also reduces 
fuel efficiency and tire tread life, and may affect the vehicle’s 
handling and stopping ability.

490

uu

When Driving

u

Tire Pressure Monitoring System (TPMS) - Required Federal Explanation

Driving

Please note that the TPMS is not a substitute for proper tire 
maintenance, and it is the driver’s responsibility to maintain 
correct tire pressure, even if under-inflation has not reached the 
level to trigger illumination of the TPMS low tire pressure telltale.

Your vehicle has also been equipped with a TPMS malfunction 
indicator to indicate when the system is not operating properly.
The TPMS malfunction indicator is combined with the low tire 
pressure telltale. When the system detects a malfunction, the 
telltale will flash for approximately one minute and then remain 
continuously illuminated. This sequence will continue upon 
subsequent vehicle start-ups as long as the malfunction exists.

When the malfunction indicator is illuminated, the system may 
not be able to detect or signal low tire pressure as intended.

TPMS malfunctions may occur for a variety of reasons, including 
the installation of replacement or alternate tires or wheels on the 
vehicle that prevent the TPMS from functioning properly.

Always check the TPMS malfunction telltale after replacing one or 
more tires or wheels on your vehicle to ensure that the 
replacement or alternate tires and wheels allow the TPMS to 
continue to function properly.

491

Continued

Driving

Honda Sensing

®

Honda Sensing

®

 is a driver support system which employs the use of two distinctly 

different kinds of sensors: a radar sensor located behind the emblem and a front 
sensor camera mounted to the interior side of the windshield, behind the rearview 
mirror.

Honda Sensing

®

 has following functions.

The functions which do not require switch operations to activate

Collision Mitigation Braking System

TM

 (CMBS)

TM


2

 P. 494

Road Departure Mitigation (RDM) System 

2

 P. 528

The functions which require switch operations to activate

Adaptive Cruise Control (ACC) 

2

 P. 506

Lane Keeping Assist System (LKAS) 

2

 P. 519

492

uu

Honda Sensing

®

u

Driving

MAIN Button

Press to activate standby mode for ACC and 
LKAS. Or press to cancel these systems.

LKAS Button

Press to activate or cancel the LKAS.

RES/+/−/SET Button

Press 

RES/+

 to resume the ACC or increase 

the vehicle speed.
Press 

−/SET

 to set the ACC or decrease the 

vehicle speed.

Interval Button

Press the   (interval) button to change the 
ACC following-interval.

CANCEL Button

Press to cancel ACC.

Operation Switches for the ACC/LKAS

MAIN

 button

Interval 
Button

CANCEL


Button

LKAS Button

RES/+

 Button

−/SET

 Button

493

uu

Honda Sensing

®

u

Driving

You can see the current state of ACC and 
LKAS.

a

Indicates that ACC and LKAS are ready to 
be activated.

b

Indicates that LKAS is activated and 
whether or not traffic lane lines are 
detected.

c

Indicates whether or not a vehicle is 
detected ahead.

d

Shows the set vehicle speed.

e

Shows the set vehicle interval.

Multi-Information Display Content


Content      ..     28      29      30      31     ..