Honda Passport (2022 year). Manual in english - page 23
 

  Index      Manuals     Honda Passport (2022 year). Manual in english


Search            copyright infringement  


Content      ..     21      22      23      24     ..


Honda Passport (2022 year). Manual in english - page 23


Continued

365

uu

Bluetooth

®

 HandsFreeLink

®

u

HFL Menus

Features

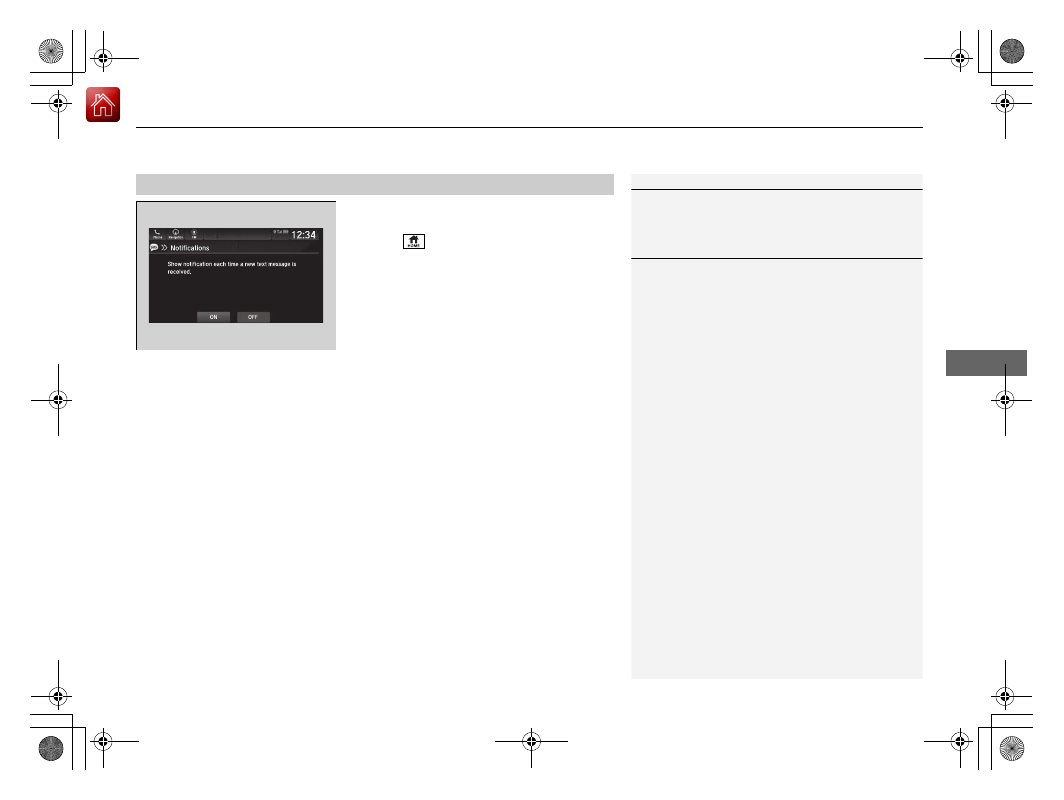
To turn on or off the text message 
notice

1.

Select .

2.

Select 

Messages

.

3.

Select 

Settings

.

4.

Select 

Notifications

.

5.

Select 

ON

 or 

OFF

.

To Set Up Text Message Options

1

To Set Up Text Message Options

To use the text message function, it may be necessary 
to set up on your phone.

1

To turn on or off the text message notice

ON: 

A pop-up notification comes on every time you 

receive a new message.

OFF: 

The message you receive is stored in the system 

without notification.

uu

Bluetooth

®

 HandsFreeLink

®

u

HFL Menus

366

Features

HFL can display newly received text messages as well as the last 20 messages 
received on a linked cell phone. Each received message can be read aloud and 
replied to using a fixed common phrase.

1.

A pop-up appears and notifies you of a new 
text message.

2.

Select 

Open

 to display the message.

u

The text message is displayed.

3.

Select 

Play

 to listen to the message. To 

discontinue the message read-out, select 

Stop

.

Receiving a Text Message

1

Receiving a Text Message

The system does not display any received messages 
while you are driving. You can only hear them read 
aloud.

The system can only receive messages that are sent as 
text (SMS) messages. The message sent using the 
data services will not be displayed in the list.

With some phones, you may be able to display up to 
20 of the last text messages received.

State or local laws may limit your use of the HFL text 
message feature. Only use the text message feature 
when conditions allow you to do so safely.

Continued

367

uu

Bluetooth

®

 HandsFreeLink

®

u

HFL Menus

Features

You can select one from the 

Bluetooth

®

 device list to be active and receive 

notifications.

1.

Select .

2.

Select 

Messages

.

3.

Select 

Settings

.

4.

Select 

Change Connected Phone

.

5.

Change a desired phone.

2

To change the currently paired phone


P. 356

Selecting a Phone

1

Selecting a Phone

You can only receive notifications from one phone at 
a time.

uu

Bluetooth

®

 HandsFreeLink

®

u

HFL Menus

368

Features

1.

Select .

2.

Select 

Messages

.

u

Select a phone if necessary.

3.

Select a message.

u

The text message is displayed.

Displaying Messages

1

Displaying Messages

The 

 (blue) icon appears next to an unread 

message.

If you delete a message on the phone, the message 
will also be deleted from the system. If you send a 
message from the system, the message goes to your 
phone’s outbox.

To see the previous or next message, select 


Prev


or 

Next


 on the message screen.

Message List

Text Message

Continued

369

uu

Bluetooth

®

 HandsFreeLink

®

u

HFL Menus

Features

Read or Stop reading a message

1.

Go to the text message screen.

2.

Select 

Play

.

u

The system starts reading the message 
aloud.

3.

Select 

Pause

 to stop reading.

Select 

Play

 again to start reading the 

message.

Reply to a message

1.

Go to the text message screen.

2.

Select 

Reply

.

3.

Select the reply message.

u

The pop-up menu appears on the screen.

4.

Select 

Send

 to send the message.

u

Message sent

 appears on the screen 

when the reply message was successfully 
sent.

1

Reply to a message

The available fixed reply messages are as follows:

Talk to you later, I’m driving.

I’m on my way.

I’m running late.

OK

Yes

No

You can add a reply message by selecting 

+ Create 

New Message

.

2

To edit a reply message

 P. 370

Only certain phones receive and send messages when 
paired and connected. For a list of compatible 
phones:

U.S.: Visit 

automobiles.honda.com/handsfreelink/

or call 1-888-528-7876.

Canada: For more information on smartphone 
compatibility, call 1-855-490-7351.

uu

Bluetooth

®

 HandsFreeLink

®

u

HFL Menus

370

Features

To edit a reply message

1.

Select .

2.

Select 

Messages

.

3.

Select 

Settings

.

4.

Select 

Edit System Replies

.

5.

Select the reply message you want to edit 
or 

+ Create New Message

.

u

The on-screen keyboard screen is 
displayed.

6.

Enter a reply message, and then select 

Save

.

To delete a reply message

1.

Select .

2.

Select 

Messages

.

3.

Select 

Settings

.

4.

Select 

Delete System Replies

.

5.

Select 

 on the reply message you want to 

delete.

u

The pop-up menu appears on the screen.

6.

Select 

Delete

.

1

To edit a reply message

You can change the order of reply messages by 
selecting 

Reorder

.

371

uu

Bluetooth

®

 HandsFreeLink

®

u

HFL Menus

Continued

Features

Making a call to a sender

1.

Go to the text message screen.

2.

Select 

Call

.

uu

Bluetooth

®

 HandsFreeLink

®

u

HFL Menus

372

Features

Automatic collision notification

If your vehicle’s airbags deploy or if the unit 
detects that the vehicle is severely impacted, 
your vehicle automatically will attempt to 
connect to the HondaLink

®

 operator. If 

connected, information about your vehicle, its 
location, and its condition can be sent to the 
operator

*1

; you also can speak to the operator 

when connected. 

IMPORTANT:

 For vehicles equipped with HondaLink

®

 Assist, owner activation 

constitutes authorization for Honda to collect information from your vehicle needed 
to provide the service, and agreement to the Terms of Use at 

www.hondalink.com/TermsAndConditions

. In a crash, HondaLink

®

 Assist will 

attempt to notify emergency services but NEITHER HONDA NOR ITS SERVICE 
PROVIDERS GUARANTEE THAT SUCH NOTIFICATION WILL OCCUR.

Honda reserves the right to terminate HondaLink

®

 Assist services at any time or for 

any reason, and in the future may not be able to provide services due to changes in, 
or obsolescence of, technology integral to the service or changes in governmental 
regulation.

*1: Depending on your phone and adequate cellular coverage, your vehicle’s location may not 
be sent to the operator.

In Case of Emergency

1

In Case of Emergency

Your vehicle may not be able to connect to the 
operator if the battery level is low, the line is 
disconnected, or you do not have adequate cellular 
coverage.

You cannot use this emergency service when:

You travel outside the HondaLink

®

 service coverage 

areas.

There is a problem with the connecting devices, 
such as the microphones, speakers, or the unit 
itself.

You cannot operate other phone-related functions 
using the screen while talking to the operator.
Select 

Hang Up

 to terminate the connection to your 

vehicle.

1

Automatic collision notification

If the unit fails to connect to the operator, it 
repeatedly tries until it succeeds.

Continued

373

uu

Bluetooth

®

 HandsFreeLink

®

u

HFL Menus

Features

To enable notification

1.

Go to the phone settings screen.

2

Phone settings screen

 P. 352

2.

Select 

HondaLink Assist

.

3.

Select 

ON

 or 

OFF

.

1

To enable notification

Setting options:

ON

: Notification is available.

OFF

: Disable the feature.

uu

Bluetooth

®

 HandsFreeLink

®

u

HFL Menus

374

Features

Manual operator connection

*

If you need to talk to the HondaLink

®

 operator 

in a situation where no airbag has deployed, 
you can manually connect to them by pressing 
the 

ASSIST

 button with the power mode in 

ACCESSORY or ON.

1.

Open the cover attached to the ceiling 
console.

2.

Press the 

ASSIST

 button.

u

You are connected to the HondaLink

®


operator.

1

Manual operator connection

*

Do not press the button while driving. When you 
need to contact the operator, park the vehicle in a 
safe place.

If the unit fails to connect to the operator, it 
automatically cancels the action after three minutes.

If necessary, the cover can be broken to access the 

ASSIST

 button.

ASSIST

 Button

* Not available on all models

375

Driving

This chapter discusses driving and refueling.

Before Driving

................................... 376

Towing a Trailer

................................ 382

Off-Highway Driving Guidelines

..... 392

When Driving

Starting the Engine .......................... 394
Automatic Transmission ................... 402
Shifting ............................................ 403
Auto Idle Stop.................................. 411
ECON Mode .................................... 417
Intelligent Traction Management...... 418

Vehicle Stability Assist

TM

 (VSA

®

), aka Electronic 

Stability Control (ESC), System............... 420

Agile Handling Assist ....................... 422
Blind spot information System

*

........ 423

Intelligent Variable Torque Management (i-

VTM4

TM

) AWD System

*

.................. 426

Tire Pressure Monitoring System (TPMS) 

with Tire Fill Assist.......................... 427

Tire Pressure Monitoring System (TPMS) - 

Required Federal Explanation ......... 429

Honda Sensing

®

................................ 431

Collision Mitigation Braking System

TM


(CMBS

TM

) ....................................... 434

Adaptive Cruise Control (ACC)......... 446
Lane Keeping Assist System (LKAS) .. 459

Road Departure Mitigation (RDM) 

System ....................................... 468

Front Sensor Camera ....................... 473
Radar Sensor.................................... 475

Braking

Brake System ................................... 476
Anti-lock Brake System (ABS) ........... 478
Brake Assist System ......................... 479

Parking Your Vehicle

When Stopped ................................ 480
Parking Sensor System

*

................... 482

Cross Traffic Monitor

*

..................... 487

Multi-View Rear Camera

.................. 491

Refueling

Fuel Information .............................. 493
How to Refuel ................................. 494

Fuel Economy and CO

2

 Emissions

Improving Fuel Economy and Reducing 

CO

2

 Emissions................................ 496

* Not available on all models

376

Driving

Before Driving

Driving Preparation

Check the following items before you start driving.

Make sure there are no obstructions on the windows, door mirrors, exterior 
lights, or other parts of the vehicle.

u

Remove any frost, snow, or ice.

u

Remove any snow on the roof, as this can slip down and obstruct your field of 
vision while driving. If frozen solid, remove ice once it has softened.

u

When removing ice from around the wheels, be sure not to damage the wheel 
or wheel components.

Make sure the hood is securely closed.

u

If the hood opens while driving, your front view will be blocked.

Make sure the tires are in good condition.

u

Check air pressures, and check for damage and excessive wear.

2

Checking and Maintaining Tires

 P. 528

Make sure there are no people or objects behind or around the vehicle.

u

There are blind spots from the inside.

Exterior Checks

1

Exterior Checks

NOTICE

When doors are frozen shut, use warm water around 
the door edges to melt any ice. Do not try to force 
them open, as this can damage the rubber trim 
around the doors. When done, wipe dry to avoid 
further freezing.

Do not pour warm water into the key cylinder.
You will be unable to insert the key if the water 
freezes in the hole.

Heat from the engine and exhaust can ignite 
flammable materials left under the hood, causing a 
fire. If you’ve parked your vehicle for an extended 
period, inspect and remove any debris that may have 
collected, such as dried grass and leaves that have 
fallen or have been carried in for use as a nest by a 
small animal.  Also, check under the hood for leftover 
flammable materials after you or someone else has 
performed maintenance on your vehicle.

Continued

377

uu

Before Driving

u

Driving Preparation

Driving

Store or secure all items on board properly.

u

Carrying too much cargo, or improperly storing it, can affect your vehicle’s 
handling, stability, stopping distance, and tires, and make it unsafe.

2

Maximum Load Limit

 P. 379

Do not pile items higher than the seat height.

u

They can block your view and may be thrown forward in the event of sudden 
braking.

Do not place anything in the front seat footwells. Make sure to secure the floor 
mat.

u

An object or unsecured floor mat can interfere with your brake and accelerator 
pedal operation while driving.

If you have any animals on board, do not let them move around in the vehicle.

u

They may interfere with driving and a crash could occur.

Securely close and lock all doors and the tailgate.

2

Locking/Unlocking the Doors from the Inside

 P. 137

Adjust your seating position properly.

u

Adjust the head restraint, too.

2

Adjusting the Seats

 P. 181

2

Adjusting the Front and Rear Outer Seat Head Restraint Positions

 P. 188

Adjust the mirrors and steering wheel properly.

u

Adjust them while sitting in the proper driving position.

2

Adjusting the Steering Wheel

 P. 178

2

Adjusting the Mirrors

 P. 179

Interior Checks

1

Interior Checks

The headlight aim is set by the factory, and does not 
need to be adjusted. However, if you regularly carry 
heavy items in the cargo area or tow a trailer, have 
the aiming readjusted at a dealer or by a qualified 
technician.

378

uu

Before Driving

u

Driving Preparation

Driving

Be sure items placed on the floor behind the front seats cannot roll under the 
seats.

u

They can interfere with the driver’s ability to operate the pedals, the operation 
of the seats, or the operation of the sensors under the seats.

Everyone in the vehicle must fasten their seat belt.

2

Fastening a Seat Belt

 P. 42

Make sure that the indicators in the instrument panel come on when you start the 
vehicle, and go off soon after.

u

Always have a dealer check the vehicle if a problem is indicated.

2

Indicators

 P. 80

379

uu

Before Driving

u

Maximum Load Limit

Continued

Driving

Maximum Load Limit

The maximum load for your vehicle is 948 lbs (430 kg).

See the Tire and Loading Information label attached to the driver’s 
doorjamb.

This figure includes the total weight of all occupants, cargo, and 
accessories, and the tongue load if you are towing a trailer.

Steps for Determining Correct Load Limit -

(1)

Locate the statement “The combined weight of occupants and 
cargo should never exceed XXX kg or XXX lbs.” on your 
vehicle’s placard.

(2)

Determine the combined weight of the driver and passengers 
that will be riding in your vehicle.

(3)

Subtract the combined weight of the driver and passengers 
from XXX kg or XXX lbs.

1

Maximum Load Limit

Gross Vehicle Weight Rating (GVWR):
The maximum allowable weight of the vehicle, all 
occupants, all accessories, all cargo, and the tongue 
load.

2

Specifications

 P. 582

Gross Axle Weight Rating (GAWR):
The maximum allowable weight of the vehicle axle.

2

Specifications

 P. 582

3

WARNING

Overloading or improper loading 
can affect handling and stability 
and cause a crash in which you 
can be hurt or killed.

Follow all load limits and other 
loading guidelines in this manual.

Label Example

380

uu

Before Driving

u

Maximum Load Limit

Driving

(4)

The resulting figure equals the available amount of cargo and 
luggage load capacity. For example, if the “XXX” amount 
equals 1,400 lbs. and there will be five 150 lb. passengers in 
your vehicle, the amount of available cargo and luggage load 
capacity is 650 lbs. (1,400 - 750 (5 x 150) = 650 lbs.)

(5)

Determine the combined weight of luggage and cargo being 
loaded on the vehicle. That weight may not safely exceed the 
available cargo and luggage load capacity calculated in step 4.

(6)

If your vehicle will be towing a trailer, load from your trailer will 
be transferred to your vehicle. Consult this manual to 
determine how this reduces the available cargo and luggage 
load capacity of your vehicle.


Content      ..     21      22      23      24     ..