Honda CR-V (2022 year). Manual in english - page 43
 

  Index      Manuals     Honda CR-V (2022 year). Manual in english


Search            copyright infringement  


Content      ..     41      42      43      44     ..


Honda CR-V (2022 year). Manual in english - page 43


687

uu

Maintenance Under the Bonnet

u

Engine Coolant

Main

tenan

ce

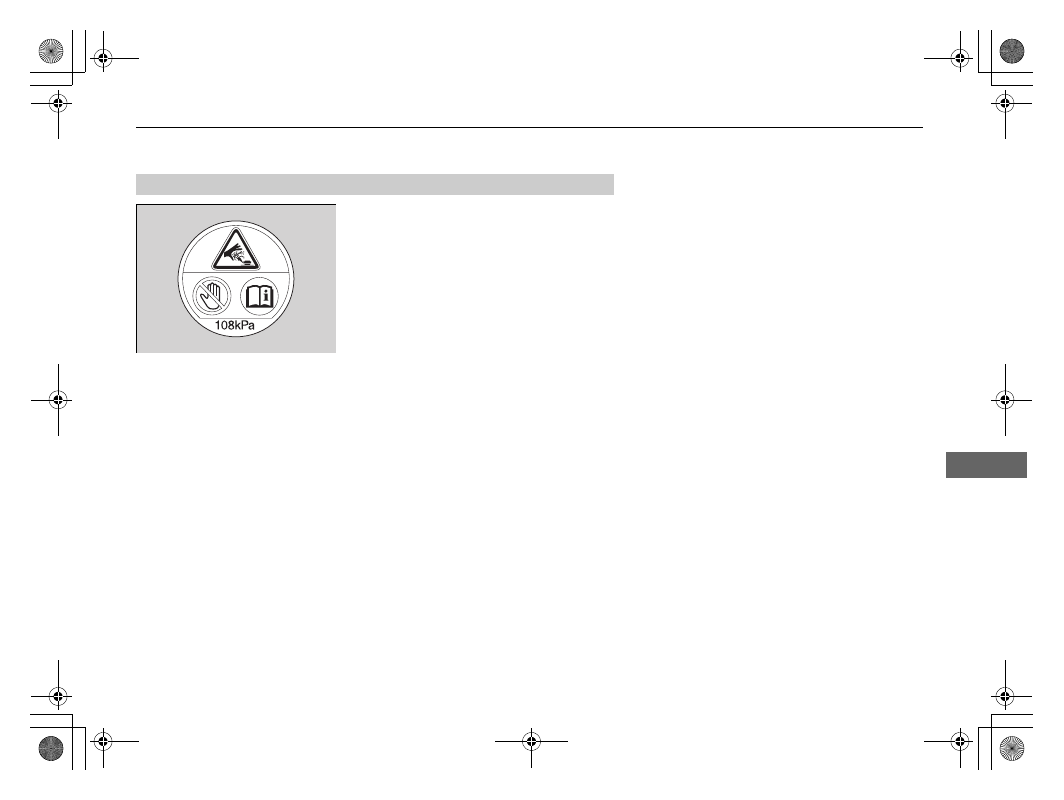
Never open when hot.

Hot coolant will scald you.

Relief pressure valve begins to open at 108 
kPa.

Engine Coolant Reserve Tank Cap

688

uu

Maintenance Under the Bonnet

u

Transmission Fluid

Main

tenan

ce

Transmission Fluid

Have a dealer check the fluid level and replace if necessary.
Follow your vehicle’s maintenance service timing of when to change continuously 
variable transmission fluid.

2

Maintenance Schedule

*

 P. 670

Do not attempt to check or change the continuously variable transmission fluid 
yourself.

Have a dealer check the fluid level and replace if necessary.
Follow your vehicle’s maintenance service timing of when to change manual 
transmission fluid.

2

Maintenance Schedule

*

 P. 670

Do not attempt to check or change the manual transmission fluid yourself.

Continuously Variable Transmission (CVT) Fluid

Specified fluid: Honda HCF-2 Transmission Fluid

Manual Transmission Fluid

Specified fluid: Honda Manual Transmission Fluid (MTF)

1

Continuously Variable Transmission (CVT) Fluid

NOTICE

Do not mix Honda HCF-2 with other 
transmission fluids.

Using a transmission fluid other than Honda HCF-2 
may adversely affect the operation and durability of 
your vehicle’s transmission, and damage the 
transmission.
Any damage caused by using a transmission fluid that 
is not equivalent to Honda HCF-2 is not covered by 
Honda’s new vehicle limited warranty.

1

Manual Transmission Fluid

NOTICE

If Honda MTF is not available, you may use the API 
certificated SAE 0W-20 or 5W-20 viscosity motor oil 
as a temporary measure.
Replace with MTF as soon as possible. Motor oil does 
not contain the proper additives for the transmission 
and continued use can cause decreased shifting 
performance and lead to transmission damage.

* Not available on all models

689

uu

Maintenance Under the Bonnet

u

Brake/Clutch

*

 Fluid

Main

tenan

ce

Brake/Clutch

*

 Fluid

The fluid level should be between the 

MIN


and 

MAX

 marks on the side of the reserve 

tank.

The brake fluid reserve tank is also used for 
your vehicle’s clutch fluid. As long as you keep 
the brake fluid level as instructed above, there 
is no need for checking the clutch fluid level.

Specified fluid: Brake Fluid with DOT 3 or DOT 4

Checking the Brake Fluid

1

Brake/Clutch

*

 Fluid

NOTICE

Brake fluid marked DOT 5 is not compatible with your 
vehicle’s braking system and can cause extensive 
damage.

We recommend using a genuine product.

If the brake fluid level is at or below the 

MIN

 mark, 

have a dealer inspect the vehicle for leaks or worn 
brake pads as soon as possible.

Left-hand Drive Type

MAX

Reserve 
Tank

MIN

Manual transmission models

Right-hand Drive Type

MAX

Reserve 
Tank

MIN

* Not available on all models

690

uu

Maintenance Under the Bonnet

u

Refilling Window Washer Fluid

Main

tenan

ce

Refilling Window Washer Fluid

Check the amount of window washer fluid 
using the washer fluid level gauge on the cap.

If the level is low, fill the washer reservoir.

If the washer fluid is low, a symbol appears on 
the driver information interface.

Pour the washer fluid carefully. Do not overflow the reservoir.

1

Refilling Window Washer Fluid

NOTICE

Do not use engine antifreeze or a vinegar/water 
solution in the windscreen washer reservoir.
Antifreeze can damage your vehicle’s paint. A 
vinegar/water solution can damage the windscreen 
washer pump.
Use only commercially available windscreen washer 
fluid.
Avoid prolonged use of hard water to prevent lime 
scale build up.

Models with level gauge

Level Gauge

Models without level gauge

All models

691

uu

Maintenance Under the Bonnet

u

Fuel Filter

Main

tenan

ce

Fuel Filter

Replace fuel filter according to the time and distance recommendations in the 
maintenance schedule.

Have a qualified technician change the fuel filter. Fuel in the system can spray out 
and create a hazard if all fuel line connections are not handled correctly.

1

Fuel Filter

The fuel filter should be replaced according to the 
service reminder indication.

Models with service reminder system

692

Main

tenan

ce

Replacing Light Bulbs

Headlights

Headlights are LED type. Have an authorised Honda dealer inspect and replace the 
light assembly.

1

Headlights

The headlight aim is set by the factory, and does not 
need to be adjusted. However, if you regularly carry 
heavy items in the luggage area or tow a trailer, have 
the aiming readjusted at a dealer or by a qualified 
technician.

693

uu

Replacing Light Bulbs

u

Front Fog Light Bulbs

*

Continued

Main

tenan

ce

Front Fog Light Bulbs

*

When replacing, use the following bulbs.

1.

Remove the screw using a Phillips-head 
screwdriver and remove the holding clips 
using a flat-tip screwdriver.

2.

Pull down the under cover.

Front Fog Light: 35 W (H8 for halogen bulb type)

*

Front Fog Light: LED type

*

1

Front Fog Light Bulbs

*

NOTICE

Halogen bulbs get very hot when lit. Oil, perspiration, 
or a scratch on the glass can cause the bulb to 
overheat and shatter.

When replacing a halogen bulb, handle it by its 
plastic case, and protect the glass from contact with 
your skin or hard objects. If you touch the glass, clean 
it with denatured alcohol and a clean cloth.

Front fog lights are LED type. Have an authorised 
Honda dealer inspect and replace the light assembly.

Models with halogen front fog lights

Models with LED front fog lights

Models with halogen front fog lights

Screw

Holding clip

* Not available on all models

uu

Replacing Light Bulbs

u

Front Fog Light Bulbs

*

694

Main

tenan

ce

3.

Push the tab to remove the coupler.

4.

Rotate the old bulb to the right to remove.

5.

Insert a new bulb into the fog light 
assembly and turn it to the left.

6.

Insert the coupler into the connector of the 
bulb.

4.

Rotate the old bulb to the left to remove.

5.

Insert a new bulb into the fog light 
assembly and turn it to the right.

6.

Insert the coupler into the connector of the 
bulb.

1

Front Fog Light Bulbs

*

Insert a flat-tip screwdriver, lift and remove the centre 
pin to remove the clip.

Insert the clip with the centre pin raised, and push 
until it is flat.

Models with halogen front fog lights

Push until the pin 
is flat.

Bulb

Coupler

Tab

Right side

Bulb

Coupler

Tab

Left side

* Not available on all models

695

uu

Replacing Light Bulbs

u

Position/Daytime Running Lights

Main

tenan

ce

Position/Daytime Running Lights

Position/daytime running lights are LED type. Have an authorised Honda dealer 
inspect and replace the light assembly.

Active Cornering Lights

*

Active cornering lights are LED type. Have an authorised Honda dealer inspect and 
replace the light assembly.

Front Turn Signal Lights

Front turn signal lights are LED type. Have an authorised Honda dealer inspect and 
replace the light assembly.

Side Turn Signal/Emergency Indicator Lights

Door mirror side turn lights are LED type. Have an authorised Honda dealer inspect 
and replace the light assembly.

Brake/Taillights and Rear Turn Signal Lights

Brake/taillights and rear turn signal lights are LED type. Have an authorised Honda 
dealer inspect and replace the light assembly.

* Not available on all models

696

uu

Replacing Light Bulbs

u

Taillights and Back-Up Light Bulbs

Main

tenan

ce

Taillights and Back-Up Light Bulbs

When replacing, use the following bulbs.

1.

Remove the cover by prying on the edge 
using a flat-tip screwdriver.

u

Wrap the flat-tip screwdriver with a cloth 
to prevent scratches.

2.

Turn the socket to the left and remove it. 
Remove the old bulb.

3.

Insert a new bulb.

Taillight: LED
Back-Up Light: 16 W

1

Taillights and Back-Up Light Bulbs

Taillights are LED type. Have an authorised Honda 
dealer inspect and replace the light assembly.

Cover

Bulb

Socket

697

uu

Replacing Light Bulbs

u

Rear Licence Plate Light

Main

tenan

ce

Rear Licence Plate Light

Rear licence plate light is LED type. Have an authorised Honda dealer inspect and 
replace the light assembly.

High-Mount Brake Light

High-mount brake light is LED type. Have an authorised Honda dealer inspect and 
replace the light assembly.

Rear Fog Light

Rear fog light is LED type. Have an authorised Honda dealer inspect and replace the 
light assembly.

698

uu

Replacing Light Bulbs

u

Other Light Bulbs

Main

tenan

ce

Other Light Bulbs

When replacing, use the following bulbs.

1.

Pry on the edge of the cover using a flat-
tip screwdriver to remove the cover.

u

Wrap the flat-tip screwdriver with a 
cloth to prevent scratches.

2.

Remove the old bulb and insert a new 
bulb.

Vanity Mirror Light Bulbs

*

Vanity Mirror Light: 1.4 W

Bulb

When replacing, use the following bulb.

1.

Pry on the edge of the cover using a flat-
tip screwdriver to remove the cover.

u

Wrap the flat-tip screwdriver with a 
cloth to prevent scratches.

Luggage Area Light Bulb(s)

Luggage Area Light: 5 W

Models with third row seat

Models without third row seat

2.

Remove the old bulb and insert a new 
bulb.

Bulb

* Not available on all models

699

uu

Replacing Light Bulbs

u

Other Light Bulbs

Main

tenan

ce

When replacing, use the following bulb.

1.

Open the glove box.

2.

Remove the old bulb and insert a new 
bulb.

Glove Box Light Bulb

*

Glove Box Light: 3.4 W

Pull

Handle

Bulb

* Not available on all models

700

Main

tenan

ce

Checking and Maintaining Wiper Blades

Checking Wiper Blades

If the wiper blade rubber has deteriorated, it will leave streaks and the hard surfaces 
of the blade may scratch the window glass.

Changing the Front Wiper Blade Rubber

1.

Turn the ignition switch to LOCK 

(

0

*1

.

2.

While holding the wiper switch in the 

MIST

 position, turn the ignition switch to 

ON 

(

w

*1

, then to LOCK 

(

0

*1

.

u

Both wiper arms are set to the 
maintenance position as shown in the 
image.

3.

Lift both wiper arms.

*1: Models with the keyless access system have an 

ENGINE START/STOP

 button instead of an 

ignition switch.

1

Changing the Front Wiper Blade Rubber

NOTICE

Avoid dropping the wiper arm onto the windscreen, 
it may damage the wiper arm and/or the windscreen.

701

uu

Checking and Maintaining Wiper Blades

u

Changing the Front Wiper Blade Rubber

Continued

Main

tenan

ce

4.

Press up on and hold the tab, then slide 
the holder off the wiper arm.

5.

Pull the end of the wiper blade in the 
direction of the arrow in the image until it 
is out of the holder’s end cap.

6.

Pull the wiper blade in the opposite 
direction to slide it out of the holder.

Tab

Blade

End Cap At 
The Bottom

Blade

Holder

702

uu

Checking and Maintaining Wiper Blades

u

Changing the Front Wiper Blade Rubber

Main

tenan

ce

7.

Insert the flat side of the new wiper blade 
onto the bottom part of the holder. Insert 
the blade all the way.

8.

Install the end of the wiper blade into the 
cap.

9.

Slide the holder onto the wiper arm until it 
locks.

10.

Lower both wiper arms.

11.

Turn the ignition switch to ON 

(

w

*1

 and 

hold the wiper switch in the 

MIST

 position 

until both wiper arms return to the 
standard position.

*1: Models with the keyless access system have an 

ENGINE START/STOP

 button instead of an 

ignition switch.

Holder

Blade

Cap


Content      ..     41      42      43      44     ..